Threat Intelligence: MISP Lab Setup
MISP is an open-source Threat intelligence and sharing platform (formerly known as Malware Information Sharing Platform) that is used for collecting, storing distributing and sharing cybersecurity indicators and threats about cybersecurity incidents & malware analysis.
MISP provides facilities to support the exchange of information but also the consumption of information by network intrusion detection systems (NIDS), a Log-based intrusion detection system (LIDS), but also by log analysis tools, SIEMs.
- MISP provides storage of technical and non-technical information about seen malware and attacks.
- Creates automatically relations between malware and their attributes.
- It Stores all of the intelligence and threat attributes data in a structured format.
- It Shares threat attributes & malware data by default with other trust-groups.
- MISP able to Improve malware detection and reversing to promote information exchange among organizations (e.g. avoiding duplicate works).
- MISP Stores all information from other instances locally (ensuring confidentiality on queries).

To configure MISP in your Ubuntu platform, there are some prerequisites required for installation.
- Ubuntu 20.04.1
- Mysql
- Non-root user
Table of Content
- Install MISP and All Dependencies
- Default Credentials
- Change admin password
- Create an organization
- Create admin for the new organization
- Enable threat intel feeds
- Setup of IPython+PyMisp
- Integrate MISP instance with PyMISP
- Create a MISP event
- Addition of object to MISP event
- Search MISP for IOC
- Threat monitoring
- Updation of MISP in future for latest versions
Install MISP and All Dependencies
Let’s begin installation with system update and upgrade.
sudo apt-get update -y && sudo apt-get upgrade -y

MISP requires Mysql-client available in our machine. Install Mysql-client using the below command.
sudo apt-get install mysql-client -y

To install MISP on fresh ubuntu 20.04.1, all you need to do is the following. Just remember one thing this is an automated bash script that can’t run with Root privileges run this script with Non-root users.
Install MISP with install.sh
curl https://raw.githubusercontent.com/MISP/MISP/2.4/INSTALL/INSTALL.sh -o misp_install.sh

Change the permission of file misp_install.sh and make it executable. To do this run the following command. The script will need some time to install MISP on your Ubuntu platform.
chmod +x misp_install.sh
./misp_install.sh -A

In the middle of installation Enter “Y” to create MISP user

Now, we are going to add a rule to firewall this will allow port 80/tcp and 443/tcp
sudo ufw allow 80/tcp
sudo ufw allow 443/tcp

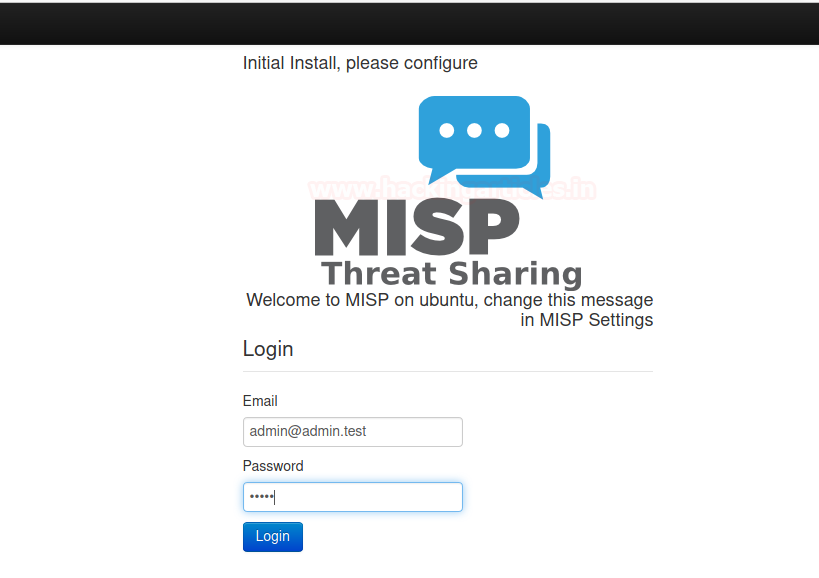
After, the installation of MISP we can use a browser to connect to MISP.
By Default, MISP is listening on loopback address or Base URL To access MISP on your Browser browse the following URL
https://127.0.0.1/users/login

Default Credentials
For the MISP web interface -> admin@admin.test:admin
For the system -> misp:Password1234
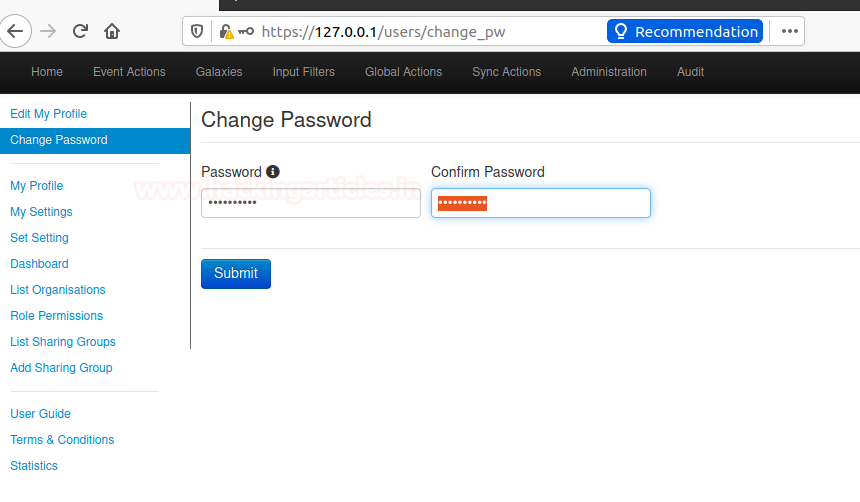
Change Admin Password
Enter new Password
The password must be in standard form. Minimum Length of password is at least 12 words that contain upper case & lowercase alphabet, special character and a numerical value
For example – Ignite@12345
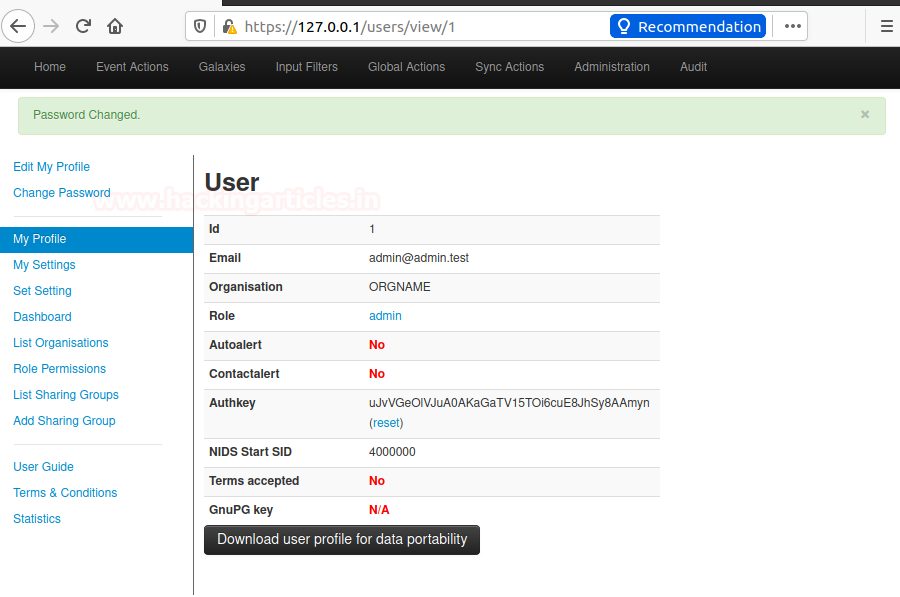
You can verify your credentials by a head over to
https://127.0.0.1/users/view/1
or also by going in my profile section of MISP Administration panel
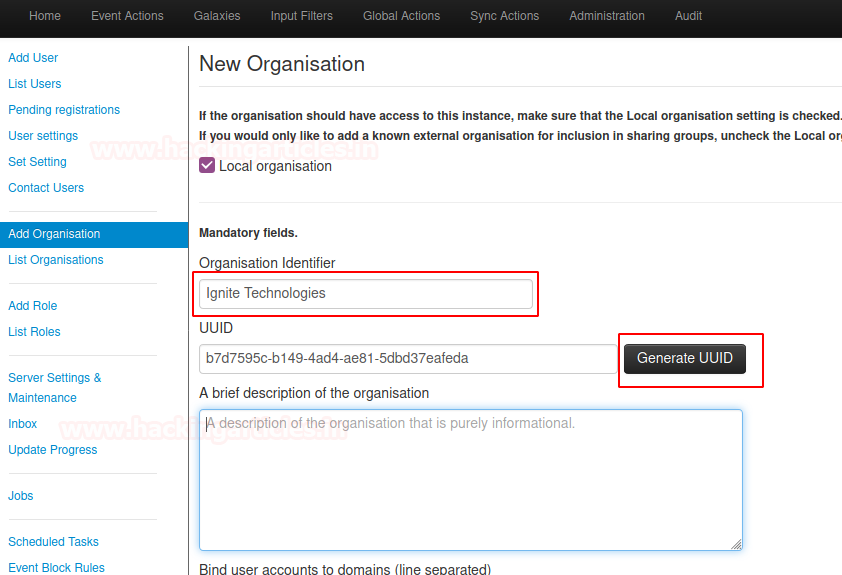
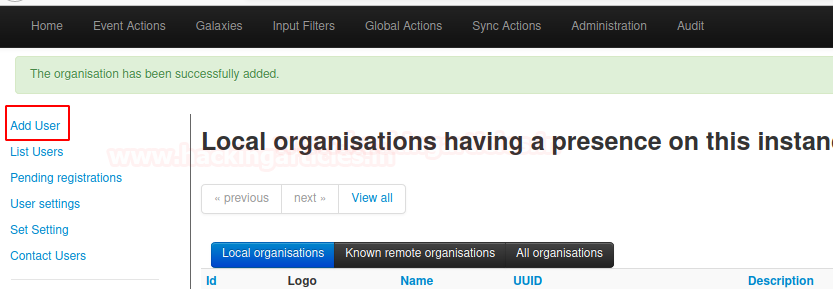
Create an organization
GO to Administration section head over to Add Organisations

- Select Administration > add Organisations
- Enter “< organization name >” into organization identifier
- Select “Generate UUID”
- Select “submit” button at the bottom
You can also check the instance presence of your local organizations by heading over to List organizations under the section of Administration

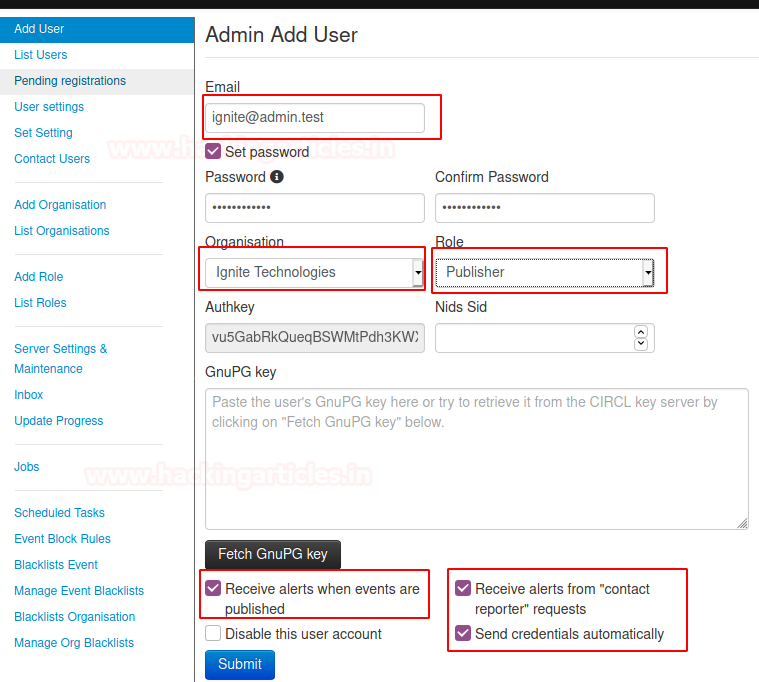
Create Admin for New Organisation
we have successfully created an organization let’s assign an Admin role to the organization all you need to do is head over to “Add User” under the section of “Administration”
Administration > Add user
- Enter “ignite@<fqdn>” for email
- Check the “set password” password should be in a standard form that satisfies the minimum requirements.
- Select “<new org name>” for organization
- Select “Role” for the new organization
- Select “submit” button at the bottom
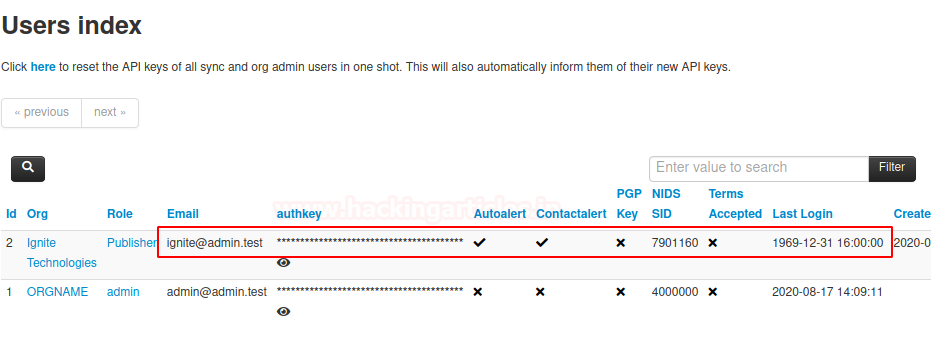
You can also check the instance Rights of your local organizations by heading over to List organizations under the section of Administration
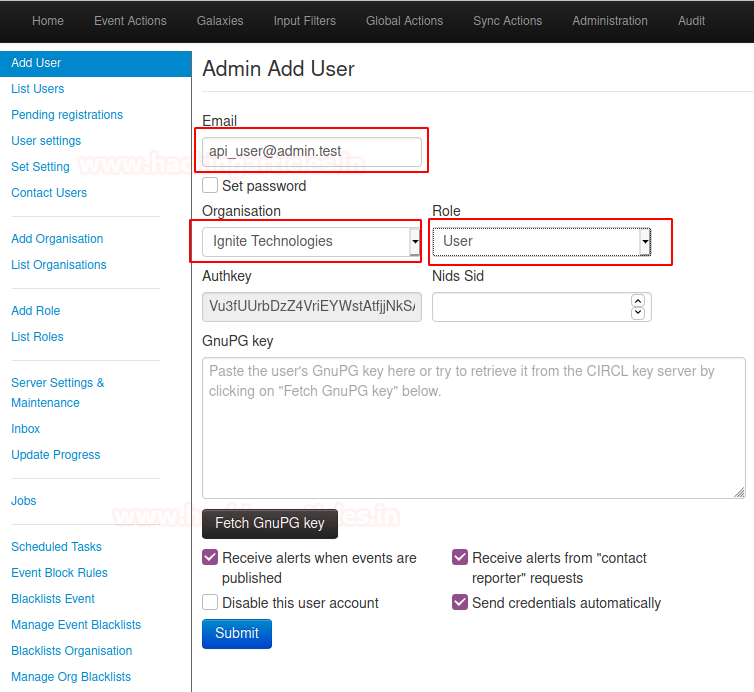
Create an API user for the new organization
Administration > Add user
- Enter “api_user@<fqdn>” for email
- Then, select “<new organization name>” for the organization
- Select the “user” role for the new organization
- Finally, select the “submit” button at the bottom
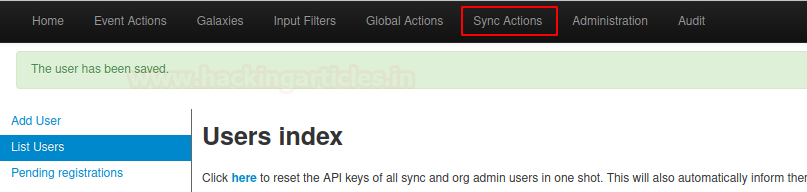
Enable Threat intel feeds
To enable feeds you will need to login to MISP console with the superuser account which is admin@admin.test account.
This one is a little bit special, as we can go into the “Sync actions” tab to build our panel.
When entering the Sync actions tab, select the list feeds tab.
From there find feeds such as CIRCL osint and check feeds tab
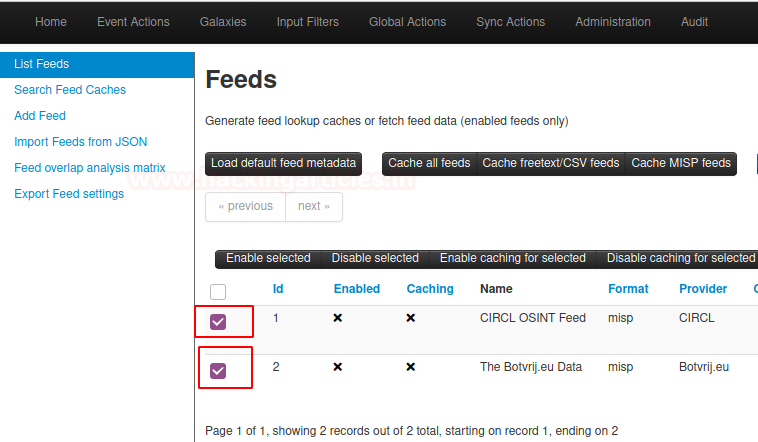
And then head over to the “Edit” icon
- Check “Enabled”
- Check “Lookup Visible”
- Check “Caching Enabled”
- Select “Edit” at the bottom

By Editing feeds head over to “fetch and store all feed data” tab
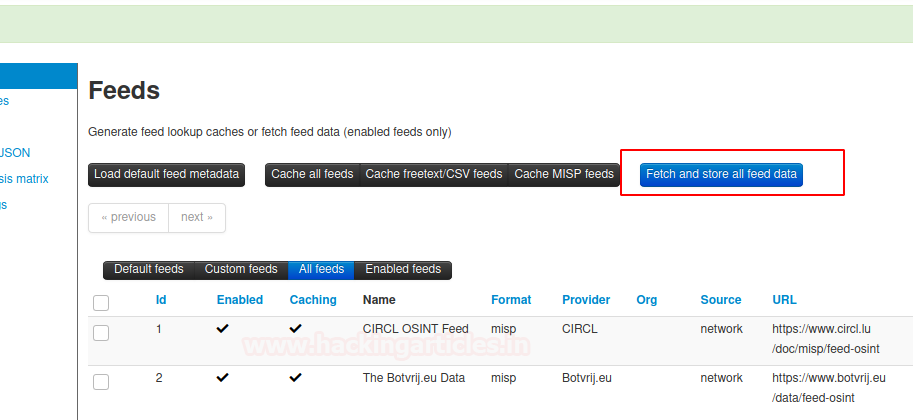
Great! we have successfully Enabled threat intel feeds.
Setup Ipython+PyMISP
PyMISP is a python library to access MISP platforms via there REST API.
PyMISP allows you to fetch events, add or update events/attributes, add or update samples or search for attributes. It is used to store indicators of compromise (IOCs) in MISP and query IOCs from MISP.
In the MISP console head over to Administration and select List Users
Look for “api_user@<fqdn>” and copy “auth key”
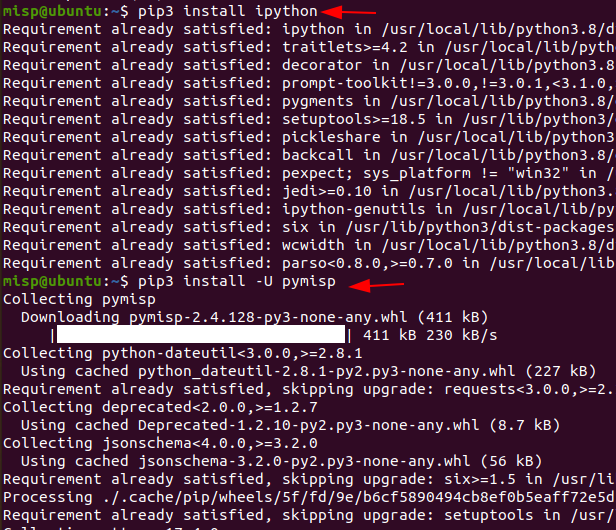
Let’s open the terminal and begin setup of Ipython & PyMISP
To do this run the following command
pip3 install ipython
pip3 install -U pymisp
Connect MISP instance with PyMISP
Ipython
Ipython is an alterative python interpreter it is an interactive shell used for computing in python. Let’s load the Ipython interpreter and start scripting to do this follow the below commands. Just remind one thing don’t leave or exit from python interpreter till the end (e.g ipython).
ipython
from pymisp import ExpandedPyMISP
misp_url = 'https://<FQDN of MISP>'
misp_key = "<Enter MISP API key>"
misp_verifycert = False
misp = ExpandedPyMISP(misp_url, misp_key, misp_verifycert)

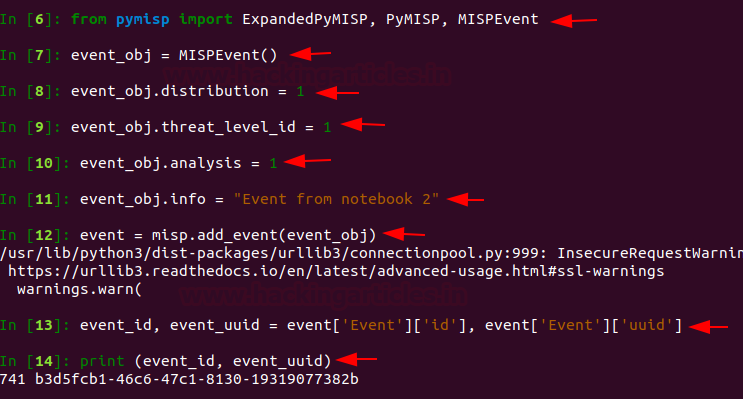
Create MISP Event
MISP events are encapsulation for contextually linked information. Linked information will include things such as domains, file hashes, IP addresses, Malicious binaries,. We are going to call an object named “Event from notebook 2” to do this run the following command.
from pymisp import ExpandedPyMISP, PyMISP, MISPEvent
event_obj = MISPEvent()
event_obj.distribution = 1
event_obj.threat_level_id = 1
event_obj.analysis = 1
event_obj.info = "Event from notebook 2"
# Add event to MISP
event = misp.add_event(event_obj)
event_id, event_uuid = event['Event']['id'], event['Event']['uuid']
print (event_id, event_uuid)
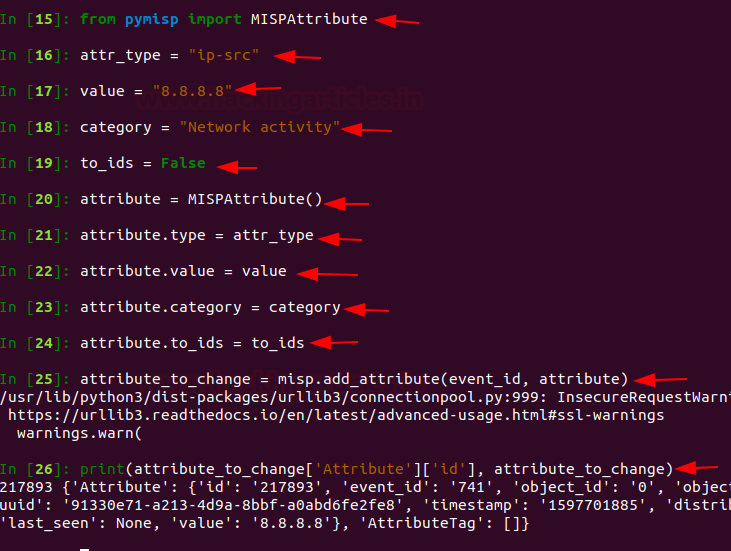
Addition of object to MISP event
The creation of a new MISP object generator should be done using a pre-defined template and inheritance. Our new MISP generator needs to generate attributes, and add them as class properties using additional attributes. When the object is sent to MISP, all the class properties will be exported to JSON Export. Attributes in MISP can be network indicators such as IP address, System indicators (e.g a string in memory), or bank account details.
To do this run the following command.
from pymisp import MISPAttribute
# Define attributes
attr_type = "ip-src"
value = "8.8.8.8"
category = "Network activity"
to_ids = False
# Create attribute object
attribute = MISPAttribute()
attribute.type = attr_type
attribute.value = value
attribute.category = category
attribute.to_ids = to_ids
# Add attributes to event
attribute_to_change = misp.add_attribute(event_id, attribute)
# Print event
print(attribute_to_change['Attribute']['id'], attribute_to_change)
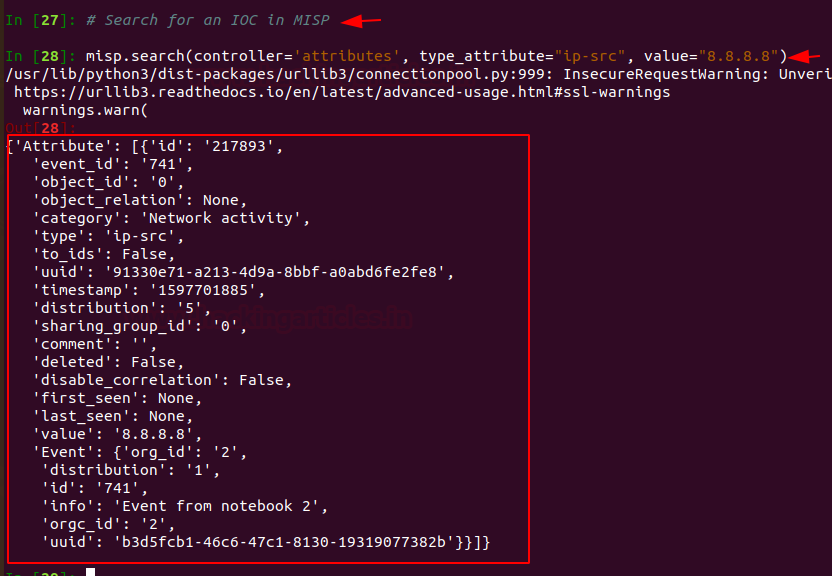
Search MISP for IOC
Let’s search for an IOC in MISP ipython interpreter. Run the following command to perform the search.
misp.search(controller='attributes', type_attribute="ip-src", value="8.8.8.8")
Awesome now you have completely setup MISP on your Ubuntu Platform.
Great!
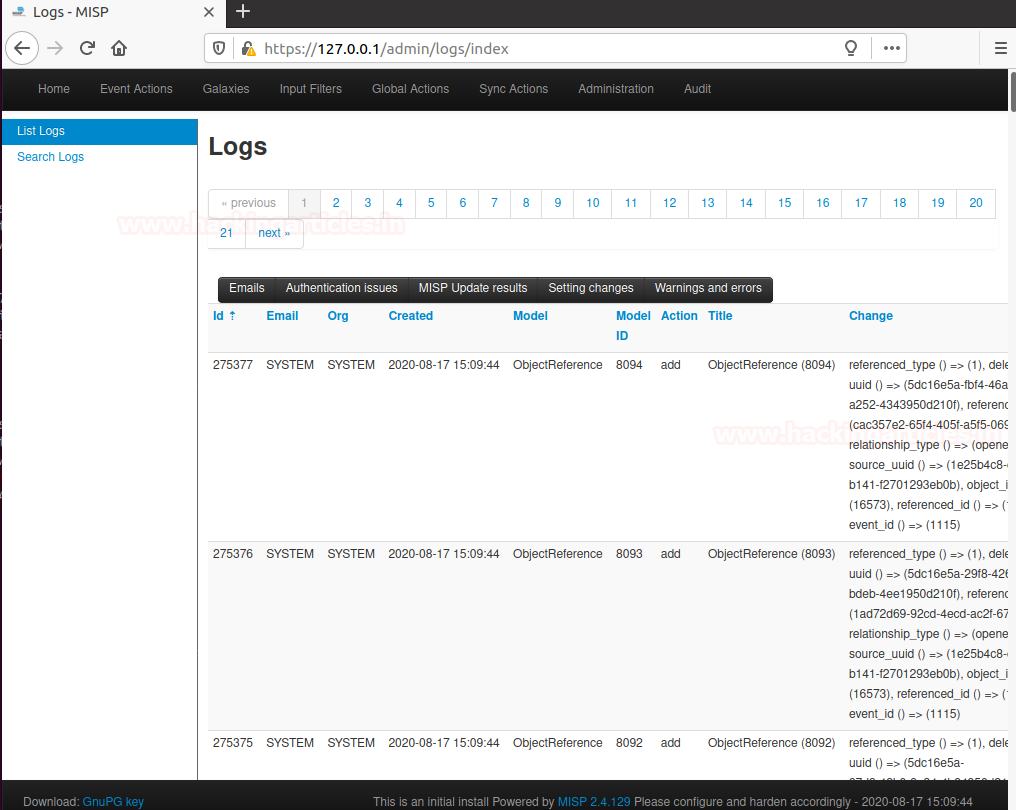
Threat Monitoring
Let’s check what happens on the MISP dashboard.
This one is gonna very special as we can go into the “Audit” tab to build our panel.
When entering the Audit tab select “List Logs” tab
Wait this is not enough 🙂
Hold tight!
As we can see, Now we have direct access to every log related to Threat Intelligence.
We can for Example track illegal attacks.
Similarly, we can do Malware analysis from various servers also we can see logs of (NIDS) Network intrusion detection system, (LIDS), Log analysis Tools, SIEMs.
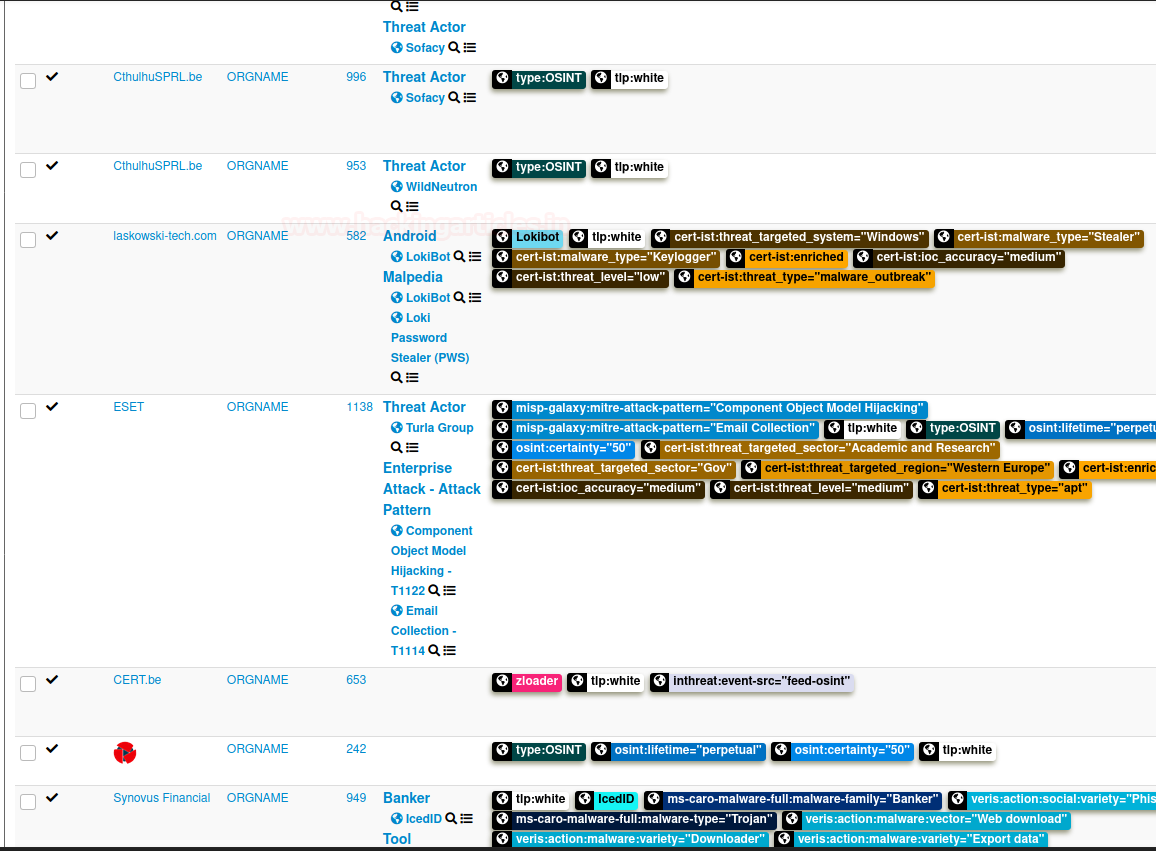
Nice! Now your Panel is included in your dashboard.
Updation of MISP in Future for Latest Versions
It is strongly recommended to upgrade MISP via the Web interface. This Blog may not always be up-to-date and will require you to fix permissions.
In general, updating MISP between point releases for example 2.4.50 -> 2.4.53 happens with the following command are to be executed to be as root.
Then, to update the latest commit from 2.4 branches simply pull the latest commit.
Finally, enter the following command
cd /var/www/MISP
sudo -u www-data git pull origin 2.4
sudo -u www-data git submodule update –init –recursive
Author – Vijay is a Certified Ethical Hacker, Technical writer and Penetration Tester at Hacking Articles. Technology and Gadget freak. Contact Here
Thanks for this. Can you also help with steps additional integration like sandsox, phish tank .
Well defined…impressive
I entered this command: > chmod +x misp_install.sh ./misp_install.sh -A < terminal responds with: – ./misp_install.sh: line 1: 404:: command not found
What should I do?
Thanks in advance!
Hi serge,
there are 2 separate command lines and you have run both commands on the same line