Packet Crafting with Colasoft Packet Builder
In this tutorial, we are going to discuss Packet Crafting by using a great tool Colasoft packet builder which is quite useful in testing the strength of Firewall and IDS and several servers against malicious Flood of network traffic such as TCP and UDP Dos attack. This tool is very easy to use especially for beginners.
Packet crafting is a technique that allows network administrators to probe firewall rule-sets and find entry points into a targeted system or network. This is done by manually generating packets to test network devices and behavior, instead of using existing network traffic. Testing may target the firewall, IDS, TCP/IP stack, router or any other component of the network. Packets are usually created by using a packet generator or packet analyzer which allows for specific options and flags to be set on the created packets. The act of packet crafting can be broken into four stages: Packet Assembly, Packet Editing, Packet Play, and Packet Decoding.
For more detail visit Wikipedia.org
Mode of Operation
Packet Assembly: It is the initial state of packet crafting where tester needs to decide the network that can be compromised easily by creating a packet which can exploit the network by shooting its vulnerability. The packet should be designed in a manner that it maintains its ability to be undetectable in the target’s network.
Famous Tools for Packet Assembly are: Hping3 and Yersinia
Packet Editing: In this stage captured packet is edited or modified which cannot be possible to do in Packet Assembly phase. In this phase, the packet is edited in a manner that it can dump more and more information about the target’s network by making a small amount of change in it. For example, change data length (payload) of packets.
Famous Tool of packet Editing: Colasoft and Scapy
Packet Playing: In this phase when the packet is ready to launch then it sends to target’s network for exploiting its network and collect the information. This is the actual arena where above both actions is tested and if the packet is failed to complete its goal of retrieving victim’s information or exploit its vulnerability then again the packet send back to Packet Editing phase for modification.
Packet Analysis: This is the last stage where the packet is analysis when it received on the targeted network. The captured packet is decoded for further investigating for retrieving its internal details which can speak up its goal for establishing a connection on the target’s network.
Famous Tool of Packet Analysis: Wireshark and Tcpdump
Colasoft Packet Builder enables creating custom network packets; users can use this tool to check their network protection against attacks and intruders. Colasoft Packet Builder includes a very powerful editing feature. Besides common HEX editing raw data, it features a Decoding Editor allowing users to edit specific protocol field values much easier.
Users are also able to edit decoding information in two editors – Decode Editor and Hex Editor. Users can select one from the provided templates Ethernet Packet, ARP Packet, IP Packet, TCP Packet, and UDP Packet, and change the parameters in the decoder editor, hexadecimal editor or ASCII editor to create packets. Any changes will be immediately displayed in the other two windows. In addition to building packets, Colasoft Packet Builder also supports saving packets to packet files and sending packets to the network.
From: http://www.colasoft.com/packet_builder/
Let’s start!!!
TCP Packet Crafting
You can download it from the above-given link, once it gets downloaded then run the application as an administrator, to begin with crafting various Packets. As I had an example above a packet crafting involves 4 phases, let’s start it by adding the packet which we will craft for testing our network.
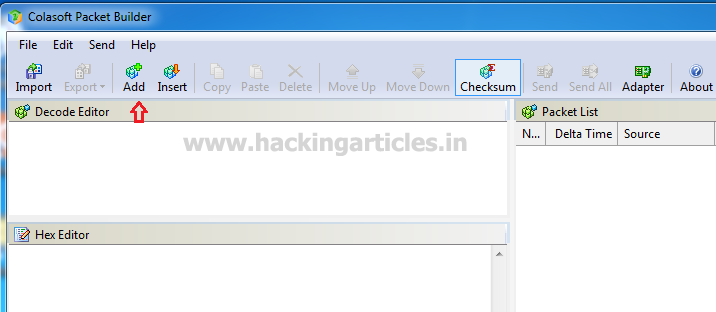
Click on ADD given in menu bar.
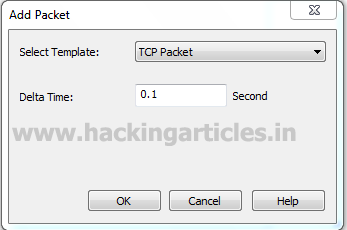
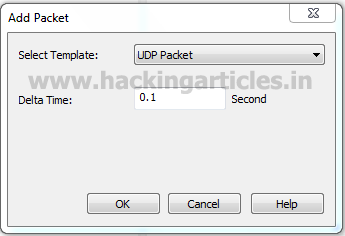
A small window will pop up to select the mode of IP packet to be crafted. Here we are going to choose TCP packet for crafting for example by increasing the size of the packet or by sending the individual flag of the Tcp Protocol to the destination IP address. Well if you will notice given below image then you will observe that I had set delta time 0.1 sec as time elapses for the flow of traffic for all crafted packets. The delta time is the time gap between each packet.
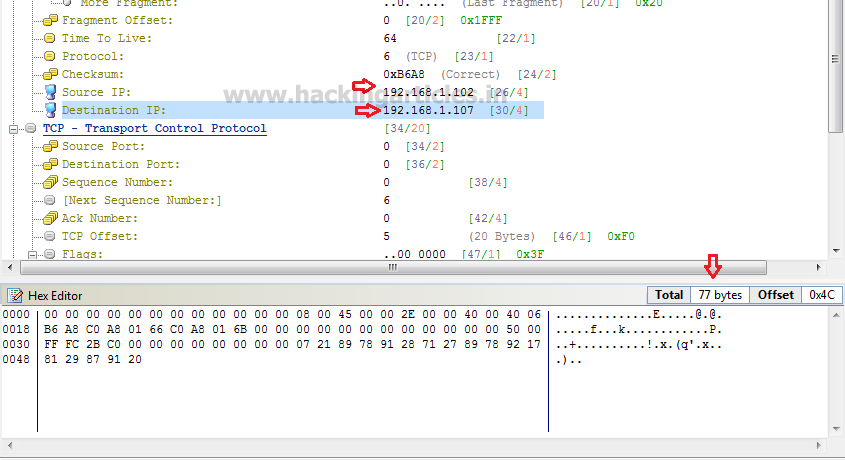
Window is categories into three phases as Decode Editor, Hex Editor, and packet List. From the given image you can observe the following information which I had edited for TCP packet
Decode Editor: This section contains packet information such as protocol, Time to live and etc. Here you need to add source address responsible for sending a packet and then add destination address which is responsible for receiving incoming packet traffic.
- Source address: 192.168.1.102
- Destination address: 192.168.1.107
Hex Editor: This section displays the raw information (Hexadecimal) related to the data size of the packet. By typing a random string you can increase the size of the packet.
Packet size: 77 bytes
This phase is also known as Packet Editing mode where we can modify our packet.
Packet List: It displays complete information of your packet which contains a source address, destination address, time to live and other information which we had edited.

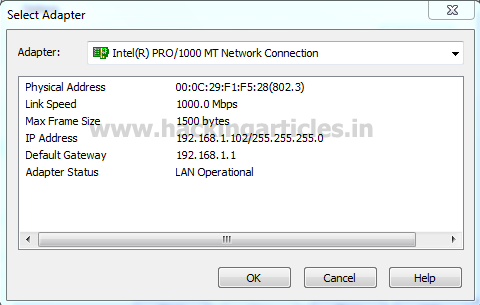
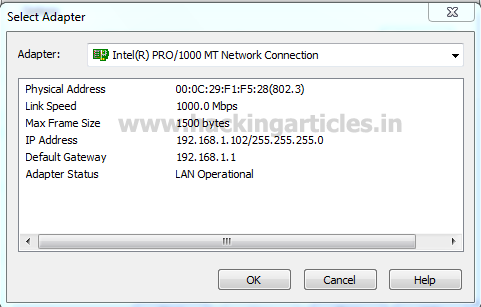
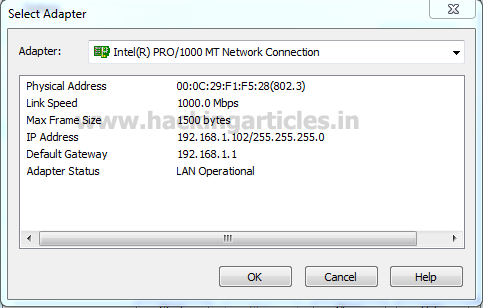
Click on Adapter given in the menu bar to select a specific adapter from which packets will be sent. From given below image you can observe it, it showing adapter status: LAN Operational.
Note: It is only available when you have run the application as administrator.
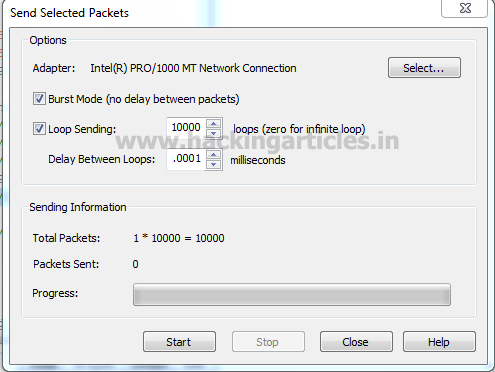
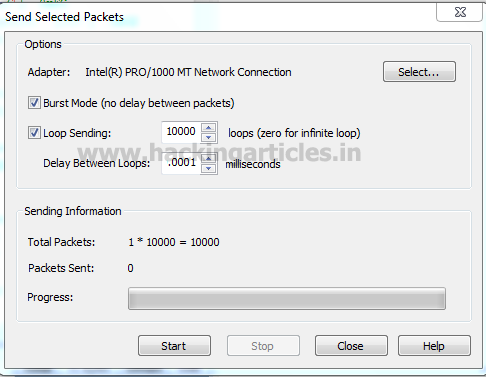
Click on Send option from the menu bar and enable the checkbox for “Burst Mode” and “Loop sending” and adjust the number of packets to be sent to the Destination Network and the delay time gap between each packet.
Then click on start to send the TCP packets. This phase is known as Packet playing mode where are ready to the sent packet on the target network.

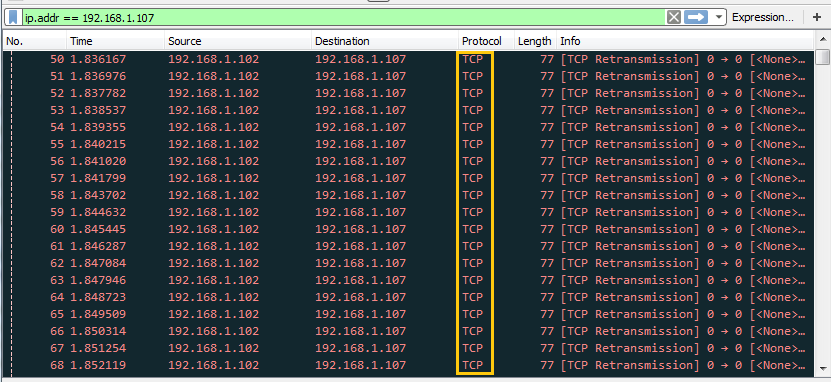
Using Wireshark we can capture packet and traffic between source and destination. So here you can perceive that infinite TCP packet is being transferred to target’s network. This phase is known as packet analysis mode where the sent packet is sniff or analysis for identifying sender objectives behind sending the packet.
ARP Packet Crafting
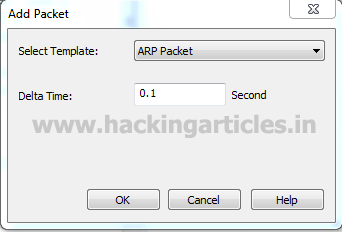
Again repeat the same to choose ARP packet for crafting Packet for ARP protocol on the target’s network. Well if you will notice given below image again then you will observe that I had set same delta time 0.1 sec.
Apart from editing source and destination IP here we need to add source and destination physical address also.
Hence this time I had set below information in decoder Editor and Hex editor.
- Source MAC: AA:AA:AA:AA:AA:AA
- Source address: 192.168.1.102
- Destination MAC: BB:BB:BB:BB:BB:BB
- Destination address: 192.168.1.107
- Packet size: 78 bytes
You can use any method to find the destination MAC address.

After editing your packet information verifies that changes through packet list are given on the right side of the window before sending the packet. If you notice given image below then you can read the summary where it is show broadcasting ARP message who is 192.168.1.107?

Click on Adapter given in menu bar to select specific adapter for network selection. From given below image you can observe it showing adapter status: LAN Operational.

Click on Send option from the menu bar and enable the checkbox for “Burst Mode” and “Loop sending” and adjust the number of packets to be sent to the Destination network according to your wish.
Then click on start to launch the sending process of ARP packet. This action is known as Packet playing.
From the given image below you can observe the continue ARP packet making a request for who is 192.168.1.107, which meaning our packet playing is given a positive result. From Wireshark target is able to analysis the goal of the packet received from the sender’s network.

IPv4 Packet Crafting
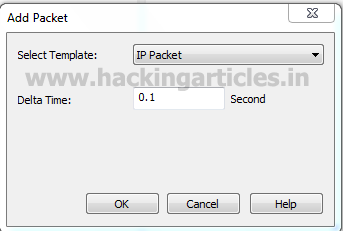
Again repeat the same process to choose IP packet for crafting Packet for IPv4 protocol on the target’s network. Again if you will notice given below image again then you will observe that I had set same delta time 0.1 sec.
This time I had set below information in decoder Editor and Hex editor for Editing Packet.
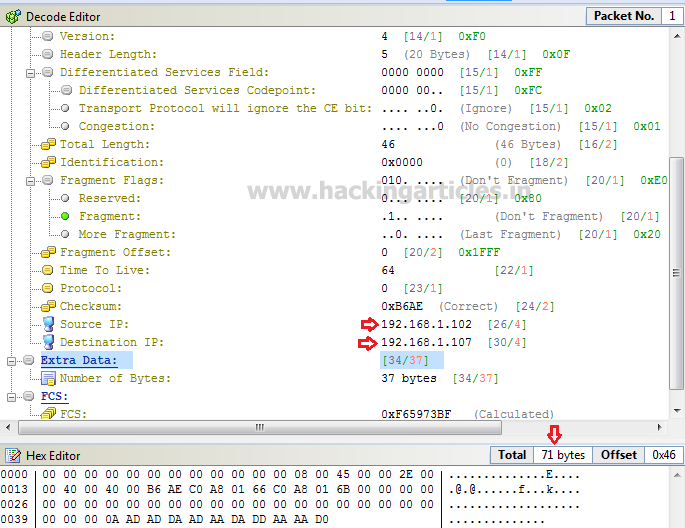
- Source address: 192.168.1.102
- Destination address: 192.168.1.107
- Packet size: 71 bytes
After editing your packet information verifies that changes through packet list are given on the right side of the window before sending the packet.

Click on Adapter given in menu bar to select specific adapter for sending the packet. From given below image you can observe it showing adapter status: LAN Operational.
Click on Send option from the menu bar and enable the checkbox for “Burst Mode” and “Loop sending” and adjust the number of packets to be sent to the Destination network according to your wish.
Then click on start to send the IPv4 packet.
You can clearly observe in given below image the flow of traffic of IPv4 packets from senders network to Receivers network in packet analyzing mode.

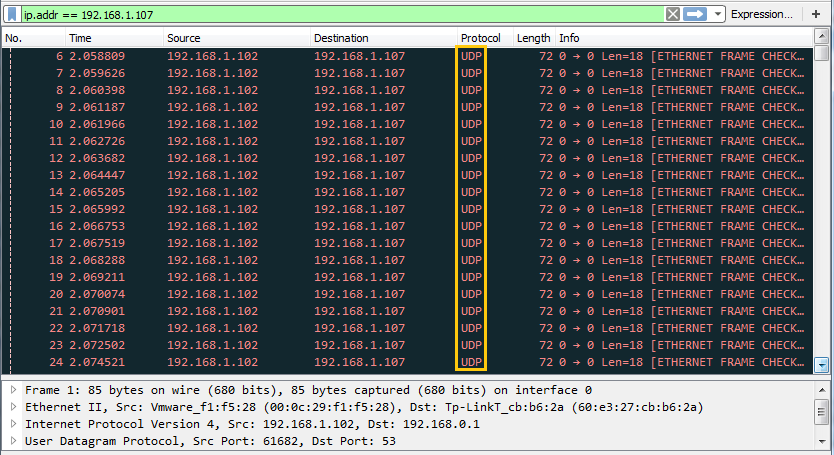
UDP Packet Crafting
Again repeat the same to choose UDP packet for crafting UDP Packet. If you will notice given below image then you will observe that again I had set delta time 0.1 sec as time elapses for the flow of traffic for all packets.
This time I had Edited below information in decoder Editor and Hex editor for designing my packet.
Source address: 192.168.1.102
Destination address: 192.168.1.107
Packet size: 72 bytes

After editing your packet information verifies that changes through packet list are given on the right side of the window.

Click on Adapter to select specific adapter for sending the packets. From given below image you can observe it is showing adapter status: LAN Operational.
Click on Send option from the menu bar and enable the checkbox for “Burst Mode” and “Loop sending” and adjust the number of packets to be sent to the Destination network according to your wish.
Then click on the start button to sending the crafted UDP packet.

You can clearly observe in given below image the flow of traffic of UDP packets from senders network to the Receivers network.
Hence in this tutorial, we tried to explain all for the mode of operation of crafting a packet for testing a network using colasoft and Wireshark.
Author: Rahul Virmani is a Certified Ethical Hacker and the researcher in the field of network Penetration Testing (CYBERSECURITY). Contact Here