Multiple ways to Capture Memory for Analysis
In this article we will be going to learn the how to capture the RAM memory for analysis, there are various ways to do it and let take some time and learn all those different circumstances call for a different measure.
What is RAM?
RAM is short for Random Access Memory. It is referred to as the main memory of a computer which makes it quite important for a computer to run. RAM allows the user to temporarily store data in the system which one is using or is about to use. But as RAM is volatile, all the data stored in RAM will be lost as soon as the power goes out. RAM is both readable and writable which make it easy to access and user-friendly. The importance of RAM is that it makes your system faster as storing in your hard drive takes a lot of time as well as a toll on your system. RAM is also useful to save and redeem data from the system. All in all, you can conclude that RAM helps to improve the performance of your device.
Benefits for capture the memory
Capturing RAM is an important task as investigators have realized over time that volatile memory can cover many types of facts, and this evidence can be beneficial in an investigation, allowing an investigator to understand what applications a suspect was using at the time of the attack. It can also be possible that remote attackers would have some stored data, tools in RAM rather than on the system.
Some tools can do that work
Dumpit
MoonSols DumpIt fuses Windows 32 bit and Windows 64 bit into one executable, asking no questions to the user end.
We can download the Dumpit software from here
It is a compact tool that can make it easy to save the contents of your systems RAM. It’s a console utility but no need to open command line or master a host command-line switch. Instead, all we need to do it is Only a double click on the executable is enough to generate a copy of the physical memory in the current directory.

As we can see in the above image this tool is already providing us with the destination of the image that we are going to create by this process and asking us at the user end we want to continue or not.
If we want to continue then we have to press “y”.

If we start the process then after completing the process it shows the message if we got succeeds it shows the message “success”.
Now we can check the path which was given by the software whether we are able to capture the RAM or not.

Now we can see that we successfully created our captured memory, which is known as the RAM image.
Magnet Forensics
Magnet Forensics offers a free RAM capturing or memory imaging tool that captures the physical memory of suspects’ systems, allowing investigators to analyze and recover valuable facts found only in the system’s memory.
We can download the software from here.
Magnet Ram capture has a small memory footprint, which means investigators can run the tool while data overwrites in memory. We can capture memory data in Raw (.DMP/.RAW/.BIN) format and easily analyze it.
This image serves as evidence in the forensic investigation. Forensic investigators process some evidence found in the RAM, including a program running on the system, network connections, evidence of malware intrusion, registry hives, usernames & passwords, decrypted files, and keys, etc.
Now we can start the Ram capturing process by just executing the software by clicking on it.

Now we can see that our captured memory which is known as the RAM image is successfully created.

As we can see in the above image we have to provide the name of memory image and the format in which we want to capture the memory image.

After providing the above details, we have started our process of capturing the memory image. It depends on the size of the memory how much time it takes to complete the process.
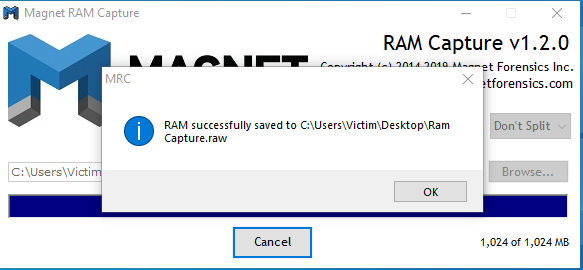
After completing the process, it shows a pop-up message which indicates the process is successful and provides us the path location were our captured memory is located which we were provided earlier by us.

Now we can check our located path to see whether our memory image generated or not, as we can see in the above image that we successfully created our image; now we can analyze that memory image.
Access data FTK imager
FTK imager can create the live memory image and paging file for both windows 32bit and 64bit systems. We can download the FTK imager from here and install in our system. The main purpose of building the FTK imager is to process and index data upfront and try to eliminate wasted time for searches to execute. No matter how many different data we are dealing with or amount of data we have to go through, FTK get us their quicker and better than anything else. Download Here
Now start the software of the access data FTK imager

Now to start we need to click on the file button as shown in the above image.

After clicking on the file button our screen would look like this. Now we need to search the capture memory button and click on that button for the start of the capture memory process.

Then, we need to provide some information regarding that image, such as the destination path of the memory image, the file name of the memory image, and whether we want to include its page file and AD1 file.

After we provide that information, it indicates that our process has started. And it also consistently shows the status of our process and the final destination or path where our image will save.

After completing, it shows us the message that says “Memory capture finished successfully” along with the location or destination of our memory image.

Now we are going to check that location to see whether we saved our image. But as we can see in the above image, we successfully captured the memory image.
Belkasoft Live RAM Capturer
This free forensic tool reliably extracts all content of the system’s volatile memory, even if an active anti-debugging system protects it. Its separate 32-bit and 64-bit builds are available to minimize the tool’s footprint as much as possible.
You can analyze memory dumps captured with Belkasoft Live RAM Capturer using any RAM analysis software.
But First, we need to download Belkasoft Live RAM capturer from here and install in our system.
Then open this software and select the path where we want to save our memory image and Click on the capture button.

After providing all the details it starts to load its drivers to start the process of capturing the memory image. Now it shows the active live progression of the task given by us to capture the memory image.

After completing the overall process, it completes it’s active progression by touching on the right side of its wall and provide us some sneak peeks of our captured memory. And suggests to us its image analyser from belkasoft and also provides its link to download it.

Now we need to check whether our memory will be captured or not. As we can see in the image given below, we succeed in our process.

These are some ways or tools to capture the live memory image for analysing it for searching some evidence through it to help in the investigation of an investigator in his cases.
To learn more about Cyber Forensics. Follow this Link
Author: Shubham Sharma is a Pentester, Cybersecurity Researcher and Enthusiast, contact here.
Hi Admin,
I’ve been following your blog- hackingarticles.in for quite some time now, and I love your content and the lessons you share with your readers. Every time I read a post, I gain more knowledge from it, which is why I think it’s so great.
I was wondering if I could contribute sponsored guest posts on your blog. I have quite a few titles ready to publish. The article will be original and freshly written.
How much will you charge? Let me know! I really look forward to your positive response.
Thanks & Regards,
Lisa Ruiz
kindly contact raj@hackingarticles.in
Awesome blog, Raj!
Would you recommend me to use Belkasoft RAM capturer over the other (as it’s not free to use…)?
I understood that Belkasoft’s is running at kernel mode. Thus, preventing malwares to, perhaps, being captured by a RAM capture (thus hiding something in the memory).
Do you know if other softwares (such as Magnet’s) run at a kernel level as well? If not, how to be sure that malwares wouldn’t detect RPM’s coming from these softwares? (I guess they use RPM win32 API to capture the RAM data)
Keep up your good work, cant wait to read further articles!