Linux For Beginners: A Small Guide
More often than not, certain operating systems tend to get tied to certain tasks. When it comes to penetration testing, Linux based operating systems are always mapped to it. This article will help you get comfortable with the fundamentals of Linux. So let’s start.
Table of Content:
- Why use Linux for pentesting?
- The Basic Linux Commands
- Text Manipulation
- Installing and Removing Softwares
- Playing with permissions
- Conclusion
Why use Linux for pentesting?
Linux offers a far higher level of control of the operating system, not to mention that it is open source. This also makes Linux transparent and easier to understand. Before we try to “hack” anything, it is a must to know how it works, this is why transparency in Linux is a huge plus.
Because Linux is very popular amongst the pen-testing community, most of the used penetration testing tools and frameworks are also then built for Linux.
Maintenance is also comparatively easy as the software can be easily installed up from its repository. It is also very stable when compared to traditional operating systems like Windows.
Basic Linux Commands
Just like how we use Windows on a daily basis, creating folders, moving files, copying things, we’re going to learn these everyday operations for Linux.
We’ll be spending most of our time in the terminal, which is the command-line interface of our operating system. This is where we type out commands to perform the operations we want.
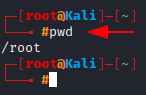
The “pwd” Command
Before we begin, we should know which directory we are working in, and where are the files we create going to be stored. The pwd command is one way to identify the directory we’re in.
So as we did it in our case, we found that we’re in the /root directory.
The “whoami” Command
Using the whoami command we see which user we’re logged in as. Here, we’re logged in as root (which translates to an administrator in the windows terms)

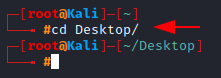
cd: Changing directories
To change directories via the terminal, we use the cd command. Let’s change our current directory to Desktop.
cd Desktop/
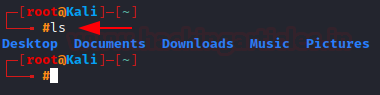
ls: Listing the Contents
To see the contents of a directory we use the “ls” command, (very similar to the dir command in windows)
The “Help” Command
Nearly every command, application and or utility in Linux has a dedicated help file which guides its usage. If you want to learn more regarding a specific command or if you’re stuck, help (-h, –help) will be your best friend.
Let’s find out more about volatility framework.
volatility --help

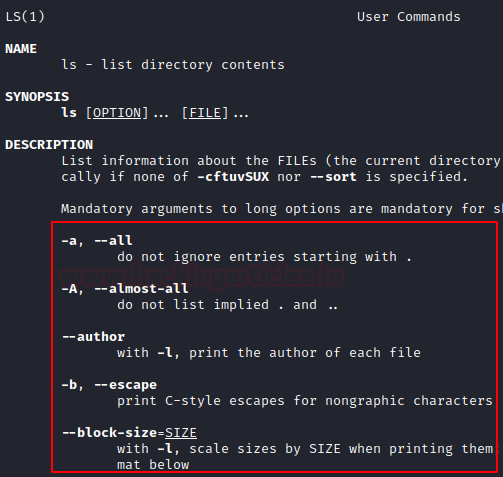
man: The Manual Pages
In addition to the help file, most commands and applications also have a manual page, which can be accessed via typing man before the command.
As seen below, it provides a description and all the tags that can be used with the ls command.
man ls
locate: Searching keywords
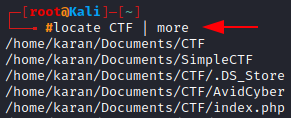
When searching for a specific keyword, one of the easiest ways to do so is using locate. Type locate and then the keyword on the terminal and it will search the entire file system for the occurrence of it.
Though a few drawbacks of using locate as it provides too much information and the database it uses is updated once a day, so you can’t find files created minutes or hours ago.
Let’s search for the keyword: CTF with
locate CTF | more
whereis: Finding binaries
Let’s begin this section with what are binaries?
Files that can be executed, similar to .exe’s in Windows are referred to as binaries. These files generally reside in the /usr/bin or /user/sbin directories.
Utilities like ls, cd, cat, ps (we’ll cover some of these later in the article) are stored in these directories too.
When looking for a binary file, we can use the whereis command. It returns the path of the binary as well it’s man page. Finding the binary file: git.
whereis git

which: Finding binaries
The which command is more specific and only return the location of the binary in the PATH variable in Linux. Finding the binary file: git.
which git

Filtering with grep
Very often when using the command line, you’ll want to search for a particular keyword, this is where grep comes in.
Let’s search for the word: echo, in the simple_bash.sh file by typing
grep -I "echo" simple_bash.sh

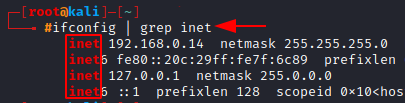
Thought the most common use case of grep it to pipe the output into it with the keywords to filter the output.
Here we use grep just to get the IP address of our machine, instead of all the other information that comes when running the ifconfig command. (We’ll touch on the ifconfig common in the later section)
ifconfig | grep inet
Searching with the “find” command
The find command is the most powerful and flexible of the searching utilities. It is capable of different parameters, including, the filename (obviously), date of creation and or modification, the owner, the group, permission and the size.
Here we use -type and -name tag which tells find the type of file we are looking for as well as its name. The backslash (/) indicates the root directory, which is where we want to search the file in.
find / -type f -name hacking_articles

If your result looks like this:

It is because the find command is also searching through directories your account doesn’t have the permission to access to. Hence, for a cleaner result, we use 2>&1 which sends all the permission denied errors to /dev/null (into nothing) and then using grep filters them out of the output)
find / -type f -name hacking_articles 2>&1 | grep -v "Permission Denied"

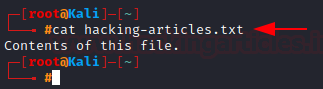
The “cat” command
We use the cat command to output the contents of a file on the terminal. Let’s use the cat command on “hacking-articles.txt”.
cat hacking-articles.txt
Creating files with “touch”
The touch command allows you to create a new file. Simply specifying the filename after the touch command will result in the creation of that file.
Let’s create a text file and name it “hacking-articles-2.txt”
touch hacking-artciles-2.txt

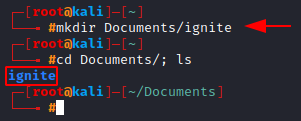
mkdir: Creating a directory
In order to make a directory or mkdir for short, we just need to specify the directory name after the mkdir command.
Let’s create a directory: ignite
mkdir Documents/ignite
cp: Copying files
To copy files we use cp, which creates a duplicate of the file in the specified location. Let’s copy the text file we created earlier into the directory we just created above. We then list the contents of the directory to ensure that the file has been copied.
To copy a file we type, cp <the file we want to copy> <the destination of the “copied” file>
cp hacking-articles-2.txt Documents/ignite

mv: Moving/Renaming files
We can use the move command: mv not only to move files in the specified location but to also rename them. Now let’s try to move the file we copied into the ignite folder, outside of it.
mv hacking-articles-2.txt /root/Documents/

rm: Removing files
To remove a file, you can simply use the rm command. Let’s remove the “hacking-articles-2.txt” file.
As you can see from ls, the file no longer exists.
rm hacking-artcles-2.txt

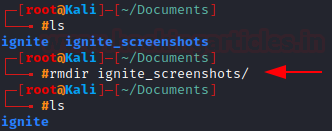
rmdir: Removing a directory
In order to remove a directory, we use the rmdir command which stands for “remove directory”. Let’s remove the “ignite_screenshots” directory.
(Use rm -r for directories with content inside them, r stands for recursive)
rmdir ignite_screenshots/
Text manipulation
In Linux, almost everything you are going to deal with is going to be a file, more often a text file; for instances, configuration files. Hence, learning how to manipulate text becomes crucial while managing Linux and its applications.
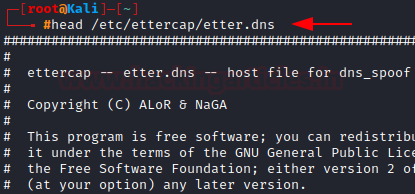
Grabbing the head of a file
When dealing with large files, we can use the head command, which by default displays the first 10 lines of a file. Let’s view the first 10 lines of the etter.dns file.
(etter.dns is a file configuration of file of a tool called Ettercap which is used to in DNS spoofing and ARP attacks)
head /etc/Ettercap/etter.dns
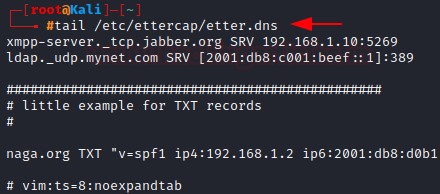
Grabbing the tail of a file
Similar to the head command, the tail command is used to view the last lines of file. Let’s view the bottom lines of the etter.dns file.
tail /etc/ettercap/etter.dns
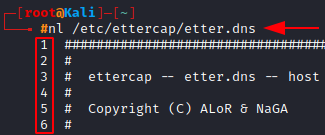
nl: Numbering the lines
We can use the nl command to number the lines while it outputs them on the terminal window. Again using the etter.dns let’s number all of the lines this time.
nl /etc/Ettercap/etter.dns
sed: To find & Replace the Text
The sed command lets you search for the occurrence of a word or a text pattern and then perform some action on it. Here we are going to use the /s tag to search for the occurrence of WWW and /g for global replacement with www.
sed s/WWW/www/g hacking-artciles.in

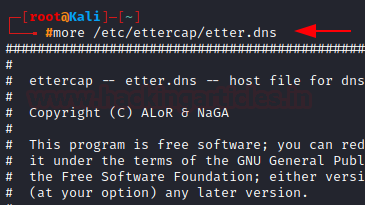
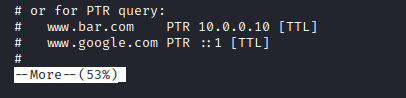
more: Controlling the display of a file
The more command displays a page of a file at a time and lets you scroll down using the ENTER key. Opening the etter.dns file using more.
more /etc/ettercap/etter.dns
Less: Displaying and filtering a file
The less command is very similar to more, but it comes with the added functionality of being able to filter keywords. Let’s open the etter.dns file using less. We can further press the backward slash (/) on the keyboard and then enter the keyword we want to search for, here I’ve searched my own IP Address.
less /etc/ettercap/etter.dns


Installing and Removing Softwares
We often need to install software that didn’t come with your distribution of Linux or later down the lane even remove the unwanted software.
In Debian based Linux distributions, like Kali Linux (the one I am using), the default software manager is the Advance Packaging Tool or apt for short. Just how we would go to the Appstore to download an app, we have repositories in Linux. We’ll learn how to access this repository, search in it and download from it.
Searching for a package to install
Before we download any software package, let’s check whether it is available in the repository, which is where our Linux operating stores information. We’ll be using the apt tool.
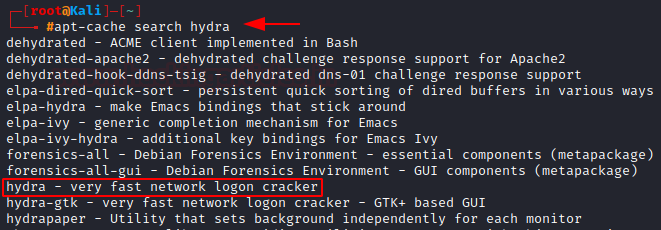
Type apt-cache search and then the package that you want to search for, let’s search for Hydra which is login cracking tool.
Highlighted is the tool we are talking about.
apt-cache search hydra
Installing packages
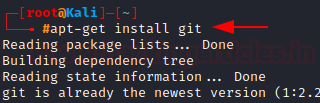
Now let’s install the packages we want. This time we’ll be using the apt-get command followed by install and the package name.
Let’s install git, which will later allow us to pull repositories from Github to install furthermore tools.
apt-get install git
Removing packages
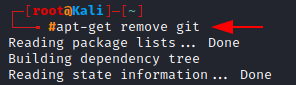
To remove any package from your machine, simply type remove after apt-get with the package name.
Let’s remove the git package. (I recommend to Press n to abort this step)
apt-get remove git
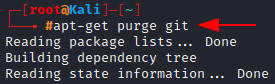
Purging packages
Sometimes the package we just removed leaves residual files behind (an example would configuration files) In order to completely wipe out everything clean, we use the purge option with apt-get.
Let’s try to purge git (again you can press n to abort)
apt-get purge git
Updating the repository
It is good practice to update the repository as they are usually updated with new software or newer versions of existing software. These updates have to be requested and can be done by typing update after apt-get.
Let’s update our repository. (Note: update doesn’t apply these changes only downloads them)
apt-get update

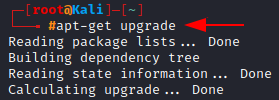
Upgrading the repository
In order to apply the changes from the command we run above: update, we have to run the apt-get with the upgrade tag. This then installs or rather upgrades all the new updates that were downloaded to the system.
(Note: Upgrading can be time-consuming, so you might not be able to use your system for a while)
apt-get upgrade
Adding repositories to the sources.list file
The server that holds the information of the software for particular distributions of Linux are known as repositories. We can nano into the file at /etc/apt/sources.list and add repositories here.
(I recommend not to add any experimental repositories in your sources.list because they can download problematic software and cause things to break. )
Highlighted is the repository my Kali Linux is using.
nano /etc/apt/sources.list


Playing with Permissions
Before we start learning the Linux commands to play with permissions, let’s learn about file/directory permission in Linux first.
As you know by now, in Linux the root user is all-powerful, the root user can do anything on the system. The other users have limited capabilities, and are usually collected into groups that generally share a similar function.
For example, a different group for the developer team, deployment team and administrators to initiate different levels of access and permission.
All the files and directories in Linux are allocated with three of levels of permission:
r permission: This allows the user access to open and view a file
w permission: This allows the user to view and edit the file
x permission: This allows the user to execute the file (not necessarily view or edit it tho)
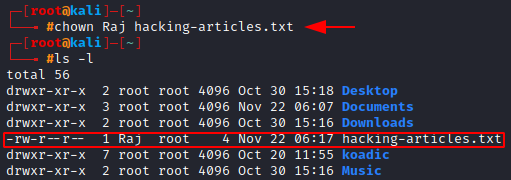
Granting ownership to an individual user
We change the ownership of the file so that the new user who owns can have the ability to control its permissions. Here we’ll use the chown command to change the owner.
Let’s change the owner of hacking-artciles.txt from root to Raj
chown Raj hacking-articles.txt
Granting ownership to a group
To transfer ownership of a file to a group we use the chgrp command. To ensure only the ignite team member can have the ownership, let’s change the group to ignite.
chgrp ignite hacking-articles.txt
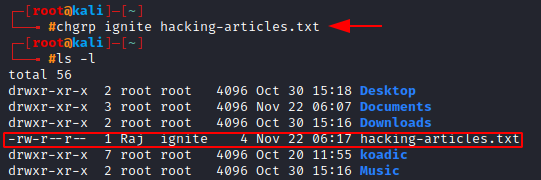
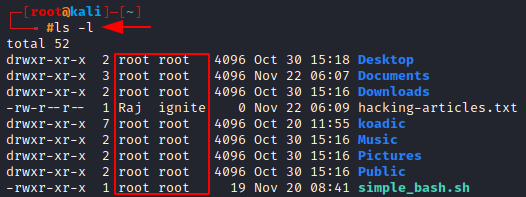
Checking ownership
As you can see in the screenshots above, we are using the ls command with the l tag to view the permissions granted to the files and directories.
This out represent,
- The type of file (- representing a file, while d representing a directory)
- The permissions of the file for the owner, group and users, respectively
- The number of links
- The owner of the file, user and then group
- The size of the file in bytes
- When the file was last created or last modified
- The name of the file
Highlighted are the ownership section of the file.
Changing permissions
We use the chmod command to change the permissions of a file. This table will help you in deciding the permissions you want to give the file:
| 0 | — |
| 1 | –x |
| 2 | -w- |
| 3 | -wx |
| 4 | r– |
| 5 | r-x |
| 6 | rw- |
| 7 | rwx |
We could run, chmod 777 $filename to give the file ALL the permissions,
or simply chmod 111 $filename to give it executable permission.
Another way of doing so, is chmod +x $filename, as seen below.
We can see the colour of the file change, indicating that it is executable.
chmod +x hacking-articles.txt

Granting permissions with SUID
SUID bit says that any user can execute the file with the permissions of the owner but those permissions don’t extend beyond the use of that particular file.
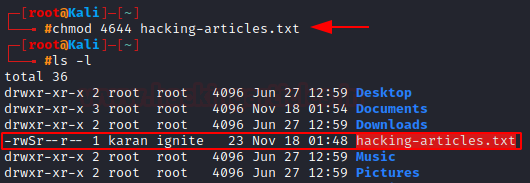
To set the SUID bit, we need to enter 4 before the regular permissions, so the new resulting permission of 644 will become: 4644.
Let’s set the SUID bit for “hacking-articles.txt”.
chmod 4644 hacking-articles.txt
Granting the root User’s Group Permission SGID
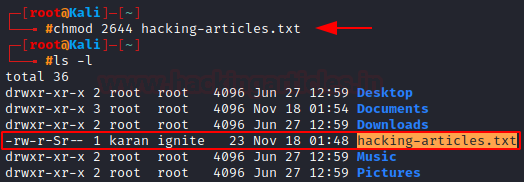
Similar, SGID also grants temporary elevated permission but for the file owner’s group.
To set SGID permission, we need to enter 2 before the regular permission.
Let’s set the SGID bit for “hacking-artivcles.txt”.
chmod 2466 hacking-articles.txt
Conclusion
Hope this article has helped you understand the Linux operating system and kickstart your journey as a penetration tester. Practise these commands, try them out on your own, get comfortable with the command-line interface. Also be sure to check out the part 2 of this article, where we dig deeper into more advanced Linux concepts like managing networks, process management, scripting & automation and much more!
Author: Karan Bhandari is a Certified Ethical Hacker, he is passionate about security and forensics innovation and industry. Contact LinkedIn.