Forensic Investigation: Ghiro for Image Analysis
In this article, we will learn how we can use the Ghiro image analysis tool in forensic investigation. Ghiro is a digital image forensic tool. Which is fully automated and opensource.
Table of Content
- What is Ghiro?
- Features of Ghiro
- Setup the Ghiro
- Working on case with Ghiro
What is Ghiro?
It is developed by Alessandro Tanasi Jekil and Marco Buoncristiano Burlone. It is a fully automated tool designed to run forensic analysis over a massive amount of images, just using a user-friendly and fancy web application.
To know more about the Ghiro image analysis tool you click here.
Features of Ghiro
The web interface allows us to control every Ghiro feature. For a rapid and comprehensive review of image analysis, we can input one image or a collection of photographs. We are able to search for any type of analysis data and organize photographs in cases.
The main features of Ghiro.
- Metadata Extraction: Metadata is divided into several categories depending on the standard where they are come from, Image metadata are extracted and categorized. EX- EXIF, IPTC, XMP.
- GPS Localization: It is Embedded in the image metadata sometimes there is a geotag, a bit of GPS data providing the longitude and latitude of where the photo was taken, it is read and the position is displayed on the map.
- MIME Information: The image MIME type detected to know the image type we are dealing with, in both contacted and extended form.
- ELA: ELA stands for Error Level Analysis. It identifies areas within an image that are at different compression levels. The entire picture should be at roughly the same level if a difference is detected, then it likely indicates a digital modification.
- Thumbnail Extraction: The thumbnails and data related to them are extracted from the image metadata and stored for review.
- Thumbnail Consistency: Sometimes when a photo is edited the original image is edited but the thumbnail not difference between the thumbnails and the images are detected.
- Signature Engine: They have over 120 signatures that provide evidence about the most critical data to highlight focal points and common exposures.
- Hash Matching: Suppose we are searching for an image and we have only the hash value. We can provide a list of hashes and all images matching are reported.
Setup the Ghiro
Now we need to set up our Ghiro, we recommend the “OVA” version because it is the faster way to start using the Ghiro. After downloading the Ghiro, in few minutes you will have a fully functional Ghiro set up to start to analyze our images.
To download the Ghiro image analysis tool, click here.
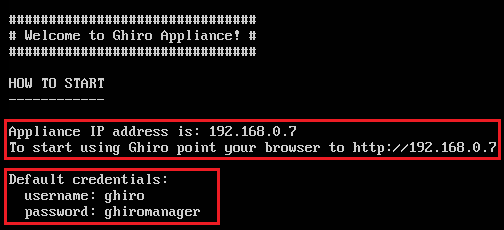
After opening this OVA file in Virtual Box or VMWare, It will come up as a screen like this.
It is showing us the two details
IP address: 192.168.0.7
We can use this detail to trigger our software.
Default credentials to log in Ghiro are
Username: ghiro
Password: ghiromanager
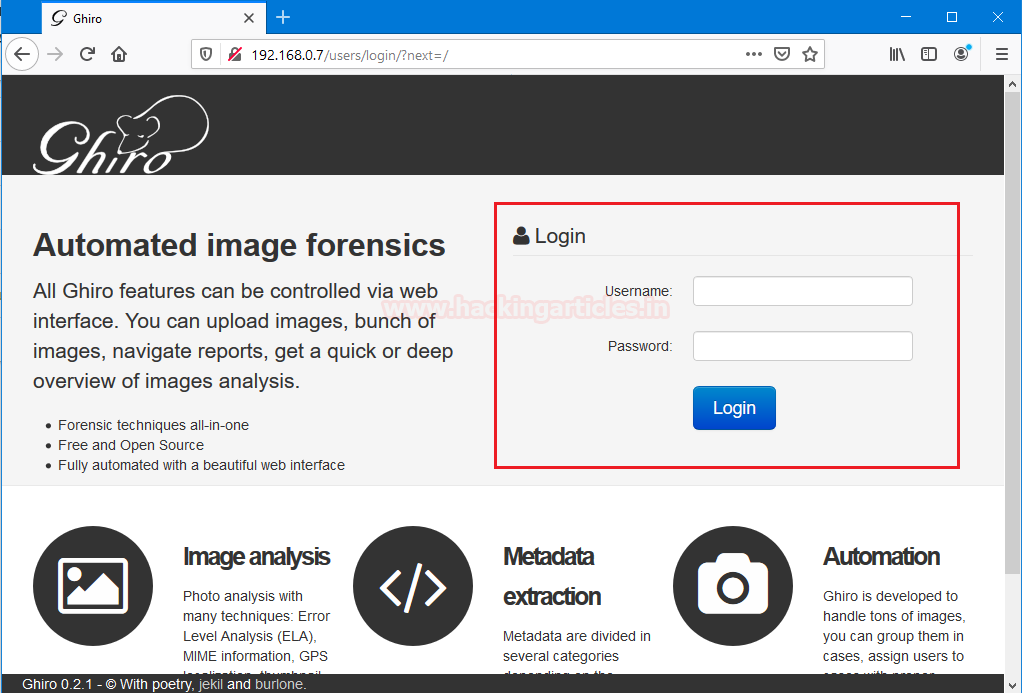
Now we open that IP address in our browser, to move further in the setup process.
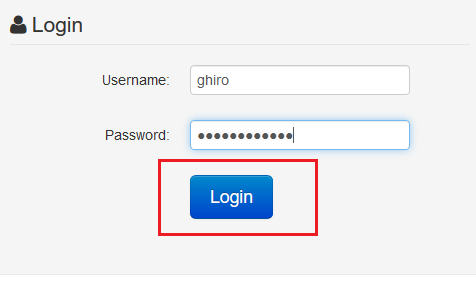
Straight away we focus on the login screen and fill up its credentials. After filling up the details click on the login button.
Now, we can see that we successfully set up the Ghiro, the dashboard in the home screen says that welcome to Ghiro, Which confirms that our setup is successful.
As we can see that it has we user which user: ghiro through which we log in the software. At the initial point, it shows zero cases and zeroes analysis left because we just set up this software.

Working with Ghiro
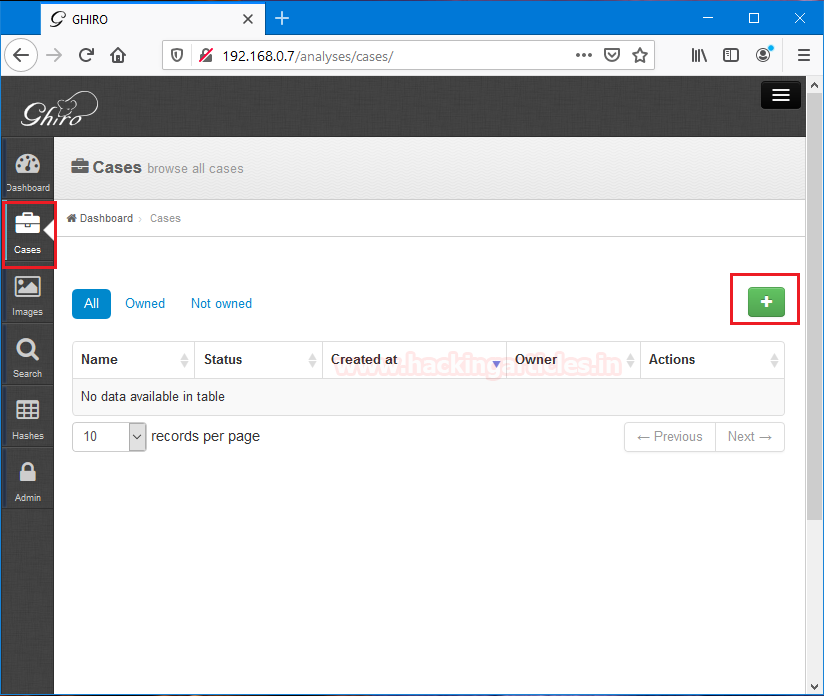
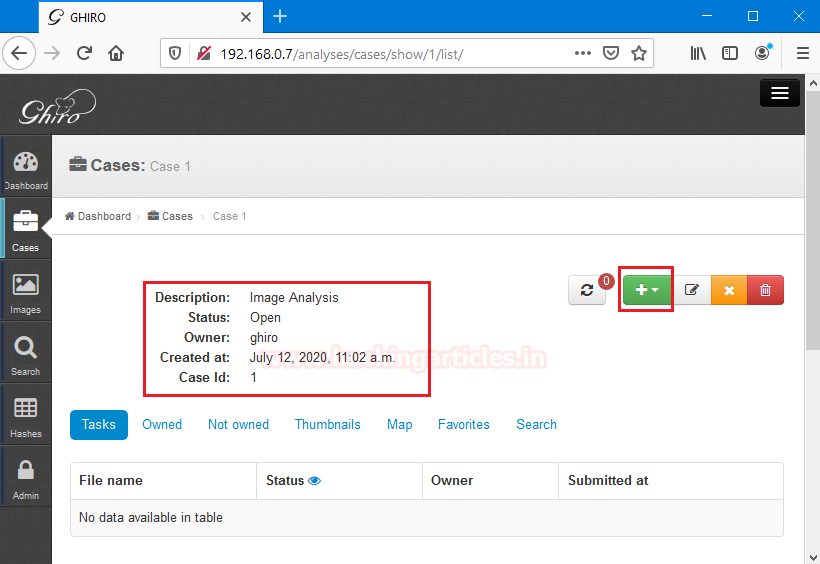
To start working with Ghiro for image analysis we need to click on cases. Where we can see that it is completely blank, then notice a [+] to add any case to this directory.
Now, we need to fill up the details regarding the forensic case like case name, case description, and its Investigating user.

After saving the details regarding this forensic case, It will confirm these details and ask us to add images to analysis. To add images click [+] button.
To will lead us to a window through which we can add images by clicking in the add file option. Browse the file you want to analyze. After adding those files click on the start upload button.

Uploading and Managing Files
After uploading these files it will show us the files and their status of uploading these images. In this uploading process, Ghiro demands us to refresh this screen by clicking on the highlighted refresh button. Click on the refresh button to finishing up the upload.

We can see that the file upload process in just finished now we have two options to analyze the image. The first option is directly to click on the image name to view their details.
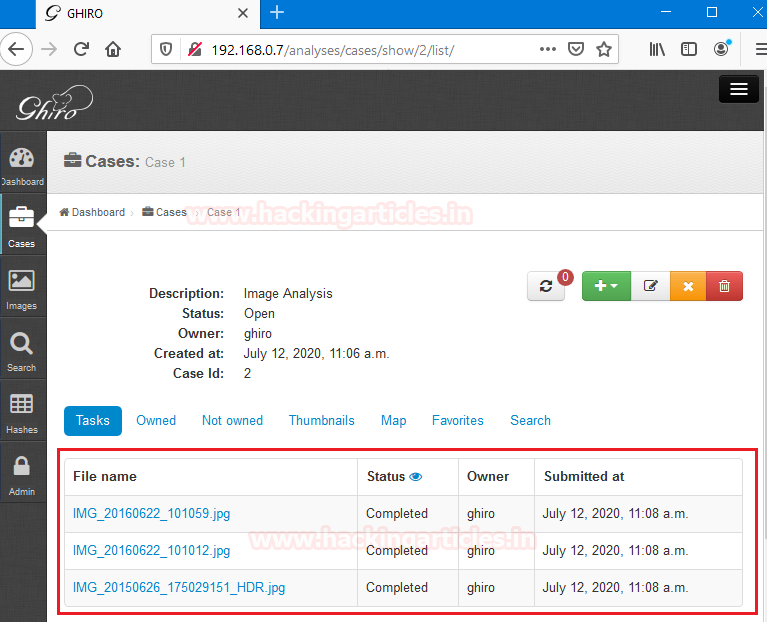
The second option is to click on the images tab and then click on the image we want to see their details. Both of them are kind of the same it doesn’t affect the forensic investigation process.
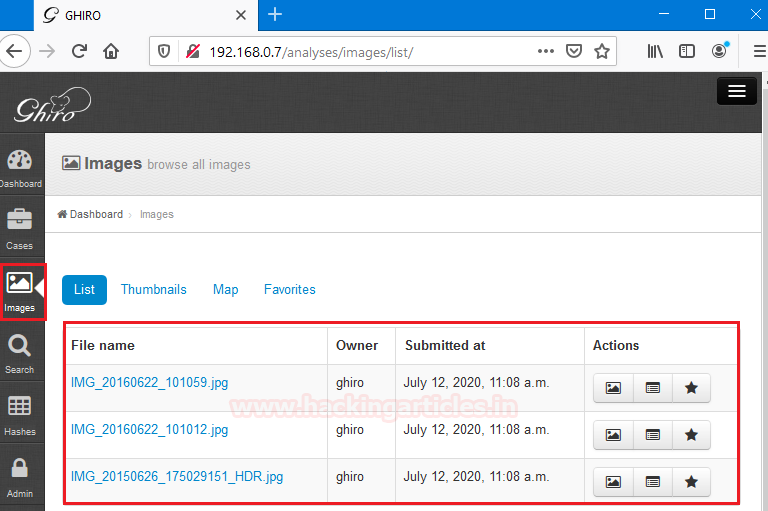
Image Analysis Options
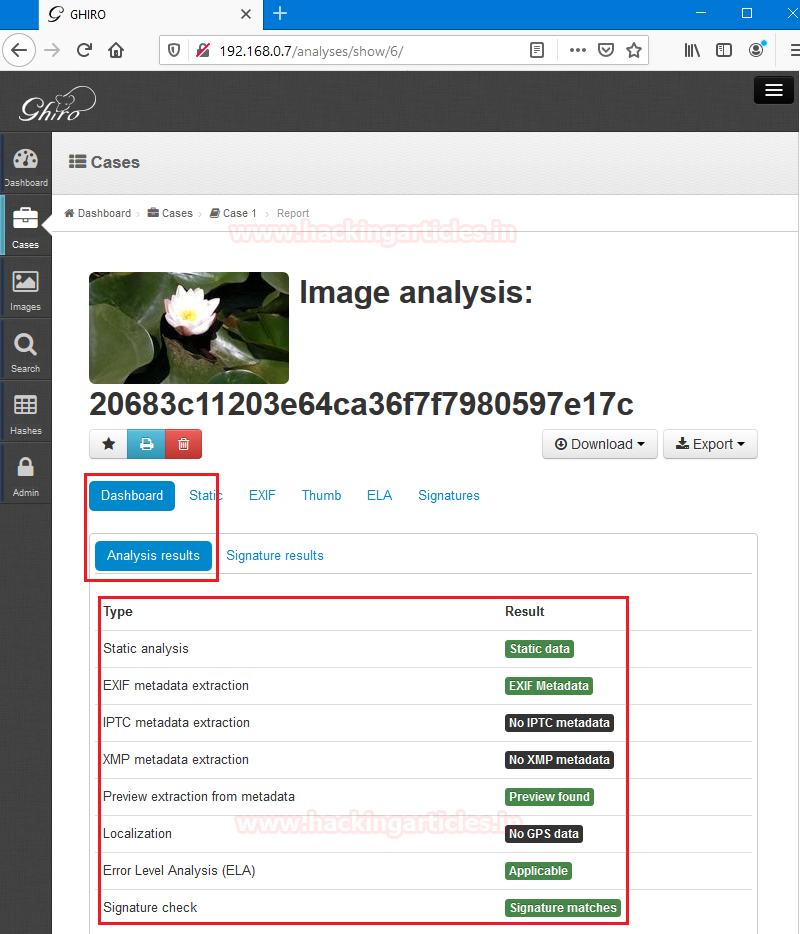
Click on the image we want to analyze, it will show us the basic details regarding the image in the dashboard which shows us all the analysis results like static analysis, EXIF, IPTC, XMP, Signature check, etc.
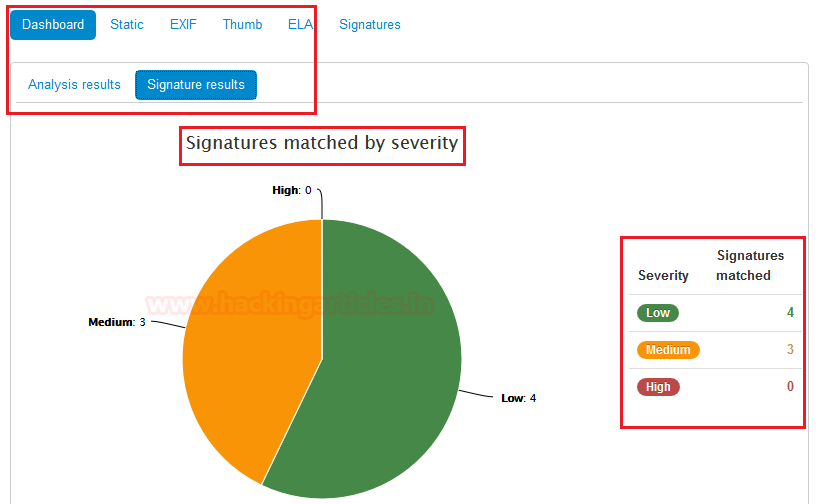
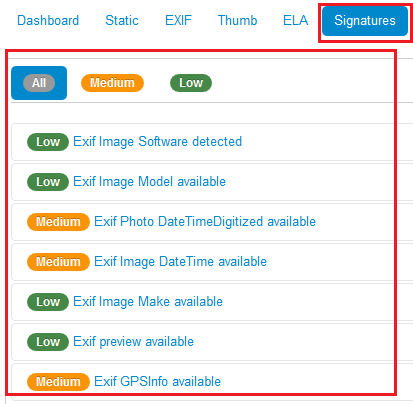
Now we clicked on the second options offer by the dashboard menu which is Signature results. Which shows us all the signature matched by severity. In case 4 are low, 3 are medium and nothing is high.
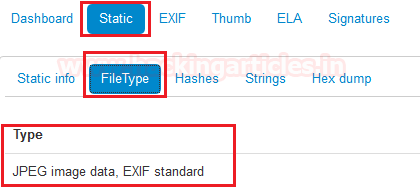
Then, In the second tab, we see static and its first option is static info. In the static info option, we see all the basic information about the image.

We switched to the second option which is FileType. Which says it is a jpeg file standard for EXIF.
The Third option shows all the Hash values of this file within different algorithms. If we Focus hard we can see that MD5 hash values are the file name, when we clicked on the image for analysis.

The fourth option which we see is Strings. It will show us all strings behind this image file with the slight details of the metadata of this image file.

The final option offered by the static is the Hex dump. It will show us the hexadecimal value of that image file through which can get some small details about that image file.

Advanced Analysis Features
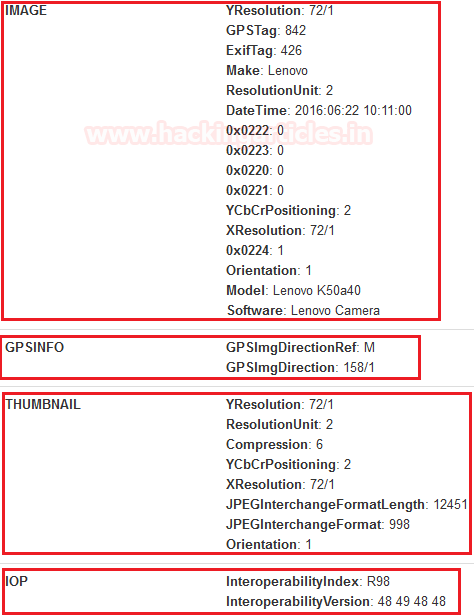
Now switch on the third tab EXIF, which has only one option which says about EXIF the metadata. We get some of the major details for our forensic investigation.

Scroll down to get full segments of the metadata of image files that can become handy in forensic investigation. Regarding GPS, Thumbnails, and IOP.
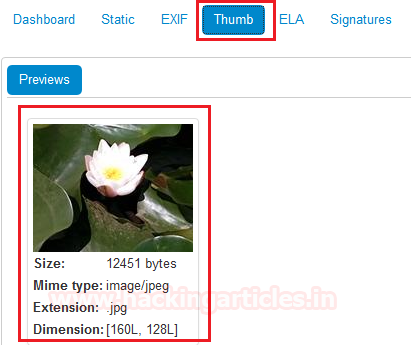
After switching the one more we found out the thumb tab. This shows us all details regarding the thumbnail of the image. Regarding Mime type, Extension, and Dimension.
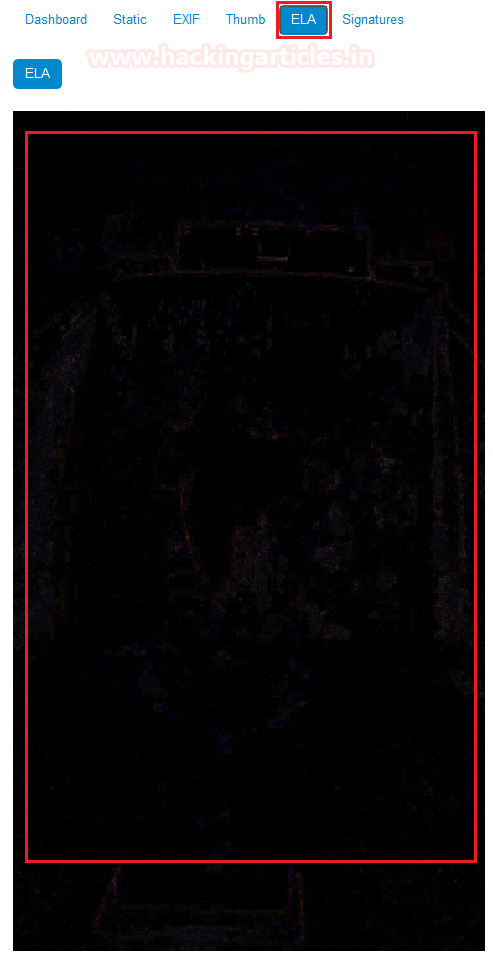
The fifth tab of Ghiro image analysis we get ELA. Error Level Analysis (ELA) permits identifying areas within an image that are at different compression levels. With JPEG images, the entire picture should be at roughly the same level. If a section of the image is at a significantly different error level, then it likely indicates a digital modification.
If we focus hard and keep the brightness high we can see the Error image analysis of our image as well.
The final tab shows us the signature values in the image analysis. Which we already discussed above.
Overall Ghiro is the complete image analysis tool that can be quite beneficial in any Forensic Investigation.
To learn more about Cyber Forensics. Follow this Link
Author: Shubham Sharma is a Pentester and Cybersecurity Researcher, Contact Linkedin and twitter.