Defense Evasion: Hide Artifacts
Today, in this article, we will focus on various methods that attackers implement to evade detection by hiding artifacts in the victim’s system to execute their malicious intent.
Table of Content
- Introduction
- Hiding Files and Directories
- Using Command Prompt
- Hiding System Users
- Using Command Prompt
- Using Registry Edit
- Hiding File Systems
- Over Command Prompt
- Using Registry Edit
- With Disk Management
- NTFS File Attributes
- Using Command Prompt
- Detection
Introduction
Additionally, we can define an artifact as an important system file, which may include documentation, test plans, images, and even some executable modules.
Operating Systems have a feature to hide these artifacts, in order to avoid disrupting user work environments and prevent users from changing files or features on the system. However, an attacker can abuse these functionalities in order to carry out his evil intents by hiding up these artifacts which thus provides a clear path to evade his detection.
Let’s try to understand the above statement by taking a simple example.
Suppose an attacker penetrates your machine and got a session enabled with that, which thus allows him to exploit your system. The very first thing that the attacker would do, is that he would create a hidden file and hide his payload, as by exploiting the operating system’s feature i.e. hiding artifacts. Once the attacker has his payload hidden, now he can carry that out for his malicious intent by tricking up the system administrator.
With that said, let’s have a look at the various approaches that the attackers take to evade their presence.
Hiding Files and Directories
Attackers may set files or directories to be hidden to evade detection mechanisms.
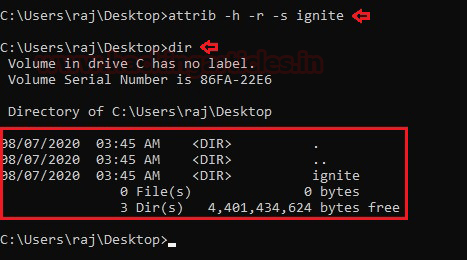
Let’s boot into our command prompt by running it as an administrator. Further, we’ll create up a folder over at our directory, as in our case I’ve done it as ignite at Desktop. The same can be confirmed by running the dir command.
In order to hide the file which we have just created, simply run the following command:
attrib +h +s +r ignite

Okay!! The file has been hidden now, but wait, let’s see how to unhide the same, simply run the following command:
attrib -s -h -r ignite
Great!! From the below screenshot we can see that as we hit the “dir” command we got our file back over onto the Desktop.
Hiding Users
Adversaries may use hidden users to mask the presence of user accounts that they create. In this section, we will look at how users can be hidden.
Using Command Prompt
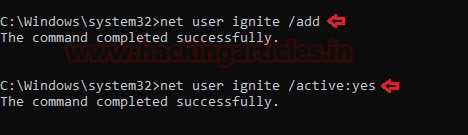
So let’s reboot into our command prompt and create a user as in our case we have named it as “ignite”. A user can be created by using the command: net user ignite /add.
Now that you have created the user, you need to activate it by running the command: net user ignite /active:yes
We will hide the user “ignite” by running the command:
net user ignite /active:no
To check the changes, we would simply restart our PC and notice that our user is no more visible on the sign-in page.
So, to unhide the user, simply re-run the command:
net user ignite /active:yes
We’ll notice that our user “ignite” is again visible over at our sign-in page.
Using Registry Editor
This method can be lengthier as compared to the above one, but it’s always good to know. So, let’s explore this path and hide our user.
Over at the Run Window, type “Regedit” in the search prompt
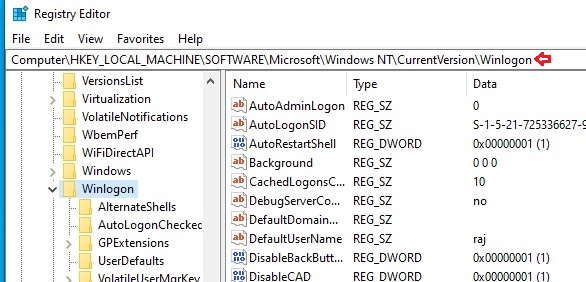
Once we enter the registry edit, just navigate to HKEY_LOCAL_MACHINE\Software\Microsoft\WindowsNT\CurrentVersion\Winlogon
Now, that we have navigated to the path mentioned above let’s Right-click on Winlogon -> Select New and choose Key
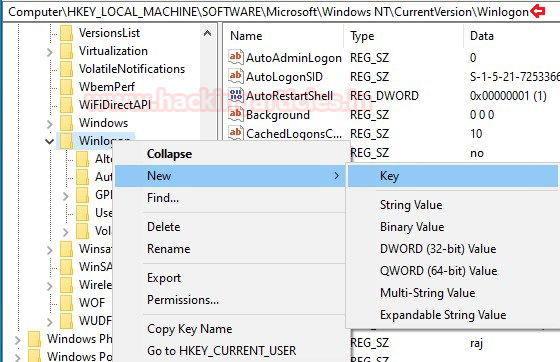
After completing the above process, we will rename the new key created as “SpecialAccounts”.
Then, right-click on SpecialAccounts -> Select New and choose Key. We’ll rename this key as “UserList”.
We can see that we have created two new keys. One is “SpecialAccounts” under Winlogon and the second key is “UserList” under “SpecialAccounts”.
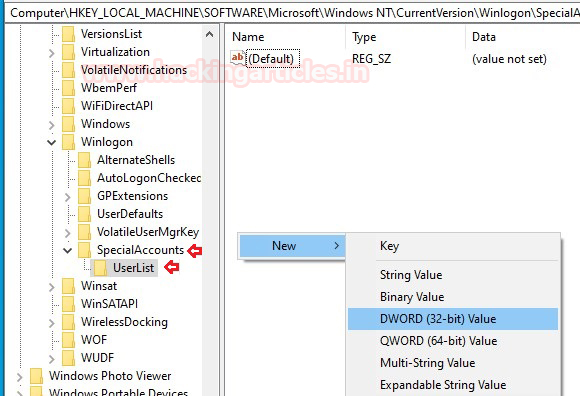
Over at the blank right-hand side, follow up as:
Right-click -> Select New -> Select DWORD (32-bit) Value as shown below
The new key created should be named as the user we are supposed to hide. In our case, we have named the new key as “ignite” as we are hiding this user.
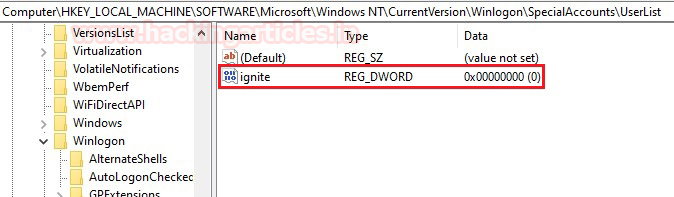
Now, close your registry editor and restart your PC to see the changes. The user is now invisible.
In order to unhide the same user, we’ll just go back to our registry editor and navigate to
HKEY_LOCAL_MACHINE\Software\Microsoft\WindowsNT\CurrentVersion\Winlogon\SpecialAccounts\UserList
Then, we’ll double click on the ignite user and change the Value data from 0 to 1 and, hit enter
Again, restart your system to see the changes. Your user is back on the sign-in page.
Hiding File Systems
Adversaries may use a hidden file system to conceal malicious attacks from users and security tools. File systems provide a structure to store and access data from physical storage. So, lets’ deep dive and have a look at how the above is accomplished.
Method 1: Over Command Prompt
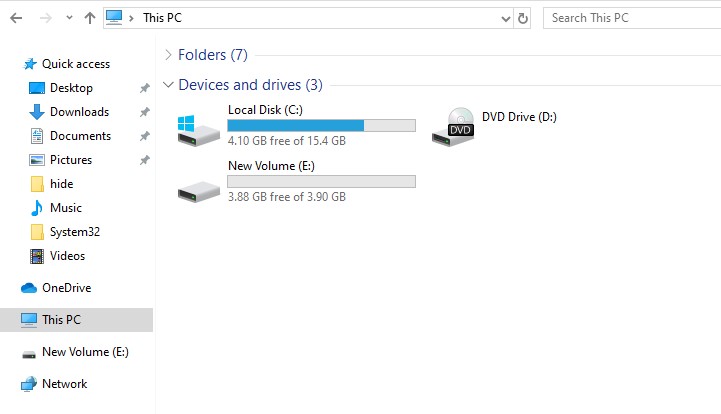
Let’s say we have an E drive which we want to hide.
Open disk partition into your command prompt with as “diskpart”
Let’s now list all the volumes available there using
list volume
As the volumes are over at our screen, let’s choose the volume which contains the drive that needs to be hidden. In our case, we select volume 3 by running the command: select volume 3
Great!! We’re almost there, now to hide the drive, simply run the command:
remove letter e
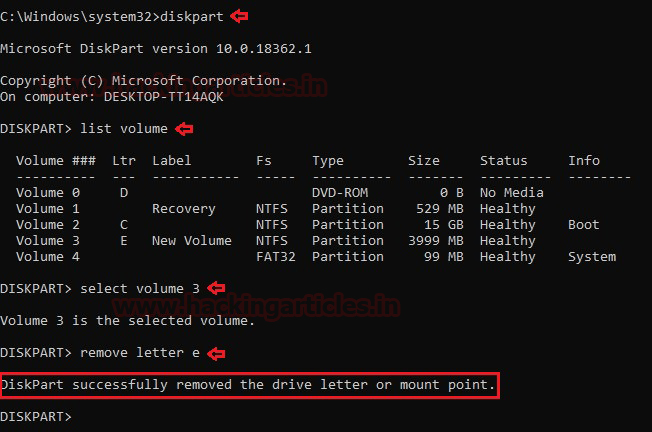
From the below screenshot we can see that Drive E is successfully hidden.
Further, to unhide the drive simply run the command “assign letter e”.

Method 2: Using Registry Editor
For this method, we’ll go back into the registry editor as explained in the “Hidden User” section and navigate to
HKEY_LOCAL_MACHINE\Software\Microsoft\Windows\CurrentVersion\Policies\Explorer
After navigating to the above-mentioned path, Right-click over on Explorer -> Select New -> DWORD (32-bit) Value as shown below.

A new key will be created which needs to be renamed as “NoDrives”

Now that we have renamed our new key as “NoDrives,” let’s double-click on it, change the base from Hexadecimal to Decimal, and enter the value in the Value Data field according to the drive we wish to hide.
In our case, as we’re hiding the E drive, we will set the Value data to “16” as the decimal value of the alphabet E is 16. You can set it according to yours.

Reboot your system again, and check for the drives.
Great!! From the below screenshot you can see that our drive has been hidden now.

To unhide the drive, navigate back to “Regedit” as explained above and move to HKEY_LOCAL_MACHINE\Software\Microsoft\Windows\CurrentVersion\Policies\Explorer. Right-click on “NoDrives” and just Delete it. Again, restart your system and see that the drive is again visible.
Method 3: Using Disk Management
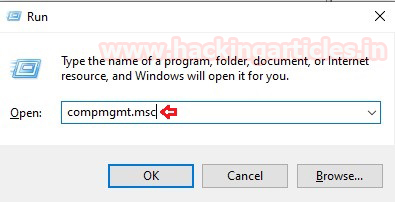
Let’s open Disk Management by running the command “compmgmt.msc” in the Run Dialog Box as shown below.
We’ll select the drive which we want to hide and right-click on it.
Then select “Change Drive Letters and Paths”.

After completing the above step, we’ll select the drive and click on the “Remove” button.

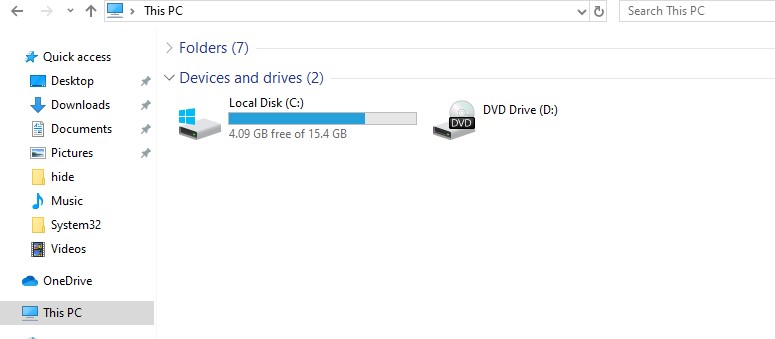
Finally, reboot your system, and you’ll notice that the system has now hidden the drive. In our case, drive “E” is not visible as we can see below.

Let’s unhide the drive by going back to disk management. Double click on New Volume and, select “Change Drive Letter and Paths”. Click on the Add button and add the drive you wish to by selecting “Assign the following drive letter” option and press ok.
NTFS File Attributes
Adversaries may use NTFS file attributes to hide their malicious data to evade detection. Every New Technology File System (NTFS) formatted partition contains a Master File Table (MFT) that maintains records for every file/directory on the system. Let’s explore how the above attack can be executed.
Boot up your Command Prompt again as an administrator in order to generate up a file with some data in it:
echo Welcome to ignite Technologies > file.txt
Then, as shown in the image below, we can see that the system has created our file with the data we entered.

Now, let’s create another file inside file.txt but this time we’ll make it as hidden with
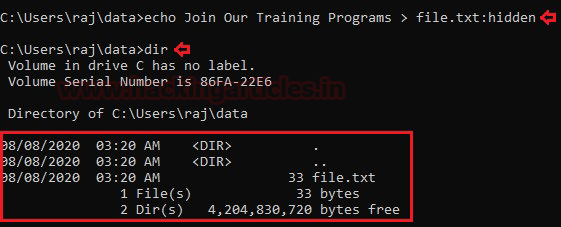
echo Join Our Training Programs > file.txt:hidden
From the below screenshot we can see that the file “hidden” is not visible at all.
Go ahead and type the command: type file.txt:hidden and hit Enter. You will notice that the file is still not visible to us.
But how to check the contents?
Simply run the command as more < file.txt:hidden and you will be there again.

Detection
Additionally, you can use the following methods to detect such types of attacks:
- Monitor processes and command-line arguments for actions that indicate hidden artifacts.
- Furthermore, you can monitor event and authentication logs to identify records that show the use of hidden artifacts.
- Monitoring the file system and shell commands for hidden attribute usage.
Source
- https://attack.mitre.org/techniques/T1564/
- https://docs.microsoft.com/en-us/windows-server/administration/windows-commands/attrib
- https://www.pcmag.com/encyclopedia/term/artifact
Learn more on Defense Evasion from this Link.
Author: Tanish Bugnait is a Cyber Security enthusiast and a security researcher. Contact here
