AlienVault: End user Devices Integration-Lab Setup (Part 2)
In this part of our lab series, we continue exploring AlienVault End User Devices Integration by setting up Windows and Linux endpoints for centralized monitoring. By integrating these devices with AlienVault OSSIM, you can collect logs, detect threats in real-time, and enhance the visibility of your network activity across the lab environment.
As logs never lie, it’s very important to aggregate and analyze the internal and external network logs constantly so that you can prevent a breach or perform incident response on time. In the previous article, we looked at the configuration and installation of AlienVault OSSIM.
The operating-system integration for AlienVault is based on window-centric for a Linux platform.
Let’s take a look at the involved process for gathering logs from Linux servers using AlienVault.
You can access the previous article from here: – AlienVault Lab setup
in this article, we will discuss how to send Ubuntu RSYS logs to the AlienVault server and the Manual configuration and installation of the SSH plugin.
So, without much theory let’s begin the integration process.
Table of Content
- Prerequisites
- credentials
- Integration of Rsyslog and SSH plugin to AlienVault OSSIM
Prerequisites
For the integration of Rsyslog and SSH plugin to AlienVault OSSIM, there are some minimum requirements as listed below.
- Ubuntu 20.04 or later
- Root privileges
Credentials
- Ubuntu 20.04 IP: 192.168.1.8
- AlienVault OSSIM IP: 192.168.1.70
- OSSIM (CLI) user: root
- OSSIM password: Designated by you on the time of server setup
Integration of Rsyslog and SSH plugin to AlienVault OSSIM
Ubuntu 20.04
Rsyslog is a software that is used for forwarding log messages in an IP network. It implements basic Syslog protocol and extends it with content-based filtering capabilities. It also supports different module outputs, flexible configuration options and adds features such as TCP for transport.
Make sure the Port 514 (UDP protocol) is both on the ubuntu 20.04 server-side and AlienVault OSSIM server is open so that the logs can be forwarded via UDP on port 514
Open rsyslog.conf file and check whether it is including all configuration file or not
To do this enter the following command
cd /etc
nano rsyslog.conf

Uncomment the following line to include all configuration files.
$IncludeConfig /etc/rsyslog.d/*.conf
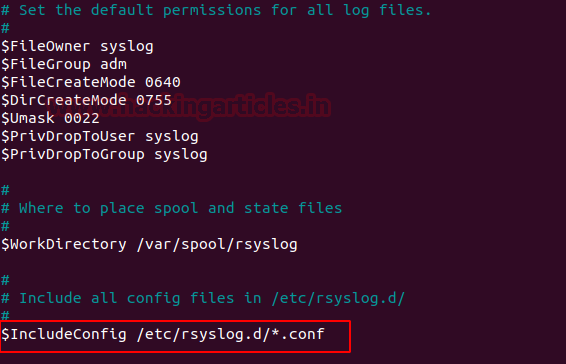
If this line by default is uncommented, then save and exit.
Now we forward the rsyslog logs to the AlienVault OSSIM server.
Create a new configuration file named alienvault.conf and add the following line as shown below:
nano alienvault.conf
cat alienvault.conf
*.* @192.168.1.70
Where 192.168.1.70 is OSSIM server IP.

To make the changes effective restart rsyslog service by the following command:
/etc/init.d/rsyslog restart

OSSIM Server
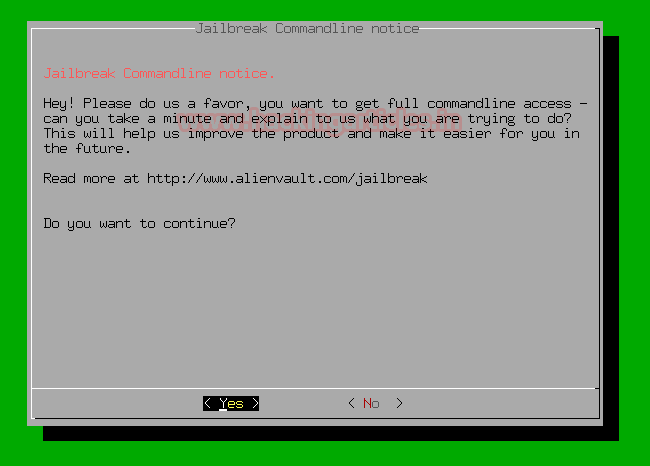
Login to the OSSIM server Jailbreak the server to CLI as shown below

On the next prompt, it will ask you for permission to access the full command line select yes and continue.
Here we’re using tcpdump on the OSSIM server to see log communications between Ubuntu 20.04 and OSSIM by running tcpdump to capture the logs with the following command:
tcpdump -i eth0 udp port 514

Let’s verify whether it is receiving logs from Ubuntu 20.04 server or not
Ubuntu 20.04
In the ubuntu machine, I m switching users by running the following command, and then after we will see the logs of switching users are reflected on the OSSIM server or not.
sudo su

Come back to the OSSIM server
OSSIM Server
Let’s check what happens here …
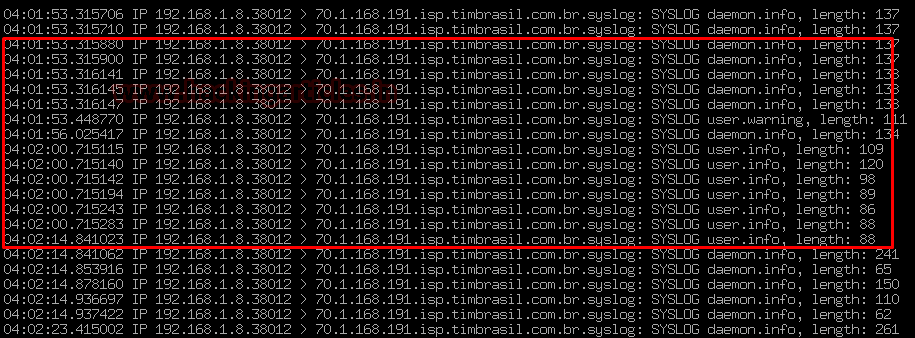
Hurrah !!! as we can see the log from the Ubuntu server has entered into the OSSIM server, then now we will redirect the logs sent to OSSIM into a file.
Configure the Filtration in the Rsyslog.
To do this follow the below steps:
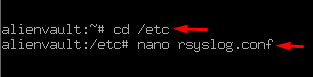
Head towards the rsyslog.conf file in the directory etc.
cd /etc
nano rsyslog.conf
In the section GLOBAL DIRECTIVES, the line “$IncludeConfig /etc/rsyslog.d/*.conf” by default it includes the whole config file of the system.

To filter specific rsyslog configurations and logs put some specific name on the place of * to filter it easily as shown below:
For example:-
$IncludeConfig /etc/rsyslog.d/debian.conf

Now head towards to directory of rsyslog.d and create a configuration file debian.conf

And enter the following rule into it:
If $fromhost-ip == ‘192.168.1.8’ then -/var/log/auth.log
&~
Then save and exit as shown below

Now we check that the logs of the ubuntu server are inserted correctly in auth.log or not.
Before we do rsyslog restart and then follow the below steps:
cd /var/log
/etc/init.d/rsyslog restart
tail -f auth.log

As we can see logs are started coming from the ubuntu server 😉
Now we move on to the AlienVault part
OSSIM needs a plug-in t to connect any data source to the server. Plugins have XML based configuration.
The plugins have two elements: cfg and SQL
Let’s go to configure cfg
Configure cfg
To do this head towards the directory /etc/ossim/agent/plugins
cd /etc/ossim
cd agent/
cd plugins/
in the directory of plugins, there are lots of plugins available that can be activated in OSSIM
we went on to modify one by hand for example SSH
To do this run the following command:
cp ssh.cfg debianssh.cfg

Then after open the debianssh.cfg configuration file.
nano debiannssh.cfg

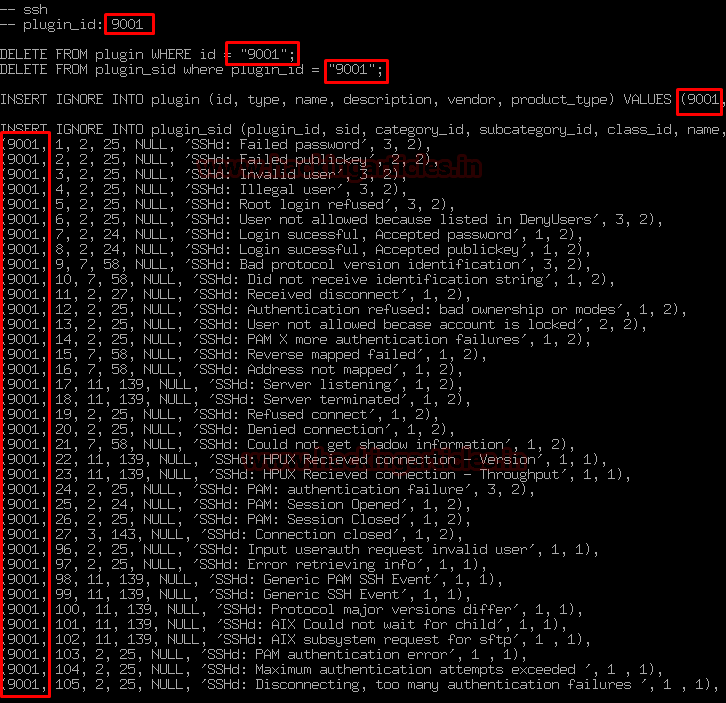
And change the plugin id with your desired no. to make it identifiable for the further process.
Here I’m replacing plugin id 4003 to 9001 as shown below:

Now we can activate the plugin
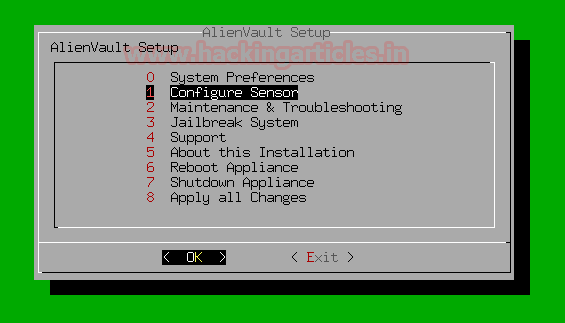
Come back to AlienVault setup by entering the following command:
alienvault-setup

And then configure the sensor by the below steps:
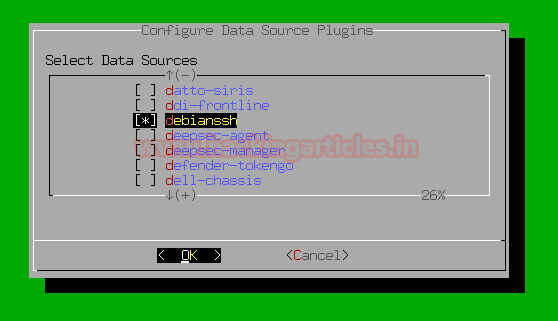
Steps: Select Configure Sensor > Configure Data Source Plugins > debianssh
Firslty, Select Configure sensor
Then, Select Configure Data Source Plugins

In the previous steps, we modified an SSH plugin into debianssh plugin. Select it in the list of plugins by pressing spacebar as shown below
And then come back to AlienVault Setup by selecting back option and then Apply All Changes
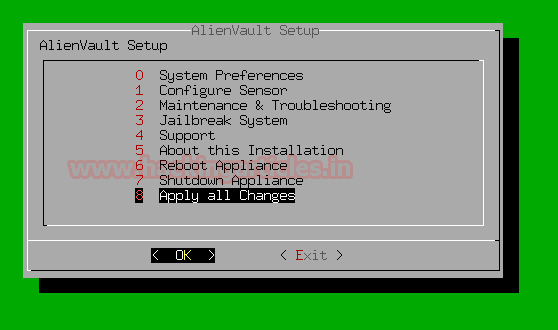
At last, it will ask for your permission to apply all changes
Select yes and then continue

On the next prompt, it will show you changes applied

Configure SQL
Let’s go to configure the SQL part of the plugin.
Head towards to the directory of /usr/share/doc/ossim-mysql/contrib/plugins by entering the following command
cd /usr/share
cd /doc
cd /ossim-mysql
cd /contrib
cd /plugins
by running command ls you can see the examples of sql plugins
we’re going to copy the ssh.sql to debianssh.sql by running the following command:
cp ssh.sql debianssh.sql

Open the debianssh.sql file
nano debianssh.sql

Let’s do some modifications in the configuration file so that it can match the plugin.cfg to the SQL database.
The configuration looks like similar as shown below
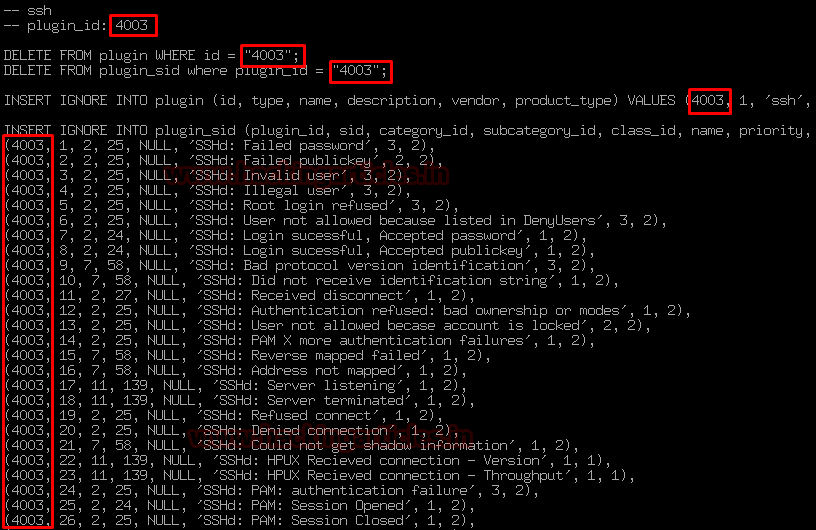
Change the plugin id 4001 to 9001 or somewhat the value of no. that you designated in the upper section as shown below:
As you can see this configuration file contains a predefined database of SSH logs so that if any suspicious SSH activity or request comes to the Ubuntu server it can match with that request.
And then Save and exit from the file.
Let’s put it into the action and activate the database be reconfiguring it.
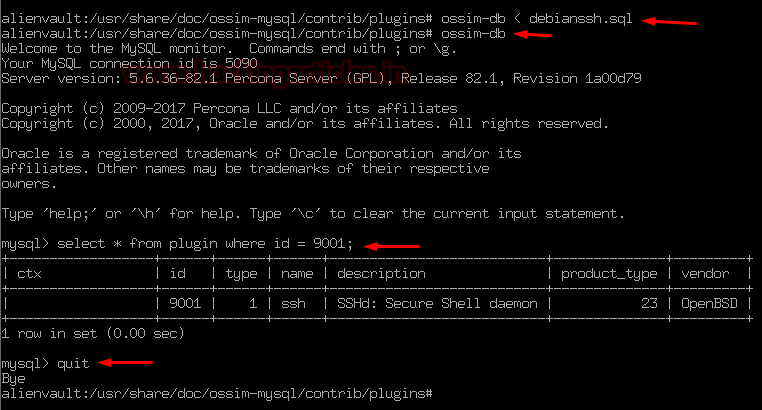
To do this enter the following command:
ossim-db < debianssh.sql
ossim-db
select * from plugin where id = 9001;
quit
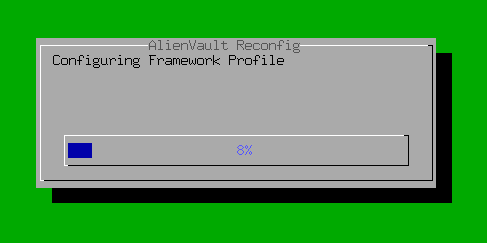
And at last reconfig the AlienVault OSSIM server by entering the following command:
alienvault-reconfig

On the next screen, it will start reconfiguring the server
If you are seeing this then congratulations…!!!
You successfully integrated Rsyslog and SSH plugin to the AlienVault OSSIM server.
Hold tight! this is not enough…..
Have patience 😉
In this article, we explained the integration and configuration process of Rsyslog and SSH plugin to AlienVault OSSIM.
In the next article, our focus will be on the configuration and installation of OSSEC Agents that send logs to AlienVault Server.
OSSEC is an open-source Host Intrusion Detection System (HIDS) that runs across multiple OS platforms such as Windows, Linux, Solaris. Mac …etc.
Author – Vijay is a Certified Ethical Hacker, Technical writer and Penetration Tester at Hacking Articles. Technology and Gadget freak. Contact Here