Wireless Penetration Testing: Fluxion
In this series of Wireless Penetration Testing techniques and tools, this time we will be focusing on Fluxion. It uses Social Engineering to manipulate the users to get the password of the wireless access points. Two attacks are supported by Fluxion which we will demonstrate in this article.
Table of Content
- Introduction
- Installation
- Capturing the SIDs
- Configuration for Handshake Snooper
- Handshake Snooper Attack
- Configuration for Captive Portal Attack
- Captive Portal Attack
- Conclusion
Introduction
Fluxion is a tool that penetration testers and security auditors use to test Wireless Access Points. It leverages social engineering techniques to extract authentication passwords from users. Specifically, it targets the WPA/WPA2 key of the access point by launching a phishing attack. Fluxion offers two main attack modes: Handshake Snooper and Captive Portal.
The Handshake Snooper attack captures WPA/WPA2 authentication hashes during the 4-way handshake. It uses a deauthentication method to forcibly disconnect users from the target access point. When users attempt to reconnect, Fluxion intercepts the handshake and captures the hashes. These captured hashes are later used in the Captive Portal attack.
The Captive Portal Attack collects the WPA/WPA2 password by setting up a rogue network. Essentially, Fluxion conducts an Evil Twin attack, where it creates a fake access point with the same SSID as the target and disconnects all users from the legitimate network. Then, through a phishing portal, it tricks users into submitting the password for the real access point.
Note: To perform attacks using Fluxion, you need an external Wi-Fi card with monitoring mode.
Installation
Now that we are aware of the abilities of the Fluxion tool, it is time to install it on our machine. We will be using Kali Linux for this particular demonstration. Fluxion is not available on Kali Linux by default and there is no method directly. We need to clone its repository from its official GitHub. We see that it has been downloaded in the directory named fluxion. Inside it, we found directories such as attacks, bin, and docs and a shell script by the name fluxion.sh. In previous versions, there was a different installation file but now all that is required is to add the parameter -i to perform the installation and dependency checks.
git clone https://github.com/FluxionNetwork/fluxion.git
cd fluxion
ls
./fluxion.sh -i

We will be greeted with the logo art of the Fluxion while it checks for the dependencies on its own. If there are any dependencies are tagged as Missing, it is advisable to install them on your own. In this particular demonstration, we have all the dependencies installed so we will ignore some of these and move on.

Capture the SIDs
Then we are provided with the Language Selection Menu. We want to select English so we will enter the number from the selection menu and press Enter key.

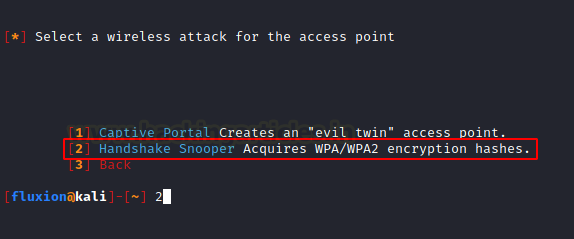
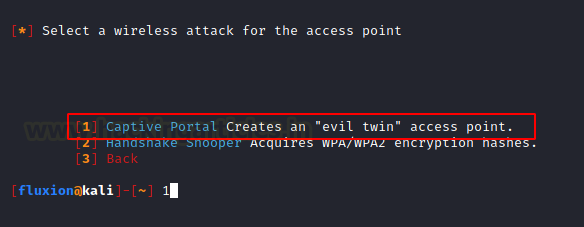
Moving on, we now have to select the Attack that we want to perform on the Access Point. We require capturing the handshake between the network router and the genuine user. We will use that handshake to test and try to get the credential required for gaining access to the Access Point.
Hence, we will need to select the Handshake Snooper. The Handshake Snooper attack attempts to retrieve WPA/WPA2 authentication hashes (the 4-way handshake), to be used later by the Captive Portal attack for key verification.
Configure Wireless Interface and Channel
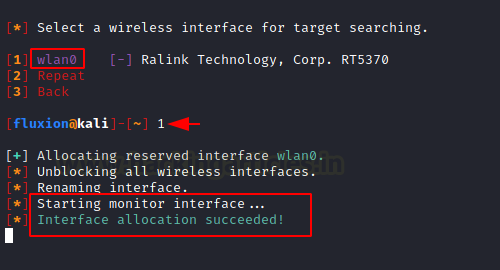
After selecting the wireless attack, choose the Wireless Interface for scanning the target. If your wireless device is connected to the wlan0 interface, select it. Once selected, Fluxion automatically starts monitor mode on that device.
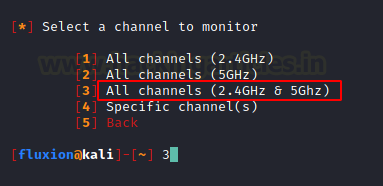
Next, we are required to select the Channel that is supposed to be Monitoring. Since a lot of Wireless Access Points these days can vary from 2.4GHz to 5GHz, we will choose all the channels in that range.
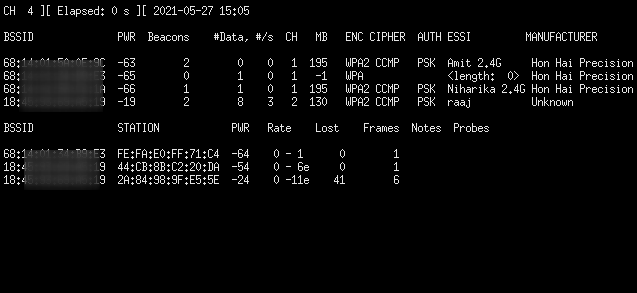
This will open a new window as shown in the image below. This will look for all the possible targets in the network reach. Make sure to let the process run for some time until your target becomes visible in the window.
Press Ctrl + C on the xterm window after locating your target or after a certain time has passed.
Configuration for Handshake Capture
Return to the terminal where Fluxion is running. Based on your previous actions, Fluxion will display a Wi-Fi list with potential targets. In this demonstration, select the “raaj” Wi-Fi by entering the corresponding number.

Target Tracking Interface
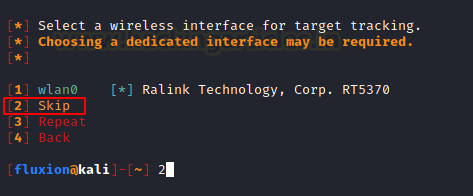
Fluxion will now ask you to select the target tracking interface. If your environment contains multiple wireless interfaces, choose the one you want to use for tracking. Since we are using a single interface in this demonstration, select Skip.
Handshake Retrieval Method
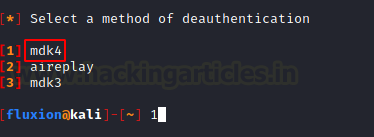
Now, choose a handshake capture method. Fluxion offers three options:
- Passive/Monitor Mode – This method silently listens for handshake packets. It’s ideal for capturing handshakes from distant targets, but it may take time for someone to connect to the network.
- aireplay-ng – This method sends deauthentication packets to disconnect users, forcing them to reconnect. When they reconnect, Fluxion captures the handshake.
- mdk4 – This method also sends deauth packets to disconnect users and capture the handshake. It’s generally faster and more effective.
While all methods are effective, mdk4 is a good choice for a quick capture.

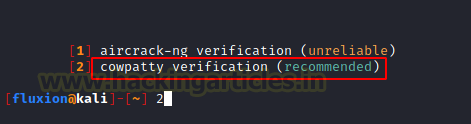
Hash Verification Tool
Fluxion now asks you to select a tool for verifying the handshake hash. Fluxion marks aircrack-ng as outdated and less reliable. Select cowpatty, as it is more accurate and reliable for this task.

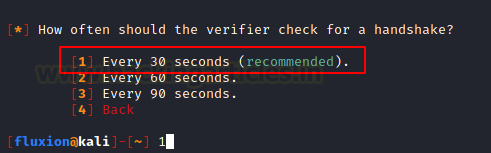
Next, you’ll choose the interval at which Fluxion will check for a valid handshake. Depending on your environment and stealth needs, you can adjust this setting. For demonstration purposes, set the interval to 30 seconds, as recommended by Fluxion.
Verifier Synchronicity
Finally, select how Fluxion should handle verifier synchronicity during handshake capture:
- Asynchronous – This method verifies handshakes while continuing to capture data. It requires more system resources and works best when running Kali Linux on a physical machine.
- Synchronous – This method stops capturing data to verify the handshake. It uses fewer system resources but may miss packets during the pause. However, with the 30-second check interval, the risk of missing handshakes is minimal.
Since we’re running Kali Linux in a Virtual Machine, choose the Synchronous method to ensure stability.

Handshake Snooper Attack
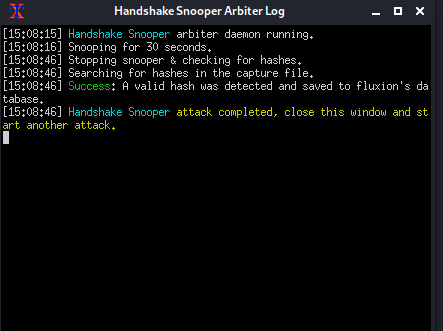
That was the last option that we are required to configure. Now the attack will begin and an xterm window will appear. It is the Log Viewer. It displays the events as they begin. The de-authentication of all the clients will start and in few moments all the users will be disconnected to the Wi-Fi device. Then when any of those users or devices try to reconnect with the Wi-Fi we will be able to capture the handshake. We can see that the attack was successful and we were able to get a valid hash as demonstrated below. At this moment we can close the log viewer and move onto the next attack.
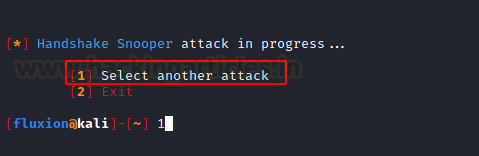
Since we have captured the handshake, we can use this handshake to perform the Captive Portal Attack which is also known as the Evil Twin Attack. As soon as we close the Handshake Sooper Log xterm window, we will be asked we want to select another attack as demonstrated below.
Configuration for Captive Portal Attack
The Captive Portal Attack, also known as the Evil Twin Attack, allows you to extract the target access point’s WPA/WPA2 key by creating a rogue network that hosts a fake authentication portal. This portal captures user credentials.
You should perform this attack in close proximity to the victim because your Kali Linux machine (acting as the captive portal) must have a strong Wi-Fi signal to attract users. After capturing the handshake using Handshake Snooper, Fluxion redirects you to the attacker selection menu. This time, select Captive Portal.
Fluxion will then ask whether you want to use the same access point as before. If you’re launching the captive portal attack directly, manually select the access point name as done previously. For this guide, continue using the previously selected target.

Fluxion now prompts you to select the interface for target tracking. If your environment has multiple wireless interfaces, select the appropriate one. Otherwise, skip this step.

Rogue AP and Credential Capture Setup
Next, select the wireless interface that will send de-authentication signals. Since we’re using wlan0, choose it again here.

Fluxion then asks you to pick the method for de-authentication. You can choose from several tools based on your preference and environment. All are equally effective. In this case, select mdk4, as it worked well during handshake capture.
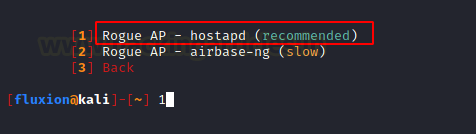
Now it’s time to configure the Rogue Access Point that will trick users into entering their Wi-Fi credentials. Since we didn’t use airbase-ng earlier—and because it’s slower—we’ll stick with hostapd as the RogueAP method.
Hash Verification and Portal Customization
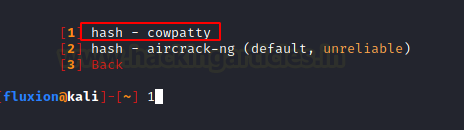
When asked to choose a hash verifier, recall that Aircrack-ng is the default. However, it can be unreliable. Since we used cowpatty earlier, select it again here for consistency.
At this point, provide the captured handshake. If you saved the handshake as a .cap file, select the second option and enter its path. Since we used Handshake Snooper in the same session, Fluxion automatically detected the hash. Select Use hash found.

Because we picked cowpatty earlier, use it again for hash verification. Even if you didn’t, cowpatty remains the recommended option due to Aircrack-ng’s reliability issues.
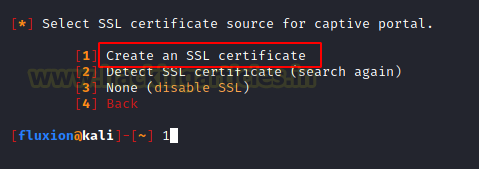
Now, choose the SSL/TLS certificate source for the captive portal. Although you can disable SSL, doing so might raise suspicion. If you already have a certificate, Fluxion detects it automatically. Otherwise, choose Create an SSL Certificate.
You’ll then configure the internet connectivity for the rogue network. The emulated mode can cause issues on iOS and Android, even though it mimics a real connection. Instead, use the disconnected mode, which has a lower failure rate and still presents the captive portal.

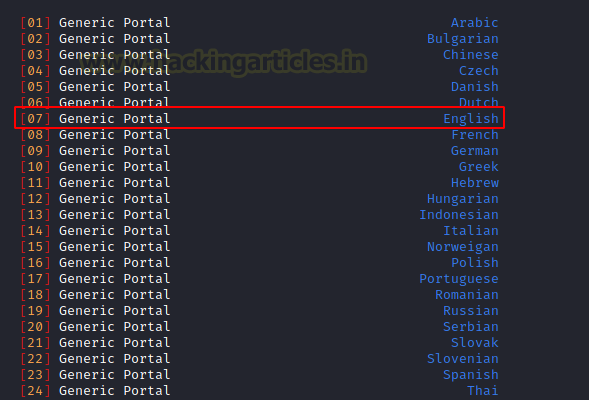
Lastly, select a portal template. Fluxion provides generic templates, but savvy users might recognize them as fake. You can search online for more realistic versions. For this demonstration, choose the generic portal with the English language.
Captive Portal Attack
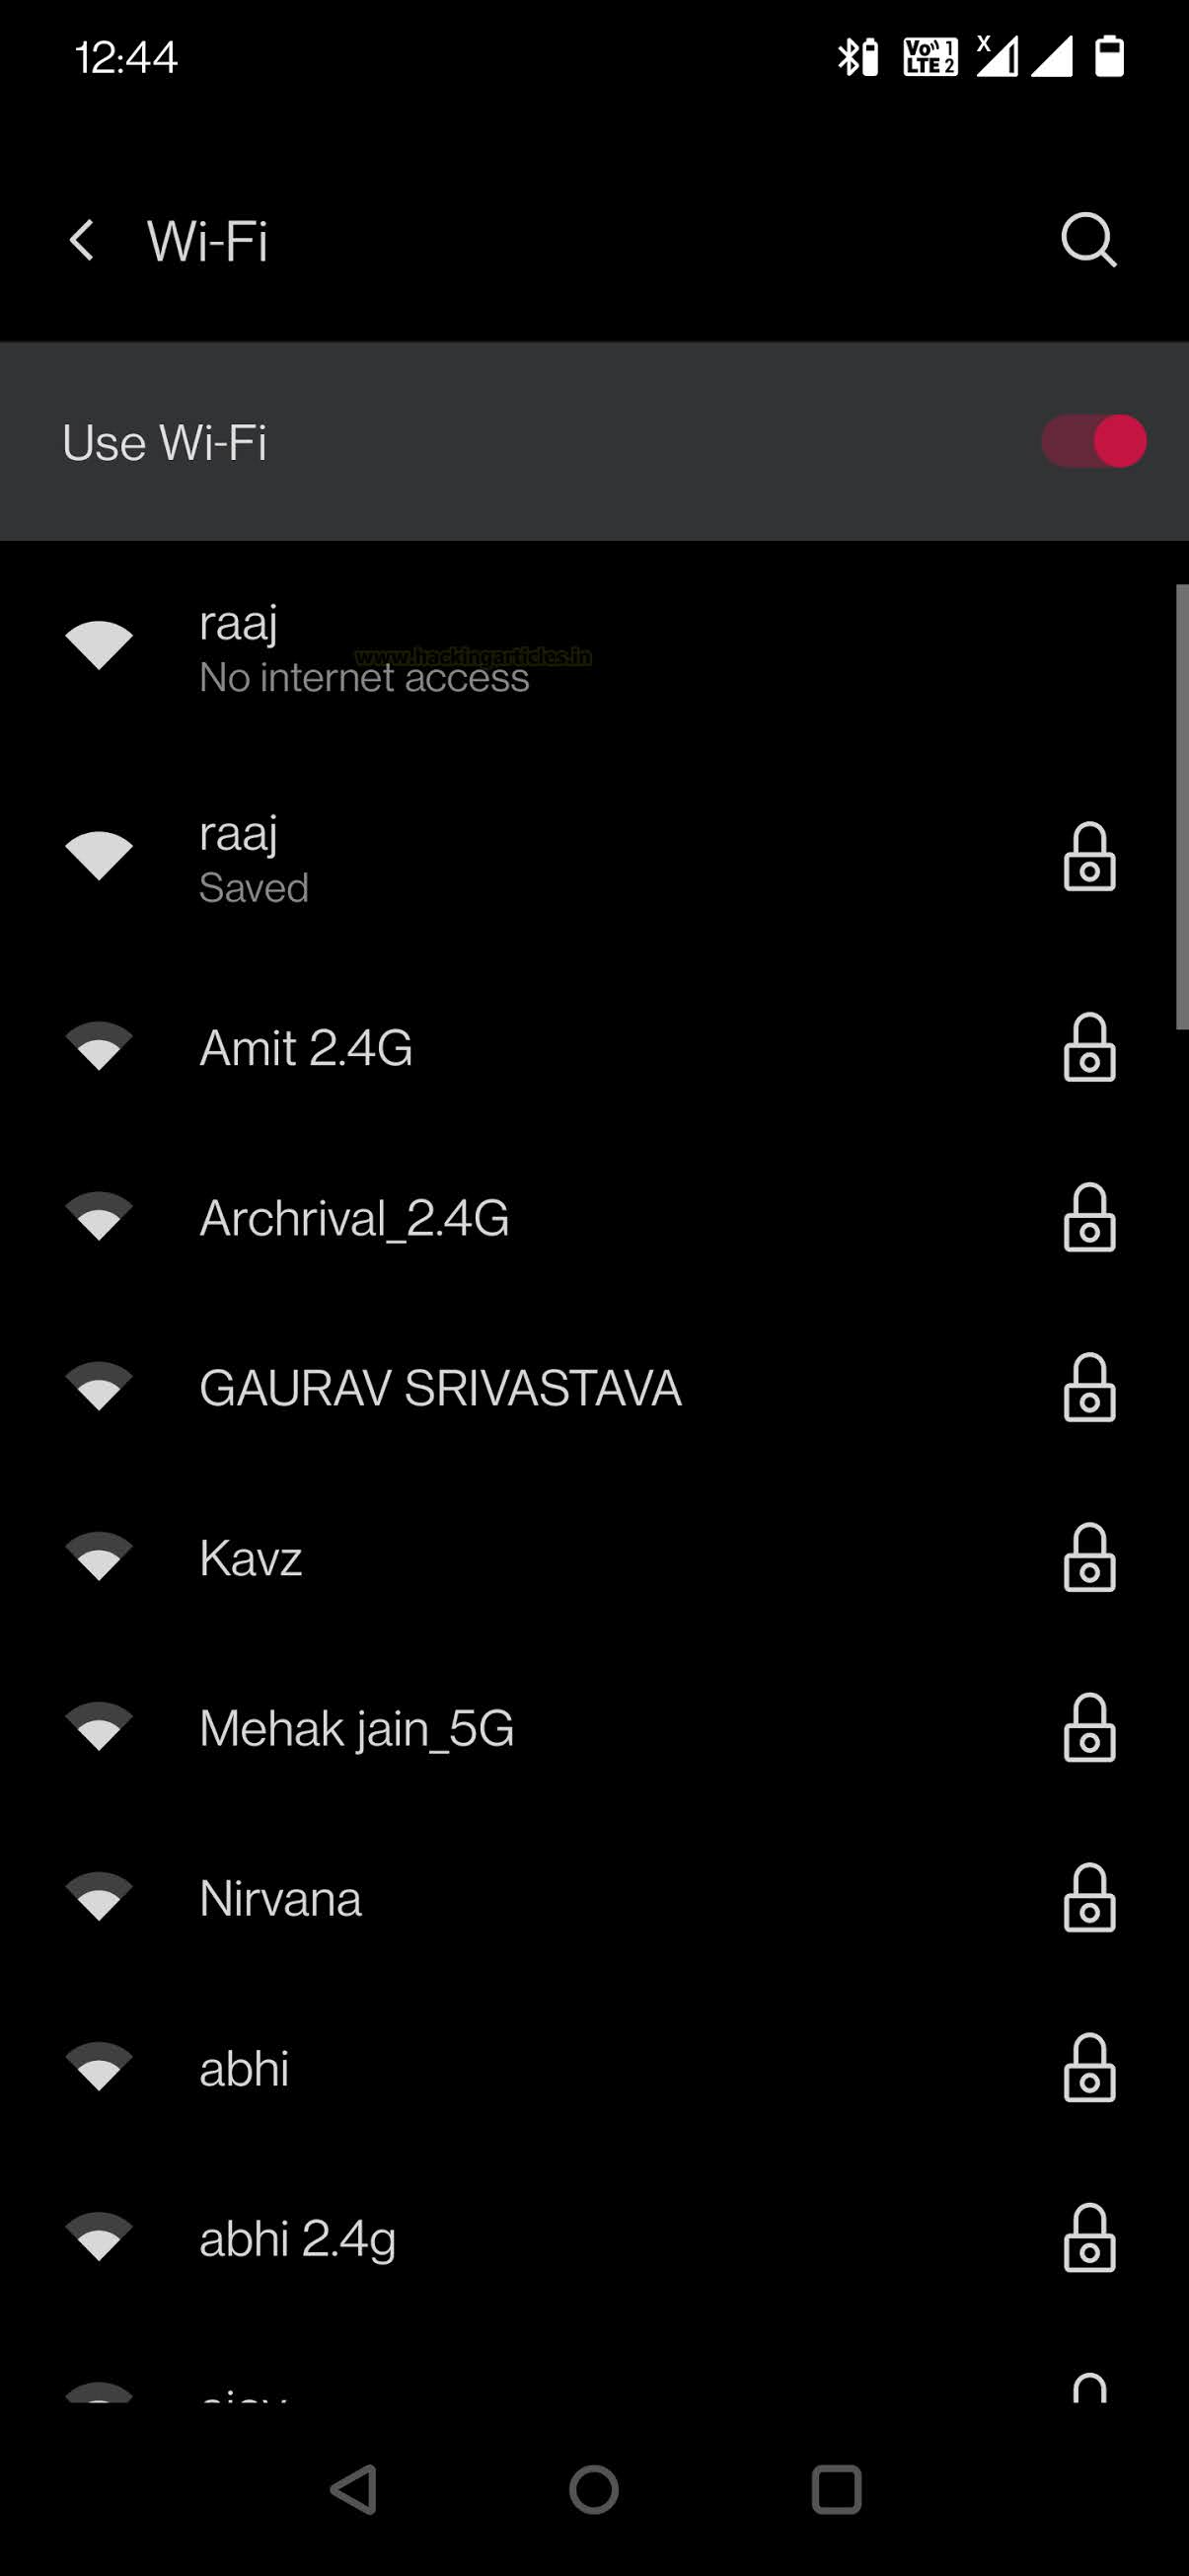
This sums up the configuration process of the Captive Portal Attack. Fluxion now begins de-authentication for all users of the target access point. All users are disconnected from their Wi-Fi and presented with two networks—one genuine and one rogue.
The image below shows how the attack appears from the victim’s perspective. Two networks with the same name, “raaj”, are visible. Since we didn’t use the emulated option, the rogue network shows “No Internet Access.” This subtle detail convinces users that the rogue network is real, increasing the chances of them connecting to it.
Switching to the attacker’s perspective, once the rogue network template is selected, multiple xterm windows appear. Let’s break them down:
- DHCP Service (Leftmost window): It assigns an IP to the victim’s device when connected to the rogue network.
hostapd Window: Acts as the Captive Portal and logs victim activity. - AP Authenticator Window: Displays SSID, MAC, and any authentication attempts. Incorrect password entries are shown here.
- DNS Service (Bottom left): Responds to all DNS queries locally since there’s no internet access.
- Web Service Log: Displays logs of the hosted portal shown to the victim.
- Jammer Service: Handles de-authentication of all connected devices from the original AP. This is similar to what we saw during the Handshake Snooper attack.
Once the victim enters the correct credentials, the Authenticator window immediately logs the success.

Capturing and Verifying Wi-Fi Credentials
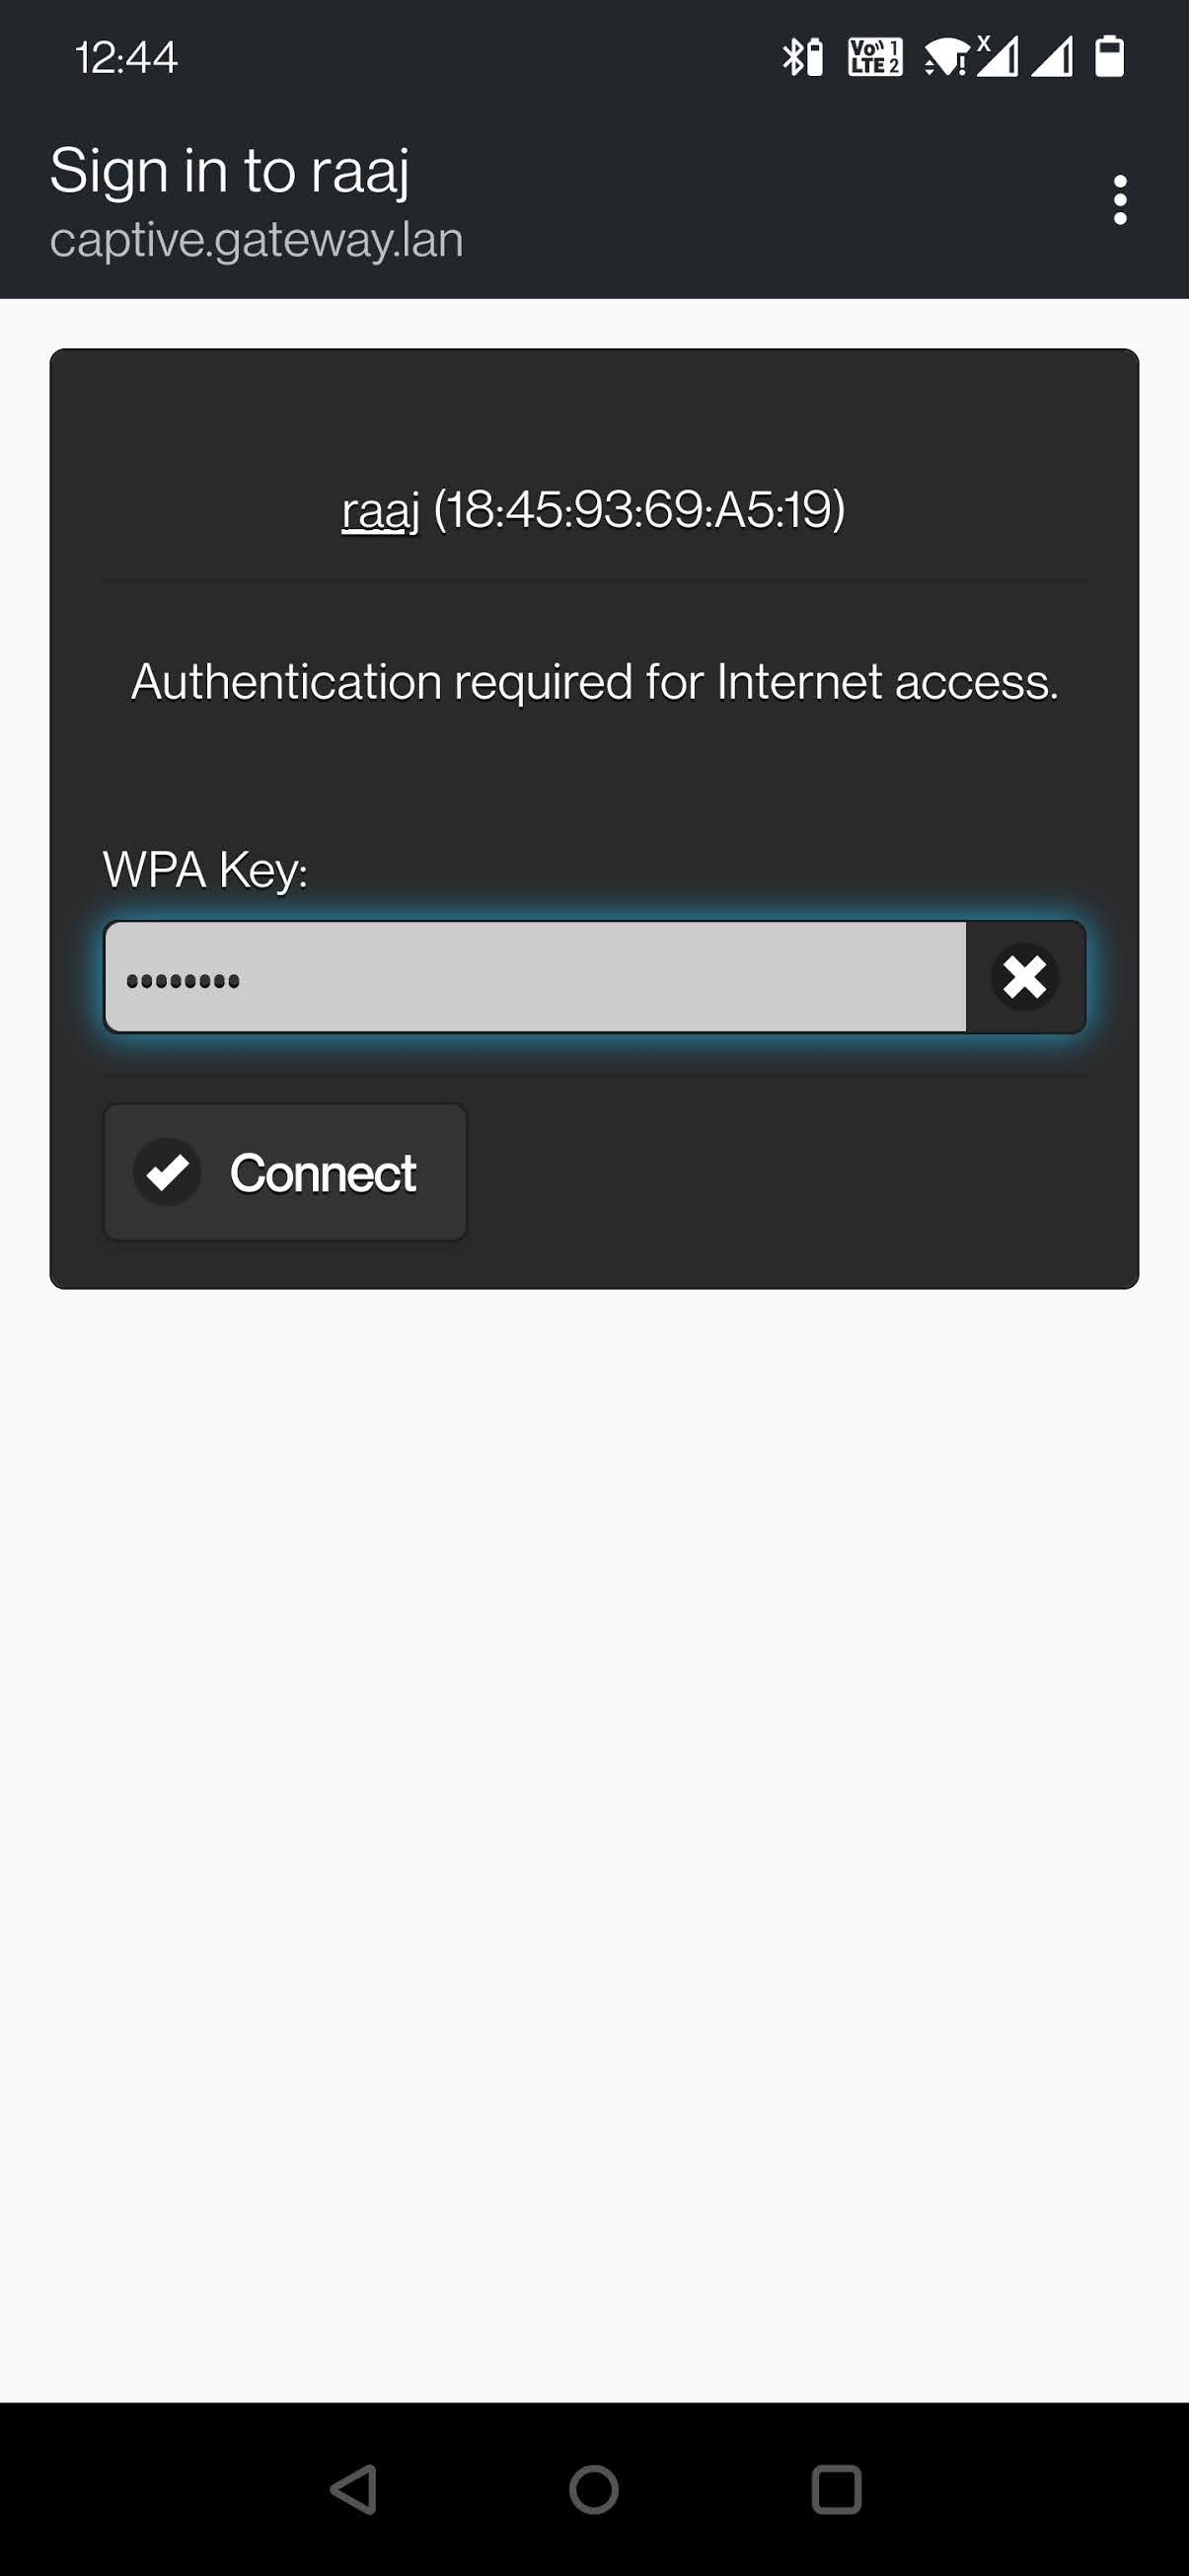
The attacker closely monitors logs to track victim activity. Back on the victim’s end, clicking the rogue network opens the in-browser portal based on our template. It shows the AP name and a generic URL, then prompts for the WPA key.
When the victim enters the password, a 4-way handshake starts. Its hash is matched against the one captured earlier. If incorrect, the portal asks the user to try again until a match is found.
As soon as the correct password is entered, the hash matches the captured one. The victim is moved to the genuine access point, and the jammer service is stopped. Disconnected users are now allowed to reconnect to the legitimate network.
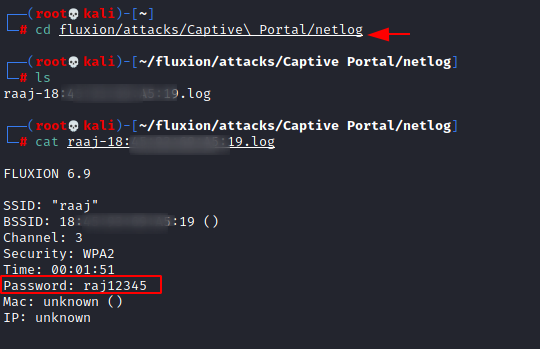
The captured password is saved here:
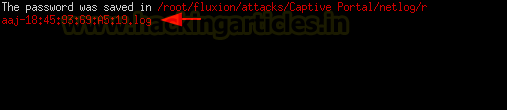
Now that we know the location of the password file, we traverse to the location and found the log file with the name of the access point that we targeted. Upon reading the log file we can see the password in cleartext. It was raj12345.
cd /root/fluxion/attacks/Captive Portal/netlog/
ls
cat raaj -18:##########.log
This completes the attack; we successfully got the correct password for the raaj Access Point.
Conclusion
Fluxion is one of the best tools when it comes to performing penetration tests or security auditing of Wireless Access Points. In this article, we saw two attacks supported by Fluxion. It was a Handshake Snooper attack and Captive Portal attack. These are not new attacks they have been in the community for quite some time but with updating security protocols and changing environment, Fluxion is still working effectively.
Author: Pavandeep Singh is a Technical Writer, Researcher, and Penetration Tester. Can be Contacted on Twitter and LinkedIn