Retina: A Network Scanning Tool
In this article, we will learn how to use retina, “a vulnerability scanner” to our best of advantage. There are various network vulnerability scanners, but Retina is the industry’s most powerful and effective vulnerability scanners. This network vulnerability scanning tool gives vulnerability assessment experience and generates full brief network vulnerability report.
Table of content
- Introduction to Retina
- Scanning process
- Working of Retina
- Network scanning with retina
- Conclusion
Introduction to Retina
Retina network scanner allows you to scan multiple platforms. It also provides you with automatic fixes and the ability to create your own audits. It works against all the critical vulnerabilities hence, allowing you to secure your network properly. As it keeps updating its database at the beginning of every session, it is pretty reliable. Retina permits you to scan parallelly by using its queuing system to scan up to 256 targets at the same time. You can also execute the majority of scans without administrative rights. It also allows you to perform custom audit scans to enhance your internal security policies. Retina Network Security Scanner is an outstanding solution designed to discover profile and assess all assets deployed on an organization’s network. With Retina Network Security Scanner, customers can efficiently identify, prioritize and remediate vulnerabilities such as missing patches and configuration weaknesses.
Scanning Process
For a scan to begin the specific details to the retina through its GUI. As soon as the scanner will receive the scanning details, it will begin the auditing process. An audit scan covers the following :
- Targeting : builds a scan list from the address group and discovery options
- Port scanning : finds out all the open, closed and filtered ports
- Detecting OS : lets you know about the OS on the target system
- Auditing : accesses vulnerabilities of each port and their respective services.
Working of Retina
First Retina recovers the list of IPs that need to be filtered then it builds and composes its target list to the eeye_ groups table. The worklist contains the work to begin and halt data. Retina at that point starts running the scan. Once targets are filtered, then the completed passages are evacuated from the line record. In case it’s powered down for any reason, this guarantees that a filter will total. At the conclusion of the check, the scanner composes Completed to the eeye_groups table within the filter comes about the database (RTD). Suppose the client prematurely ends the work, then the scanner composes Prematurely ended to that table.
Network scanning with Retina
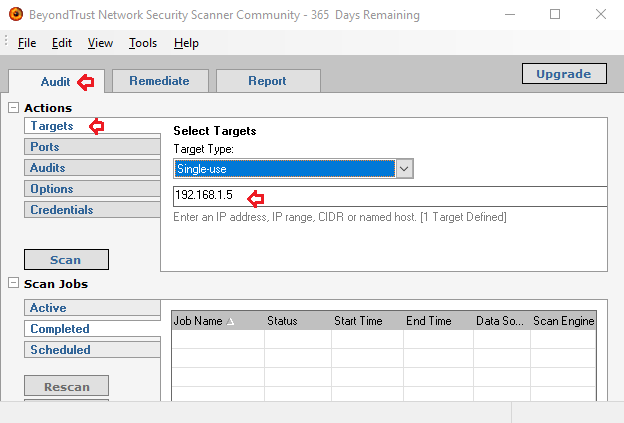
We have downloaded the Retina Vulnerability Scanner from the Offical Site. After Downloading the correct version with respect to our machine, we have installed the scanner through the setup. It is a fairly simple setup to install. After installation, we will run the application which results us by providing 3 tabs, i.e. “Audit, Remediate and Report”. First, we will work upon the Audit tab, inside which we have selected “Single-use” after that we are scanning an individual target in Target Type. We will use the IP Address for the target. In the case of “Multiple-use”, we can use a specific IP range too.
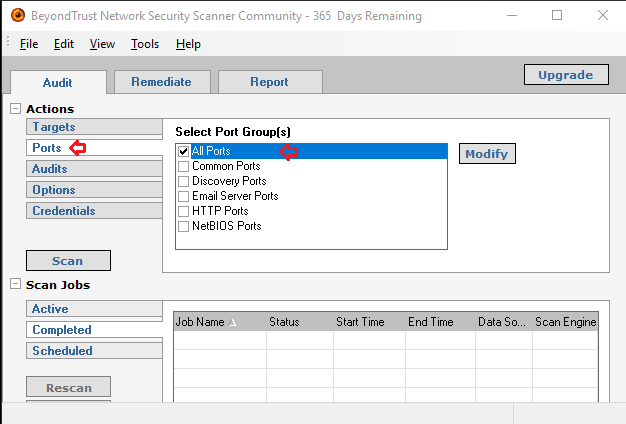
After selecting the Target, we must select the port that we want to scan, we have multiple options like, all ports, Common Ports, Discovery Ports, and others. In our scenario, we have selected “All ports”.
After selecting the ports, it’s time to select the type of audit, which we want to perform on our target machine. This includes many types with an option to modify. We can craft a personalized audit with the help of options provided. We selected “All Audits”. This took more time in performing the scan, but the personalized scan will take less time.

Now, we got the Options. Here, we have a choice to select some additional functionality that we can include in our scan. This includes OS Detection, Reverse DNS, NetBIOS Name, MAC Address and others. We can also provide the number of users that we want to enumerate.

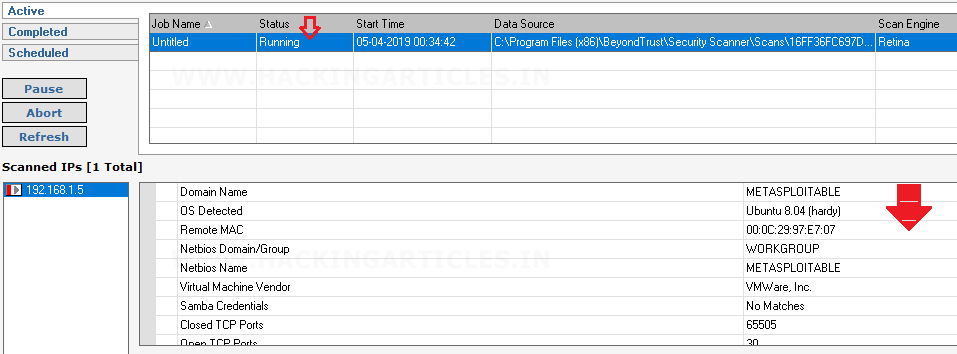
Now, we run the scanner, by clicking on the “Scan” button. After hitting the Scan button, the scan starts running and we can see the details of the Scan in Active tab of the Scan Job Section. Here we can see that name of the server “Metasploitable” and the Operating System is “Ubuntu 8.04”. We also can see other details of the scan.
Now we move on to the “Remediate Tab”, here in the Configuration Section we can see the Vulnerabilities that were found and we have the option to sort out the Vulnerabilities based on the Name, Category and other criteria. Also, in the case of multiple devices, we can generate report sorted by the individual IP address

Next, we will move towards the “Report Tab”. In this, we can select more option to refine our report. This includes sections like Scan Summary, Vulnerabilities by Category, Top Vulnerabilities, Top Open Ports etc. Apart from this, we can also select the type of report that we want. In the below image I have chosen an “Executive Report”.
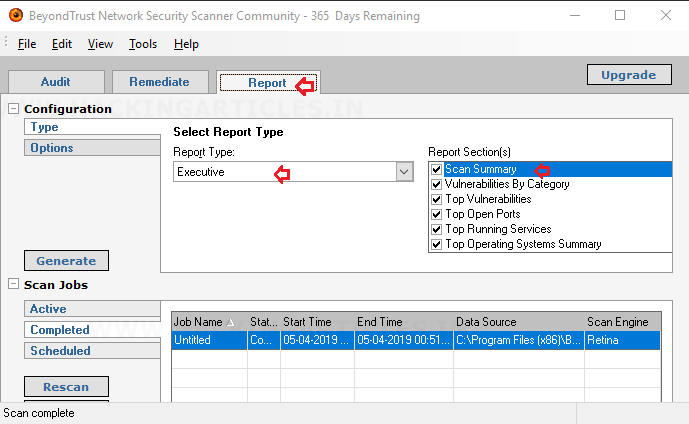
As you can see from below image we have gained with multiple choices to choose from the Report Type that listed us with many options such as: “Summary Report, Vulnerability Export Report, Access Report, Dashboard Report, etc.” This is one of the most vital features that give Retina an edge in the market of Vulnerability Scanners.
Here, in our practical, we have chosen the ‘Executive’ report type as it is the one which is most commonly used in the IT industry. You can see in the above image that, the report will cover all the major sections which are scan summary, top vulnerabilities, and open ports and all the important information that is required.
Once the report is generated, you can open it in the browser as shown in the image below. It will record the date and time of the scans and report for you too.

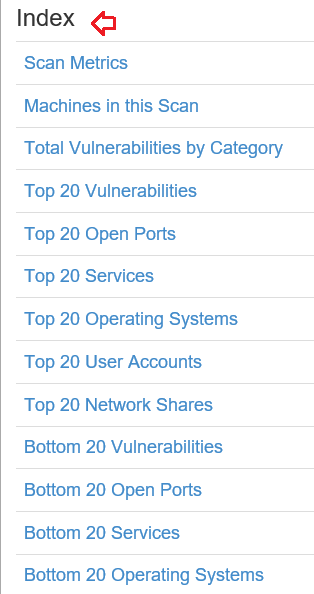
Everything in the report will be catalogued for your convenience and the title will be shown in the index as shown below. It will start by showing all the top vulnerabilities in all the way to the bottoms ones.
First in the report is “scan metrics” which gives a brief overview of the scan. This overview will inform you about how many vulnerabilities are exploitable and will also rate the vulnerabilities for you from low to high. It will also show you the time taken by the scan with the exact start and end time.
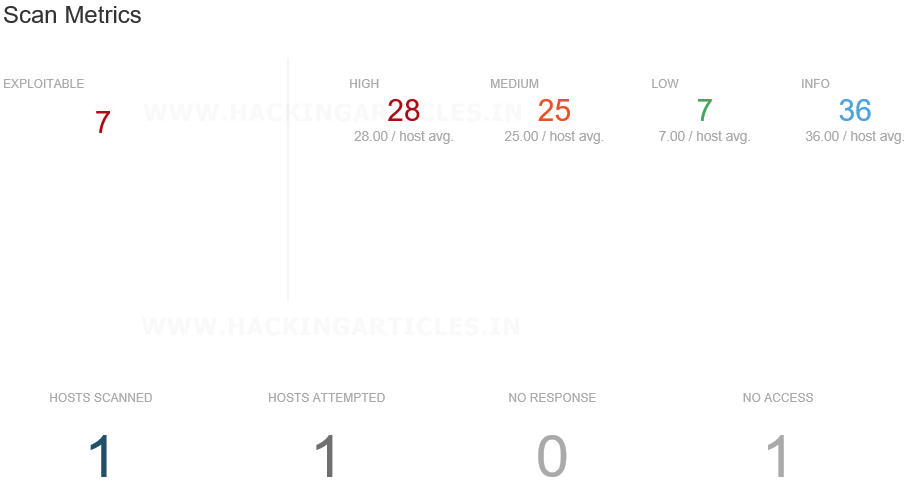

And further, it will categorise all the vulnerabilities with their basic information just as it’s shown in the image below:

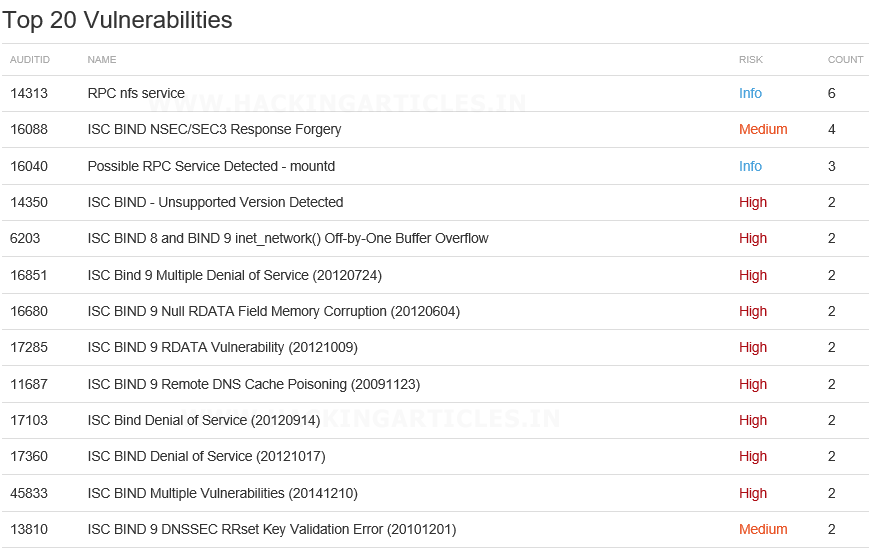
Then it will show you the top 20 vulnerabilities with their name, rise and information along with their count.
Further, it will show you the bottom 20 vulnerabilities with their names and other information.

Then, as catalogued it will go on to showing you the top twenty open ports with their names, port number and service. It also includes count which helps to tell the total no. of ports that are running in the same service.

And then it tells you about the operating system on the target machine. Which is quite necessary information as it helps you to formulate attack or security policy.

Conclusion
Since the launch of Retina Vulnerability Scanner in 1998, the Beyond Trust Network states that it has sold over 10,000 copies of the Scanner. The Retina Vulnerability Scanner is one of the scanners that have an edge over other scanners as it continuously monitors and improves their scanner with the enterprise security posture. It is the most sophisticated vulnerability assessment solution on the market that is available as a standalone application, a host-based option, or as part of the Retina CS enterprise vulnerability management solution, Retina Network Security Scanner enables you to efficiently identify IT exposures and prioritize remediation enterprise-wide
Author: Shubham Sharma is a Cybersecurity enthusiast and Researcher in the field of WebApp Penetration testing. Contact here
hello sir, please make pentesting articles on android. owasp and all. thank you.