Forensic Investigation of Social Networking Evidence using IEF
In this article, we will learn about this amazing forensic tool called Magnet Internet Evidence finder (Magnet IEF) which is used to recover or extract evidence from the various data source of the system and then integrate them into a single case file for analysis and reporting.
Table of Content
- Introduction
- Features of Magnet IEF
- From Drives
- From Files & Folders
- From Images
- From Volume Shadow Copies
Introduction
Magnet Internet Evidence finder was developed by some former police officers and forensic experts who come to know there is a need for user-friendly and easy to use the software. It is a comprehensive tool to perform task regarding the digital forensic investigation.
We can say that Digital forensic professionals around the world were heavily relied on the Magnet IEF to help them in their digital investigation process.
We can download Magnet IEF from here.
Features of Magnet IEF
There are three basic features in this tool
- Find
- Analyze
- Report
Find: There are many artifacts in the system, IEF can parse these artifacts from the system and enable us to quickly dive into evidence. It can crave data from fragmented files it can recover evidence from the unallocated spaces that are not sequential. It has features to Identify unknown apps these apps might have a potential chat database with dynamic apps and it gets its monthly updates so it continues to collect evidence from new applications as well.
Analyze: IEF can quickly drill down into the systems to find evidence with filters, keyword searches, timelines, etc. and this allows us to receive evidence in the user-friendly format so that we can easily analyze those layouts. It also provides us with the feature to view all evidence in one view and it can find out the relevant photographs by matching their hash values.
Report: IEF creates an easy to understand and navigate HTML report from any file selected within the viewer along with listing all the found evidence. It also has the feature of a portable case with which we can create a light evidence copy for our convenience. Its timeline will help us to be organized in chronological sequence and we can export our evidence report in a variety of formats include PDF, Excel, CSV, XML, and tab-delimited formats.
These features sum up operations we need to perform in order to find evidence in our digital investigations. Said operations include the different approaches to find evidence like a scan from drives, scan from files and folders, scan from the forensic image, scan from volume shadow copies and scan from mobile.
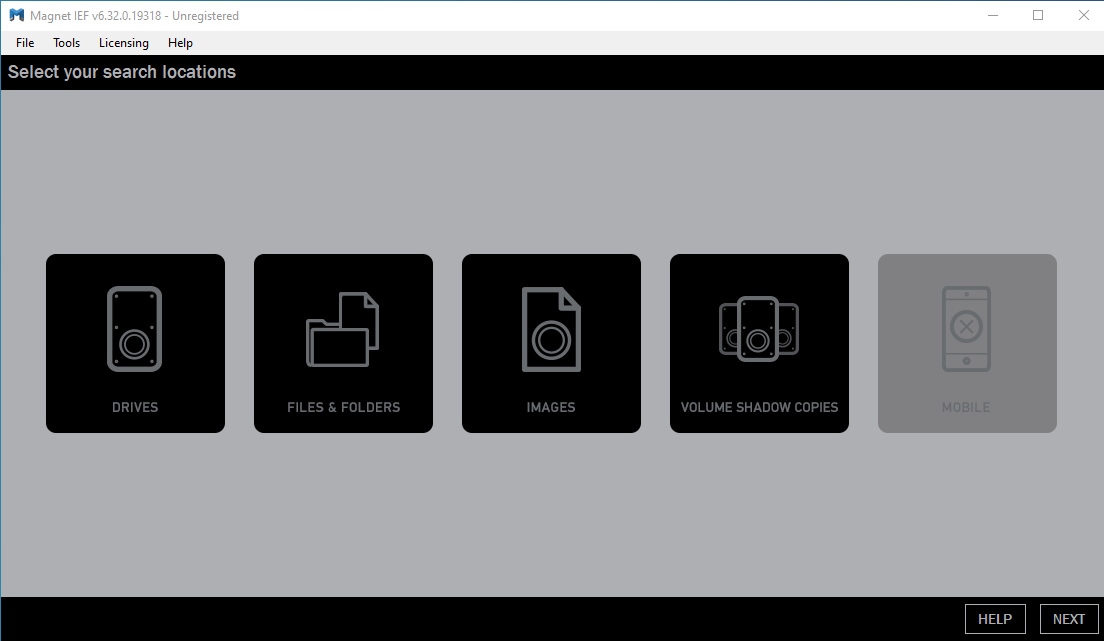
From Drives
Firstly, we follow the approach to find or search for evidence in the drives. In the Search from drive approach Magnet IEF will search in the particular drives which we select for finding evidence. We select the whole drive or a particular partition which we select.
So, once we click on the DRIVE button we need to select a partition or drive we want to scan/search for the evidence.

In the next step, it shows the partition we select and the un-partitioned space of the drive we need to select those types and along with that the search type we want in this search for evidence after that press the Next button to move further.
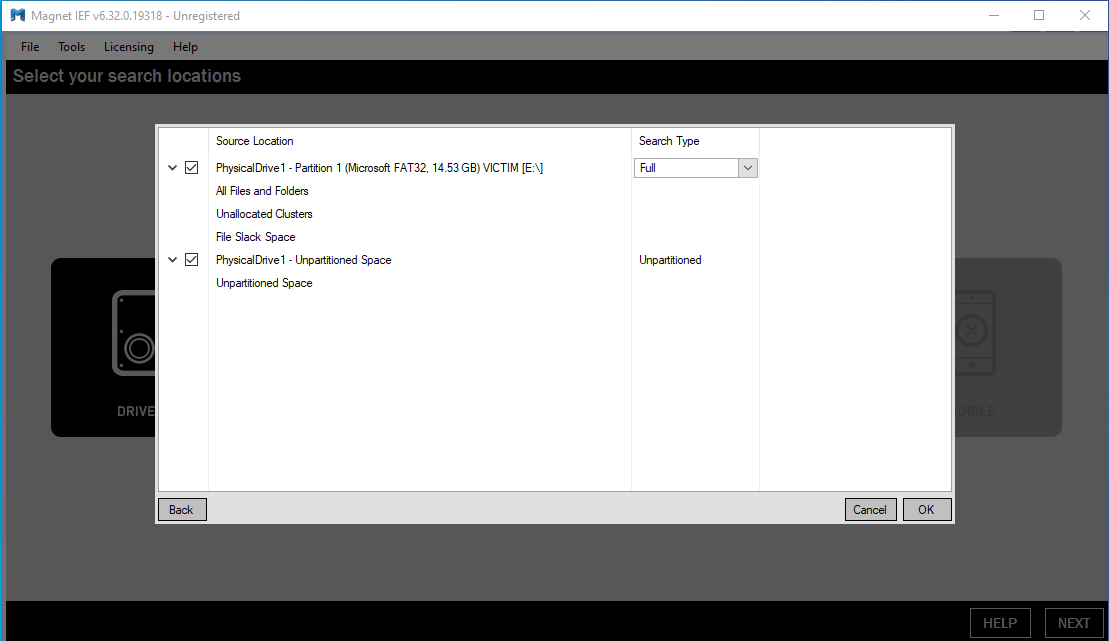
Next, we can see that Magnet IEF confirms what we selected earlier by showing us all the location of the drives and files that we wish to search. After confirming all the details, click on the Next button to move ahead.

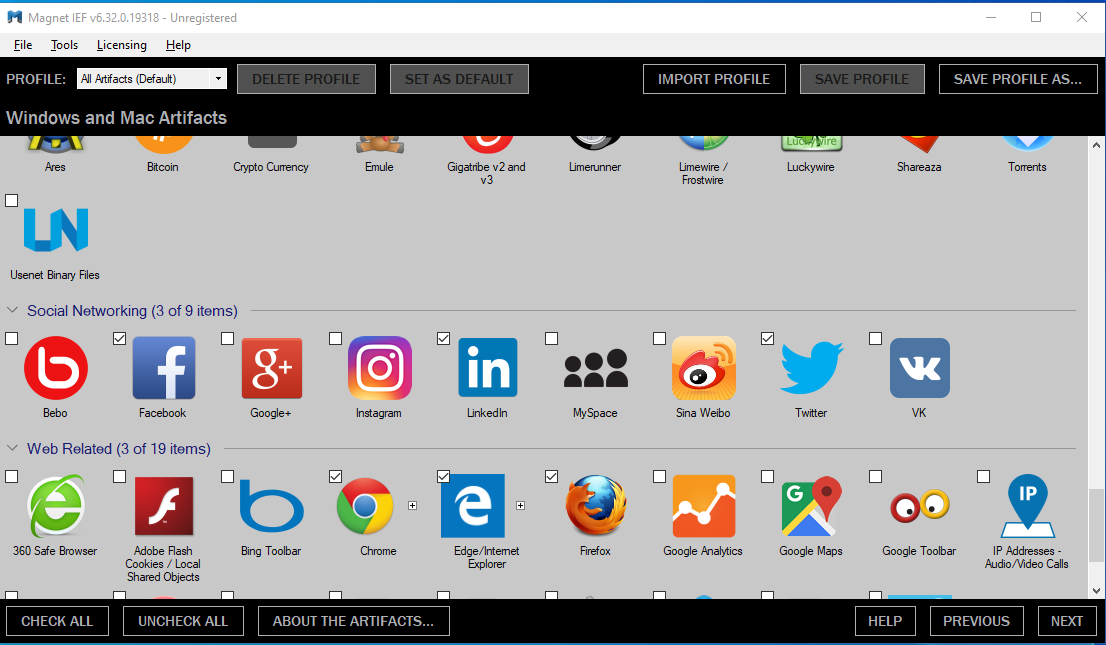
Selecting Services for Analysis
After that, it will ask for what services we are searching for, in the investigation. We can check all the services like web browsers, Social networking sites and applications, file formats, connections, services, etc. We can also check all at once or check/select them one by one as per our preference of the scan. After selecting the services press Next button.
Then, we need to specify the destination path of our report and for that provide folder name in which our reports will be saved. Along with that, some specific case information’s like a case number, examiner name, evidence’s info must also be entered. We can also add our agency logo in our report, some notes regarding our forensic investigation. We can also provide some keywords that might give us an edge in our investigation as this tool also searches for keywords to make it much more convenient for the user. After specifying the details that we must to provide, press the Find Evidence button.

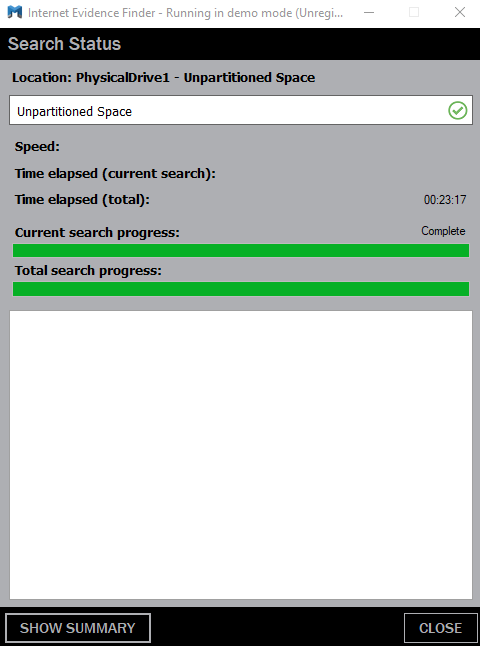
Viewing the Scan Progress and Results
After this, you will see two popups; first popup will show you the progression of your scan like which part is under scanning right now, how many files it needs to process, the time elapsed of current search and total search, the progression of current search and total search. You can also see the detailed view of the working of our Data processers by clicking on the Show Details button and wait patiently for completing its process.

The second popup will show you its report viewer which will further tell you every detail that it captures during the scan. For instance, in the image below, it shows all the details of our services. Like every other report viewer in the market, it provides us basic features such as alerts, bookmarks, chats, filter, search, etc.

Once all files get processed and the data processor completes its work the search status will signal us green indicating the completion of the work. After this, you can click on the Show Summary button if we want to see the summary of our search.
Thus, the case summary will pop-up. It just a regular notepad file with all the required information regarding our search in a compact and impactful manner.

If we check the Report Viewer and view its timeline feature it will display all the details of the services as we can see in the image below that our Firefox Cookies will expire on 2029 and, similarly, details about all other services.

From Files & Folders
This approach of searching evidence is quite similar to searching for evidence from drives. In the drive, it will take a storage partition or whole drive and run the search, to find evidence during the investigation process.
But in Files & Folders, we need to select the exact folder or files in which we want to scan for our evidence in the investigation process.
These both are quite same in the selection and process of searching for evidence. We can use the same tactics which we are using in the drive’s scan but instead of selecting the partition, we need to select files of the system and its approach of scanning remain the same. It will try to find evidence from file to file until the process completes its task.
The resulting pattern is the same as above and the Report viewer repeats every step like timeline, evidence report, etc.
From Images
In this scenario, we have fully captured the forensic image. To find evidence, from this image, we need to click on the Image in Magnet IEF. Through this approach, we can find evidence in this forensic image.
After this, we need to browse the image in the system in order to find evidence through that and then press the Open button to open this image in the software.

Then we need to select a search type of the scan, whether we want to scan the full forensic image or just a part of it. After selecting all the details of the scan press OK button to move further in the process.

Then after Magnet IEF try to confirm all the details which we provided earlier and if there is no issue we found in the details then press Next, to move further in the scan.

After selecting all the details it follows the same tactics as “Drive”. We need to specify every service that we want to include in our investigation process. After this it will ask for case details and destination path for our evidence report.
The evidence report will list all evidence found in the forensic investigation. We can filter the alerts, specify the alerts, bookmarks all the alerts we found in our evidence report. We can also see the timeline of the alerts and evidence.
Image scan helps us to find evidence in such a system, without actually acquiring the system. Which is very handy in the Digital Forensic for the Investigation.
From Volume Shadow Copies
Volume shadow copies formally known as a shadow copy. It is a service introduced by Microsoft in Windows OS. Shadow copy has to create backup copies or snapshot of the computer files and drives, even when they are in use.
It requires either windows NTFS or ReFS files, to create and store shadow copies. Shadow copy can create a local and external volume in any windows system that uses these services, like creating such scheduled windows backup or automatic system restore point.
With the help of Magnet IEF, we can also find the potential evidence from volume shadow copies. So to start this process we need to select the Volume Shadow Copies button to move ahead in the investigation.
After this, it will ask if you find out from drives or images. All processes remain the same except the scenario of scanning. One follows the scan in drives and the other follows the scan from the image.
Both try to find evidence through the same technique. If we understand the first we can crack our way in the second.

Selecting the Scan Scenario
After selecting a scan scenario, choose the drive and then the partition you want to scan. And then, press the OK button to move ahead.

Now, it requires some basic details, which we need to specify like case details, destination path, services. We will use these for searching for evidence. Quite similar to all the other scans, which we performed earlier.
Report viewer will generate the report for us so that one can understand the results of the investigation in a much convenient way. The process will remain the same in the image scan.
The Magnet IEF also provides us with the HELP function, which gives us the edge to understand every service and operations. By using that we will understand every function in a much comfortable way.
To learn more about Cyber Forensics. Follow this Link
Author: Shubham Sharma is a Pentester, Cybersecurity Researcher and Enthusiast, contact here.
good job buddy
That’s Superb methods of Social media Investigation.