Forensic Imaging through Encase Imager
Scenario: Competitors suspect Mr. X of selling his company’s confidential data, but without any evidence, they could not take any action against him. To get into reality and proof Mr. X guilty, the company has requested the forensic services and have come to know all the relevant data is present inside the desktop provided to him.
This article is about getting the forensic image of the digital evidence and restoring it to any other drive.
Since experts never advise working with the original evidence because we may accidentally lose some relevant data. We will create an image of the original evidence and work on it further. This way, we keep the original evidence safe, and we can prove the integrity and authenticity of the evidence through hash values.
This article is also very helpful if we need to back up the data safely.
Using EnCase Imager to Acquire the Forensic Image
To image the desktop we will use Encase Imager. First, download the Encase Imager from here

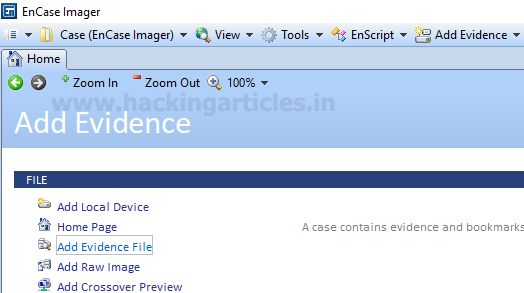
Open Encase Imager and Select Add local device option.

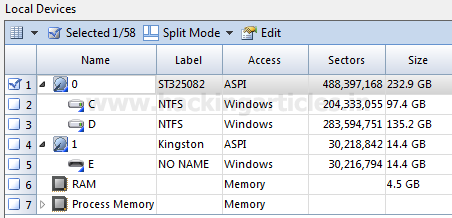
From the menu select all the options and uncheck “only show write blocked” as shown in the image and click next.

We can see all the physical drives, logical partitions, Cd Rom, RAM and process running on the system. We need to select what we need to image as our evidence. Ideally, it is a good practice to select the physical drives which contains the logical partitions as we get the complete disk image through the physical drive. In certain case, we may select only a logical drive or RAM as required.
Select / Check the number of the evidence you want to image and click on finish.
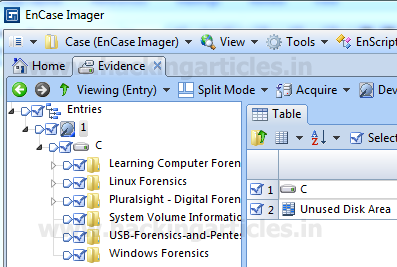
If you select more than one piece of evidence, you will list the evidence you have selected.We could have seen multiple pieces of evidence listed here.

Double Click on the evidence, we can view the contents inside it and if we wish, we can skip any part, file, or folder from imaging at this stage.
Acquiring and Saving the Image
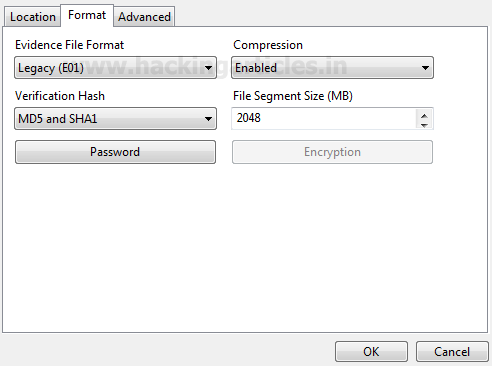
Click on Acquire to proceed for the imaging. Now we need to enter the case related information, ie case number, output path, file format in which we want to generate the image
File format selected here is E01 as this is supported by multiple tools and is suitable for further analysis.
If we want to password protect/encrypt our image we can do this at this stage.
Note: It is ideal to store the image on any other external storage drive so that the storage space is not a constraint. But for the sake of practical we are saving the image on the desktop at the following path “C:\Users\…..\Desktop\Evidence Image\1.E01”.

Click ok and image acquisition will start. You can check the status of image acquisition on the same window at the lower right corner along with the time remaining (refer below image).

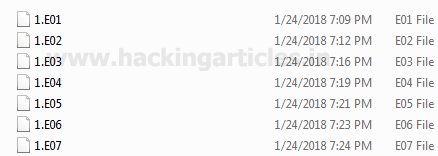
Once the acquisition is complete the image will get saved to the output folder (refer below image).
Hashing the Image to Prove Authenticity
To prove the authenticity of the evidence we can generate the Hash value of the evidence
To generate the hash value of the image click on the evidence and select hash as shown in the image below.

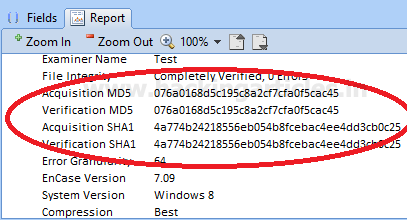
Once the hashing process is complete click on the report section on the lower pane

Right, Click and select Copy to copy the report and paste in a word /text document.

Save the report along with the Image (E01) files. This report contains all the relevant details along with the detailed report containing the hash values.

The Evidence acquisition is complete
Restoring the Evidence Image
We are done with imaging of the disk/evidence. Now we will restore this acquired image to the drive. To start with open Encase Imager and add the evidence to Encase imager
Browse to the image (.E01) file and add it to the case. The evidence added will get listed

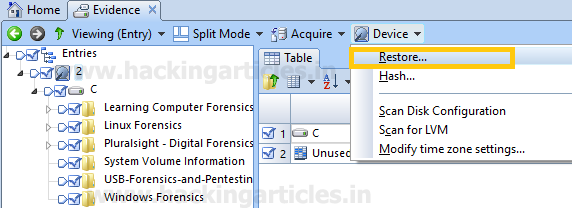
Double click on the image, select the files you want to restore, and choose the restore option located under the Device option.
When we click on restore, connect the drive where we want to restore the image and click next
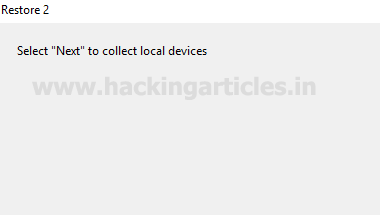
All the drives will be read

The system will display all the drives; select the drive where you will restore the image. Use the blank drive to restore the image, as the existing data will be wiped.
 ‘
‘
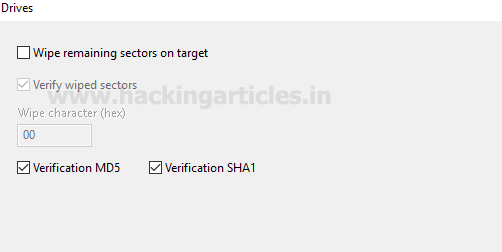
If required we can verify the Hash values and click on finish.
Type “Yes” in the text box. Click on OK this will wipe the existing data on the drive and start with the image restoration.

Restoration Progress and Completion
Image Restoration will start, we can check the progress on the lower right corner of the window.

Once the restoration is complete, we can see the data in the drive we have selected.

To ensure the integrity of the data, we can see the report section on the bottom pane and check the hash values. The hash values should be the same as of the image (we can check the original hash value in the image report.)
If required we can copy and save the report in any text / word file for any future reference.
To learn more about Cyber Forensics. Follow this Link
Author: Ankit Gupta, the author and co-founder of this website, an ethical hacker, forensics investigator , penetration testing researcher and telecom expert. He has found his deepest passion to be around the world of telecom, cyber security and digital forensics. Contact Here
Apparently, you can no longer freely download EnCase Imager.