Burp Suite for Pentester: Engagement
Today we are going to discuss the Importance of Engagement tools which is a Pro-only feature of Burp Suite. It is mainly used in information gathering and hence the analysis of any web application testing.
Its four important utilities are the following:
- Find References
- Discover Content
- Schedule Task
- Generate CSRF POC
Find References
You can use this function to search all Burp Suite tools for HTTP responses that link to a particular item. To make use of this function, select an HTTP request anywhere in Burp Suite, or any part of the site map, and choose “Find references” in “Engagement tools” from the context menu that appears when you click the Action Tab within Burp Suite.
The search result window displays responses (from all Burp tools) that link to the selected item. Whenever we view an individual search result, the system automatically highlights the response to show where the linking reference occurs.
This function treats the original URL as a Prefix whenever we search for links, so if you select a host, you will find all references related to the host and if you select a folder, you will find all references to items inside that folder.
First, we intercepted the request from Vulnweb.com, a demo lab available over the internet that can be used for testing attacks. Then click on enter after writing the URL of the Vulnerable Web in your browser, then the burp suite will capture the request of the web page in the intercept tab.

Then click on Action Tab, after that select the Engagement tools then click on Find References. This will open a result window that displays all the references related to the captured request of the URL, which is the Vulnerable Web, as shown in the image.

Discover Content
This function identifies contents and functionality that do not connect with visible content that you can browse or spider.
There are various techniques that the burp suite uses to discover content, which includes name guessing, web spidering, and extrapolation from naming conventions observed within the use of an application.
Control
This tab shows you the current status of the session. The toggle button represents whether the session is running or not, and it also allows you to pause and restart the session.
The following information is displayed about the progress of the discovery session:
- Number of requests made
- Number of bytes transferred in server responses
- Number of network errors
- Number of discovery tasks queued
- Number of spider requests queued
- Number of responses queued for analysis
Target
This option enables you to define or state the start directory of the content discovery session and decide whether to target files or directories. The available options are as follows:
- Start directory – This is the location where Burp Suite searches for content. The items within this path and sub-directories are requested during the session.
- Discover – You can use this option to determine whether the session will search for files, directories, or both.
Site Map
The discovery session uses their own site map, showing all of the content that the team has discovered within the defined scope. If you have configured your Burp suite to do so, you can add newly discovered items to Burp suite’s main site map.
First, we have intercepted the request of the Vulnweb.com which is a demo lab available over the internet which can be used for testing attacks. Then click on enter after writing the URL of the Vulnerable Web in your browser, then the burp suite will capture the request of the web page in the intercept tab.
Then click on Action Tab within the Burp suite, after that select the Engagement tools then click on Content Discovery. This action will open a result window that shows the discovery session status and displays queued tasks related to the URL whose request the tool has captured, which is the Vulnerable Web, as shown in the image.

Schedule Task
This function can be used to automatically start and stop certain tasks at defined times and intervals. We can use the task scheduler to start and stop certain automated tasks while you are not working, and to save your work periodically or at a specific time.
To make use of this function, you should select an HTTP request anywhere in Burp suite, or any part of the target site map, and choose “Schedule task” within “Engagement tools” in the context menu that appears when you right-click within Burp suite.
Types of Tasks Available
The types of task that are available within this function are as follows:
- Scan from a URL
- Pause active scanning
- Resume active scanning
- Spider from a URL
- Pause spidering
- Resume spidering
- Save state
First, we have intercepted the request of the vulnweb.com which is a demo lab available over the internet which can be used for testing attacks. Then click on enter after writing the URL of the Vulnerable Web in your browser, then the burp suite will capture the request of the web page in the intercept tab.
Scheduling the Task
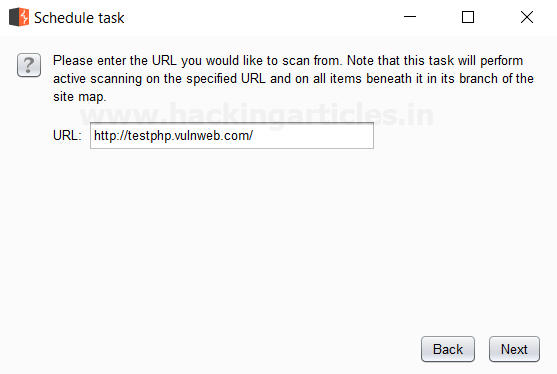
Then click on Action Tab within the Burp suite, after that select the Engagement tools then click on Schedule Task. This will open a window of schedule task options where we have selected Scan from a URL option as shown in the image.

Then Click Next a window will open where we have to give the URL we want to scan its branches from the site map.
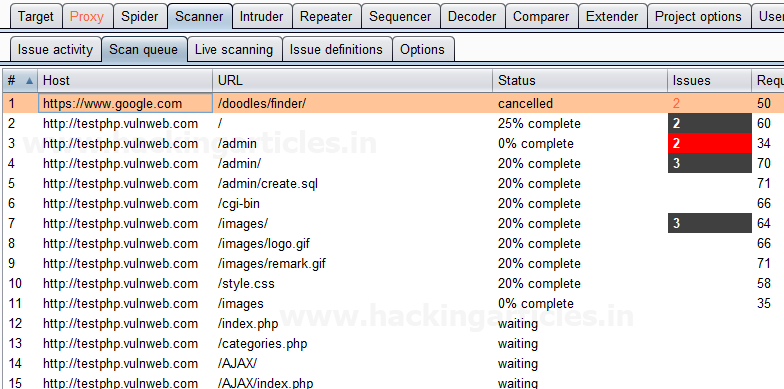
Then Click Next to open the scanner tab of the Burp Suite, which scans all the branches beneath the site map of the given URL. The scan queue tab displays this, as shown in the image related to the captured request of the URL, which is the Vulnerable Web, as shown in the image.
Generate CSRF PoC
You can use this function to generate a proof-of-concept (PoC) cross-site request forgery (CSRF) attack for any given request.
To access this function, select a URL or HTTP request anywhere in the Burp suite, and choose “Generate CSRF PoC” within “Engagement tools” in the context menu that appears when you right-click within Burp suite.
Let’s start!!
Capturing the CSRF Request
First, we have intercepted the request of the CSRF (transfer amount) option in the Bwapp LAB, where we have given an Account Number.

Then click on transfer, the burp suite will capture the request of the page in the intercept tab.
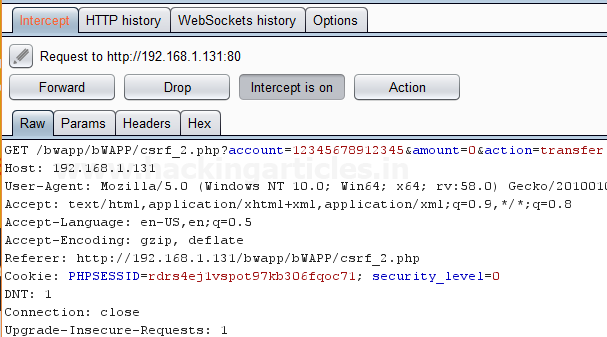
Then click on Action Tab within the Burp suite, after that select the Engagement tools then click on Generate CSRF PoC. This will open a window of the CSRF PoC where we made a change in Account value and Amount value in CSRF HTML code as shown in the image.

Testing the CSRF PoC in the Browser
After making changes in the values click on Test in Browser option or Copy HTML this will open the window of Show response in the browser then click on COPY, and then paste it in the Browser and Press Enter as shown in the image.

We see a Submit request Button is seen in the browser after that click on it.

We have reduced the amount as we transferred it from the account by making changes in the CSRF HTML code as shown in the image.

To learn more about Burp Suite for Pentesters. Follow this Link.
Author: Ashray Gupta is a Researcher and Technical Writer at Hacking Articles. He is a certified ethical hacker, web penetration tester and a researcher in nanotechnology. Contact Here

I was writing the post on the same topic. Not sure if I should write or not now !! 🙁
Great article though.
I like this, very detailed explanation.
very nice bro
Very nicely explained.