Comprehensive Guide to AutoRecon
The AutoRecon tool is designed as a network reconnaissance tool. It is a multi-threaded tool that performs automated enumeration of services. The purpose of this tool is to save time while cracking CTFs and other penetration testing environments or exams. It is useful in real-world engagements as well.
Table of Contents
- Introduction
- Features
- Installation
- Usage
- Multi-Target Scan
- Concurrent Scan
- Single Target Argument
- Heartbeat Argument
- Nmap Arguments
- Verbosity Scans
- Results
- Enum4Linux Scan
- SMTP Scan
- WhatWeb Scan
- XML Results
- Nikto Scan
- Web Services Screenshots
Introduction
The AutoRecon works in a sequential process. Initially, it performs port scans or service detection scans. Then using the results of these scans as a reference it further launches enumeration scans of those services using other tools. For example, if HTTP is found, it will check for webpages and if it will get those, it will start Nikto scan with go buster and other tools concurrently.
The tool itself is designed to be personalized by making changes in the configuration files.
Author: Tib3rius
GitHub: Tib3rius/AutoRecon
Features
- It uses pattern matching to increase the speed and accuracy in results.
- It logs all the commands that it executes so that the user can check in case of errors.
- It supports multiple targets at once. It uses IP Addresses, or IP Ranges and resolvable hostname.
- It supports customizable enumerations on different services.
Installation
There are multiple methods to install AutoRecon. Users can run it on a Docker Instance. It can be used by a small fraction of people that don’t use Kali Linux or any other Linux Distribution. To install using Docker please refer to the GitHub page of the AutoRecon. We are focusing on the installation methods with pipx. It is the recommended method by the developer of the tool and it works like charm. Before Beginning the Installation there are a few requirements in order to run AutoRecon. The AutoRecon is build on Python 3. It will not run-on Python 2. This is because it uses a library called asyncio which is not supported in earlier versions. If you don’t already have it installed, you can do it by running the following commands as root. We are installing the pip for python3 as well to install any additional packages.
apt install python3
apt install python3-pip
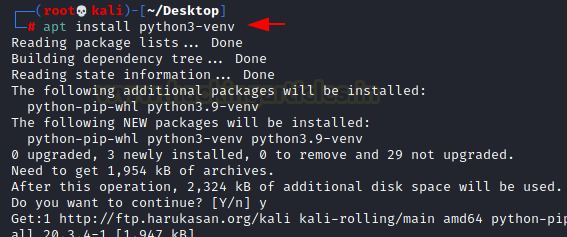
After this we will use pipx, to manage the python packages; This will take the packages that we install and put them inside their own virtual environment. This will avoid any conflicting packages inside your machine. First, we will be installing the Virtual Environment using Python3.
apt install python3-venv
Now we will download the pipx using python3-pip
python3 -m pip install --user pipx

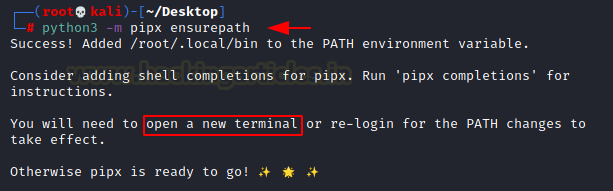
Now we will make changes to the PATH Variables to add pipx. After completion, we will need to reopen the terminal so that it can take effect.
python3 -m pipx ensurepath
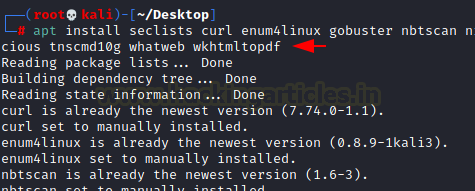
AutoRecon takes a lot of different tools and runs them on the target defined by the user. Although most of the tools are present in Kali itself let’s install or update those tools to use AutoRecon in its full glory. As the seclists is quite large in size more like 386 Megabytes so that is going to take some time.
The list of tools that required are:
- curl
- enum4linux
- gobuster
- nbtscan
- Nikto
- nmap
- onesixtyone
- oscanner
- smbclient
- SMBMap
- smtp-user-enum
- SNMP walk
- sslscan
- svwar
- tnscmd10g
- whatweb
- wkhtmltoimage
The command to install or update these tools is mentioned below:
apt install seclists curl enum4linux gobuster nbtscan nikto nmap onesixtyone oscanner smbclient smbmap smtp-user-enum snmp sslscan sipvicious tnscmd10g whatweb wkhtmltopdf
Now that we have installed all the pre-requisites, we simply need to install AutoRecon directly from its GitHub Repository using pipx. Very simple syntax to use as we can observe.
pipx install git+https://github.com/Tib3rius/AutoRecon.git

Usage
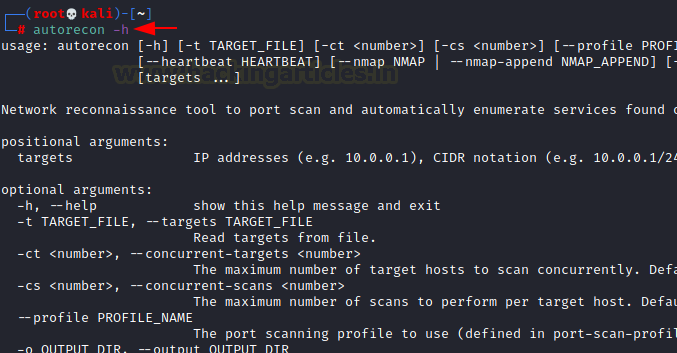
As discussed earlier, AutoRecon is an Enumeration tool. It requires a target or a set of targets. This can be IP Addresses, or CIDR Notations or hostnames as well. When triggered with the -h parameter it shows the user a help screen as depicted in the image below. It tells us that we can provide a target directly or if you have multiple targets. Then you can put the target IP Addresses into a file and then pass it as a parameter with the -t flag.
autorecon -h
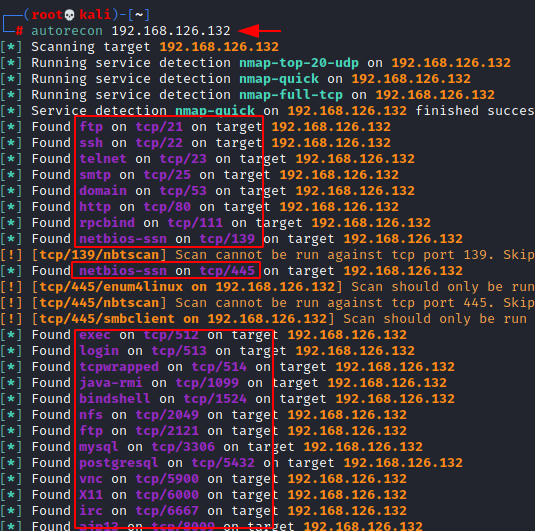
As we saw earlier that AutoRecon has a large number of parameters but most of these can be left default. The key thing to remember is the required argument “target”. It can be a space-separated list of either IP Addresses or CIDR Notations or even resolvable hostnames. We can also create a file with the targets in it. It should be in the format of one per new line. We need to reference that target file using the -t argument.
autorecon 192.168.126.132
Multi-Target Scan
By default, AutoRecon scans 5 target hosts at the same time, but you can toggle that number using the -ct parameter. This is basically the number of targets that you scan at the same time. To demonstrate, we collected some IP addresses in the network and then entered them into a text file. Then used that text file to provide targets to AutoRecon.
cat target.txt
autorecon -t targets.txt

Concurrent Scan
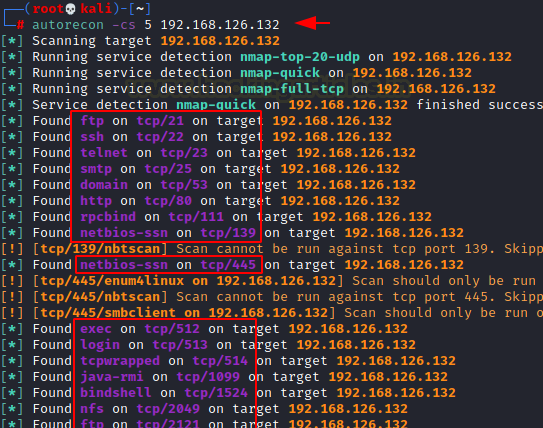
Another parameter to look at is the -cs which is the Concurrent Scans. This is basically the number of scans that are being performed per target. By default, the setting is set to 10. When changed to any other value such as 2 then only 2 scans will be performed per host. Once it is finished it will run another instance of the scan.
Hence, each of the targets that are being scanned will at least have 3 nmap scans running, basically a full TCP, a top 1000 TCP and a top 20 UDP.
autorecon -cs 5 192.168.126.132
Single Target Argument
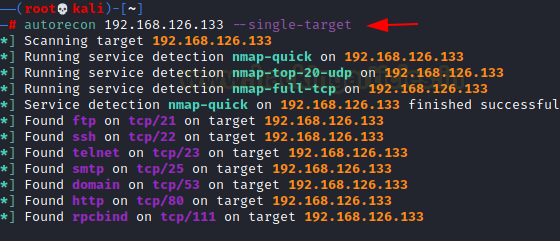
The –single-target argument enables the users to scan the host but changing the directory structure. It means that the AutoRecon will only scan the target but no directory will be created for that particular target.
autorecon 192.168.126.133 --single-target
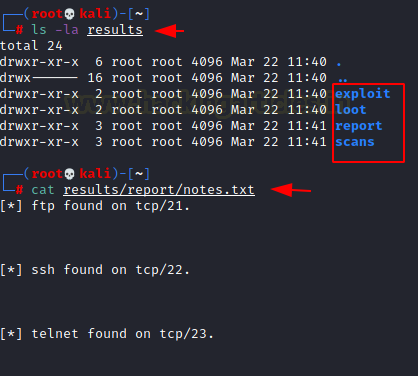
Due to the use of the –single-target parameter, it didn’t create a directory by the name of the target inside the results folder.
ls -la results
cat results/report/notes.txt
Heartbeat Argument
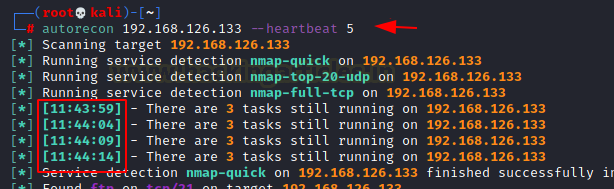
The –heartbeat argument allows the users to configure the duration of the updates that are provided by AutoRecon. By default, it is 60 seconds. It means AutoRecon will update the user what is going on and which scans are running every 60 seconds.
autorecon 192.168.126.133 --heartbeat 5
Nmap Arguments
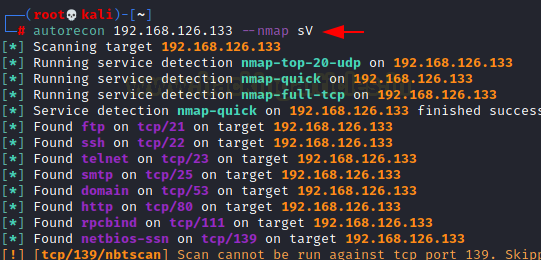
Now here we have two options, we can either replace our own parameters instead of the ones that are provided here, by using the –nmap argument and passing the parameters that we want to perform.
autorecon 192.168.126.133 --nmap sV
In the previous step, we added the -sV argument to the nmap scan, now in order to check we will read the commands.log file to see that it indeed uses the -sV parameter while scanning. It should also be noted that the default parameters -vv, –reason, -Pn are not used.
cat results/192.168.126.133/scans/_commands.log

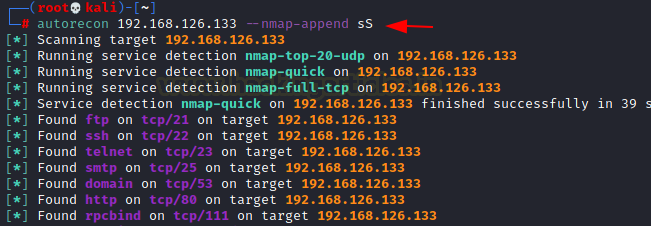
We can use the –nmap-append option to add our parameters but not override the AutoRecon default parameters. It will append our parameters to it.
autorecon 192.168.126.133 --nmap-append sS
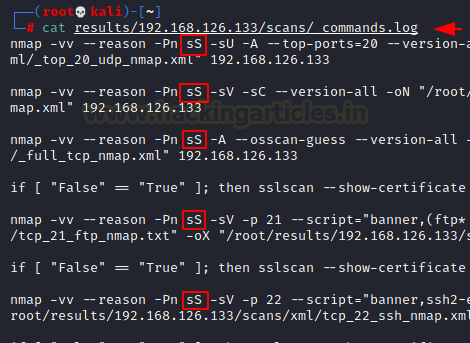
Let’s again check if the argument we added i.e., -sS has been appended with -vv, –reason, -Pn. It can be confirmed form a detailed read of the commands.log file.
cat results/192.168.126.133/scans/_commands.log
Verbosity Scans
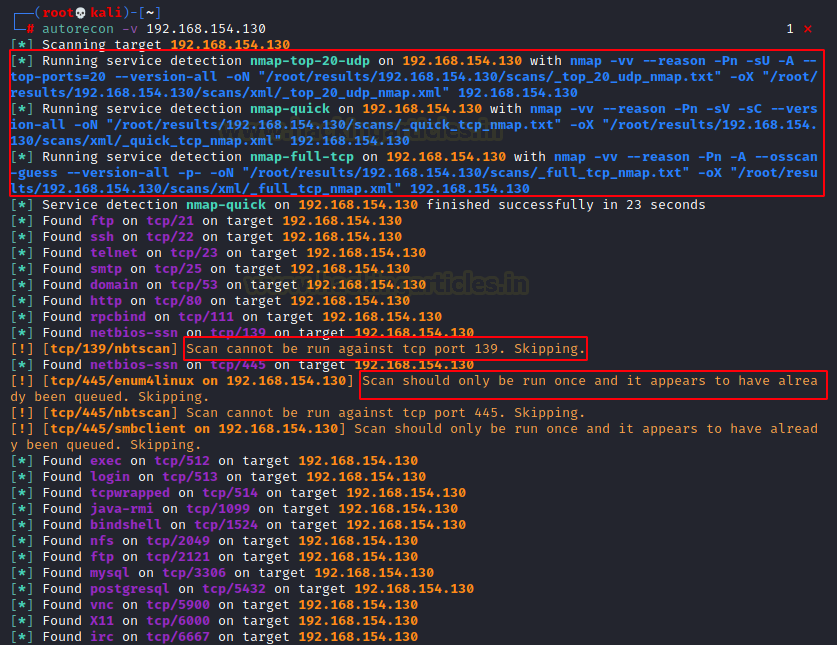
AutoRecon has different levels of verbosity. By default, it doesn’t run with any verbosity that means it just informs the user when it initiates a scan and when the scan finishes, it does not provide any details regarding those tasks. With the -v argument, it will be telling the user more about the scans like it will show the complete commands it is running, it will also provide more information about the services that were detected and are being further enumerated.
autorecon -v 192.168.154.130
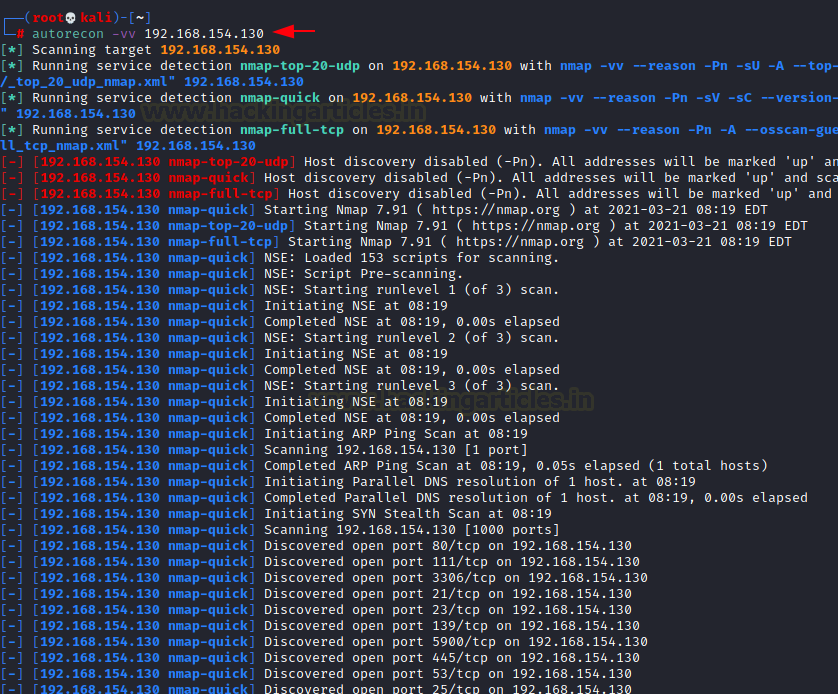
You can also use -vv which stands for Very Verbose. It is not recommended as it will print all the scans and their results in real-time. It clutters up the screen with too much information.
autorecon -vv 192.168.154.130
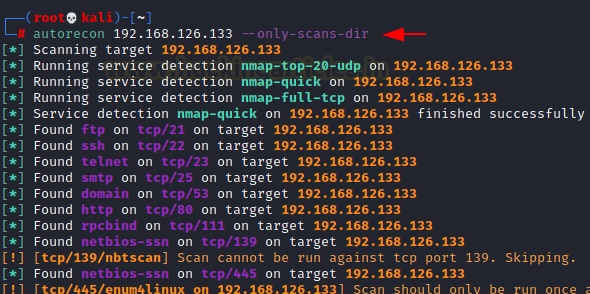
Only Scans Dir Argument
AutoRecon creates a bunch of directories based on the type of evidence it collects. But there are some situations where all that is required is the scan results. This is where the Only Scans Dir argument comes into action. This prevents the creation of other directories.
autorecon 192.168.154.130 --only-scans-dir
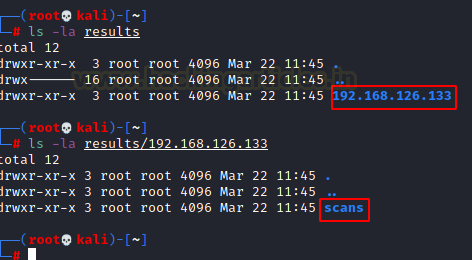
Here, we can see that inside the results/target directory we have only one directory by the name of scan which will contain the scan results. Talking about the results, let’s discuss the results that AutoRecon produces in detail.
ls -la results
ls -la results/192.168.126.133
Results
AutoRecon when initiated with a scan, it creates a result directory. The name of the directory can be configured using the -o parameter. If no parameter is mentioned, it will create the results directory in the current folder. Inside the results directory, it will divide into the different targets.
Suppose you scanned like 4 IP Addresses, it will create 4 directories with the IP Address as name. You could go inside any one of them to find different directories created according to the nature of the finding. So, the exploit directory would have any particular exploit that the target is vulnerable to. Although keep in mind that the exploit will have to be surely working. It means that it won’t show up if there is some suspicion that the exploit will work or not. The absolute surety will create entries inside that directory. Then we have the loot directory it will be anything the AutoRecon grabbed from the host machine. Repot would be the stuff that could go into a Penetration Testing Report for example notes etc.
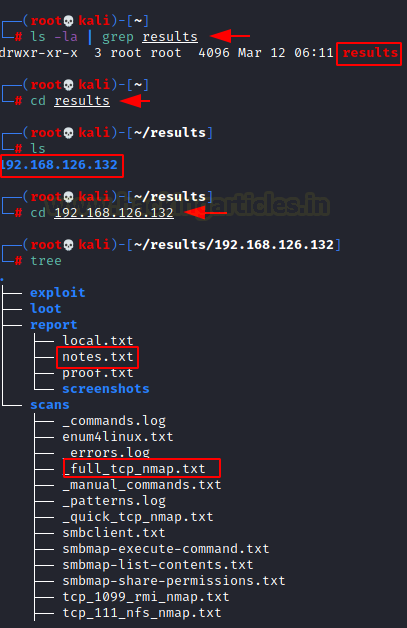
ls -la | grep results
cd results
cd 192.168.126.132
tree
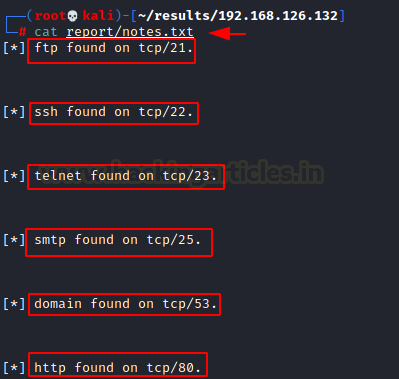
We can see that the notes inside the report folder contain the basic findings that were detected by the Nmap. It shows different services that were found running on the target application using AutoRecon. It can be used as a kind of quick reference guide.
cat ~/results/192.168.126.132/report/notes.txt
If we look further, we have the full nmap scan report.
cat ~/results/192.168.126.132/scans/_full_tcp_nmap.txt

Enum4Linux Scan
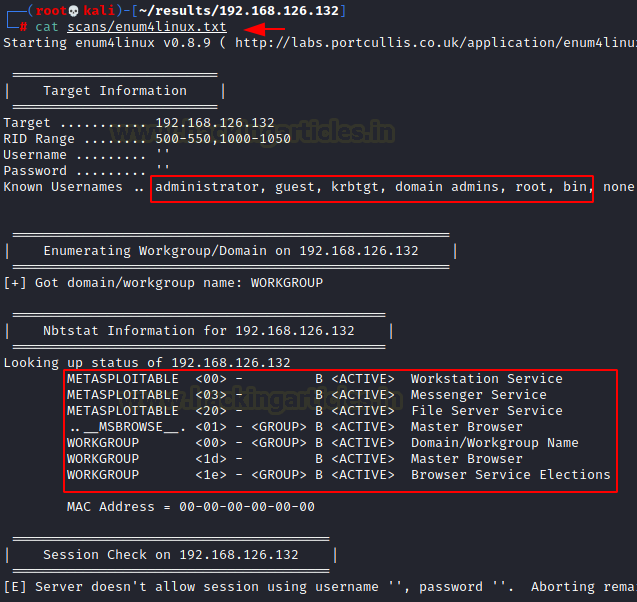
It also runs the Enum4Linux scan upon detecting the operating system like Linux. The result for this scan is located at the following location: results/<targetname>/scans/enum4linux.txt
cat ~/results/192.168.126.132/scans/enum4linux.txt
SMBMap Scan
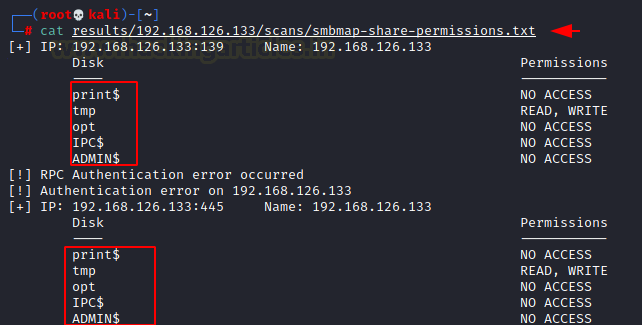
Among other scans, AutoRecon also conducts SMBMap upon find the SMB service running on the application. SMBMap enumerates the different shares on the network by the target machine with the allowed permissions on that particular share. This scan result is located at the following location: results/<targetname>/scans/smbmap-share-permissions.txt
cat ~/results/192.168.126.132/scans/smbmap-share-permissions.txt
SMTP Scan
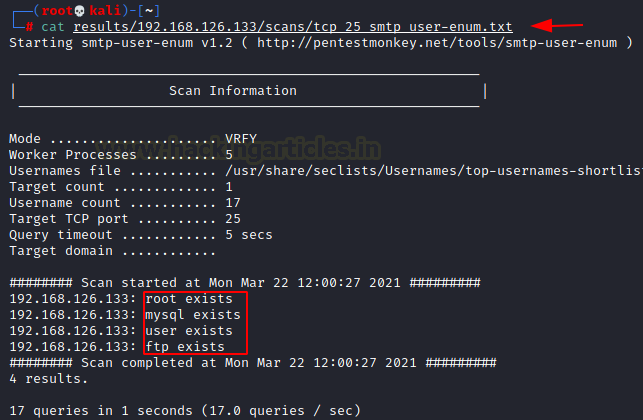
The script called smtp-user-enum also performs a simple enumeration for the SMTP users. The script runs in case the SMTP service is detected on the target machine. It enumerates for the users that created on the SMTP instance. In our demonstration, we found that there are 4 users that exist on the target server. The result for the enumeration scan can be found at the following location. results/<targetname>/scans/tcp_25_smtp_user-enum.txt
cat ~/results/192.168.126.132/scans/tcp_25_smtp_user-enum.txt
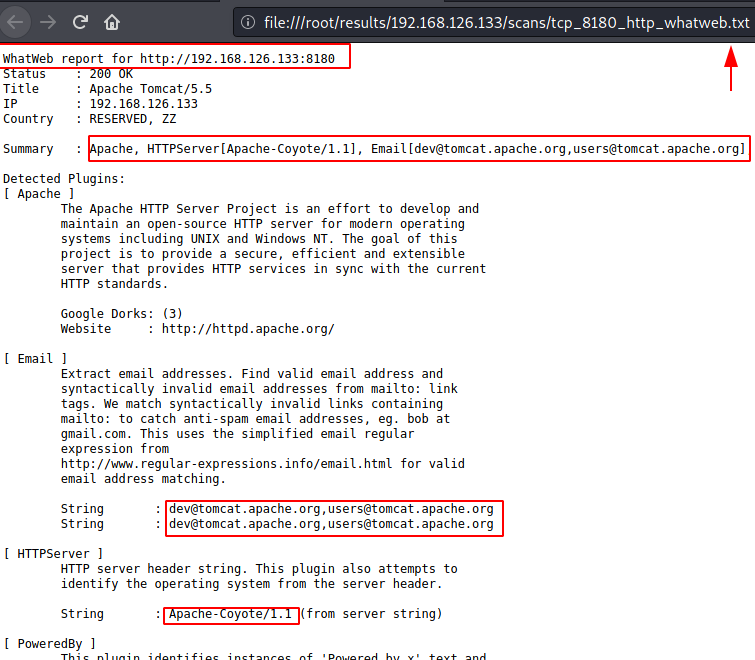
WhatWeb Scan
Another one of the scan results to look for is the WhatWeb enumeration scan. It uses the WhatWeb functionality to grab the banner on various services and then analyzing the versions and releases of the various web-based services and frameworks. The result for the WhatWeb scan can be located at the following location: results/<targetname>/scans/tcp_8180_http_whatweb.txt
file:///root/results/192.168.126.132/scans/tcp_8180_http_whatweb.txt
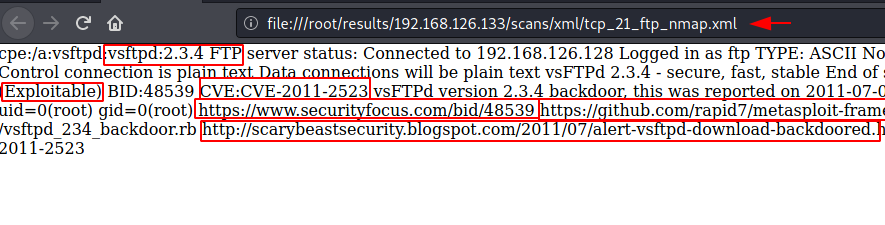
XML Results
AutoRecon also crafts a few results in the XML format for a clean and easy read. One of them results in our demonstration is the Nmap Scan for the FTP service. The XML result for the WhatWeb scan can be located at the following location: results/<targetname>/scans/xml/tcp_21_ftp_nmap.xml
file:///root/results/192.168.126.132/scans/xml/tcp_21_ftp_nmap.xml
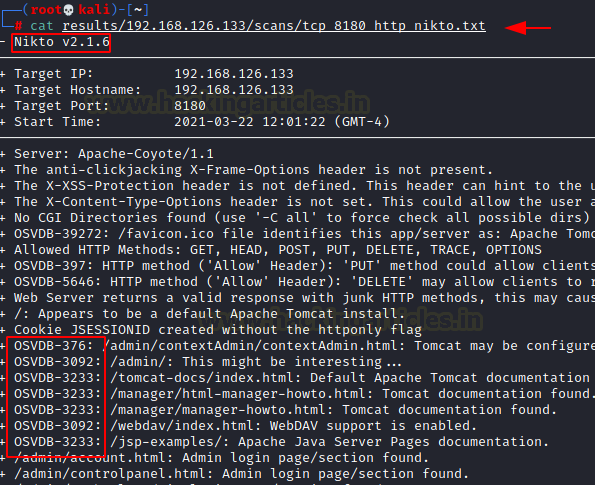
Nikto Scan
All the scans that the AutoRecon additionally run are very useful in any Penetration Assessment but Nikto is one that might do the most enumeration as it after Nmap if any tool that can extract more data is Nikto. The scan result for the Nikto scan is located at this location:
cat ~/results/192.168.126.132/scans/tcp_8180_http_nikto.txt
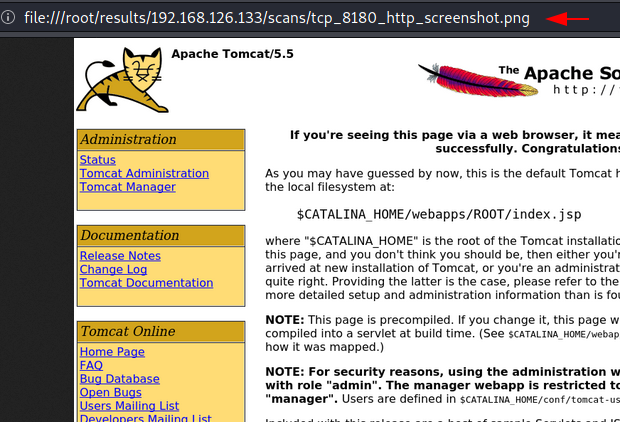
Web Services Screenshots
When faced with an HTTP service that might contain webpages, AutoRecon snaps a screenshot of the webpage. In our demonstration, there was a HTTP service running on port 8180. It was the Apache Tomcat default page. This is super helpful when solving CTFs as we need to take a look at the web services. This way we can know if it is worth browsing web service or not.
file:///root/results/192.168.126.132/scans/tcp_8180_http_screenshot.png
To learn more about Penetratio Testing. Follow this Link.
Author: Pavandeep Singh is a Technical Writer, Researcher, and Penetration Tester. Contact Twitter and LinkedIn
fucking cool!! You are incredible!
I’ve learned from you so much! I have to say Thank you, Sir!
please enable dark mode in your site other then great and I loved your content,