Comprehensive Guide on SSH Tunneling
Basically, tunneling is a process that allows data sharing or communication between two different networks privately. Tunneling is normally performed by encapsulating the private network data and protocol information inside the public network broadcast units so that the private network protocol information is visible to the public network as data.
SSH Tunnel: Tunneling is the concept to encapsulate the network protocol to another protocol here we put into SSH, so all network communication is encrypted. Because tunneling involves repackaging the traffic data into a different form, perhaps with encryption as standard, a third use is to hide the nature of the traffic that is run through the tunnels.
Types of SSH Tunneling
- Dynamic SSH tunneling
- Local SSH tunneling
- Remote SSH tunneling
Let’s Begin!!
Objective: To establish an SSH connection between remote PC and the local system of the different network.
Here I have set my lab, which consists of three systems in the following network:
SSH server (two Ethernet interfaces)
IP 192.168.1.104 is connected to the remote system
IP 192.168.10.1 connected to the local network system 192.168.10.2
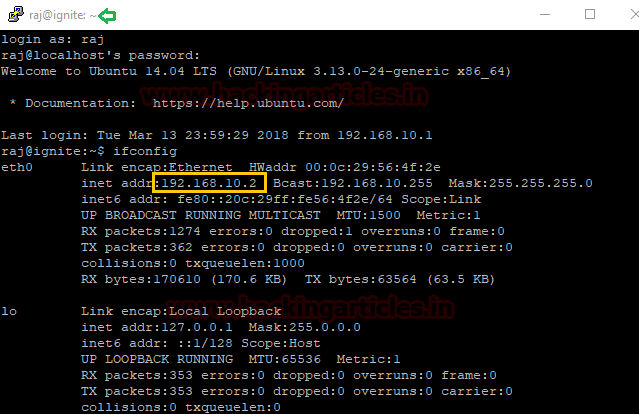
SSH client (local network) holds IP 192.168.10.2
Remote system (outside the network)
In the following image, we are trying to explain the SSH tunneling process where a remote PC is trying to connect to 192.168.10.2 which is on INTRANET of another network. To establish a connection with an SSH client (raj), remote PC will create an SSH tunnel which will connect with the local system via SSH server (Ignite).
NOTE: SSH service must be activated

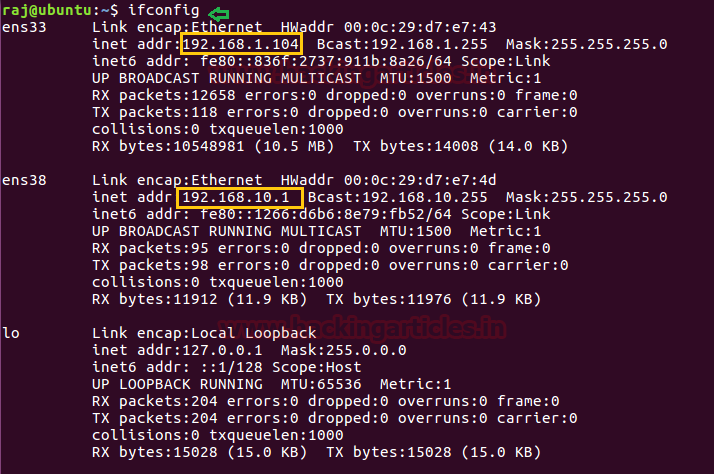
Given image below describes the network configuration for the SSH server, where it is showing two IP 192.168.1.104 and 192.168.10.1
Another image given below describes the network configuration for the SSH client, which shows IP 192.168.10.2

Dynamic SSH Tunneling through Windows
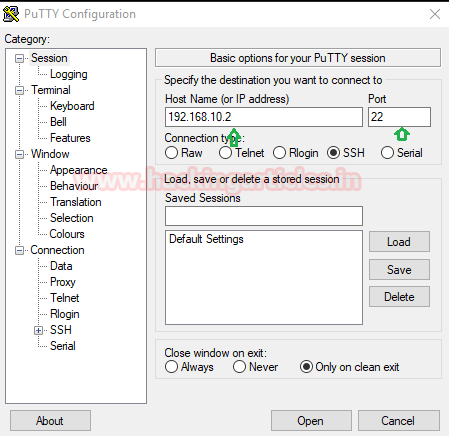
Remote Pc is trying to connect to the SSH server (192.168.1.104) via port 22 and get a successful login inside the server. Here we used Putty for establishing a connection between the SSH server (Ubuntu) and the remote user (Windows).

Similarly, now Remote PC is trying to connect with Client PC (192.168.10.2) via port 22, since they belong to different networks, therefore, it receives a network error.

Step for Dynamic SSH tunneling
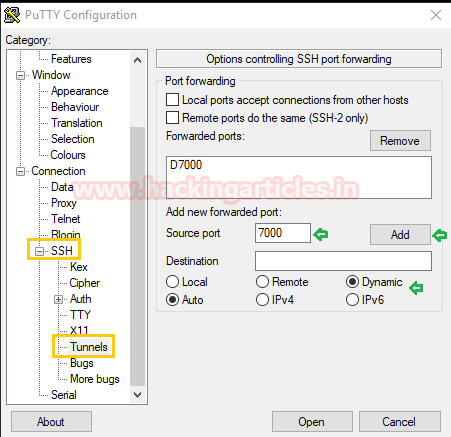
- Choose option SSH >Tunnel given in the left column of the category.
- Give new port forwarded as 7000 and connection type as dynamic and click on ADD at last.
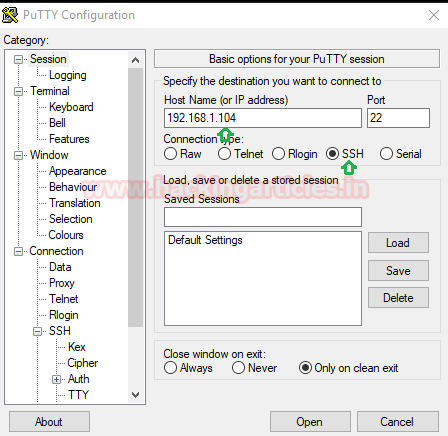
Then connect to the SSH server 192.168.1.104 via port 22 and then click on open when all things get set.
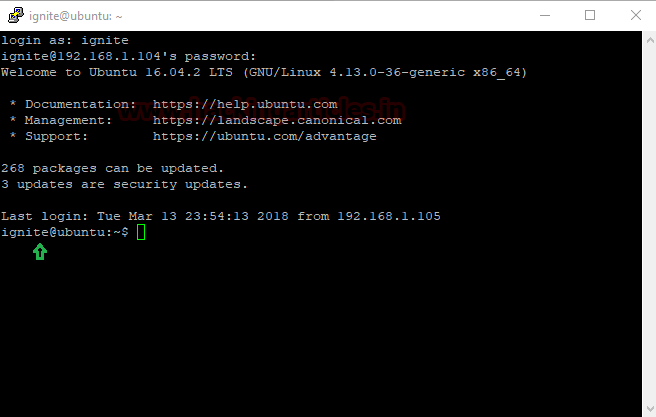
First, it will connect to the SSH server as you can see we are connected with SSH server (Ignite).
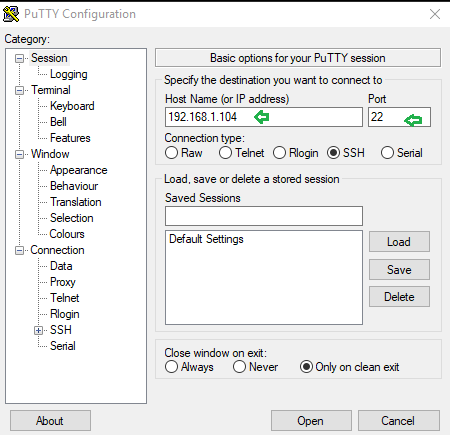
Then, login to Putty again and give IP of client system as Host Name 192.168.10.2 and Port 22 for SSH then click on open.
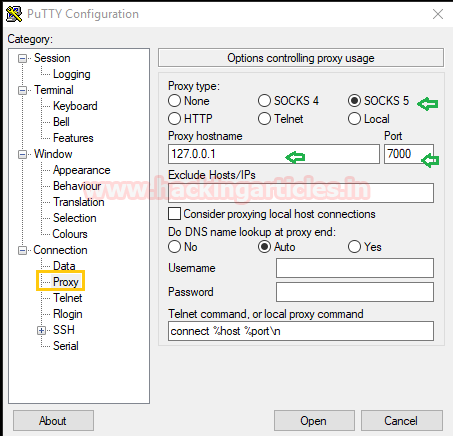
Open the previously running window of Putty choose a Proxy option from the category and follow given below step:
- Select proxy type as SOCKS 5
- Give proxy hostname as 127.0.0.1 and port 7000
- Click on open to establish a connection.
Awesome!! We have successfully access SSH client (raj) via port 7000

Dynamic SSH Tunneling through Kali Linux on Port 80
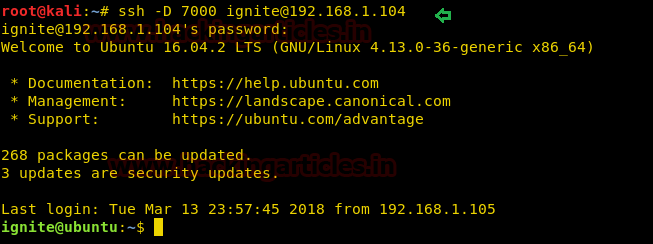
Then we are employing Kali Linux for SSH tunneling and demonstrating how an attacker or Linux user can take the privilege of Tunneling and can establish an SSH connection with client systems.
ssh -D 7000 ignite@192.168.1.104
Enter the user’s password for login and get access to the SSH server as shown below.
Next, we need to set a network proxy for enabling socksv5 and for that follow below steps.
- In your web browser “Firefox”, go to options for the General settings tab and open Network Proxy.
- Choose No Proxy
- Enable socksv5
Add localhost, 127.0.0.1, as a Manual proxy

So, from the image given below, you can perceive that now we are able to connect with the client: 192.168.10.2 via port 80.

Dynamic SSH Tunneling through Kali Linux on Port 22
Now connect to client machine through given below command:
ssh -D 7000 ignite@192.168.1.104

Install tsocks through apt repository using the command:
apt install tsocks
tsocks – Library for intercepting outgoing network connections and redirecting them through a SOCKS server.

Open the tsocks.conf file for editing socks server IP and port, in our case we need to mention below two lines and then save it.
Server = 127.0.0.1
Server_port = 7000

Then connect to SSH client with the help tsocks using given below command.
tsocks ssh raj@192.168.10.2
Enter the password and enjoy the access of SSH client.

Local SSH Tunneling through Windows
Local tunneling is a process to access a specific SSH client machine for communication. It let you establish the connection on a specific machine which is not connected from the internet.
The only difference between dynamic tunneling and local tunneling is that dynamic tunneling requires socks proxy for tunneling all TCP traffic and local tunneling only required destination IP address.
Step for SSH Local tunneling
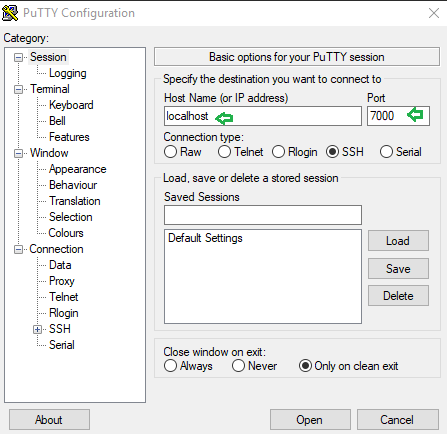
- Use putty to connect SSH server (192.168.1.104) via port 22 and choose option SSH >Tunnel given in the left column of the category.
- Give new port forwarded as 7000 and connection type as local
- Destination address as 198.168.10.2:22 for establishing a connection with the specific client and click on ADD at last.
- Click on open when all things get set.

First, this will establish a connection between the remote pc and SSH server.

Open a new window of putty and follow given below step:
- Give hostname as localhost and port 7000 and connection type SSH.
- Click on open to establish a connection.
Awesome!! We have successfully access SSH client via port 7000
Local SSH Tunneling through Kali Linux
Then again, we switch to Kali Linux for local tunneling, which is quite easy as compared to dynamic. Execute the command given below for forwarding port to the local machine.
ssh -L 7000:192.168.10.2:22 ignite@192.168.1.104

Then open a new terminal and type below command for connecting to SSH client.
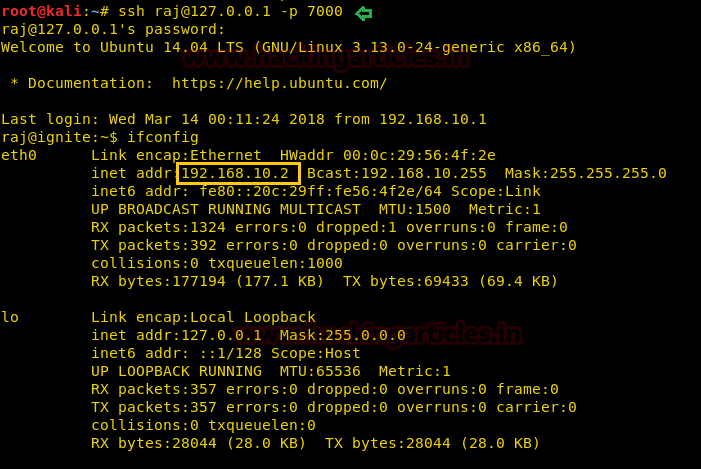
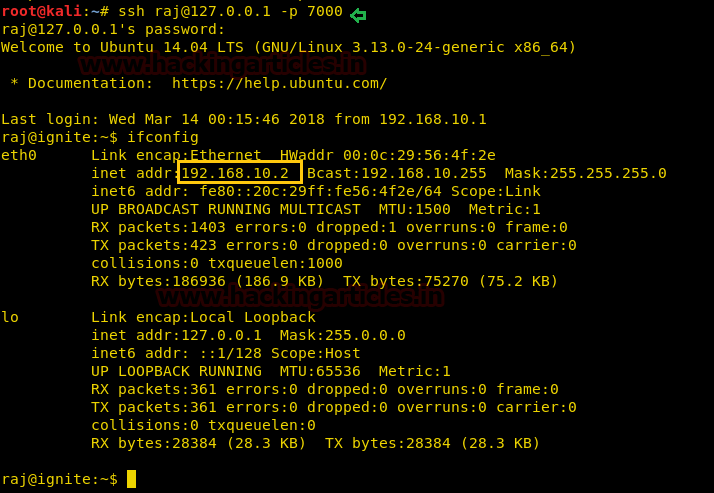
ssh raj@127.0.0.1 -p 7000
Awesome!! We have successfully access SSH client via port 7000
Remote SSH Tunneling through Putty
Remote tunneling is functional when a client machine wants to access a remote system that is outward from its network.
Firstly, need to install Putty on our SSH server (ignite) and then follow the given steps.
Step for remote tunneling
- Enter remote system IP 192.168.1.108
- Mention port 22
- Go to SSH>tunnel options
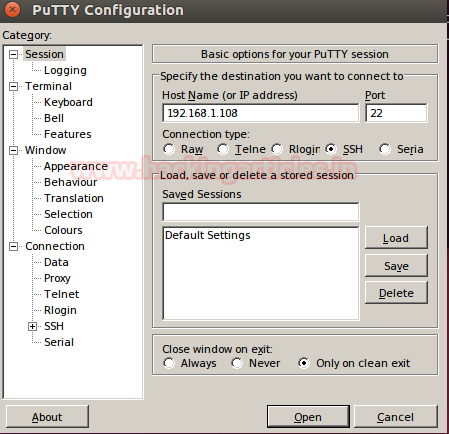
- Give new port forwarded as 7000 and connection type as Remote
- Destination address as 198.168.10.2:22for establishing a connection with the specific client and click on ADD at last.
- Click on open when all things get set.

Then the server will get connected to the Remote system as shown in image below.

Come back to the remote system and enter the following command to with SSH client machine.
ssh raj@127.0.0.1 -p 7000
From given below image you can observe that we had successfully connected with SSH client machine via port 7000.
Remote SSH Tunneling through Ubuntu
If you are not willing to use putty for remote tunneling then you can execute the following command
ssh -R 7000:192.168.10.2:22 root@192.168.1.108
Here, 192.168.1.10.2 is our local client (raj) IP and 192.168.1.108 is our remote system IP.

Come back to the remote system and enter the following command to with SSH client machine.
ssh raj@127.0.0.1 -p 7000
From given below image you can observe that we had successfully connected with SSH client machine via port 7000.

Author: Sanjeet Kumar is an Information Security Analyst | Pentester | Researcher Contact Here
Excellent work!
Use Win-PortFwd to setup windows tunnel
https://github.com/deepzec/Win-PortFwd
Good job!
Your address was already in use in one of your examples. It probably worked because the address was still bound from prior putty example though.