Convert Virtual Machine to Raw Images for Forensics (Qemu-Img)
Introduction to Qemu-img for Virtual Disk Conversion
This is a very handy little application. The QEMU team developed it. The software is very useful when dealing with virtualization, and you can find Qemu-img available for both Windows and Linux. You can change the format of a given virtual disk file to most of the popular virtual disk formats used across platforms. For example, if you are using VirtualBox in Windows and want to migrate the virtual disk for use on a Mac in Parallels, this simple program enables you to achieve that with minimum effort.
However, our purpose in writing about this today slightly differs from Qemu-img’s mainstream usage. Instead, we want to focus on using this application to convert a virtual disk image—whether whole or split—into a .raw file that most popular forensic frameworks can utilize.
Using Qemu-img for Disk Conversion in Forensics
Let’s start up Qemu-img on our Linux machine
At the terminal prompt type “qemu-img –h”
This will show you all the options that can be used with qemu-img

Right at the end of the information presented after using the command given above, we can see all the formats that this application supports.
Here is a list of all the formats that are compatible with Qemu-img

Now let’s see how this application comes in handy for use in forensics.
In a situation where an investigator includes a virtual disk as part of the acquisition and requires further dedicated analysis, they can convert the virtual disk into the .raw format.
Let’s begin.
Since our goal is to analyze the virtual disk, we are using the image file from Windows 7 installed on VMWare. The file in question is in .vmdk format.
Just a heads up, when you convert a virtual disk file to a .raw file, the size of the converted file can be quite big, so make sure you have enough space.
Here is our .vmdk file
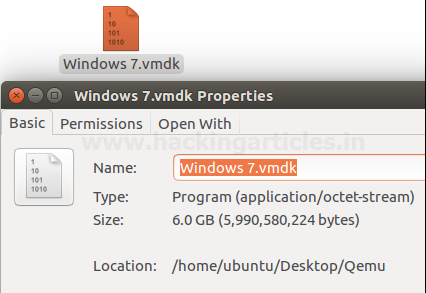
For ease of use, we have placed the .vmdk file in a folder named Qmeu on the desktop. The terminal is opened from within the folder.
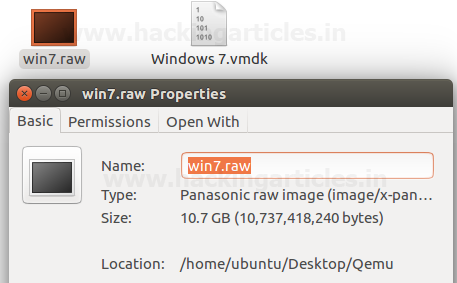
At the terminal prompt type “qemu-img convert -f vmdk -O raw Windows\ 7.vmdk win7.raw”
A breakdown of the command that we just gave:
qemu-img convert is invoking the convert function of qemu-img.
-f is the format of the input file, which in this case is .vmdk
-O is the format of the output file that we want, a .raw file.
Windows\ 7.vmdk is the name of the input file that we have in our folder.
win7.raw is the name we have given the output file with its file extension.

Give it a few minutes and check the folder, you will find the converted file.
As you can see, the size of the .raw file is 10.7 GB and the size of the .vmdk file was 6.0 GB, that’s quite a jump in size!
Carving and Mounting the .raw File
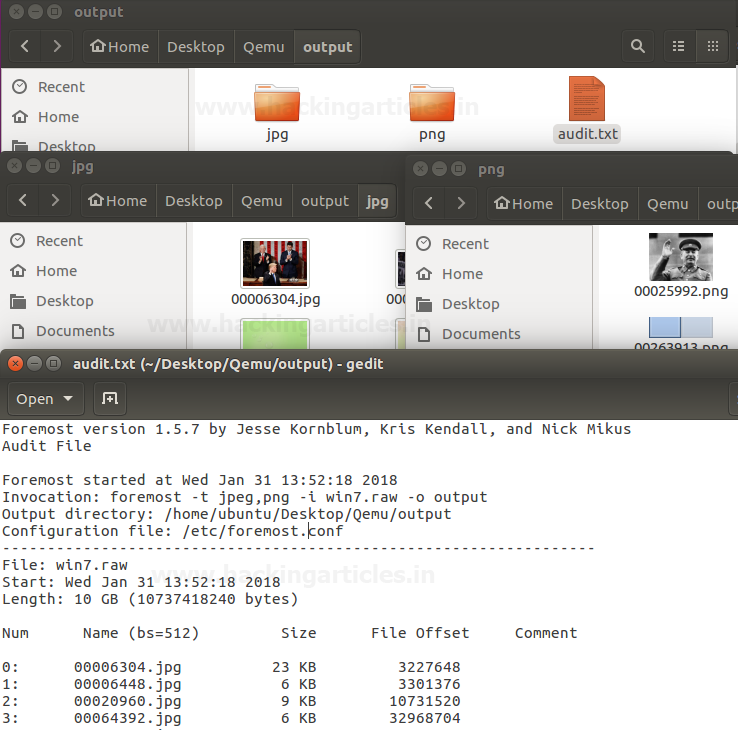
We can now use Foremost to carve the .raw file to see what’s inside.
At the terminal type “foremost -t jpeg, png -i win7 -o output”
With this command, we are carving the .raw file for .jpeg and .png files which will be collected in a folder named output. If you have any doubts about foremost you can refer to this article.
As you can see, our .raw file has been successfully carved, the results are visible below
We have successfully carved a .raw file made from a virtual disk. Now, let’s mount the.raw file to view its contents. For this operation, we will be using a Windows machine.
Then, we will mount this.raw file using FTK Imager to examine its contents. The image mounting option is available under the File menu. Then, navigate to the .raw file from within the mounting menu.

Select Mount, leave the other options as they are and the file will appear on the Mapped Image List.
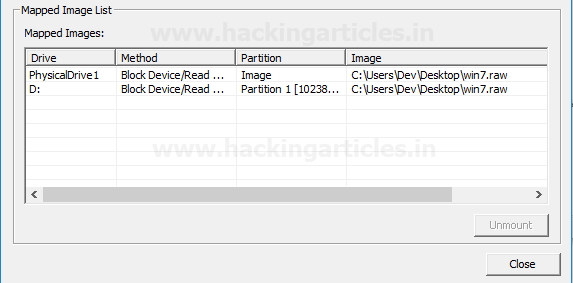
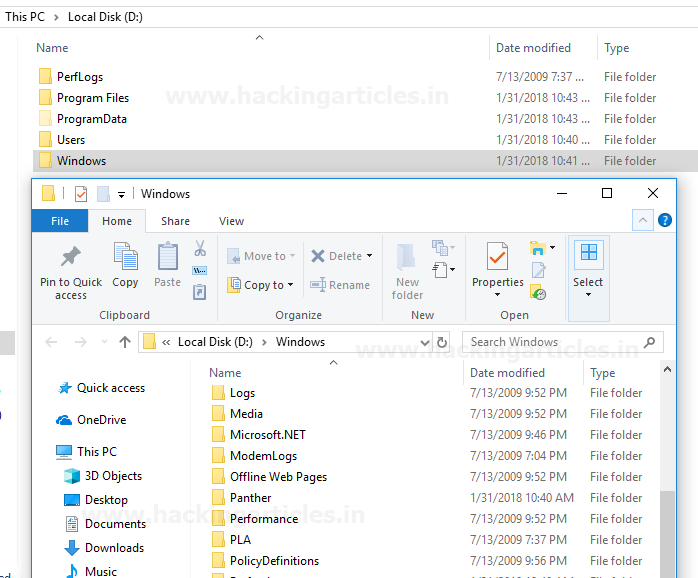
Next, we navigate to My Computer and we can see that the .raw has been mounted as a partition.
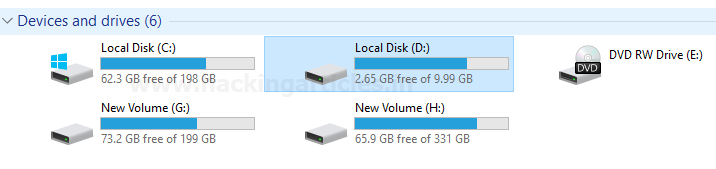
You can see and explore the Windows file system for content.
Conclusion
Qemu-img is a very simple application with high potential. You can find it to be a very valuable tool in your forensic toolkit due to its large list of compatible formats. It will make sure that the format of the acquired image does not keep you from using your forensic tool of choice to run your investigation or carve out data.
We hope you enjoy using this tool.
Have fun and stay ethical.
To learn more about Cyber Forensics. Follow this Link
Author: Abhimanyu Dev is a Certified Ethical Hacker, penetration tester, information security analyst and researcher. Connect with him here