Forensic Investigation of RAW Images using Belkasoft Evidence Center
In this article, we delve into RAW Image Forensic with Belkasoft, utilizing Belkasoft Evidence Center to conduct a comprehensive forensic investigation of raw disk images. By following the outlined steps, forensic analysts can efficiently extract and analyze critical artifacts such as browser history, downloaded files, cookies, documents, encrypted files, images, and recently accessed data. This process aids in reconstructing user activities and uncovering hidden evidence, thereby enhancing the investigative process.
Getting Started with Belkasoft Evidence Center Ultimate
Firstly , download the Belkasoft Evidence Center ultimate from this link.
Click on New Option to select the Raw Image.

Enter the Case Name.
Select the Root folder where Forensic Evidence will be created.
Then, type the name of the investigator and Case Description. Click Ok.

Now select the Raw Image and Check the Option Analyze Data Source. Click on Next.

Now Select from supported data types and click on Next.

Now Select all and Click on Finish.

Exploring Forensic Data with Belkasoft
To visualize the cached sites exactly as seen by the user, Click on Cache in Browsers option.

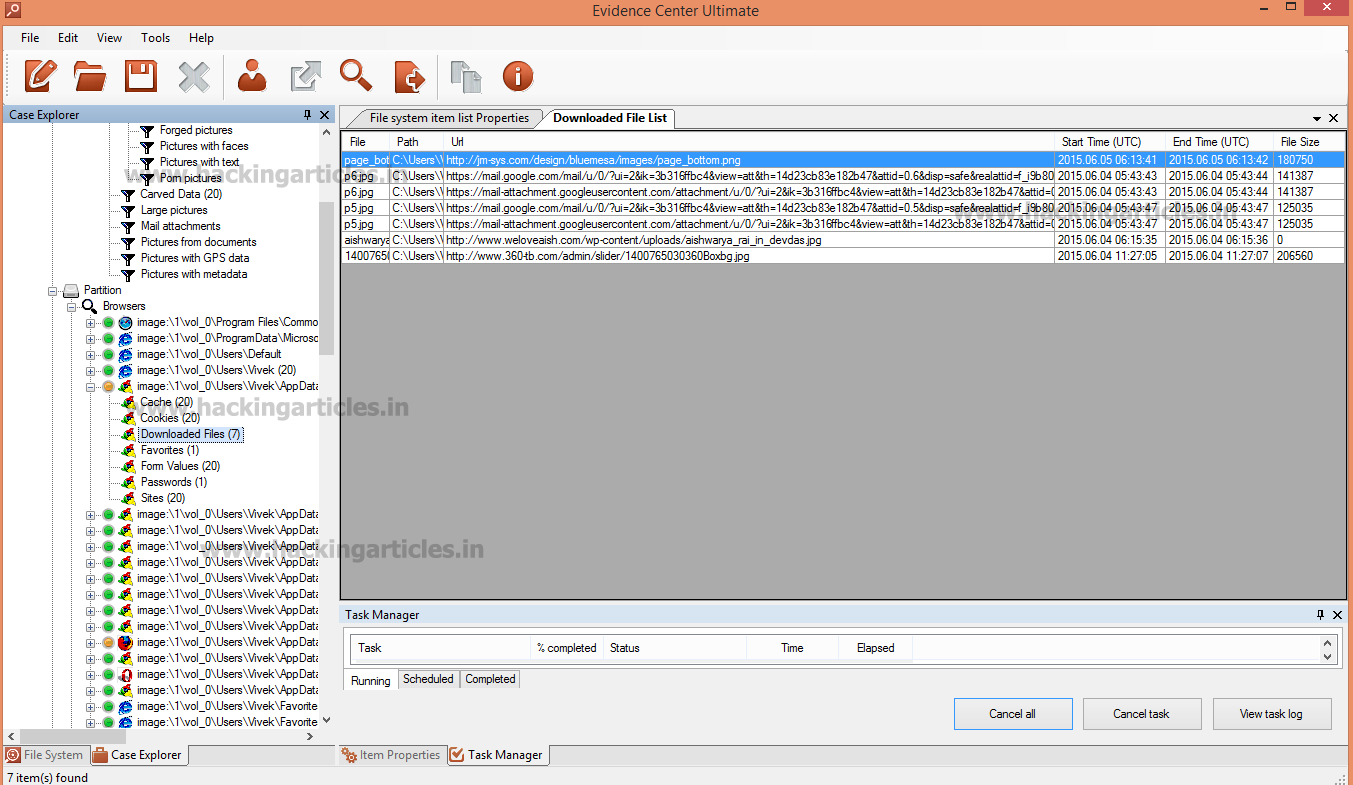
To see Downloaded file list, click on Downloaded Files.
Then, To Check the List of Sites Visited by the user, select Sites Option.

To see Cookie List, Click on Cookies Option.

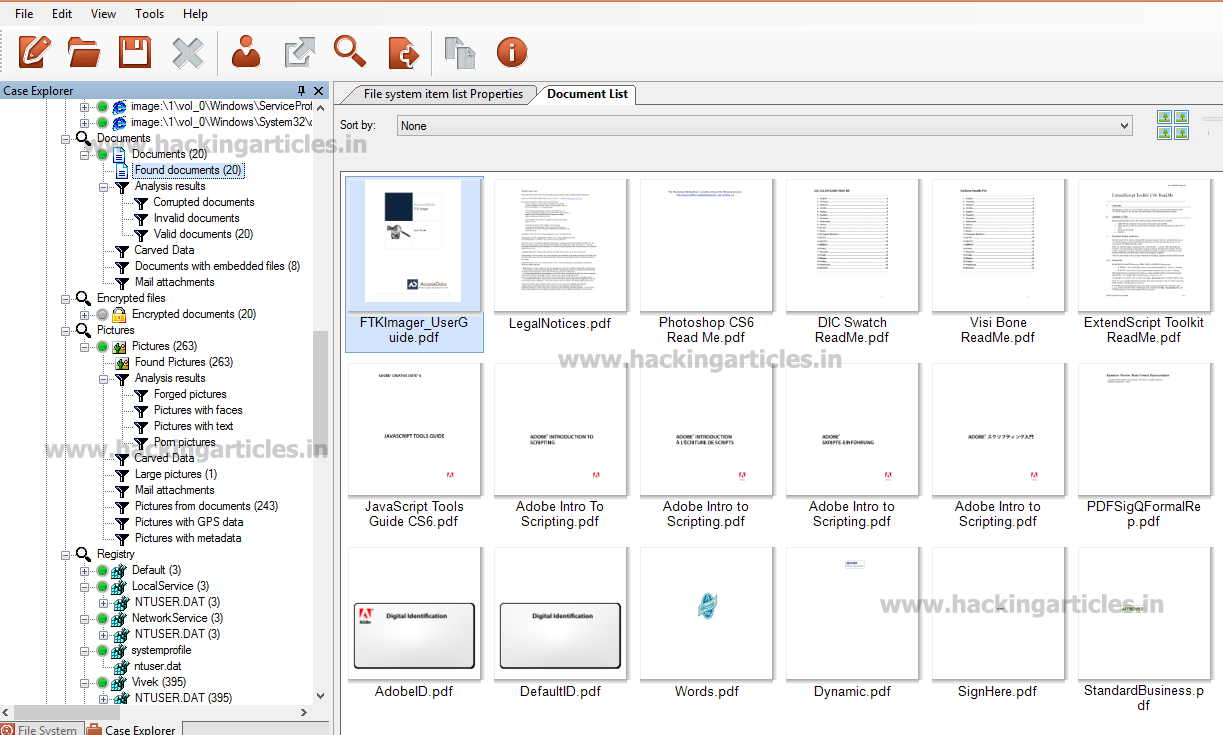
Now click on Documents option and Then Select Found Documents option to see all the office Documents files found in user pc.
To see all the encrypted files, click on Found Encrypted files option. It will detect more than 150 types of encrypted files. It is also possible to decrypt all these encrypted files with in this product by installing Passware kit Forensic integrated with Belkasoft Product.

Then, Find Picture List, Select Found Pictures in Pictures Option. To Detect Forgery in Picture. Right click on Picture, Select Analyze Pictures and Click on Detect Forgery Tab.

To find the recent files opened by Acrobat Reader, Click on Adobe Acrobat Reader Recent Option.

Next, select Last Application and Paths in the NTUSER.DAT Option to view the user’s most recent applications. This step allows you to track the application usage history effectively. The Windows operating system contains a registry file called NTUSER.DAT. In fact, each user profile has its own NTUSER.DAT file. It includes the Start menu configuration and desktop attributes. Additionally, it stores browsing history and contents of the special Documents folder.

To see last Selected Files by the user, Click on Last Selected Files.

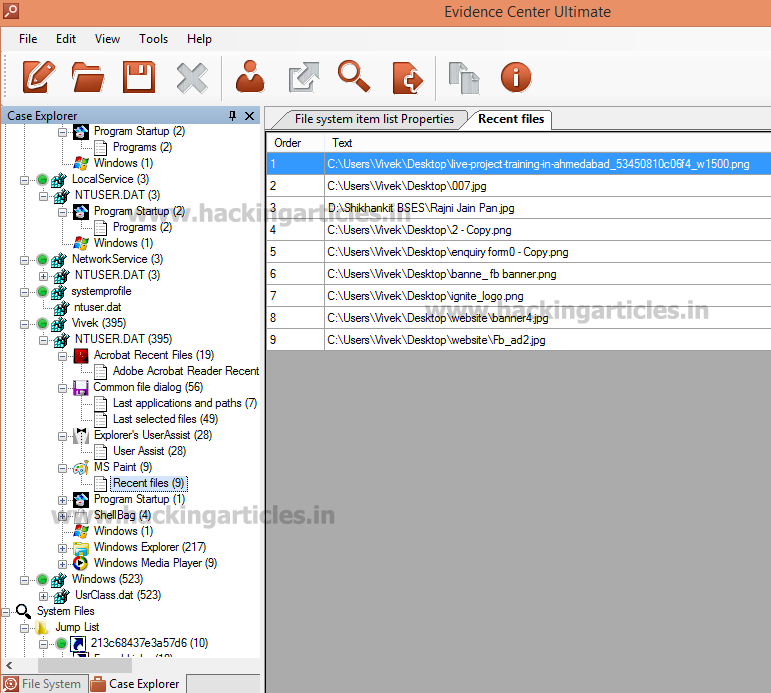
Then, to check the recent files opened by user, Click on Recent files option.
To detect latest searches by the user, click on Searches option.

Finally, to find the latest accessed files by the user , click on Recently accessed documents.

To learn more about Cyber Forensics. Follow this Link
Author: Mukul Mohan is a Microsoft Certified System Engineer in Security and Messaging. He is a Microsoft Certified Technology Specialist with high level of expertise in handling server side operations based on windows platform. An experienced IT Technical Trainer with over 20 years’ Experience. You can contact him at mukul@ignitetechnologies.in