Anonymous Logins for Pentesters
lyIn this article, we will focus on the various services that support the Anonymous Logins. We will be understanding the process to setup those service on your local target system and then using Kali Linux to access them or attack them.
Table of Content
- Introduction
- Setting up Anonymous FTP
- Attacking Anonymous FTP
- Setting up Anonymous SMB
- Attacking Anonymous SMB
- Conclusion
Introduction
Anonymous Logins are a feature that allows the user to setup its service that is accessible by any user. It doesn’t need specific credentials for accessing that resource. Various servers that want to host data which they want to be accessible to a wide range of users, user anonymous logins. In real life, while performing Network Penetration Testing, a tester should be able to identify the Anonymous Service and test it. We will also be looking behind the scenes as to how these anonymous services are setup on our local target machine running Ubuntu. We will be learning about the FTP service and the SMB service.
Setting up Anonymous FTP
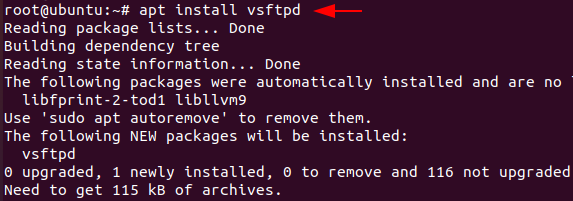
First, we’ll walk through how to configure anonymous access on the FTP server. We have root access to an Ubuntu computer. The apt command is used to install the vsftpd.
apt install vsftpd
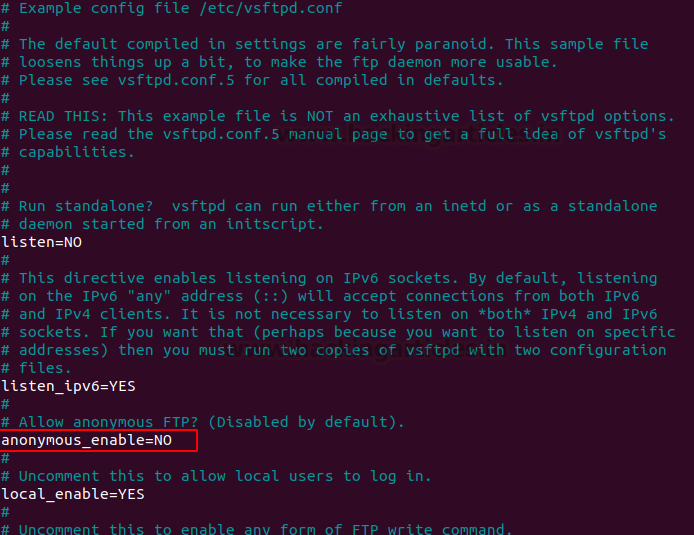
Every installed service on a Linux computer has a configuration file that you can use to tweak settings and parameters. The vsftpd by default disables anonymous login. To enable the Anonymous login feature, we must make changes to the /etc/vsftpd.conf configuration file. You can use any editor you choose, such Vi or Sublime, however we use Nano to edit the configuration file. As seen in the figure below, we navigate through all of the other options and comments until we find the “anonymous_enabled=NO” option..
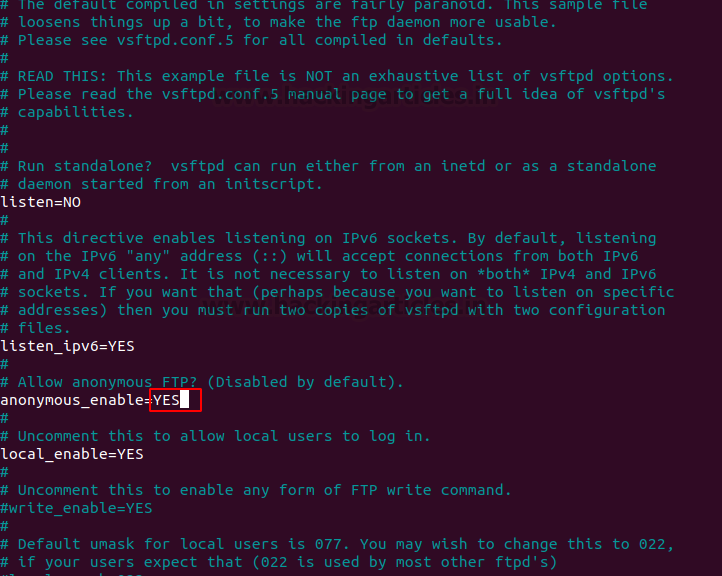
Change the “anonymous_enabled=NO” option to “anonymous_enabled=YES” to enable the Anonymous Login on the machine. Refer to the screenshot below.
Set Up Shared Directory
Just enabling the Anonymous login or installing a service is not enough to get it working. We want a fully functional FTP service. To do this we need to be able to share files using the FTP and since we have enabled the anonymous login, we should be able to download the files from the Ubuntu machine using anonymous access. FTP service requires a directory, whose contents can be shared over the network. In the /var directory, we create a directory. We gave the pub the name of the directory. Additionally, we must modify the directory’s ownership to make it appropriate for data sharing. After creating and changing ownership, we move into the directory and create a file with the message “Welcome to Hacking Articles” in it. We named the text file note.txt.
mkdir -p /var/ftp/pub
sudo chown nobody:nogroup /var/ftp/pub
cd /var/ftp/pub
echo "Welcome to Hacking Articles" > note.txt

Configure and Restart FTP Service
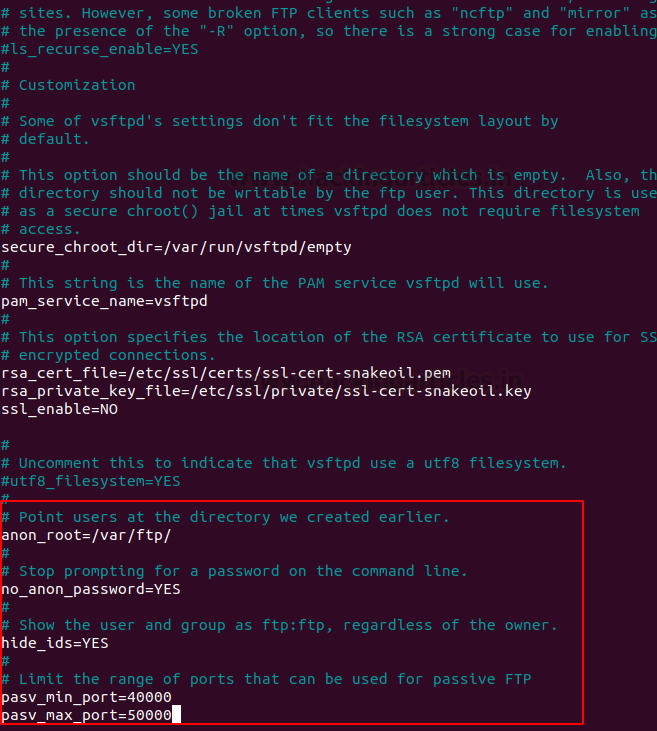
Back to the vsftpd.conf file that we were editing, we need to add a specific configuration to make the anonymous login functional. We add the directory that we just created in the configurations, then we add the no_anon_password option that will stop prompting for a password. Another option we add is the hide_ids option. It will not show the username and group of the user that is accessed, upon query it will revert the ftp:ftp combination. At last, we need to add the range of ports that can be used for passive FTP.
This completes all the configurations that we require to setup an FTP service with anonymous login enabled on an ubuntu machine. All that is required is to restart the vsftpd service in order to make the new configurations in effect. Now we will refer to our Kali Linux machine, i.e., attacker machine.
nano /etc/vsftpd.conf
service vsftpd restart

Attacking Anonymous FTP
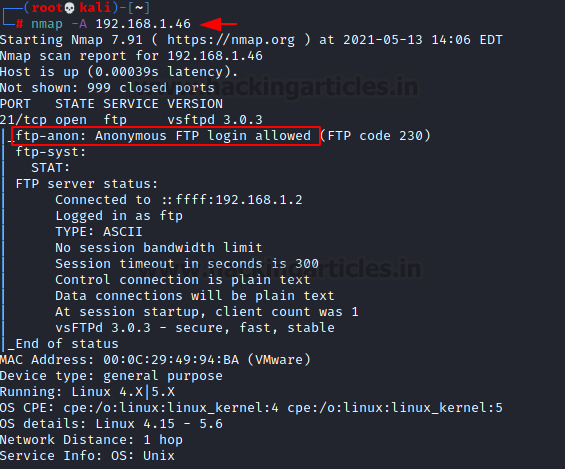
When attacking or targeting a system, one of the initial steps that an attacker takes is to perform a scan of the target. This scan gives the attacker information such as open ports and running services. We used Nmap to scan the ubuntu machine that we just configured. We can see that the Nmap was able to identify that the FTP service was functional on the target machine and it also takes another step into enumeration and informs the attacker that the FTP service has Anonymous Login Enabled.
nmap -A 192.168.1.46
Let’s attempt to access the FTP service now that it has been verified to be operating with Anonymous Login enabled. We will use the machine’s IP address to establish a connection with the FTP service in order to accomplish this. Since anonymous login is enabled and we don’t have any user credentials, we will select “Anonymous” under Name and log in. To determine which files are exchanged via FTP, we can use the directory listing program ls. We can observe that there is a text file called note.txt. As shown below, we may use the get command to transfer the text file. After the transfer, we can read the text file to confirm that we have successfully gained the data from the file that was created on the ubuntu machine.
ftp 192.168.1.46
Anonymous
ls
cd pub
ls
get note.txt
bye
cat note.txt

Setting up Anonymous SMB
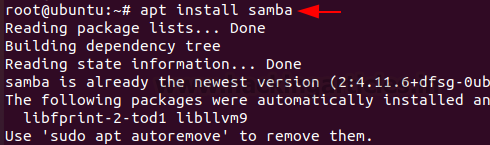
The next service that can setup Anonymous access is the SMB service. As it was originally designed for Windows Systems, we need to install the samba service on our Ubuntu machine. As we did with the vsftpd we install the samba service using the apt as shown below.
apt install samba
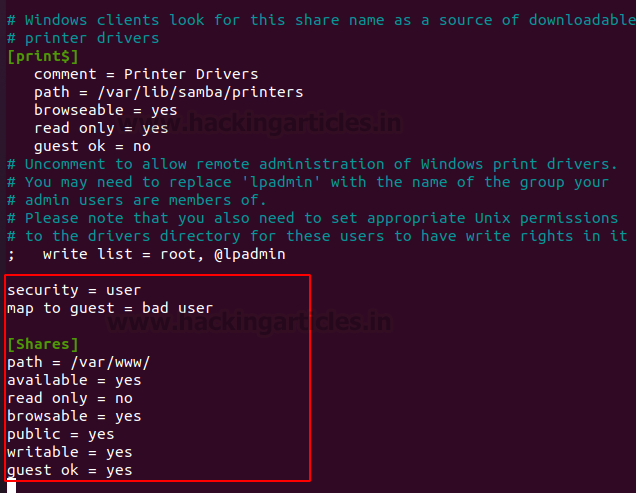
Like all services that any Linux machine installs, samba also contains the configuration file that resides inside the /etc directory. Since we are trying to setup the service with the Anonymous Login, we are going to add some additional configurations as compared to the basic installation of the samba.

We use the nano editor, but you can basically use any editor of your choice. Moving down to the file, we add the following configurations such as the directory for sharing the files. We create the /var/www directory for this purpose. We need to give it proper permissions such as browsable and public so that anonymous login can access it.
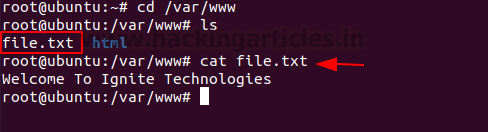
The next thing that we need to do is create a file that can be used to test the ability of file transfer using the smb. We created a text file named file.txt and entered the message “Welcome To Ignite Technologies” in it. You will need to restart the service in order to make the configurations active.
Attacking Anonymous SMB
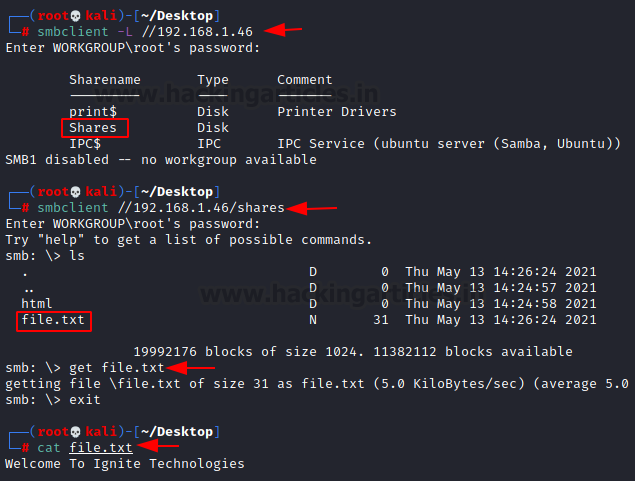
As we did with the FTP service, it is also possible to check if the service is running on the target machine using the nmap scan. Although we are not going to demonstrate it here. We are going to proceed with the assumption that the service is up and running on the target machine. We connect with the service using the smbclient. It is quite clear from the image below that we didn’t provide a user or password combination to connect to the service since the anonymous login is enabled. We then enumerated the share and found the file.txt shared. We transferred the file to the local Kali Linux machine and confirmed that the SMB Anonymous Login service is active and working.
Conclusion
Anonymous logins are quite common in real-life environments and the Capture the Flags challenges as well. As an attacker, you must understand how it works and what kind of setup you need to enable the anonymous login. Most of all, it is important to know how to interact with this kind of access.
To learn more about Penetration Testing. Follow this Link.
Author: Pavandeep Singh is a Technical Writer, Researcher, and Penetration Tester. Contact on Twitter and LinkedIn
