Multiple Ways to Install Kali
In this article, we will learn how to open the magic box of ethical hacking. Can you guess the name of that box? Ok, I tell you the name is KALI the magic box of ethical hacking. Through this article, you will learn the installation of Kali Linux on different platforms along with the features.
Table of Content
- Introduction of kali Linux
- Features of kali Linux
- Prerequsities for kali Linux installtion
- Kali installation on VM (Virtual machine)
- Kali installation on Virtual Box
- Kali installation on AWS
- Kali installation on Respberry pi
Introduction of Kali Linux
“The quieter you become, the more can to hear”—Kali Linux
As per my definition, Kali Linux is a magic box that contains multiple magic tools to play the magic. In technical terms, Kali Linux is an open-source, Debian based Linux distribution mainly for penetration testing, security auditing, computer Forensic, Security research, etc. it contains over 600 tools of information gathering(Amap, arp-scan, APT2, etc.), vulnerability analysis (Nmap, sqlmap, BBQSQL, etc., ), wireless attack( Airbase-ng, Air crack-ng, airplay-ng, etc.), web applications(BrupSuite, zaproxy, Web Scarab), exploitation (Metasploit, Armitage, crackle), forensics (DFF, Capstone, Binwalk, etc.), etc.
It is developed, maintained and funded by Offensive Security, a leading information security training company.
Features of Kali Linux
Free of cost –it is completely free of cost, you will never have to pay for it. All the development source code are freely available to you.
Over 600 tools available for different functionality e.g computer forensics, penetration testing, etc
Completely customizable – it is easy to customize based on your needs and preferences.
Usable on a wide range of ARM devices.
Prerequisites for Kali Linux Installation
Kali OS software package required a minimum of 10 GB hard disk space for installation.
- Minimum 512MB Ram is required for i386 and amd64 architectures.
- A bootable CD-DVD Drive or a USB stick.
Give me six hours to chop down a tree and I will spend the first for four sharpening the axe.—Abraham Lincoln
Installation of Kali on Vmware
Vmware Workstation enables users to set up virtual machines on a single physical machine and use them simultaneously along with the actual machine. A Virtual machine can be downloaded from www.vmware.com.
Download kali from http://kali.org/downloads/ 64 bit or 32 bit as per your computer capability.

Click on create a new virtual machine by selecting the Installer disc image file (ISO), and review the configured virtual machine and then powered on the created kali virtual machine.
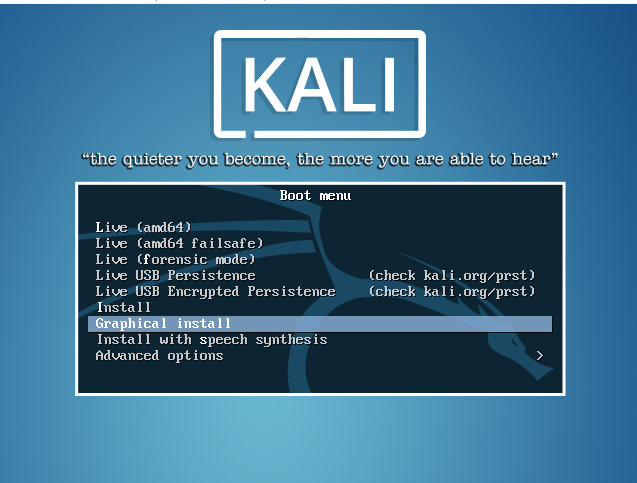
At the boot menu, many options are available so I am going to describe all boot menu options briefly:
Live (amd64)
Probably the one you’re searching for. This one will boot you into Kali, but only in the Live mode. That means, that when you terminate/shutdown your laptop everything you’ve saved/edited in Kali is lost. So if you make a file on your desktop, that file will be lost when you restart.
This is possible because Kali only writes to RAM and not your HDD.
Live (forensic mode)
This is a special and interesting mode. In this mode, the internal HDD is never touched, and the auto-mounting of devices is disabled. You’ll use this when performing forensics on a device (e.g. recovering sensitive files, getting evidence in crime scenes.)
Live USB Persistence
Use this if you want to install Kali on the USB you booted from, this way you can save what you’ve done, etc. If you now place a file on your desktop, it’s saved on your USB and is again accessible when you boot from it.
Live USB Encrypted Persistence
Same as above. Alone with this option, your USB is also encrypted with LUKS. If you choose USB Persistence, choose this one!
(Graphical) Install
If you want to install it on your HDD.
Install with speech synthesis
Install it, the text from the installation-menu is read out to you
But through the down arrow key, you can select Graphical install.
After selection of Graphical install, you will get the multiple next windows of
Preferred language selection- English (select as per your choice) then click continue
Location – United States (select as per your choice) click continue
Standard keymap – American English (select as per your choice) click on continue
On the next screen you will ask to configure the network, select Do not configure the network at this time and hit the continue.
Now in a single word, you can provide the hostname e.g. Kali (any name as per your choice). Then click on continue.

Set the password for the root account. Don’t forget the password you have set for the root account otherwise you have to install kali again.

On the next screen, select the time zone and click continue.
Kali detects the disk partitions. Select guided-use entire disk then click continue.

Installer confirms that partition you are going to use. Click continue.
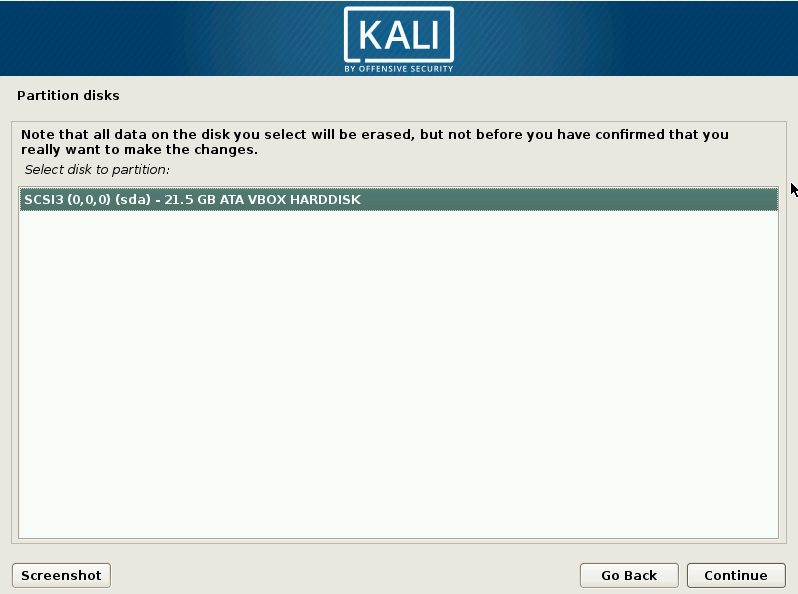
Select the All files in one partition and click on continue.

Selection of disk partition has been done, you can see the overview of partition disk you currently configured, and select the Finish partitioning and write changes to disk. After that click on continue.

Click on yes to make the changes to disk as per the selected partition changes. Then click on continue.

After partition, now Kali will start installing, you have to around 30 minutes for installation.
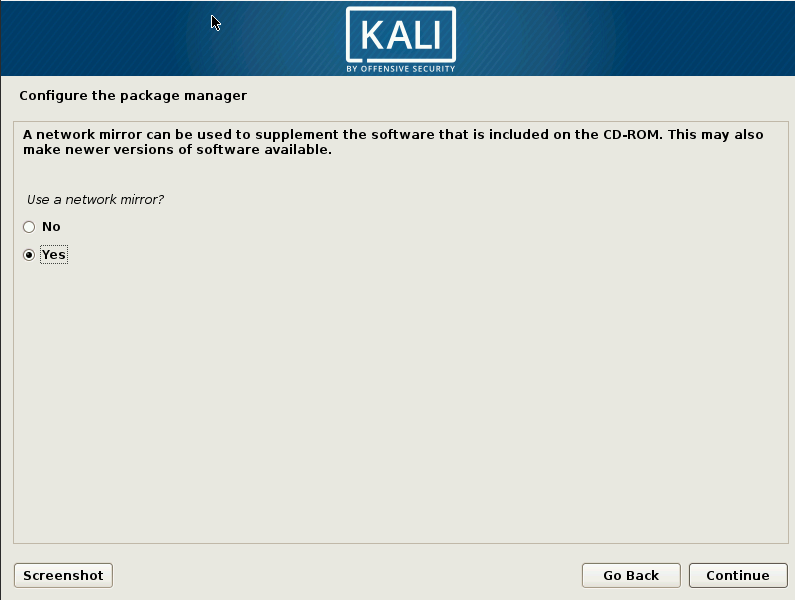
After Kali installation, on the next screen, you will get the network mirror option. You need to select No and click on continue.
You get the option to install the GRUB boot loader as it should be safe to install it to the master boot record of your first hard drive. Select yes and click on continue.

Select the boot loader device for GRUB installation. Select /dev/sda and click Continue.

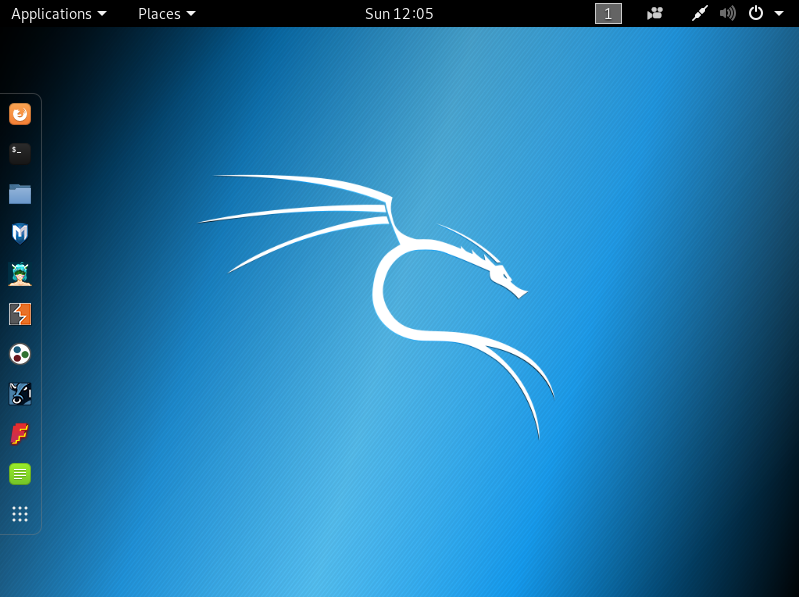
Now you will see the installation complete dialog box. Click to continue to finalize the installation and wait for the VM to reboot. After reboot, you will see the login screen. Log in with your username or root user and provide your password. You will then see the Kali Linux desktop.

Once the VM reboots, you will see the Kali Linux login screen.

Login with username: root, Password: toor, what you entered during the installation process earlier.

Successfully, Kali installation has been done, now you can start working on Kali Linux.
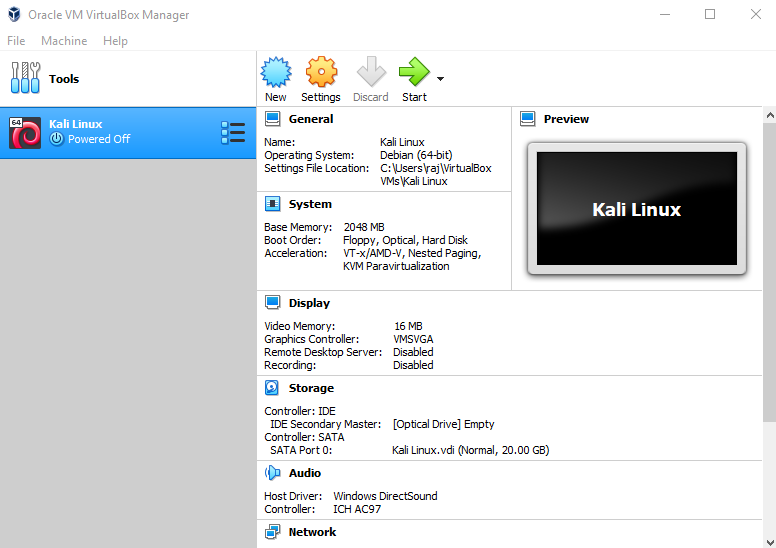
Installation of Kali Linux on Virtual Box
VirtualBox is a software system for virtualizing the x86 computing design. It acts as a hypervisor, making a VM (virtual machine) within which the user will run another OS (operating system).
The OS within which VirtualBox runs is named the “host” OS. The OS running within the VM is named the “guest” OS. VirtualBox supports Windows, Linux, or macOS as its host OS.
If you have already got put in VirtualBox then well smart otherwise install the newest version and install it from https://www.virtualbox.org/wiki/Downloads.
Prerequisites
- VirtualBox installed in your Linux system
- the image of Kali Linux present in your system
- at least 4GB of RAM
- at least 20-30GB of free disk space
- network to have a system updated
- a processor with the virtualization features enabled (often activated by default)
In virtualization, the guest OS is the virtualized system (so our Kali Linux) and the host OS is our Linux system. You can summarize the configuration that was created by you. Then launch the installation click on the green arrow button to start .
On the next screen, you will see the installer options, select Graphical install.
After the selection of Graphical install, you have to follow all the steps the same as you have done at the time of installation of Kali Linux on VMware.
Installation of Kali Linux On AWS
Amazon Web Services (AWS) is a subsidiary of Amazon that provides on-demand cloud computing platforms and APIs to individuals, companies, and governments, on a metered pay-as-you-go basis. In aggregate, these cloud computing web services provide a set of primitive abstract technical infrastructure and distributed computing building blocks and tools. One of these services is Amazon Elastic Compute Cloud, which allows users to have at their disposal a virtual cluster of computers, available all the time, through the Internet.
For more detail description refer https://en.wikipedia.org/wiki/Amazon_Web_Services.
Prerequisites
- An Aws account
- Minimum 2 GB RAM (to run Metasploit)
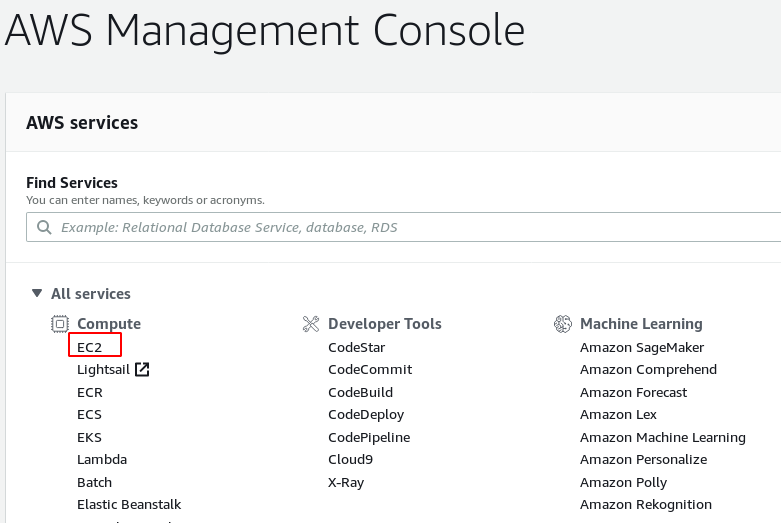
Login to https://aws.amazon.com/console/ to navigate web services. From the compute services, select EC2 (Elastic Compute Cloud) and click on Launch Instance.

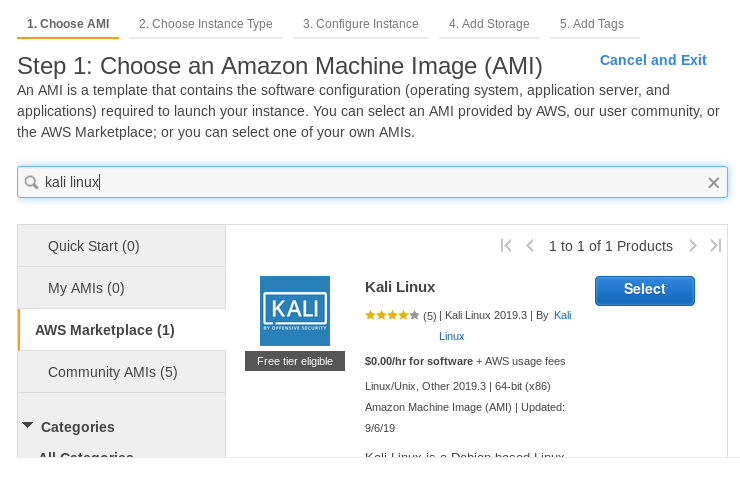
Click on AWS Marketplace, to search the AMI (Machine Image of Kali Linux)

In the search, tab writes Kali Linux, to the Kali AMI and then click on select.
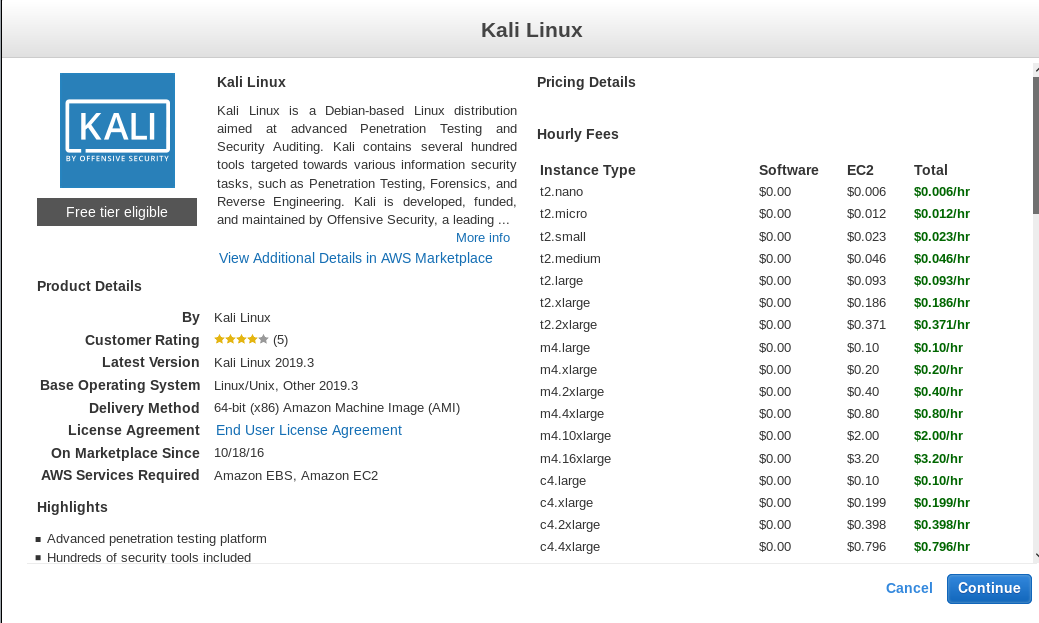
After selection, you can see the summary of all the instances types, software, amount available for Kali Linux. (As per your requirement you can choose, also free tier instance is also available).Then click on continue.
Now you can choose instance type as per your budget, you can select t2micro along with vcpu 1,2.5GHz, Intel Xeon Family,1GiB memory, EBS only). But to run the Metasploit to need minimum of 2 GB RAM, you can opt t2 small or t2 medium.

Review the selected instance and click on the launch.
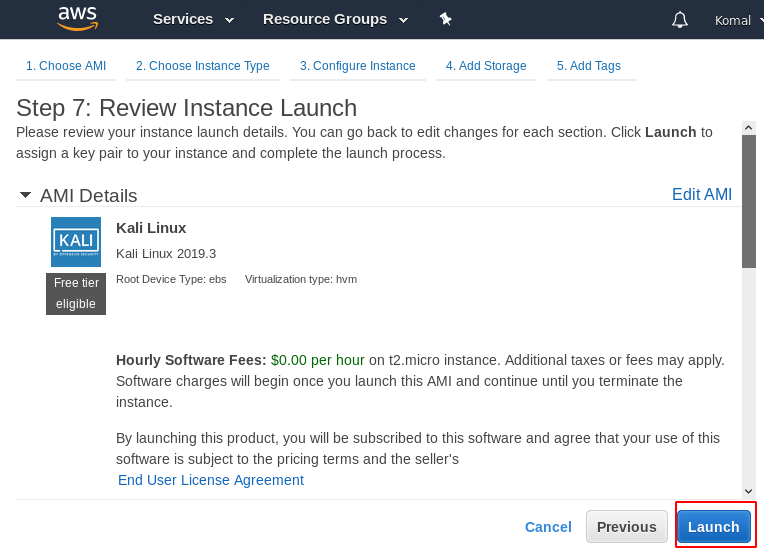
Here, you need to create a new key pair and give a name to the key . Click on download key pair as you will not be able to download the file again after it’s created. Then click on Launch Instances.

Save the Downloaded .pem file.

Click on Launch Instances

After Launch instance, you can see the instance is running even you can provide the name to your created instance. Click on connect to get access to SSH with other information on public DNS.

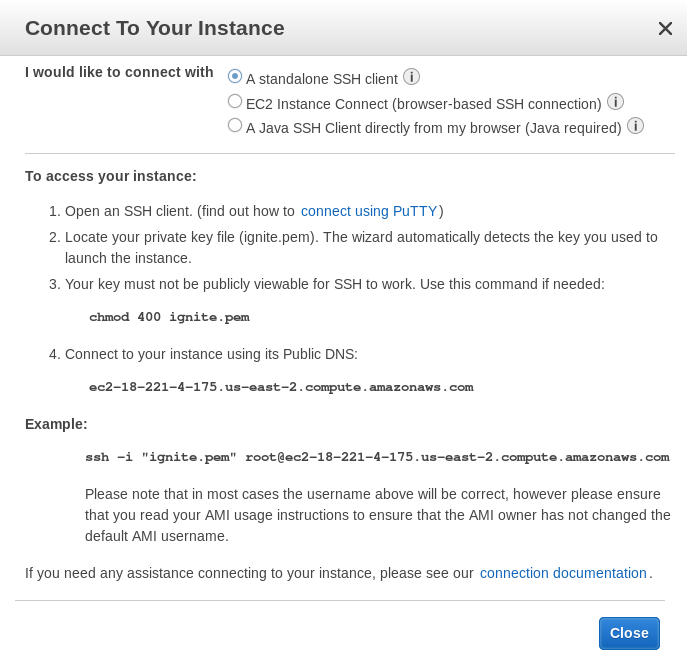
For a Linux user:
You can access the Kali AWS from a linux machine. Set the permissions and connect the SSH server:
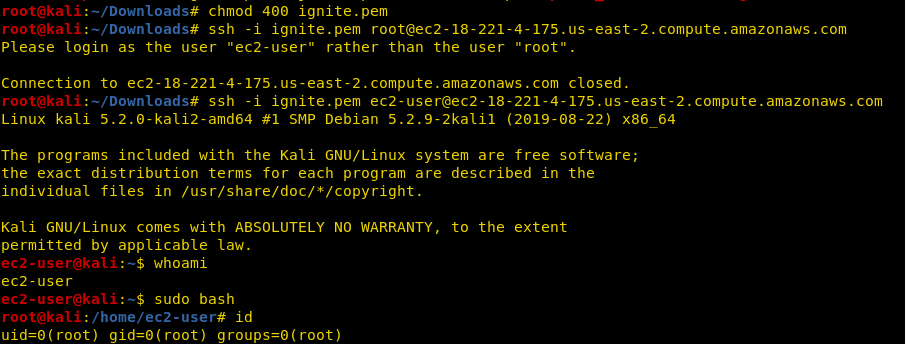
chmod 400 ignite.pem
ssh -i ignite.pem root@ec2-18-221-4-175.us-east.2.compute.amazonaws.com
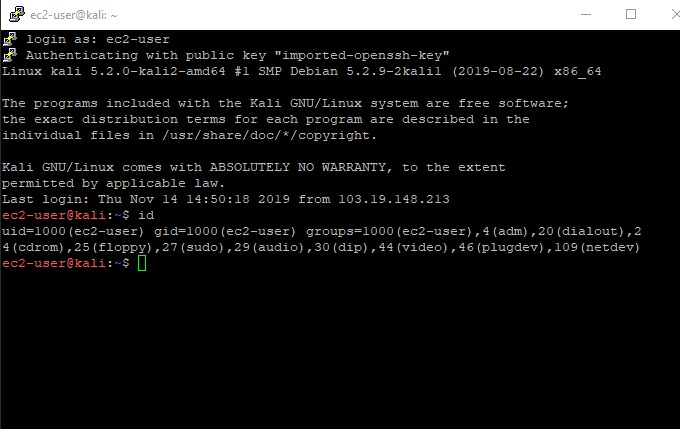
Login with username ec2-user.
For Window Users:
Open the puttygen and load the previously downloaded private key to convert it into a putty supported format.


Save the private key and close the Puttygen program. Open the Putty program to connect it with Kali Linux, in hostname put the public DNS details and load the private key in the Auth tab under the SSh navigation.
Then click on open
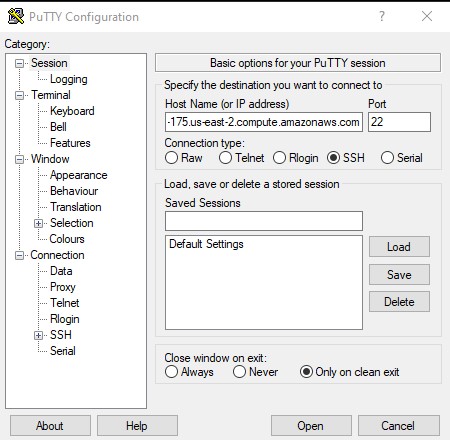

Login with username ec2-user and your kali Linux from the cloud is ready. As this is minimal installation, to get all the tools run the command apt-get install kali-linux-full
Note: You should not go over the usage limit otherwise you will be charged and need to pay the bill.
Installation of Kali on Raspberry Pi
The Raspberry Pi is a low-cost, credit-card-sized ARM computer. Despite being a good bit less powerful than a laptop or desktop PC, its affordability makes it an excellent option for a tiny Linux system and it can do far more than act as a media hub.
The Raspberry Pi provides an SD card slot for mass storage and will attempt to boot off that device when the board is powered on.

By default, the Kali Linux Raspberry Pi image has been streamlined with the minimum tools, similar to all the other ARM images. If you wish to upgrade the installation to a standard desktop installation, you can include the extra tools by installing the kali-Linux-full meta-package.
For more details please refer https://github.com/thehackingsage/HackPi.
Prerequisites
- Kali Linux Raspberry 2,3, 4 ARM images.
- SD card (minimum size 8 GB but can use 16GB 0r even 32 Gb)
- Bootable Kali
First, download the Kali Linux 2 or more image file for a raspberry file from the https://www.offensive-security.com/kali-linux-arm-images/#1493408272250-e17e9049-9ce8.
I need to write it to the SD card. Choose the Kali Linux ISO file to be imaged with “select image” and verify that the USB drive to be overwritten is the correct one. Click the “Flash!” button once ready.
Once Etcher alerts you that the image has been flashed, you can safely remove the USB drive and proceed to boot into Kali with it.
Now, you can have a plugged raspberry pi device with the bootable SD card into the monitor. After powering up the raspberry pi 3 b, it will go through a bootup process and the screen will go blank for a few seconds.
For the final step, a login prompt will appear asking for a username and a password. The default should be ‘root’ and ‘toor’ respectively.
Thank you
Author: Nisha Sharma is trained in Certified Ethical hacking and Bug Bounty Hunter. Connect with her here
Useful, Thanks
Good article. I absolutely love this site. Keep it up!
one more masterpiece article for beginners. million thanks nisha sharma
Thank you very much sir… So usefull to us for learning purpose….
Good
Is there any method for Google cloud to install kali??
There is one more method which is by using WSL in windows.