Multiple Ways to Create Image file for Forensics Investigation
In this article, we will learn how to capture the forensic image of the victim’s hard drives and systems to get help in the investigation. There are multiple ways to do that work and these tools will help us a lot in the process of an investigation so let’s start this process.
Table of Content
- Introduction
- What is a Forensic image?
- FTK Imager
- Belkasoft Acquisition Tool
- Encase Imager
- Forensic Imager
Introduction
In today’s digital era, the indulgence of devices is increasing more and more and with-it cybercrime is also on the rise. When such a crime occurs, the hard drive becomes an important part as it is crucial evidence. Therefore, during investigation one cannot directly perform various tasks on the hard drive as it is considered tempered. Also, one can lose data by mistake while performing tasks on it. Hence, the necessity of disk image. Now that we have understood the importance and use of disk image, let us now understand that what exactly a forensic image is.
What is a Forensic image?
A Forensic image is an exact copy of hard drive. This image is created using various third-party tools which can easily capture the image of a hard drive bit by bit without changing even a shred of data. Forensic software copies data by creating a bitstream which is an exact duplicate. The best thing about creating a forensic image is that it also copies the deleted data, including files that are left behind in swap and free spaces. Now that we have understood all about the forensic imaging, let us now focus on the practical side of it. We will learn and understand how to create such image by using five different tools which are:
- FTK Imager
- Belkasoft acquisition tool
- Encase imager
- Forensic imager
FTK Imager
FTK imager can create an image and paging file for windows; along with capturing volatile memory for analysis purpose.
We can download FTK imager from here
After installing the FTK imager we can start by creating an image and to do so, we have to go to the file button and from the drop-down menu, select the Create Disk Image option.

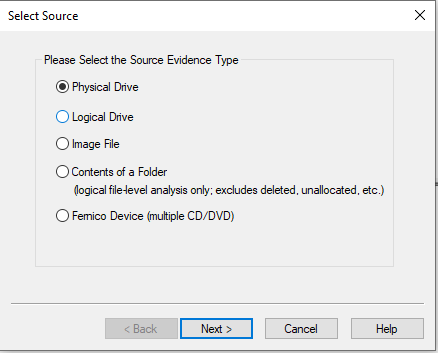
After selecting the create disk image it will ask you the evidence type whether i.e. physical drive, logical drive, etc. and once you have selected the evidence type then press the next button to move further in the process.
Now it will ask for the drive of which you want to create the image. Select that drive and click on Finish button.

Now, we need to provide the image destination i.e. where we want our image to be saved. And to give the path for the destination, click on Add button.

Then select the type you want your image to be i.e. raw or E01, etc. Then click on Next button.
Further it will ask you to provide details for the image such as case number, evidence number, unique description, examiner, notes about the evidence or investigation. Click on Next button after providing all the details.

After this, it will ask you for the destination folder i.e. where you want your image to be saved along with its name and fragment size. Once you fill up all the details, click on the Finish button.

And now the process to create the image will start and it will simultaneously inform you about the elapsed time, estimated time left, image source, destination and status.

After the progress bar completes and status shows Image created successfully then it means our forensic image is created successfully .

And so, after the creation of the image you can go to the destination folder and verify the image as shown in the picture below :

Belkasoft Acquisition
Belkasoft Acquisitiontool formally known as BAT. This tool can create images of hard drives, Removable drives, Mobile devices, Computer RAM memory, cloud data. The acquired image can be analyzed with any third-party tool.
We can download the belkasoft Acquisitiontool from here
Once the dialogue box opens, click on Drive option.

Now, it will show you all the drives available. From these options select the one drive whose image you want to create and then click on Next button.

After selecting the drive, we need to provide the destination path along with the format of image and hash algorithm for the checksum. We can also choose whether to split image or not. And then click on the Next button.

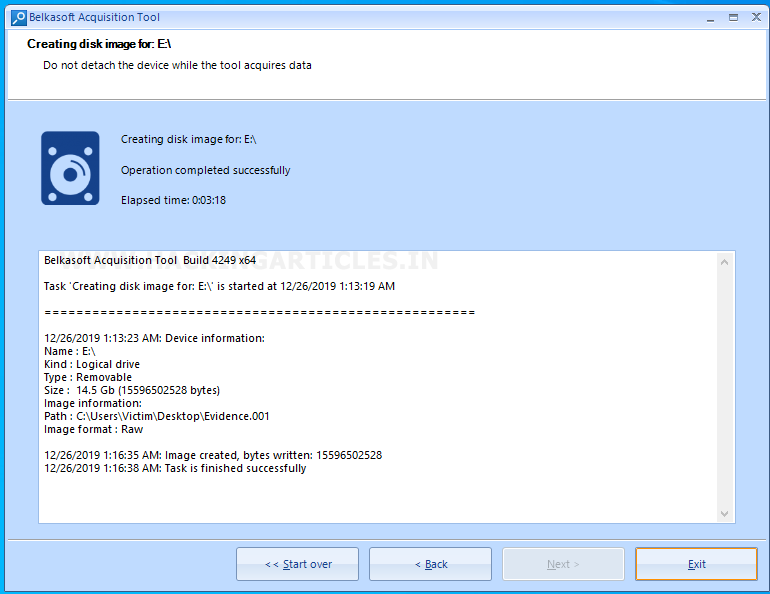
The process of creating the image will start as you can see from the picture below :

Once the process is complete and the image is created, click on the Exit button.
To verify the image, go to the destination folder and access it as shown in the picture below :

Encase Imager
Another way to capture image is by using Encase tool. We can download Encase imager from here.
To start the process, firstly, we need to give all the details about the case. And then click on Finish button.

After that, we need to choose the hard drive whose image we want to create. Once you have selected the drive, click on Next button.

Now, select the specific drive whose image you want to create as shown in the picture below and click on Next button.

Then after selecting all the things it asking us to review all the details which were given. Once review is done, click on Finish Button.

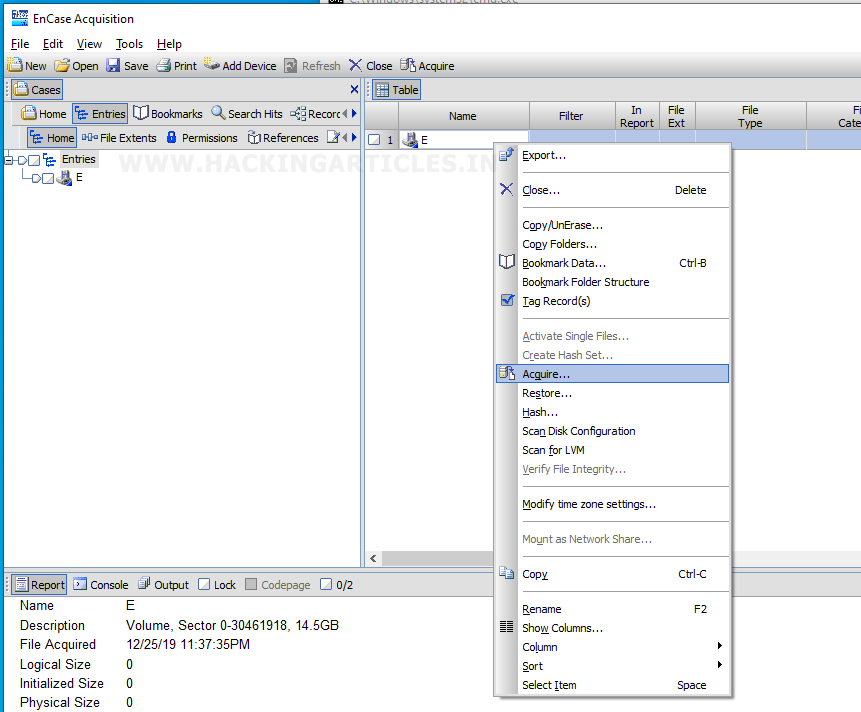
After that, right-click on the chosen driven and then select the Acquire option from the drop-down menu.
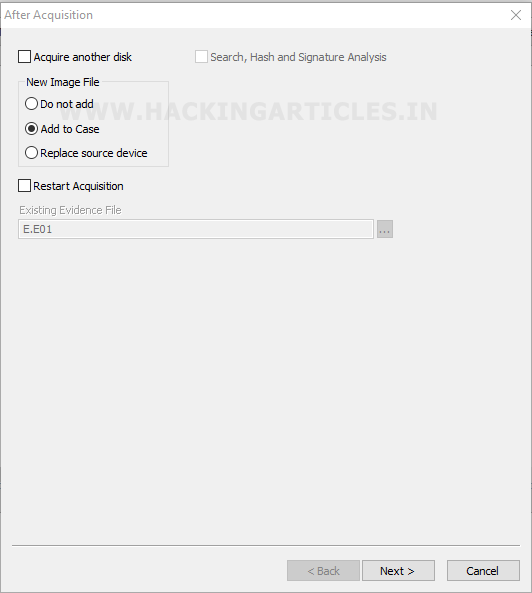
After this select the add to case option and then click on Next button.
After this, give the name, number and other details for your image. Then click the finish button.

After clicking on the finish button, you can observe that on the right-hand side, the lower section of the encase window will show the status of the process.

After everything is done, it will show you all the details like status, start time, name, process id, destination path, the total time for the whole acquiring image, images hashes. And then at last, you can click on OK.

Once the image is created, you can see that Encase uses E01 format while creating an image and further splits it into multiple parts as shown in the picture below:

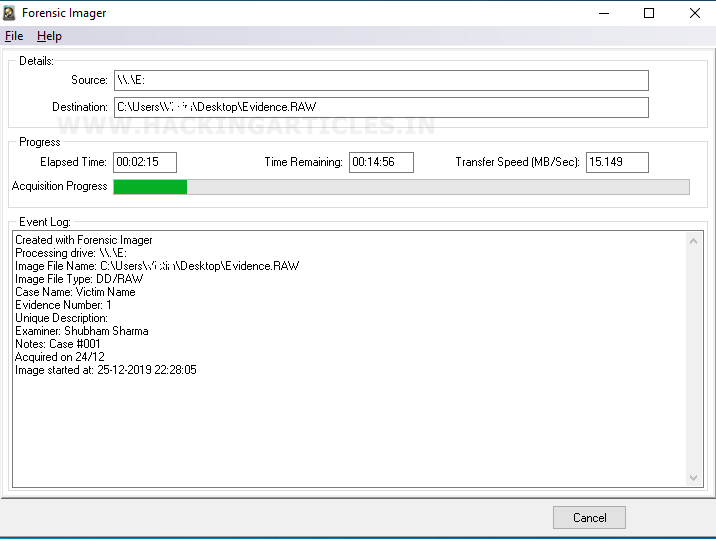
Forensics Imager
Another way to capture an image is by using forensic imager. We can download Forensic imager from here.
To start the process, click on Acquire button as shown in the image.

Next, it will ask you the source to acquire image.

As you have given the source for the image, then it will ask you the destination details i.e. the path, format, checksum and other evidence related details. Once you fill all these up, click on Start button.

After clicking on start, you can observe that the process has begun as shown in the picture below :
After completing the process, it will show you a pop-up message saying acquisition completed. It means that our forensic image is created. In order to check we need to check the destination path to verify our forensic image.

We checked at the destination our image is successfully created and ready to be analyzed as a piece of evidence for the forensic investigation.

So, these were the five ways to capture a forensic image of a Hard drive. One should always the various ways to create an image as various times calls for various measures.
Author: Shubham Sharma is a Pentester, Cybersecurity Researcher and Enthusiast, contact here.