Linux for Beginners: A Small Guide (Part 3)
Let’s cover more advanced concepts and pick of where we left in part 2 of this article where we learned somehow to interact and manage network devices, discover the different process running on your system and getting a grip of the usage of environment variables.
In this article, we’ll be focusing on some advanced Linux fundamentals, like scripting, automation and Linux services that help us with a getting more out of our Operating system, making our workflow optimal. Let’s dig right into it.
Table of Content
- Bash scripting concepts
- Scheduling your tasks
- Using services in Linux
- Apache webserver
- OpenSSH
- FTP
- Conclusion
Bash Scripting Basics
Hackers often have to automate certain commands, sometimes compile them from multiple tools, this can be achieved by writing small computer programs. We’ll be learning how to write these programs or scripts in bash.
Going back to the basics, a shell is an interface between the user and the operating system that helps you interact with it, there are a number of different shells that are available for Linux, the one we’re using is called bash.
The bash shell can run any system commands, utilities and applications. The only thing we’ll need to get started is a text editor (like nano, vim). You can choose any as it would not make a difference regardless.
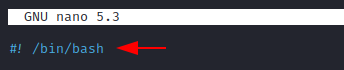
Shebang: #!
Let’s create a new file: first_script. To tell our operating system we’re using bash in order to write this script, we use shebang (#!) followed by /bin/bash as seen bellow. Open the file and type:
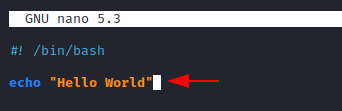
#! /bin/bash
echo
Like the name suggests, we use it to echo back a message or test we want. Let’s echo back “Hello World”.
#! /bin/bash/
echo "Hello World"
Running our bashscript
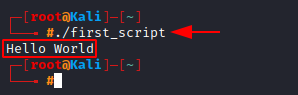
Before we can run our script, we need to give it permission to do so. As we learned earlier, using chmod with +x tag should give the file executable permission.
Adding “./” before the filename tells the system that we want to execute this script “first_script”.
Taking user input
To add more functionality to our bash script, we need to discuss variables.
A Variable in like a bucket, it can hold some value inside the memory. This value can be any text (strings) or even numbers.
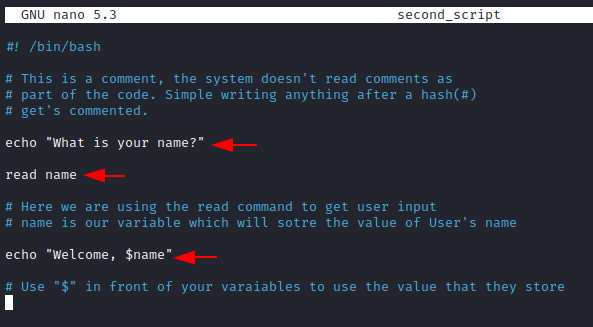
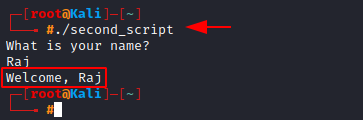
Let’s create another script where we learn how to take user input and declare variables.
echo "What is your name?"
read name
echo "Welcome, $name"
Now we can finally see the magic variables, as we run this script. (be sure to give the script executable permissions first).
Creating a simple scanner
Let’s create a script that would be more useful. We’ll make our script scan the entire network for all the active hosts connected to it and find out their IP Addresses.
In order to do so, we’ll be using nmap. It is simple at an essential tool when it comes to dealing with network penetration testing.
It used to discover the open ports of a system, the services it running and has the capability to detect the operating system as well.
The syntax of nmap is, nmap <type of scan> <target IP>.
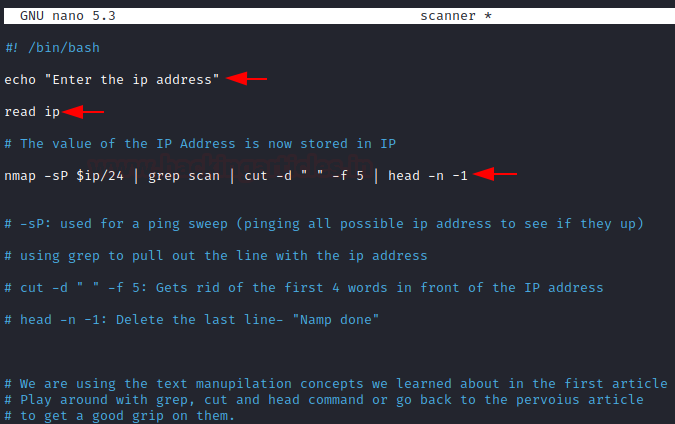
We will be creating a script that allows us to scan all the device’s IP addresses connected to our network. For this, we will be using the -sp tag of nmap. This allows for a simple ping scan, which checks for all the alive connections in your network.
Create a new file: scanner and let’s gets started.
echo "Enter the ip address"
read ip
nma -sp $ip/24 | grep scan | cut -d "" -f 5 | head -n -1
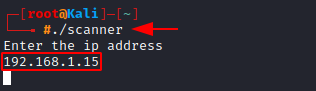
Let’s give our new bash script executable permissions, and run it.
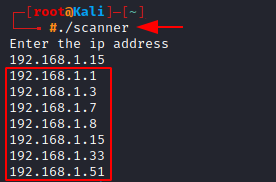
Enter your IP Address.
Now we can see, all the different devices and their IP Address’s connected to your network.
Scheduling Your Tasks
At times one is required to schedule tasks, such as a backup of your system. In Linux, we schedule jobs we want to run without having to do it manually or even think about it. Here, we’ll learn about the cron daemon and crontab to run our scripts automatically.
The crond is a daemon that runs in the background, it checks for the cron table – crontab if there are any specific commands to run at times specified. Altering the crontab will allow us to execute our task.
The cron table file is located at /etc/crontab. It has a total of 7 fields, where the first 5 are used to specify the time for it to run, the 6th field is for specifying the user and the last one is for the path to the command you want to run.
Here’s a table to summarize the first 5 fields:
| Field | Unit it changes | Syntax to enter |
| 1. | Minute | 0-59 |
| 2. | Hour | 0-23 |
| 3. | Day of the month | 1-31 |
| 4. | Month | 1-12 |
| 5. | Day of the week | 0-7 |
Scheduling our bash script- scanner
First, let’s check whether the cron daemon is running or not by typing,
service cron status

Since it shows inactive, we can start the service by typing
service cron start

Now, open the cron table in order to edit it. Type crontab in the terminal, followed by the “-e” flag (e stands for edit).
crontab -e
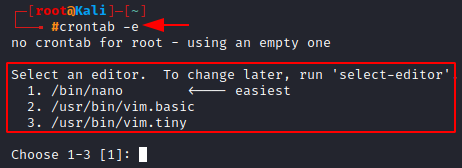
It gives you an option to select any text editor, we’ll be choosing nano as we’ve been working with it so far. So, enter 1.

Now scroll down and simply enter all the 7 fields we learned about, to schedule the task.
Let’s say we want to see all the devices connected to our network before we sleep, so we’ll execute our scanner script every day at 11:55 PM automatically. Type the following,
55 23 * * * /root/scanner

Initiate Jobs at startup using rc scripts
Whenever you switch on your Linux machine, a number of process run which helps in setting up the environment that you’ll use. The scripts that run are known as rc scripts.
When booting up your machine, the kernel starts a daemon known as init.d which is responsible for running these scripts.
The next thing we should know about is, Linux Runlevels. Linux has multiple runlevels, which tell the system what services should be started at the bootup.
Here is a table indicating the above:
| 0 | Halt the system |
| 1 | Single-user/minimal mode |
| 2-5 | Multiuser modes |
| 6 | Reboot the system |
Let’s add a service to the rc.d now. This can be done using the update-rc.d command. This enables you to add or remove services from the rc script.
We will enable MySQL to start every time we boot. Simply write MySQL after update-rc.d and follow it with defaults (options: remove|defaults|disable|enable>)
update-rc.d mysql defaults
Now, we restart the system, you’ll see MYSQL has already been started.
We can check for it using the ps aux and grep command as we learned earlier.

Using Services In Linux
Services in Linux is a common way to denote an application that is running in the background for you to use. Multiple services come preinstalled in your Linux machine, one of the most common ones is Apache Web Server, which helps us creating and deploying Web Servers or OpenSSH which allows you to connect to another machine. Let’s dig deeper into these services, to understand their inner function, which will help us in abusing them.
Playing with services (start, stop, status, restart)
Before we begin, we should know how to manage these services. The basic syntax to do so is, service <service_name> <start|stop|restart|status>
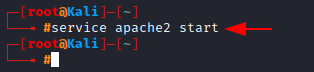
Let’s start the apache2 server.
service apache2 start
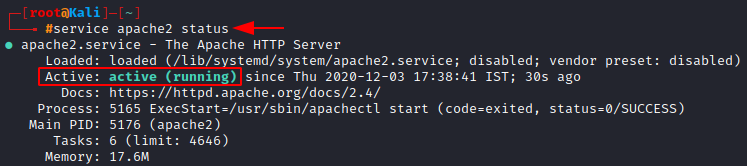
Now, we use the status tag to check whether the service is up or not
service apache2 status
To stop this service, we type
service apache2 stop

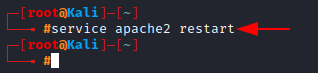
At times when the service does a faulty start or you’ve changed a particular configuration, you might want to restart it, to reflect the changes. This can be done with the restart option.
Creating an HTTP Web Server using Apache webserver
More than 60% of the world’s web servers use Apache, it is one of the most commonly used services. As a pen-tester, it is critical to understand how apache works. So, let’s deploy our own web server and get familiar with Apache.
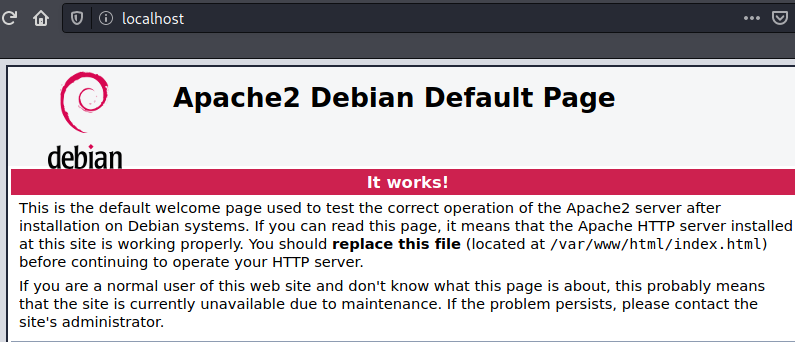
Start the apache2 service (if you haven’t already) and now we are going to the HTML file that will get displayed on the browser, apache’s default web page is present at: /var/www/html/index.html
Let’s open this with nano and write some of our HTML code.
nano /var/www/html/index.html

We see the html code present by default

Save the file a now to see what the apache server displays, we can go to the browser and type
http://localhost
Getting familiar with OpenSSH
Secure Shell or ssh is basically what enables us to connect to a terminal on a remote system, securely. Unlike its ancestor telnet which was used quite some years back, the channel ssh using for its communication is encrypted and hence more secure.
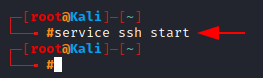
Again, before we start using the ssh service, we have to start it first.
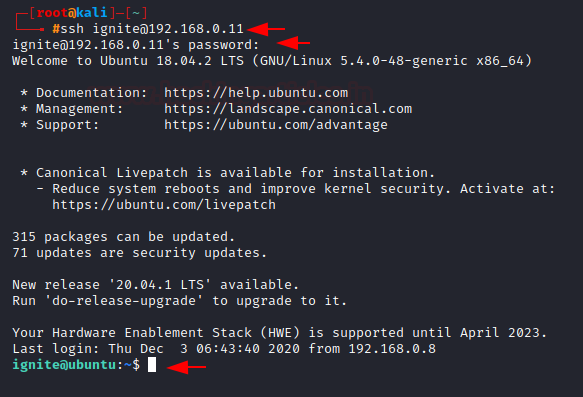
Now to connect to a remote system and get access to its terminal, we type ssh followed the <username>@<ip address>. Let’s connect to my host machine.
ssh ignite@192.168.0.11
We have successfully connected to another machine called ubuntu with the user ignite
Working with FTP
Let’s talk about the File Transfer Protocol or FTP. This protocol is generally used, as the name suggests for transfer of files via the command line. Here we’ll try connecting to an ftp server and download files from it, via the ftp command.
To access an ftp server, we type ftp followed by the domain name or the IP Address. Here’s an example:
ftp ftp.cesca.es

Now it’s going to ask you to enter a name, we can type anonymous here since this server allows it.

Now it’s going to ask for the password, and we type anonymous there as well.
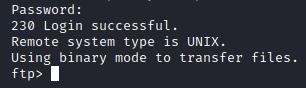
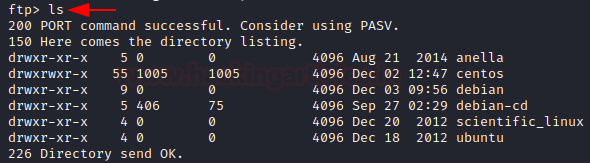
As we can see we’ve been logged in successfully. Now with the help of the basic navigation commands we learned in the first part of this article, we can ls to list the contents.
Navigate around for a file you want to download. Let’s try download the file at
ubuntu/release/favicon.ico, simply type get and the file name
get favicon.ico

To exit the ftp session, type bye. Now we can ls and see the file we just downloaded.

Conclusion
Hope this article helped you understand some more advanced concepts of the Linux operating system. Do practices these commands and get familiar with the services we used. Continue your learning journey, search for new things, try them yourself, there is a giant Linux community to help you at any step, cheers!
Author: Karan Bhandari is a Certified Ethical Hacker, he is passionate about security and forensics innovation and industry. Contact LinkedIn.