Linux for Beginners: A Small Guide (Part 2)
Let’s dig in deeper from the previous concepts of part 1 of this article where we learned some basic day to day commands like navigating around the directories, creating files, copying them, commands to manipulate text on your terminal windows, installing software packages on your system and playing with file permissions.
In this article, we’ll be focusing more on Linux fundamentals that provide us with a more granular level control over our operating system. Let’s dig right into it.
Table of Content:
- Managing networks
- Process management
- Environment variables
- Conclusion
Managing Networks
Networking is a crucial topic for any aspiring penetration tester. A lot of times you would be required to test a network or something over it. Hence, it becomes important to know you to connect and interact with all of your network devices.
Let’s get started with learning all the various tools and utilities to analyze and manage networks.
Ifconfig: Analyzing networks
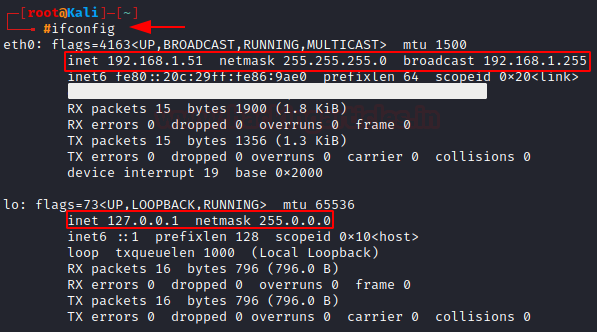
The ifconfig command is one of the most basic tools for interacting with active network interfaces. Here we run ifconfig and we can see the IP address mapped to our 2 network interfaces: eth0 and lo.
We can also see the netmask and a broadcast address of the network interface attached. As well as the mac address which I have blurred out.
(lo is localhost and is always mapped to 127.0.0.1)
iwconfig: Checking wireless network devices
If you have a wireless adapter, you can use the iwconfig command to gather crucial information such as its IP address, MAC address, which mode it is in and much more. Since I don’t have a wireless adapter, my output is as such.

Changing your IP Address
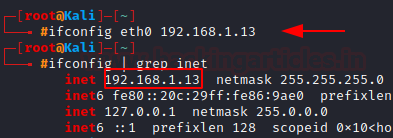
In order to change your IP address, enter ifconfig, the interface you want to change the address for and the new address you want to assign to it. Let’s change the IP address to 192.168.1.13.
Upon running ifconfig we see the change reflected.
ifconfig eth0 192.168.1.13
Spoofing your MAC Address
You can also use ifconfig to change your MAC address. Since MAC address is globally unique and it often used as a security measure to keep the hackers out of networks or even to trace them, spoofing your MAC address is almost trivial in order to neutralize these security measures and maintain anonymity.
In order to change our MAC address to 00:11:22:33:44:55, we’ll have to down the interface, change the MAC address and then up the interface again.
ifconfig eth0 down
ifconfig eth0 hw ether 00:11:22:33:44:55
ifconfig eth0 up

Using DHCP Server to assign new IP Addresses
Linux has a Dynamic Host Configuration Protocol (DHCP) server that runs a daemon – a process that runs in the background called DHCP daemon. This DHCP server assigns IP addresses to all the systems on the subnet and it also keeps log files of such.
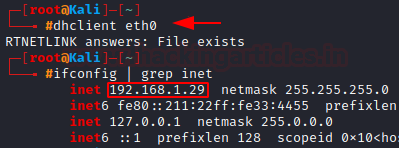
Let’s request an IP Address from DHCP, by simply calling the DHCP server with the command dhclient and network interface you would want to change the IP Address of.
We can see the IP Address has changed from what we had manually given it earlier.
dhclient eth0
Examining DNS with dig
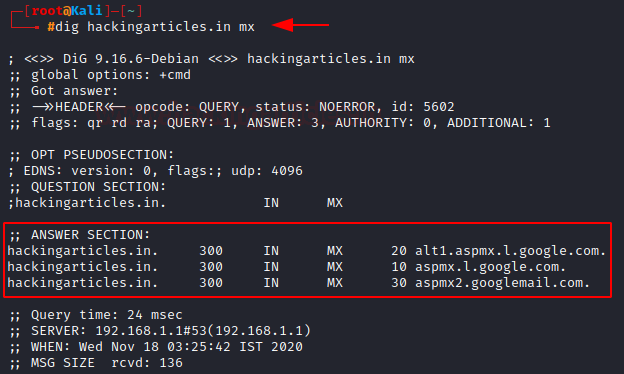
DNS is a service that translates a domain name like “hackingarticles.in” to the appropriate IP address. We can use the dig command with added options such as mx (mail server), ns (name sever) to gather more information regarding the domain and its mail and name servers respectively.
Let’s use the dig command on “www.hackingarticles.in” here we can see the domain name resolve into IP Address.
dig www.hackingarticles.in

Further searching “hackingatricles.in” mail servers:
dig hackingarticles.in mx
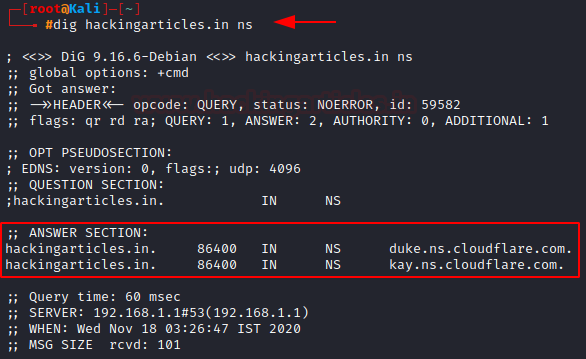
Searching for the name servers:
dig hackingarticles.in ns
Changing your DNS Server
The DNS server information is stored in /etc/resolv.conf, in order to change the DNS server we need to edit this file. We can simply use nano or vim which are some of the common text editors Linux.
Here, we are going to use the echo command and > to overwrite the resolve.conf file. We can see the change reflect when reading using cat.
- is Cloudflare’s public DNS server, you could also use Google’s which is 8.8.8.8)
echo "nameserver 1.1.1.1" > /etc/resolv.conf

Mapping the IP Addresses
There is a file in our system called hosts which also performs domain name – IP Address translation. The file is located in /etc/hosts. We can map any domain to the IP address of our choice, this can be useful as the hacker to direct traffic from network to a malicious web server (using dnspoof).
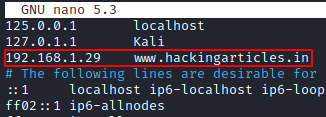
Let’s nano into the file. Here we can see localhost and kali mapped to certain IP addresses. We can map www.hackingarticles .in to our IP address. Now if anyone on the network goes to this URL it will be re-directed to our IP address, we can further run an apache server and deploy a malicious website, tricking the users in the network.
nano /etc/hosts

Process Management
A process is just a program that’s running on your system and consuming resources. There are times when a particular process has to be killed because it’s malfunctioning or as a pen-tester, you would want to stop the anti-virus applications or firewalls. We’ll learn how to discover and manage such processes in this section.
Viewing process
In order to manage the process, we must be able to view them first. The primary tool to do so is ps.
Simple typing ps in the bash shell will list down all the active processes.
(PID stands for process ID and is unique for every invoked process.)

Viewing process for all the users
Running ps command with aux, will display all the running processes for all users, so let’s run
ps aux
Here we can see PID, the user who invoked the process, %CPU the process is using, %MEM represent the percentage of memory being used and finally COMMAND which is the name of the command that has started the process

Filtering Process with its name
As we learned earlier, we can pipe the output of ps aux into grep and filter out the specific information we want.
Let’s search for msfconsole (A popular interface to use the Metasploit framework)
ps aux | grep msfconsole

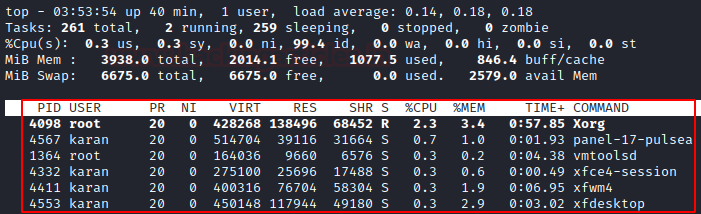
top: Finding the greediest process
In some use cases when you want to know which process is using the most resources, we use the top command. It displays the process ordered by the resources used. Unlike ps, the top also refreshed dynamically – every 10 seconds.

Changing Priority with the “nice” command
When you start a process, you can set its priority level with the nice command. Let’s increment the priority of /usr/bin/ssh-agent by 10 (increasing its priority) using the n tag.
nice -n -10 /usr/bin/ssh-agent

The “renice” Command
The renice command takes an absolute value between -20 and 19 and sets the priority to that particular level. It also required the PID (process ID).
Let’s give a process of PID 6242 a higher level of priority. (increment it by 20)
renice 20 6242

kill : The deadliest Command
At times, when a process exhibits unusual behaviour or consumes too many system resources, they are called a zombie process. In order to stop these kinds of processes, we use the kill command.
The kill command has 64 different kill signals, each signifying something slightly different.
(1 stands for Hangup and is designated to stop the process while 9 is the absolute kill, it forces the process to stop by sending its resources to /dev/null).
Let’s stop the process 6242
kill -1 6242

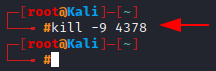
And in order to force stop process 4378
kill -9 4378
Running processes in the background
At times, you may want a process to run in the background, and we can do so by simply adding & to the end of the command.=
Let’s run nano in the background. (You can see the PID that is generated)
nano hacking-articles.txt &

Moving a process to the foreground
If you want to move a process running in the background to the foreground, you can use the fg command. Simply type fg and then the process ID.
(In order to see the background processes in your system simply use the command jobs)

Scheduling a process
Often one might need to schedule processes to run at a particular time of day. The at command is a daemon – a background process which is useful for scheduling a job to run once at some point in the future. While for jobs that occur every day, week, the crond is more suited.
Let’s execute a scanning_script.sh at 9:30pm.
at 9:00pm
/root/simple_bash.sh

User Environment Variables
Understanding environment variables is a must when trying to get the most from your Linux system, it is crucial to be able to manage them for optimal performance. Variables are just strings in key-value pairs. There are two types of variables, environment and shell, while the shell variables are only valid for the particular session, the environment variables are system-wide.
Viewing all the Environment Variables
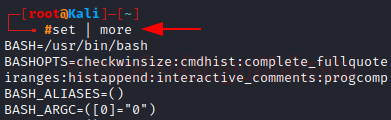
You can view all your default environment variables by entering env into your terminal from any directory, like so:
set | more
Filtering for particular variables
Again, using piping the output to the grep command we can filter out the variables we want.
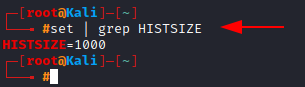
Let’s filter out HISTSIZE (history size)
As we can see the history size is set to 1000.
set | grep HISTSIZE
Changing variable value temporarily
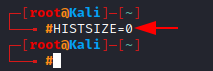
We can change the variable values simply by typing out the variable and equating it to a new value but this new value will only be changed for this particular session, if you open a new terminal window it will change back to its default.
After running this, you’ll see that when you press the up/down arrow keys to recall your previous commands, nothing happens since we changed to a number of commands being stored to 0.
HISTSIZE = 0
Making the changes permanent
When changing the variables, it is always best practice to store the default value in say, a text. This way you can always undo your changes.
Let’s echo the value into a text file name valueofHISTSIZE and save it in our working directory by
adding ~/
echo $HISTSIZE ~/valueofHISTSIZE.txt

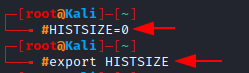
Now, just like last time change the value of HISTSIZE but now we’ll execute another command export. Which will make this change permanent.
HISTSIZE=0
export HISTSIZE
Creating user-defined variables
You can also design your custom, user-defined variables just by assigning a value to a new value name of your choice.
Let’s create a new variable called URL which has the value www.hackingarticles.in.
url_variable="www.hackingarticles.in"

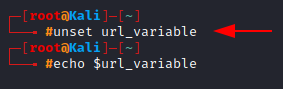
We can also delete this variable by using the unset command. Simply typing unset and the name of the variable will do the trick.
As we can see, there is no result despite running the echo command.
unset url_variable
Conclusion
The topics we learned here; help you understand a bit more of the inner workings of Linux. Practicing and applying these concepts as well as digging in deeper yourself is the way to go now. Be sure to be on the lookout for the 3rd part of this article, where we discuss more advanced Linux concepts like Bash Scripting, automation and using Linux services.
Author: Karan Bhandari is a Certified Ethical Hacker, he is passionate about security and forensics innovation and industry. Contact LinkedIn.